INTRODUCTION
Hello, Blender group. I am Takumi from Japan and I work as a software program engineer in Tokyo.
Making 3D CG is only a pastime for me, however I’ve a powerful ardour for it.
INSPIRATION
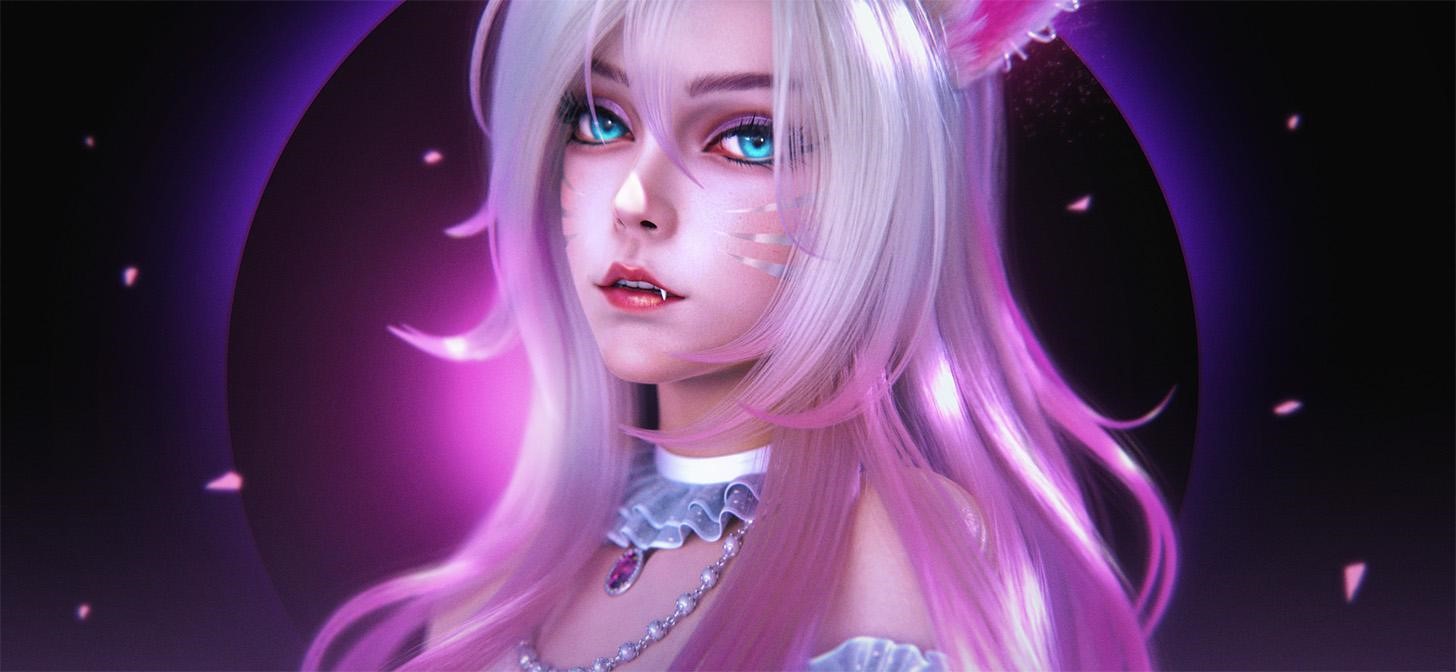
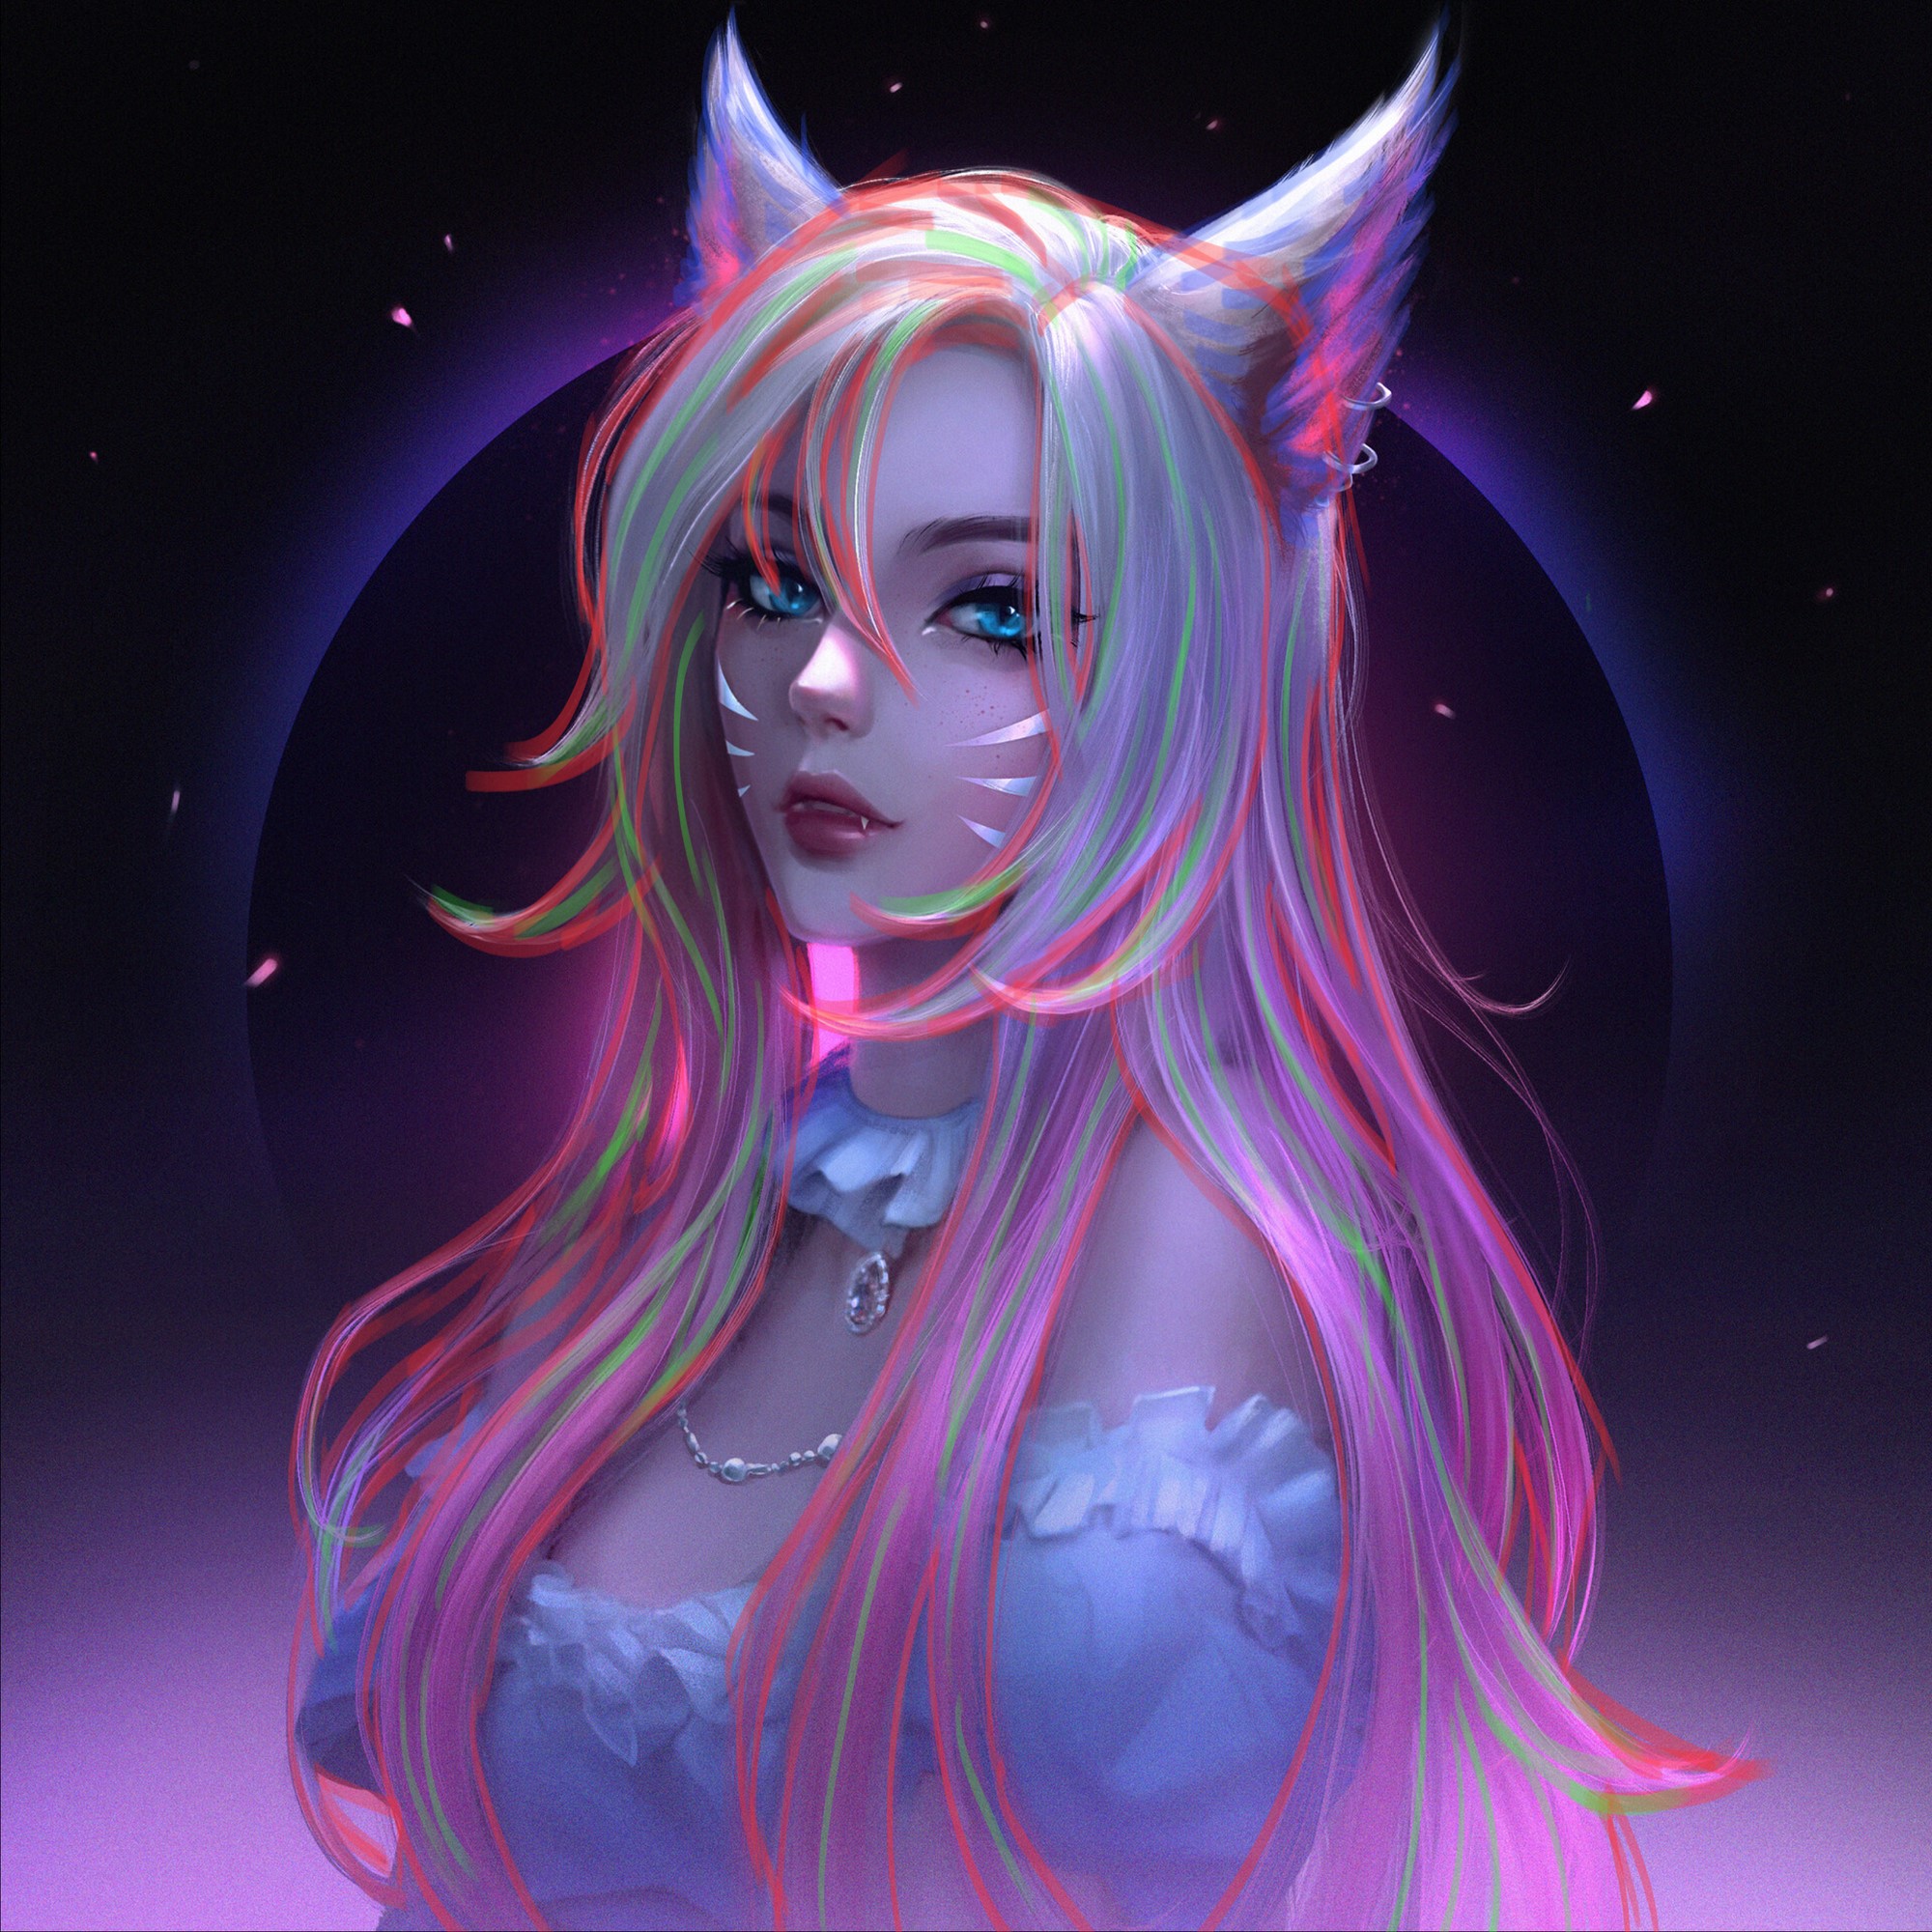
To begin with, I actually admire the unique paintings by lisai.
This stylish fascination impressed me, and I wished to recreate the fragile hair and seductive expression in Blender.
PROCESS
These are the software program I used for this course of:
- Daz Studio: Base Mannequin
- ZBrush: Sculpting
- Substance Painter: Texturing
- Marvelous Designer: Clothes
- Blender: Hair, Rendering, Cloth Materials
- Photoshop: Put up-processing
BASE BODY
I began by posing the bottom physique in Daz Studio. I roughly aligned the entire physique with the reference, and PowerPose was helpful for this.

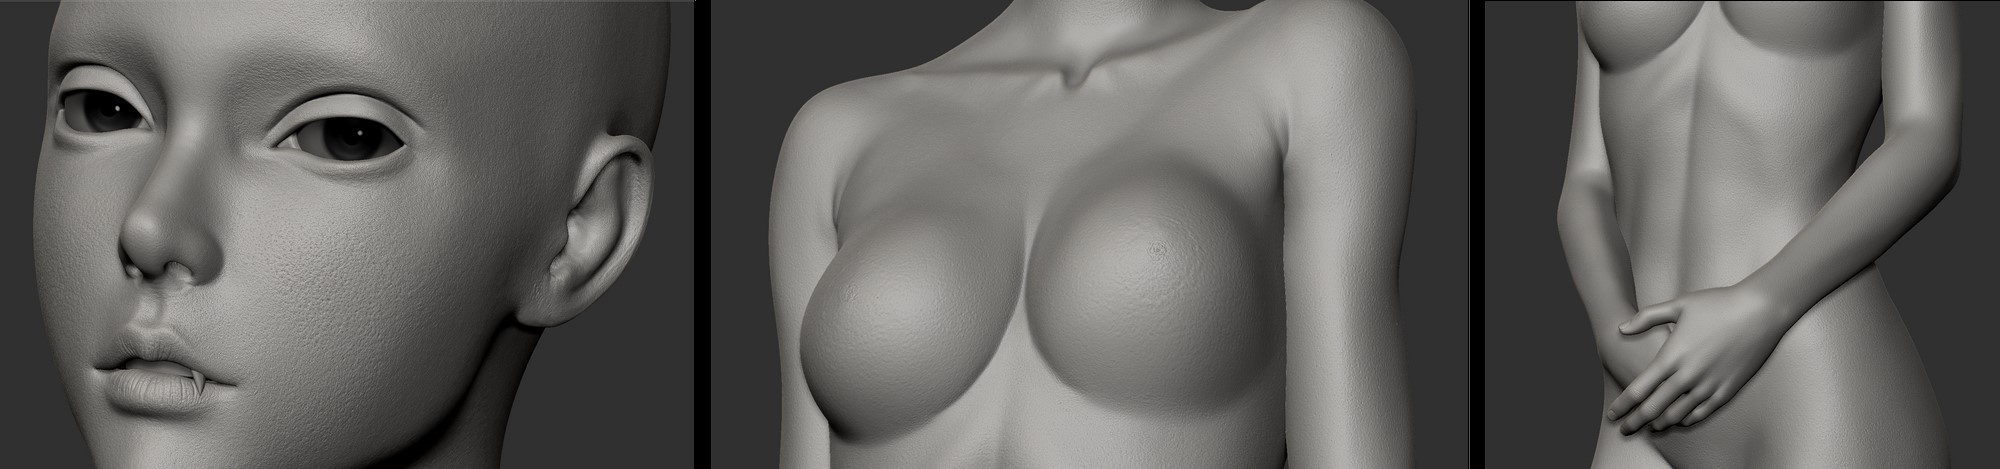
Since I take advantage of ZBrush to regulate the general silhouette, I do not fear an excessive amount of about adjusting every morph individually.
FACE
I imported the determine from Daz Studio as an .obj file into ZBrush and began sculpting the physique silhouette and face. I used an AI-generated face picture from ArtBreeder as a reference.
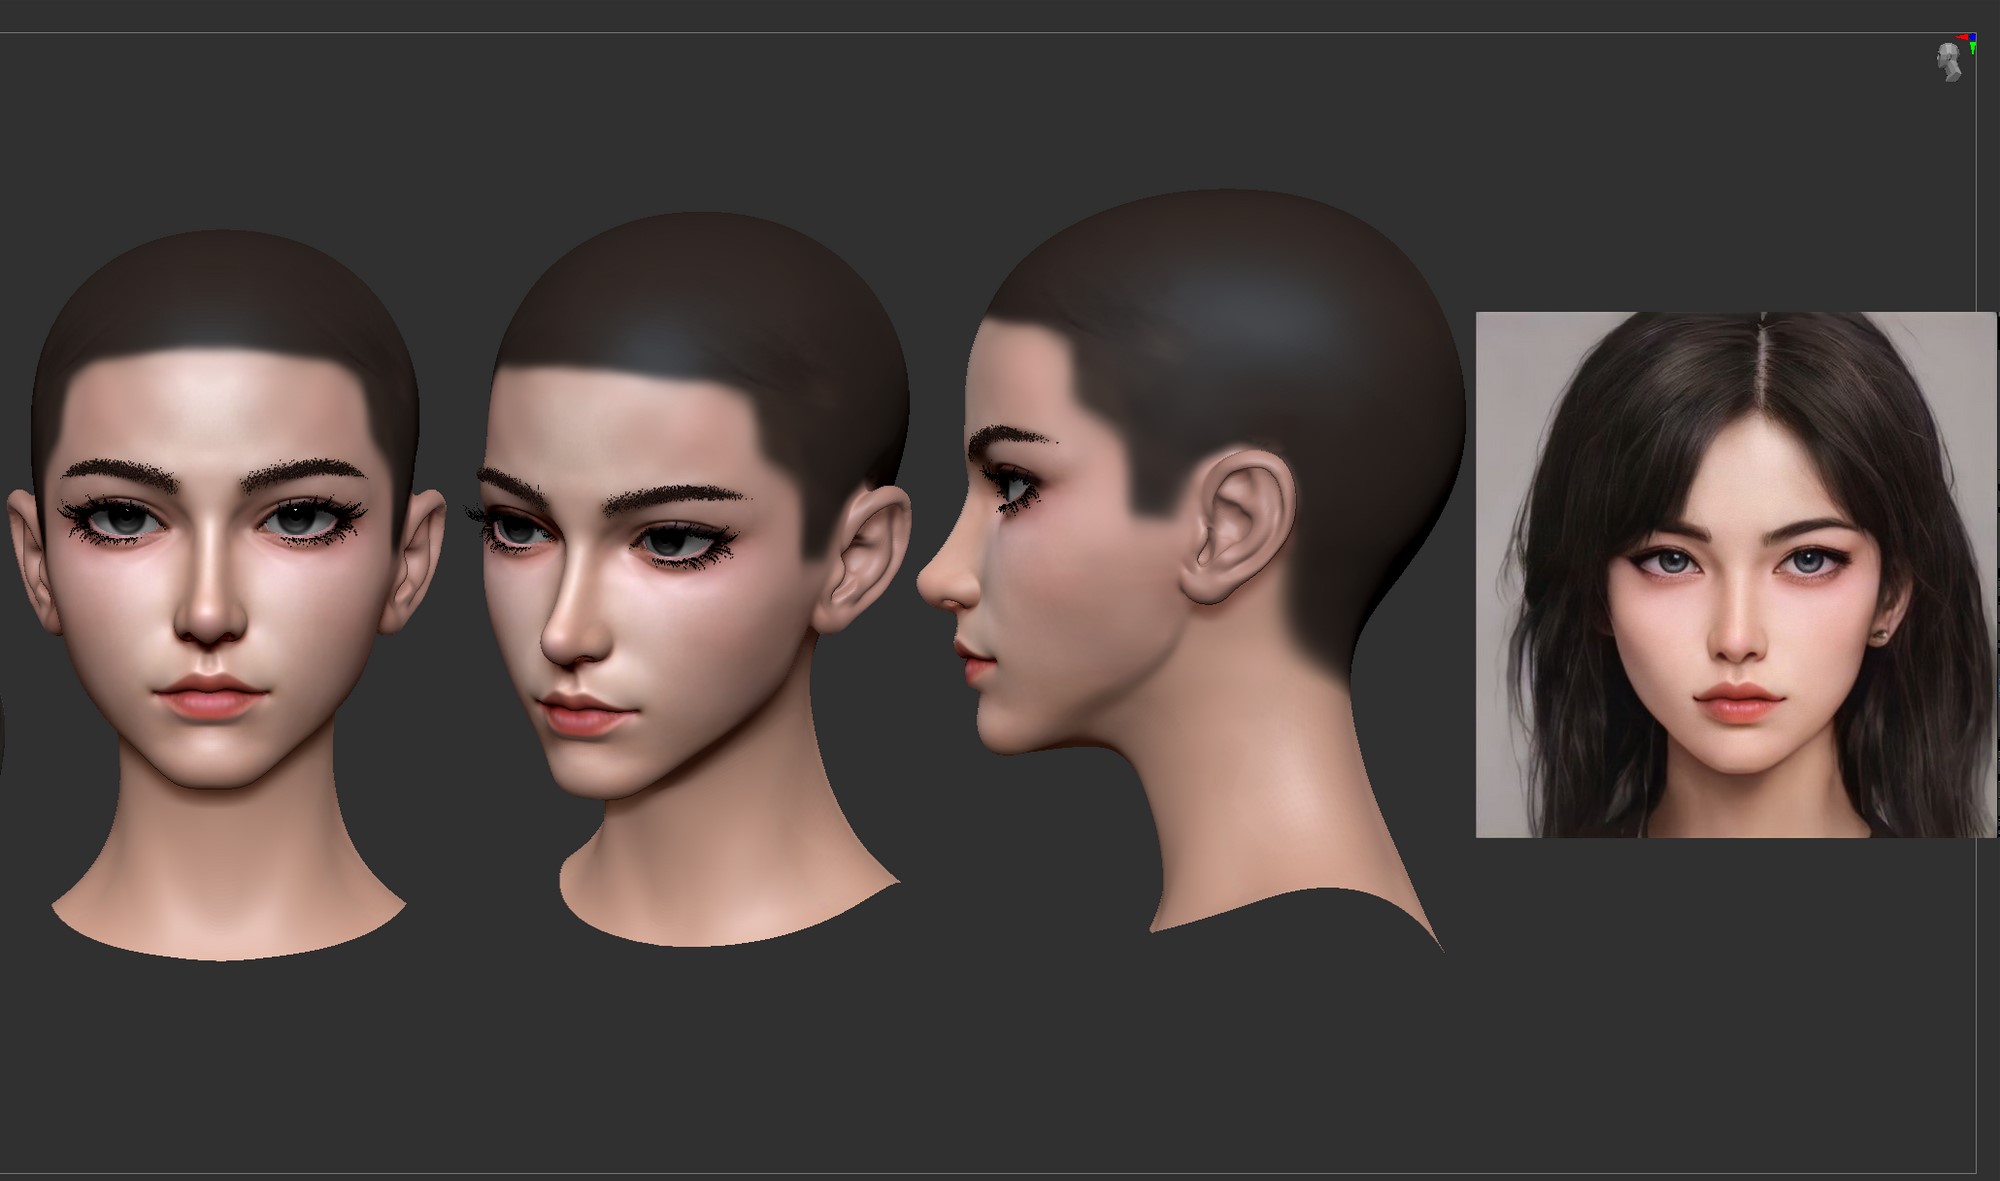
Along with matching the face form to the reference picture, I used the face coloration projected from Highlight as Polypaint for later use as a face texture.
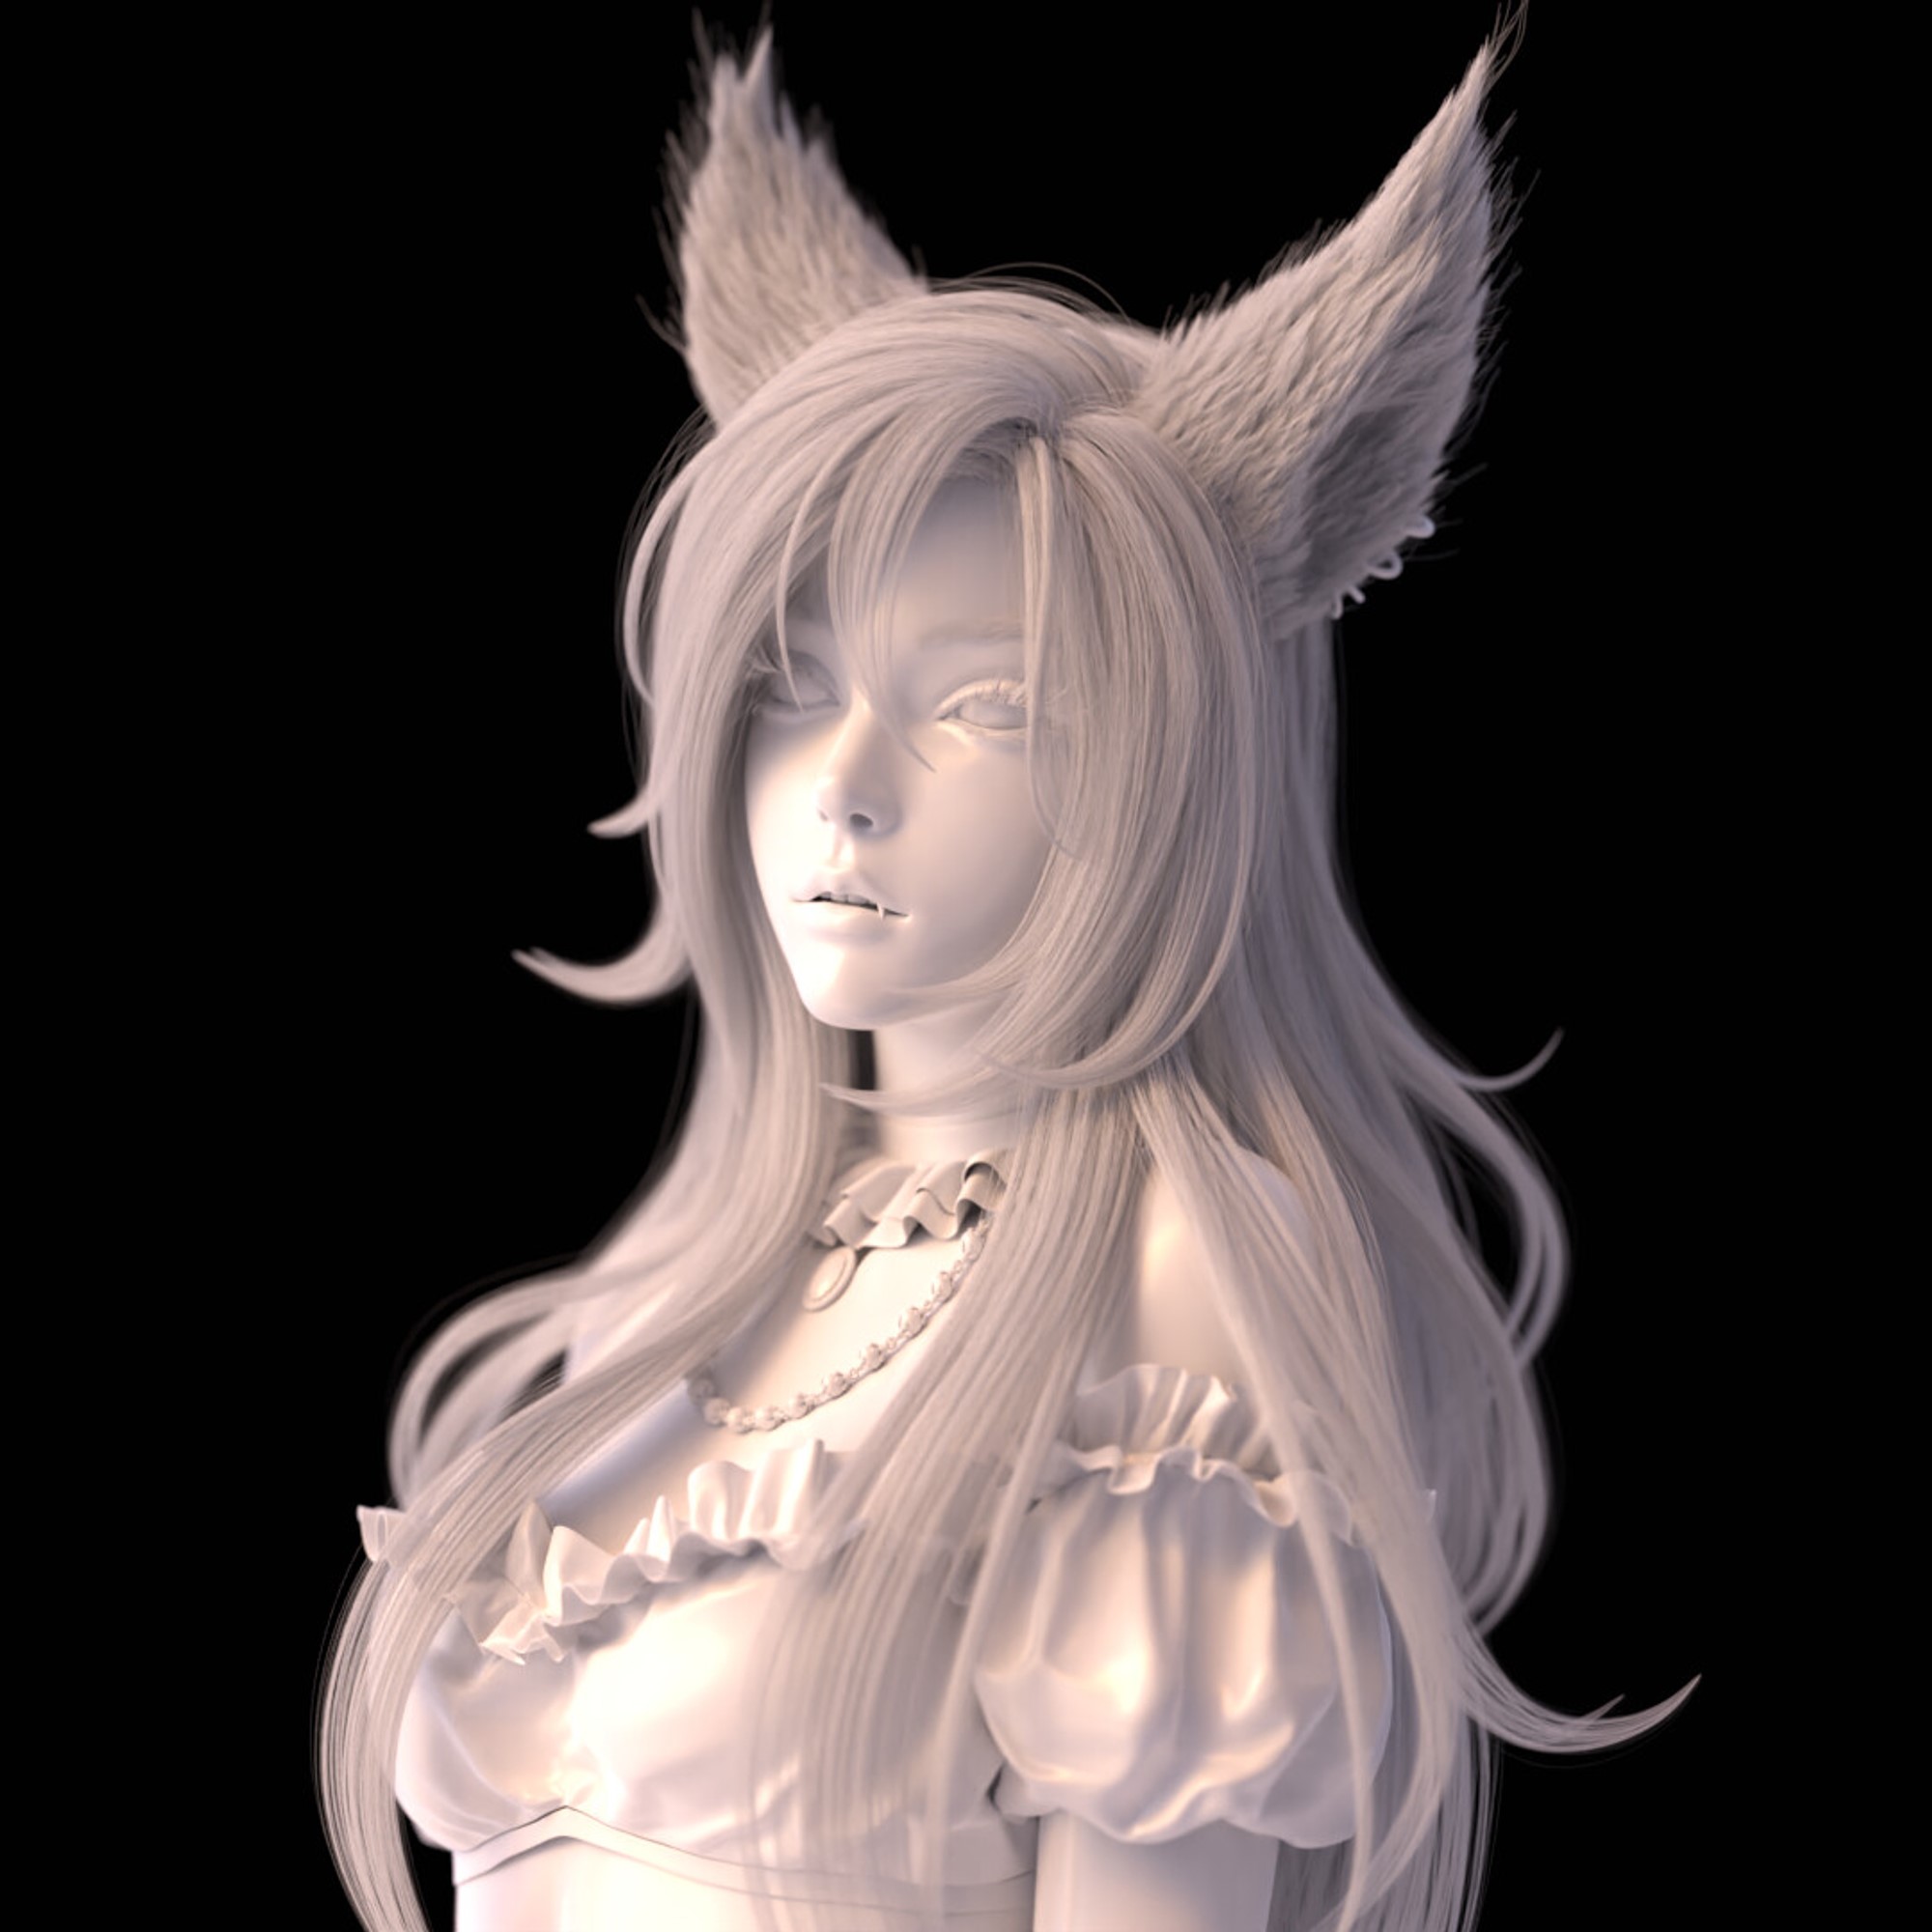
SKIN
As soon as the face and physique shapes are finalized, the pores and skin particulars are transferred from a scan mannequin. To do that, import a scan mannequin from the 3D Scan Retailer and use ZWrap to match the form.

Enhance the SubD degree of the bottom mannequin to 7, after which run Challenge All to switch the pores and skin particulars from the scan mannequin.
Moreover, use ZWrap’s ZTexTransfer to switch the colour texture from the scan mannequin.
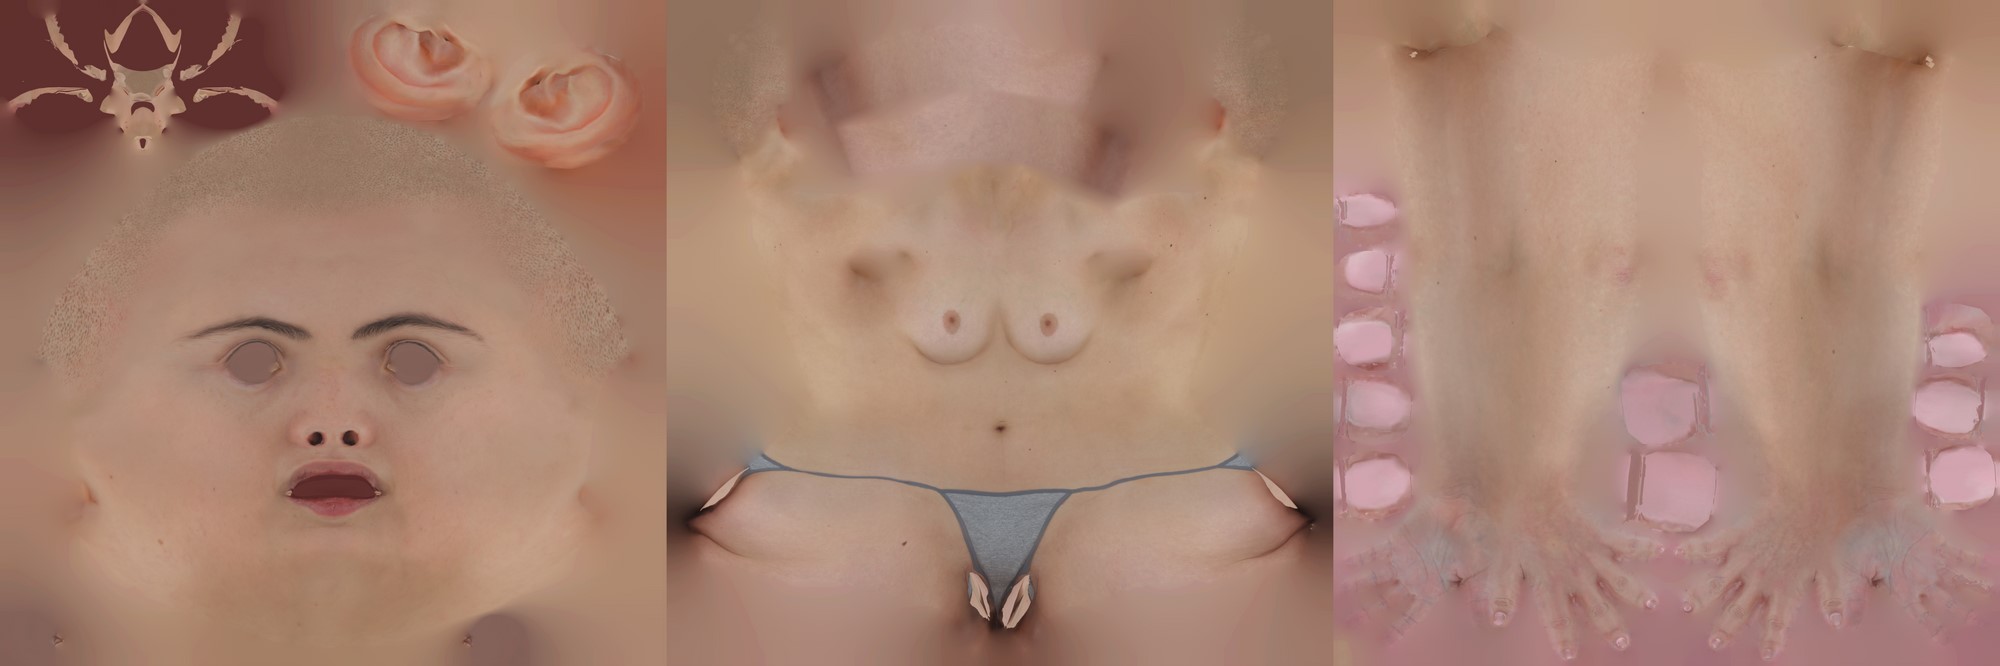
Lastly, export the conventional map and Polypaint utilizing the Multimap Exporter.

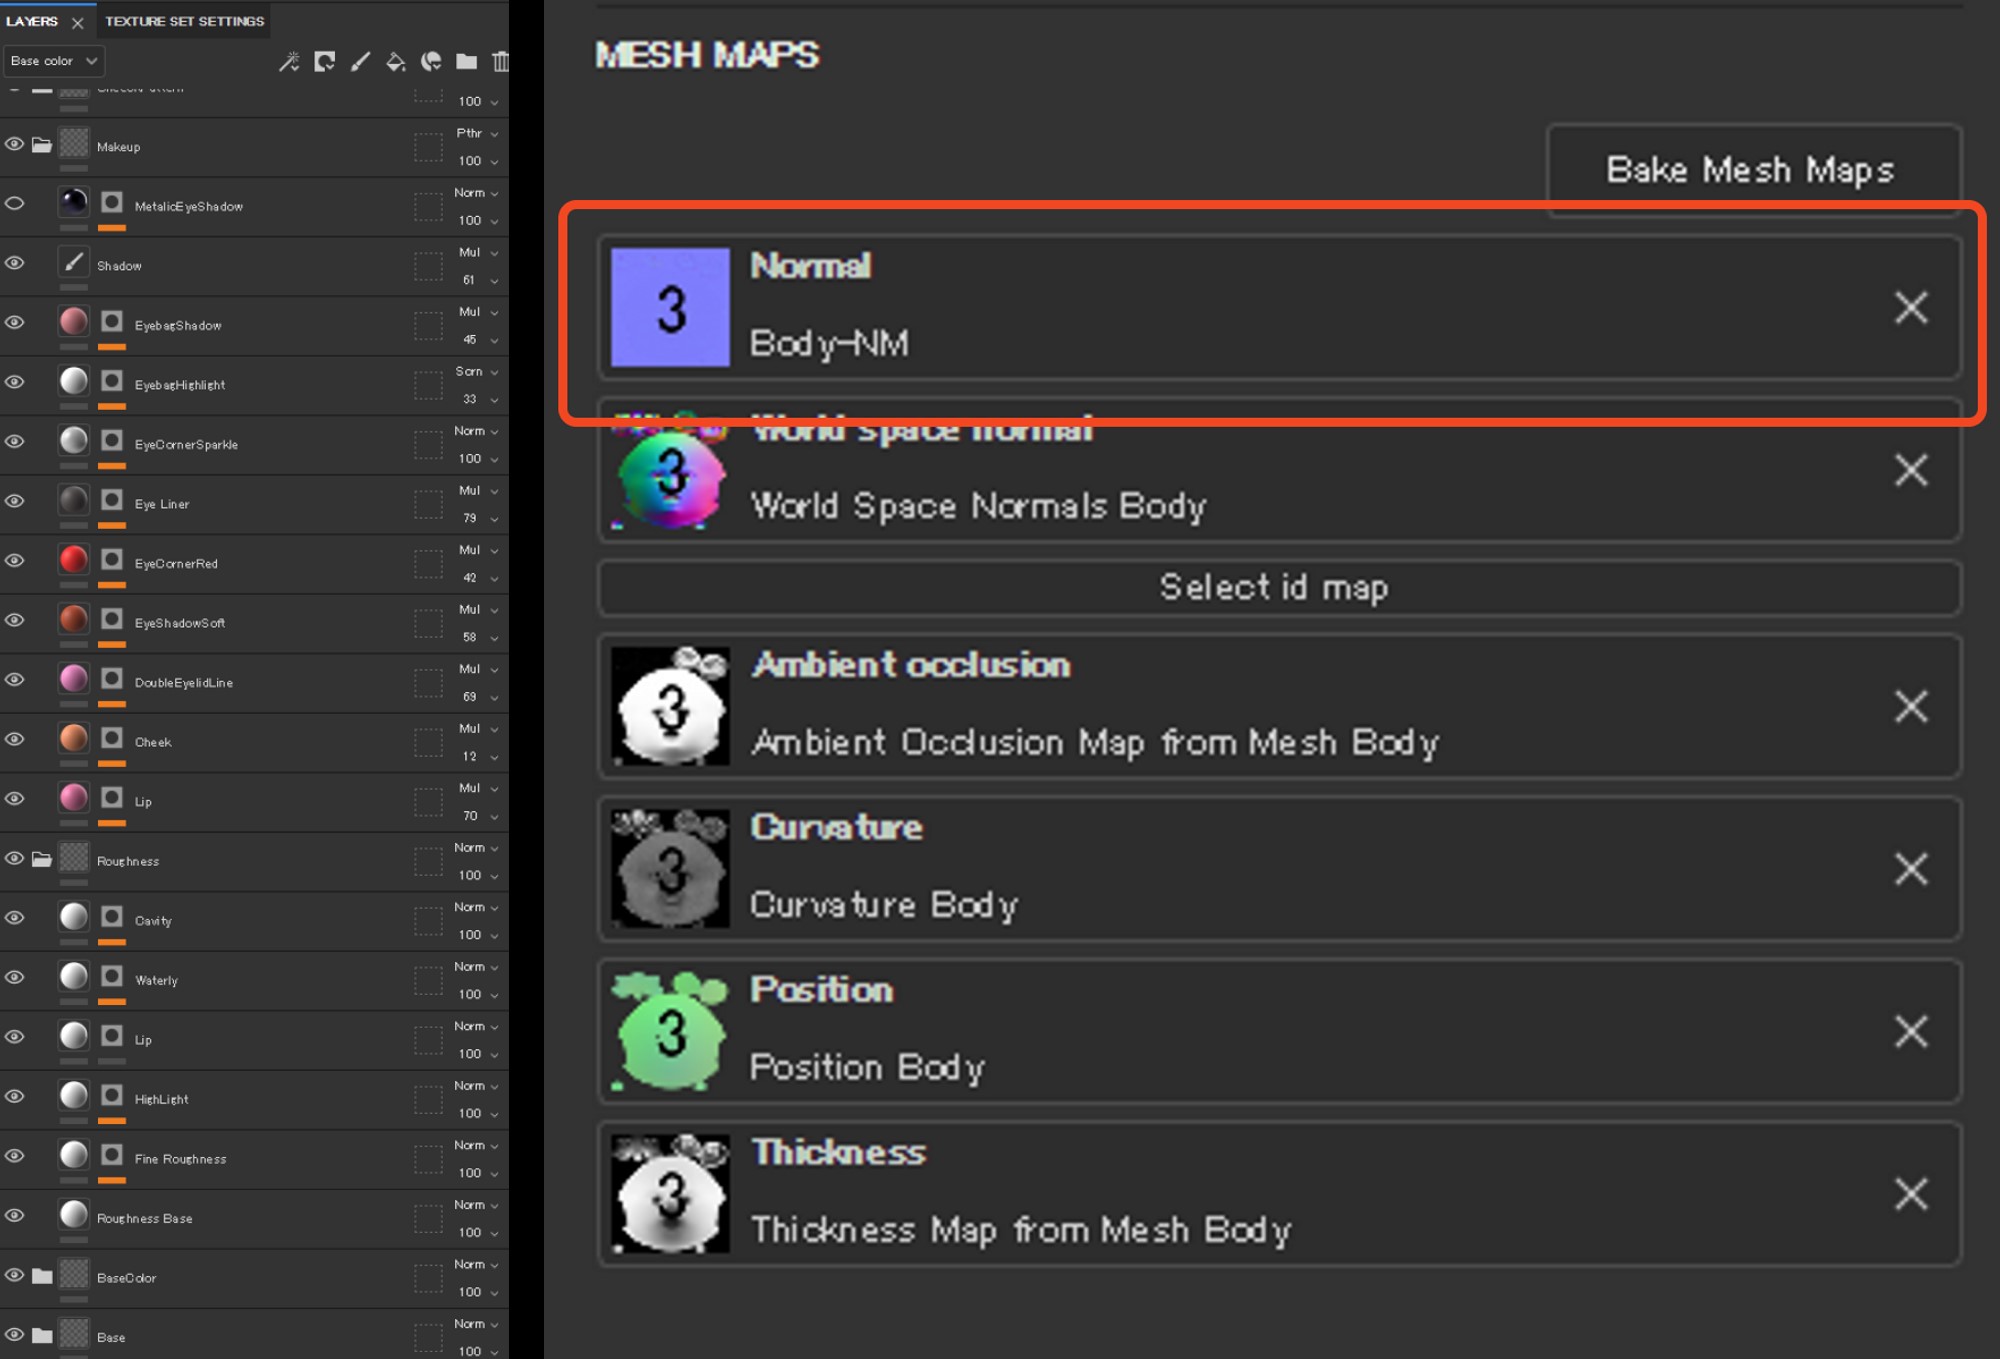
Create a Substance Painter venture and import the mannequin, together with the colour and regular textures that have been exported from ZBrush, into the venture. Insert the conventional map into the Regular slot of the Texture Set to use it. The colour textures are then utilized to the Fill layers.
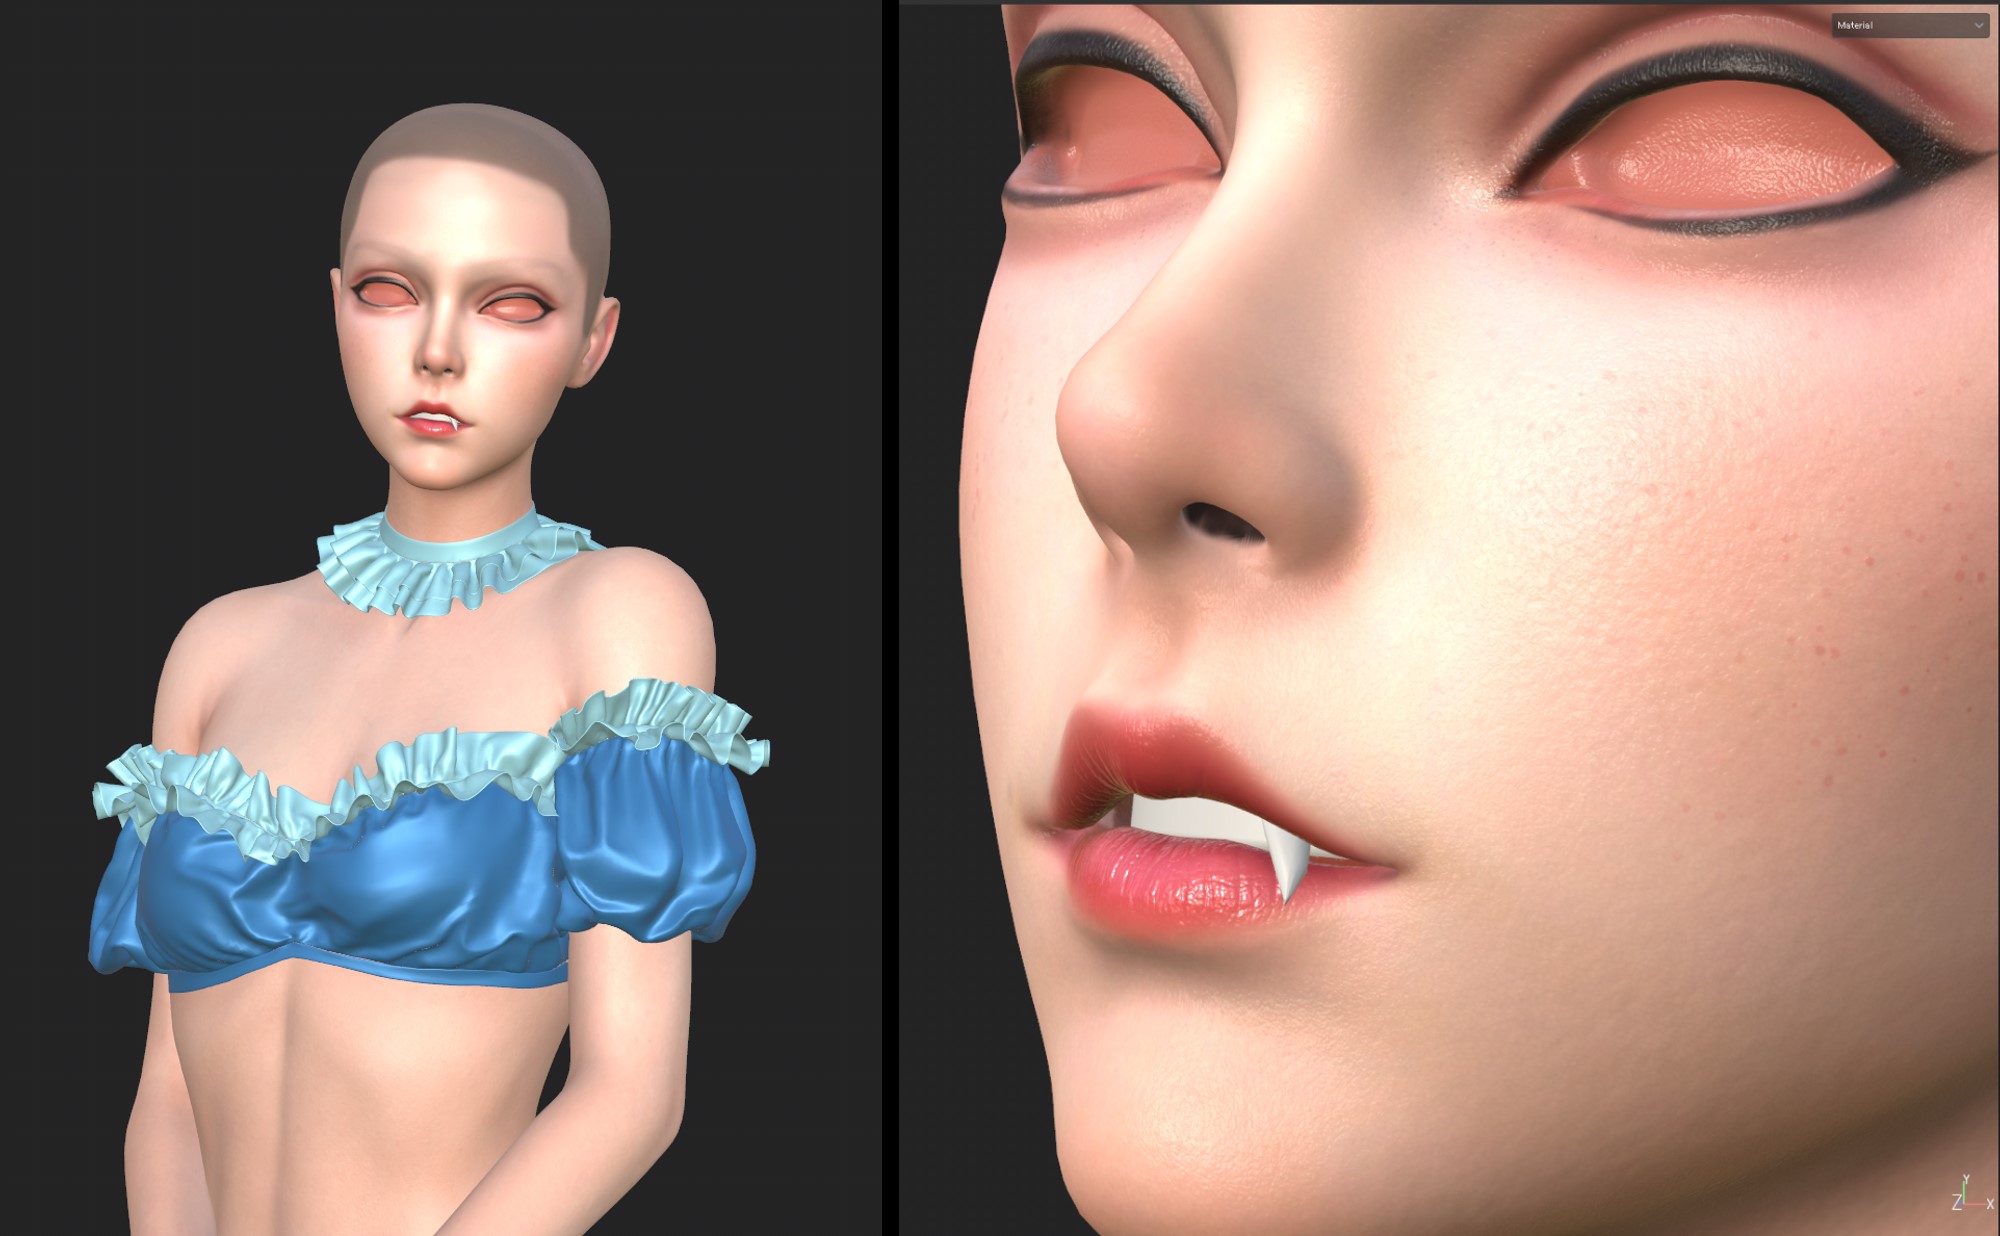
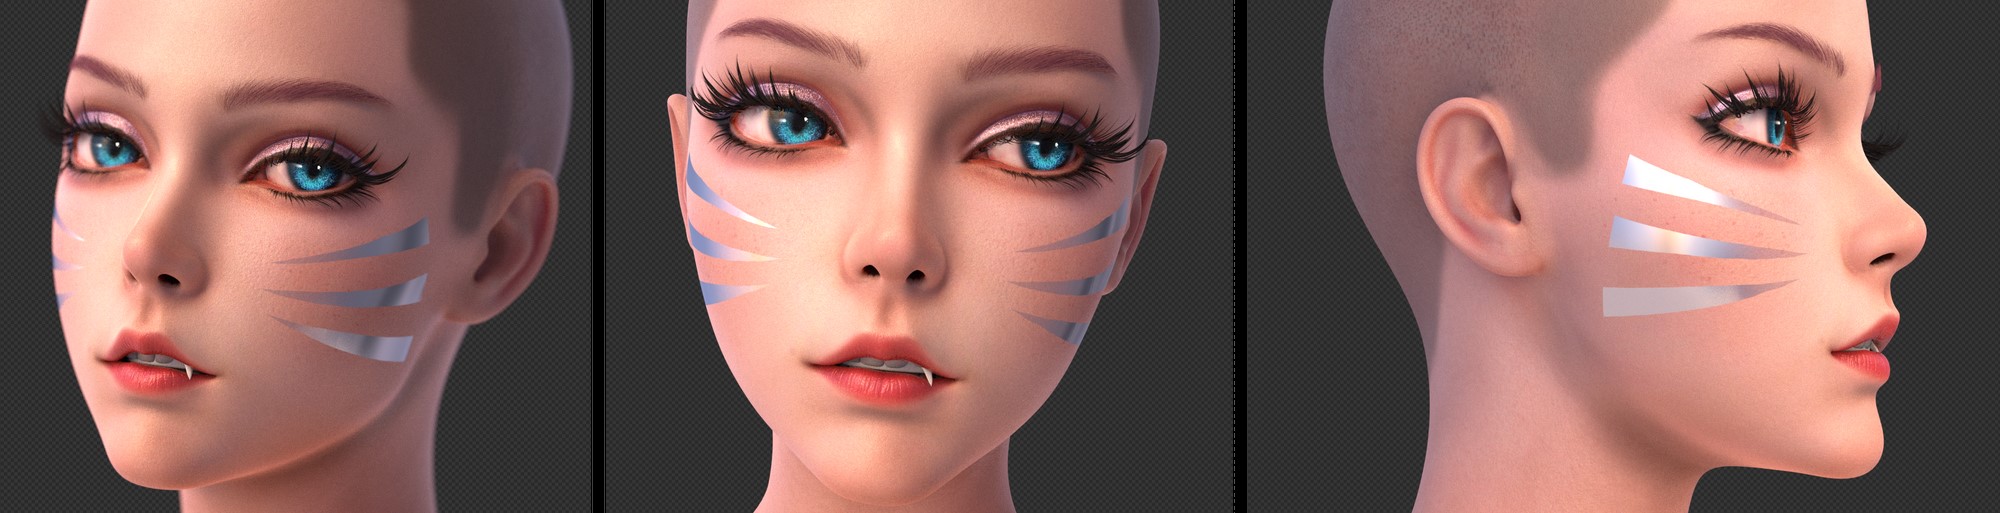
A masks is created to distinguish the colour map on the decrease portion below the neck, which is sourced from the scan mannequin, from the higher portion, which is created utilizing Polypaint from the reference picture. Lastly, make-up is utilized to the face.
The Blender pores and skin materials is as follows.

Right here is the make-up of the characters.
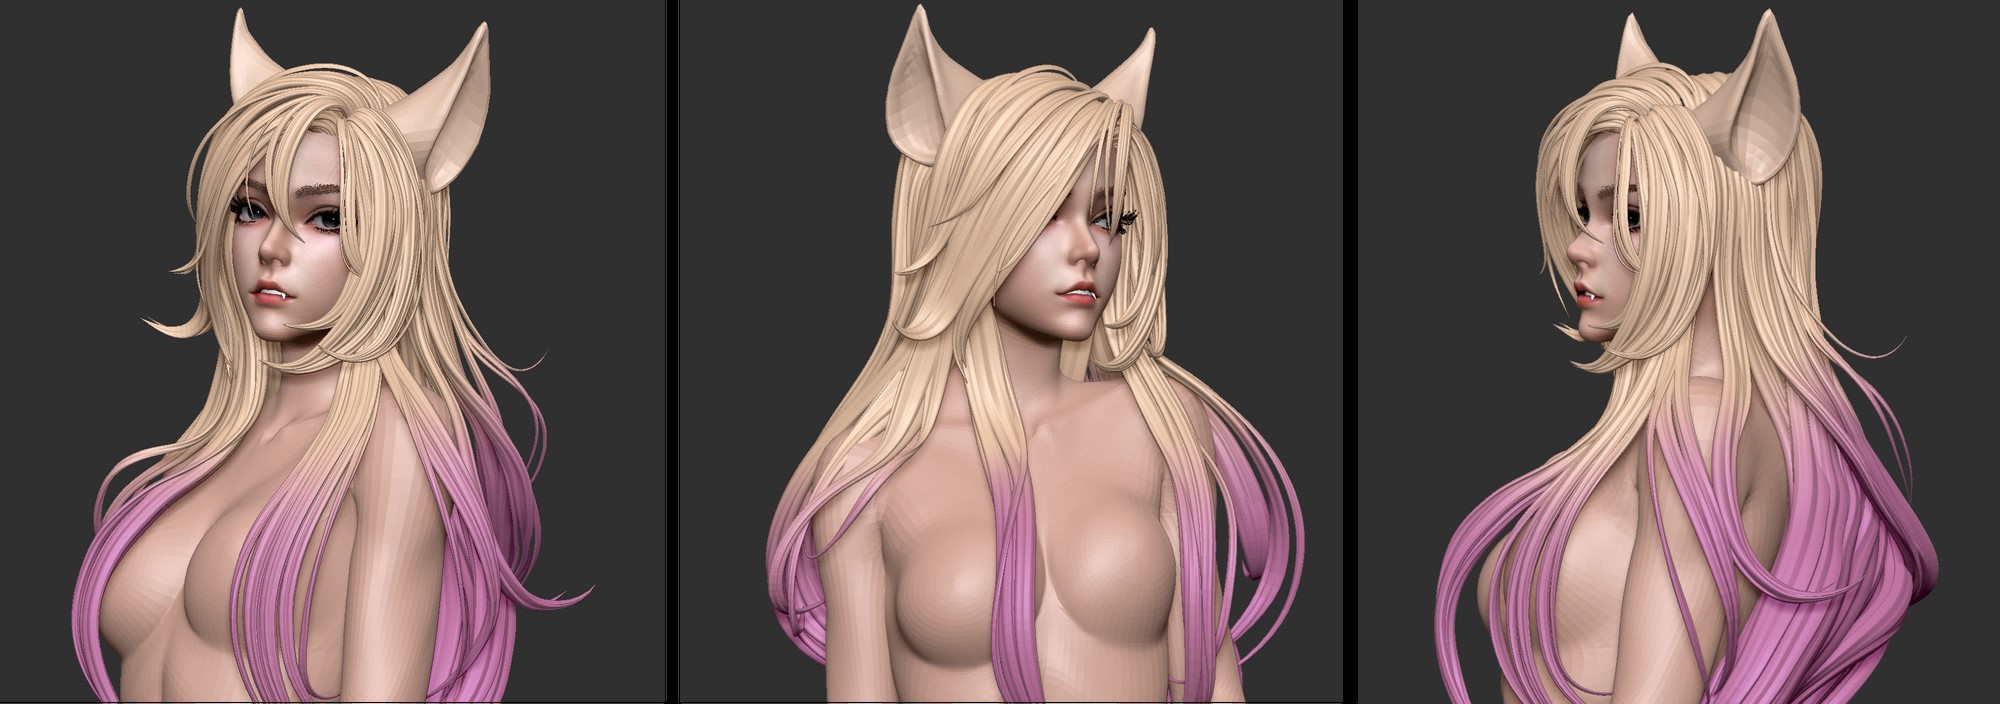
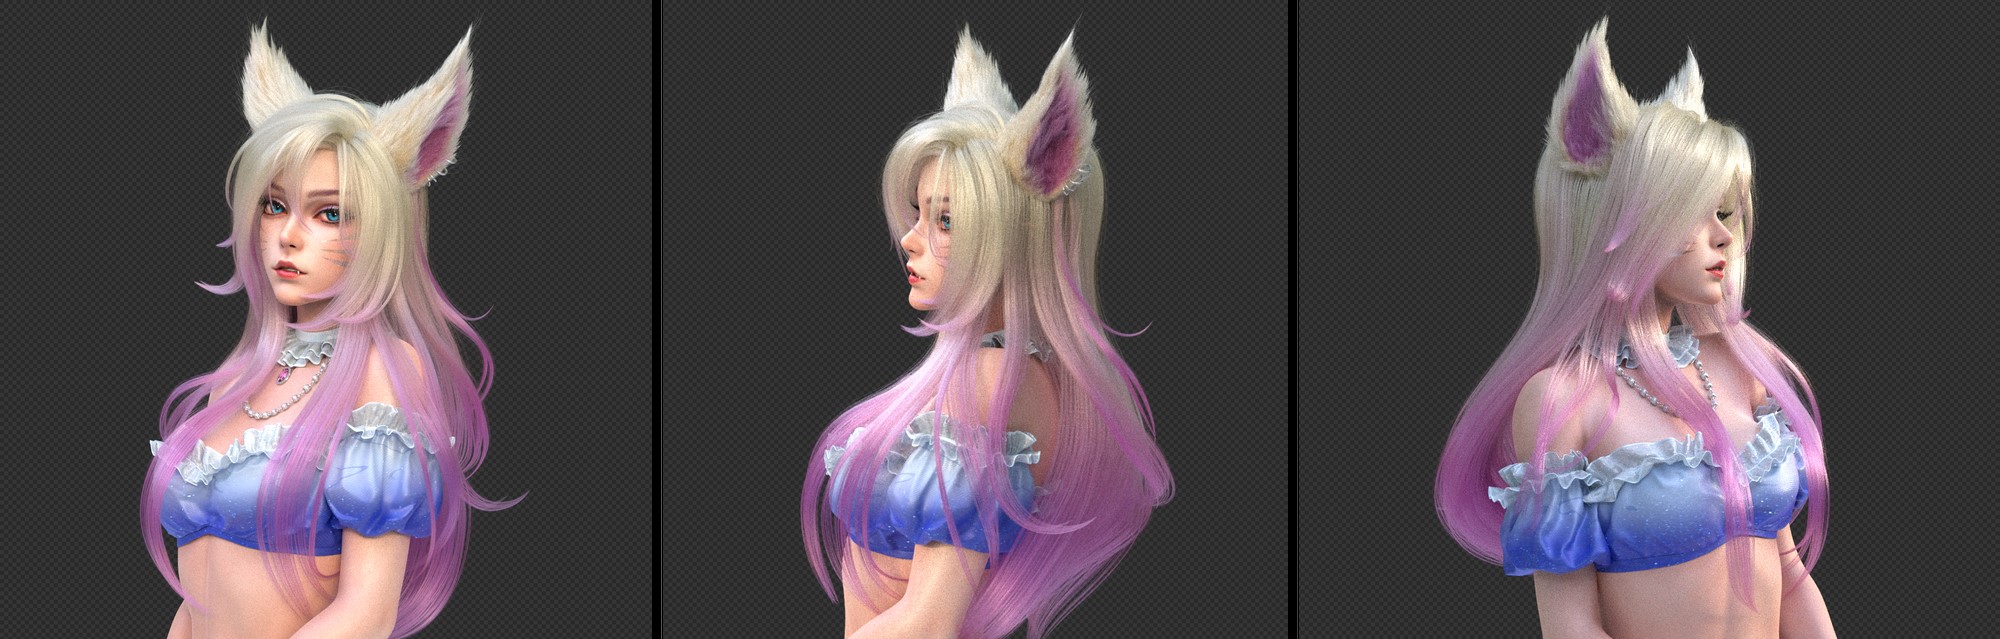
HAIR
The hair was created utilizing Blender Curve as the bottom mannequin.
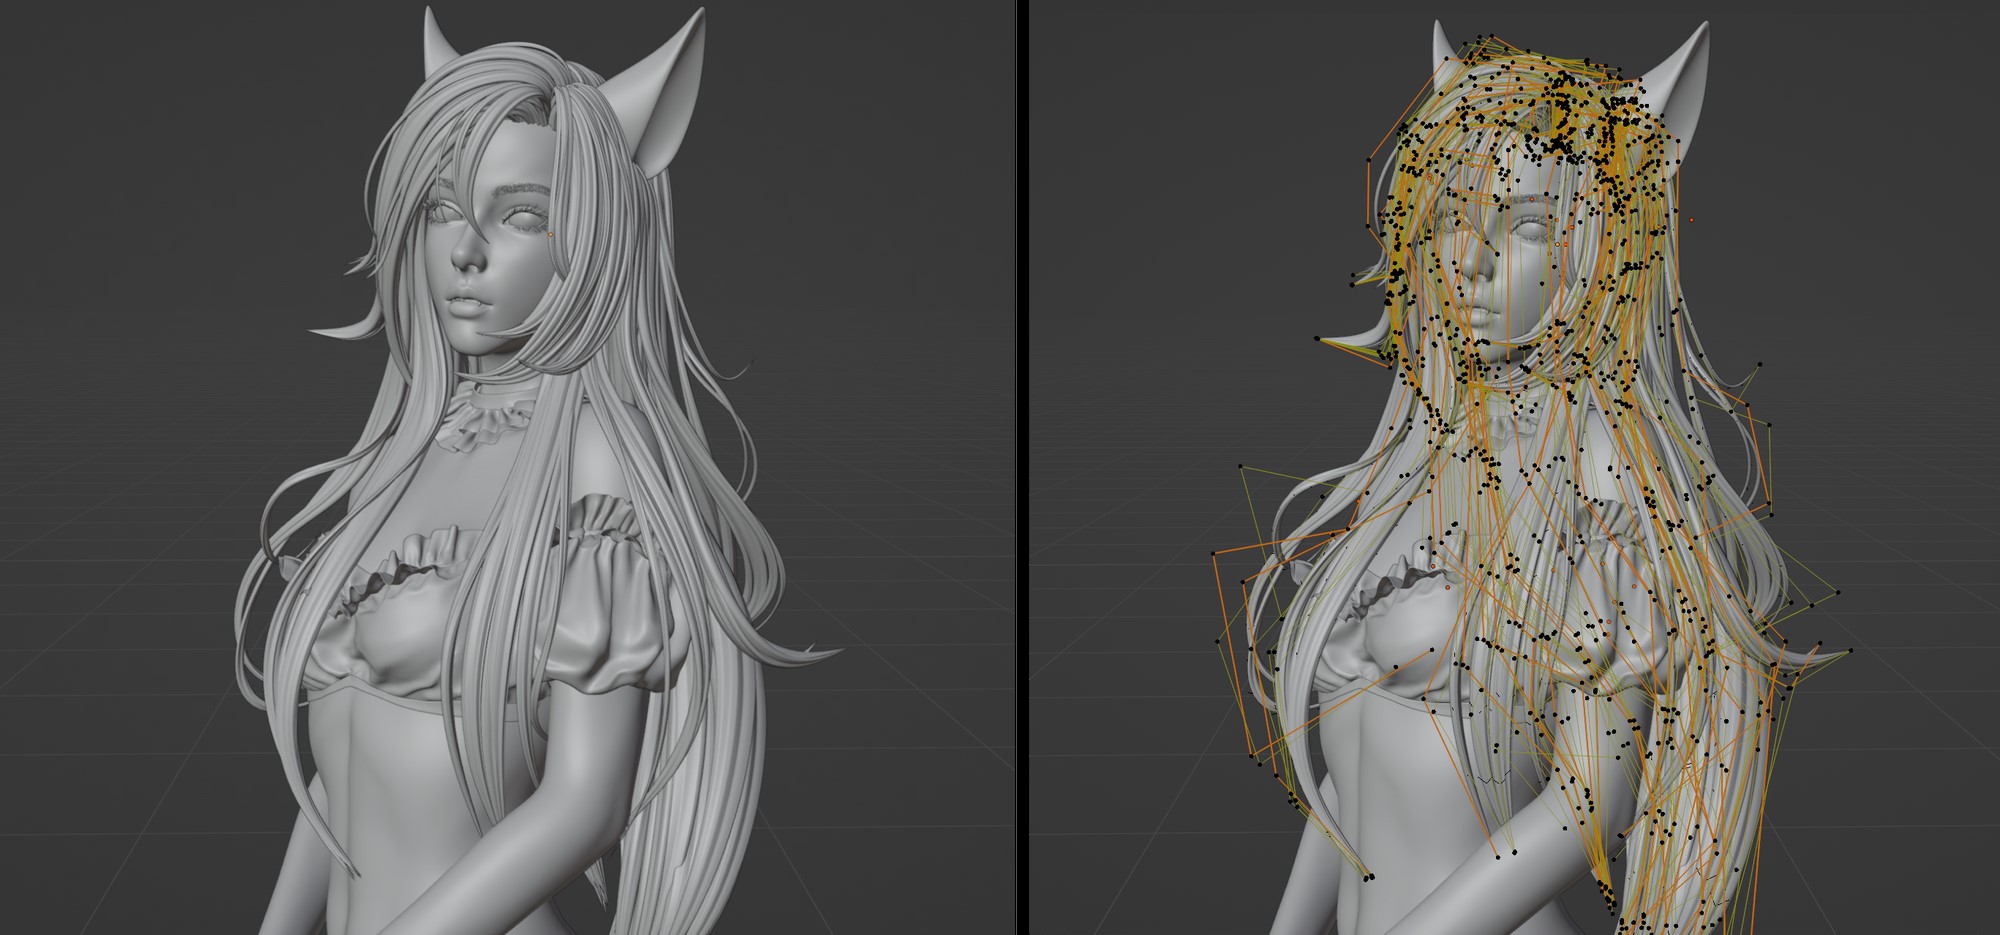
The bevel of the curve was given this form.

When creating the hair, I make certain to verify its stream and placement by portray over it. I additionally guarantee that there’s a clear distinction between the massive and small scales of every strand of hair.
As soon as the curves have been in place, I imported the adjusted hair mannequin from ZBrush into Blender and transformed it to Particle Hair.
I chosen edge loops from the hair strands to separate the thing, and it was handy to take action within the UV editor as I may choose edge loops for a number of hair strand meshes.

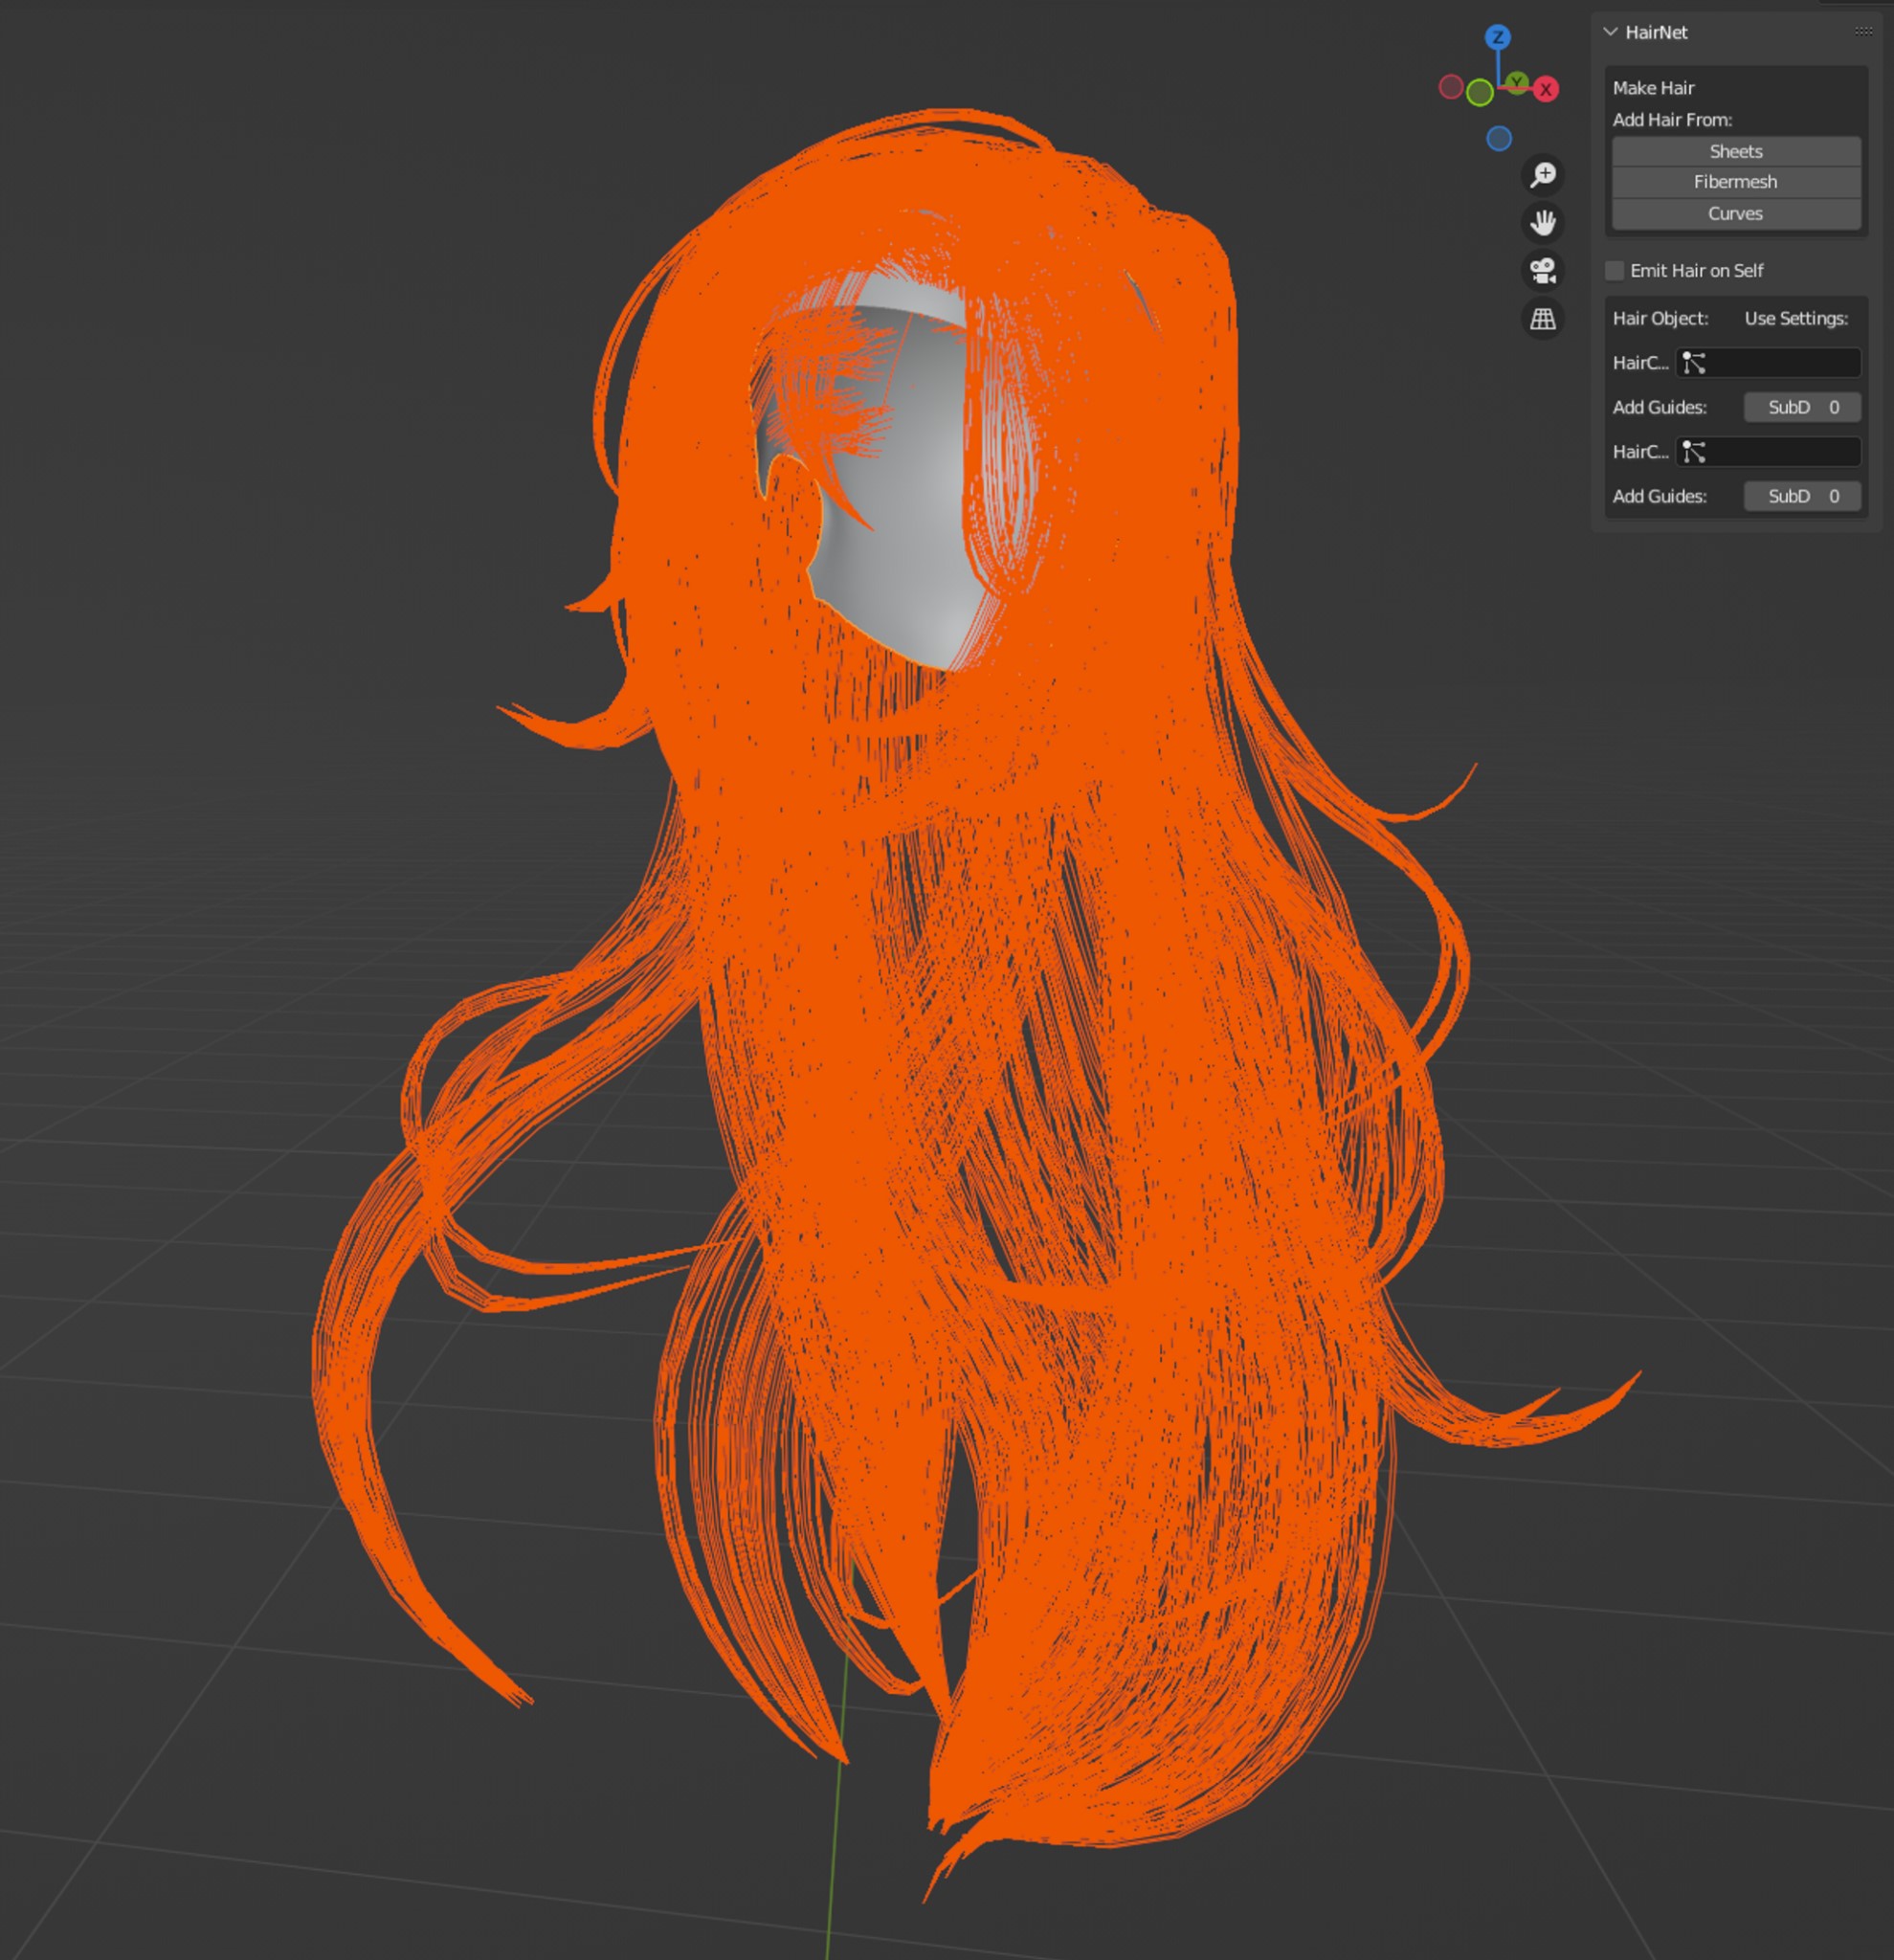
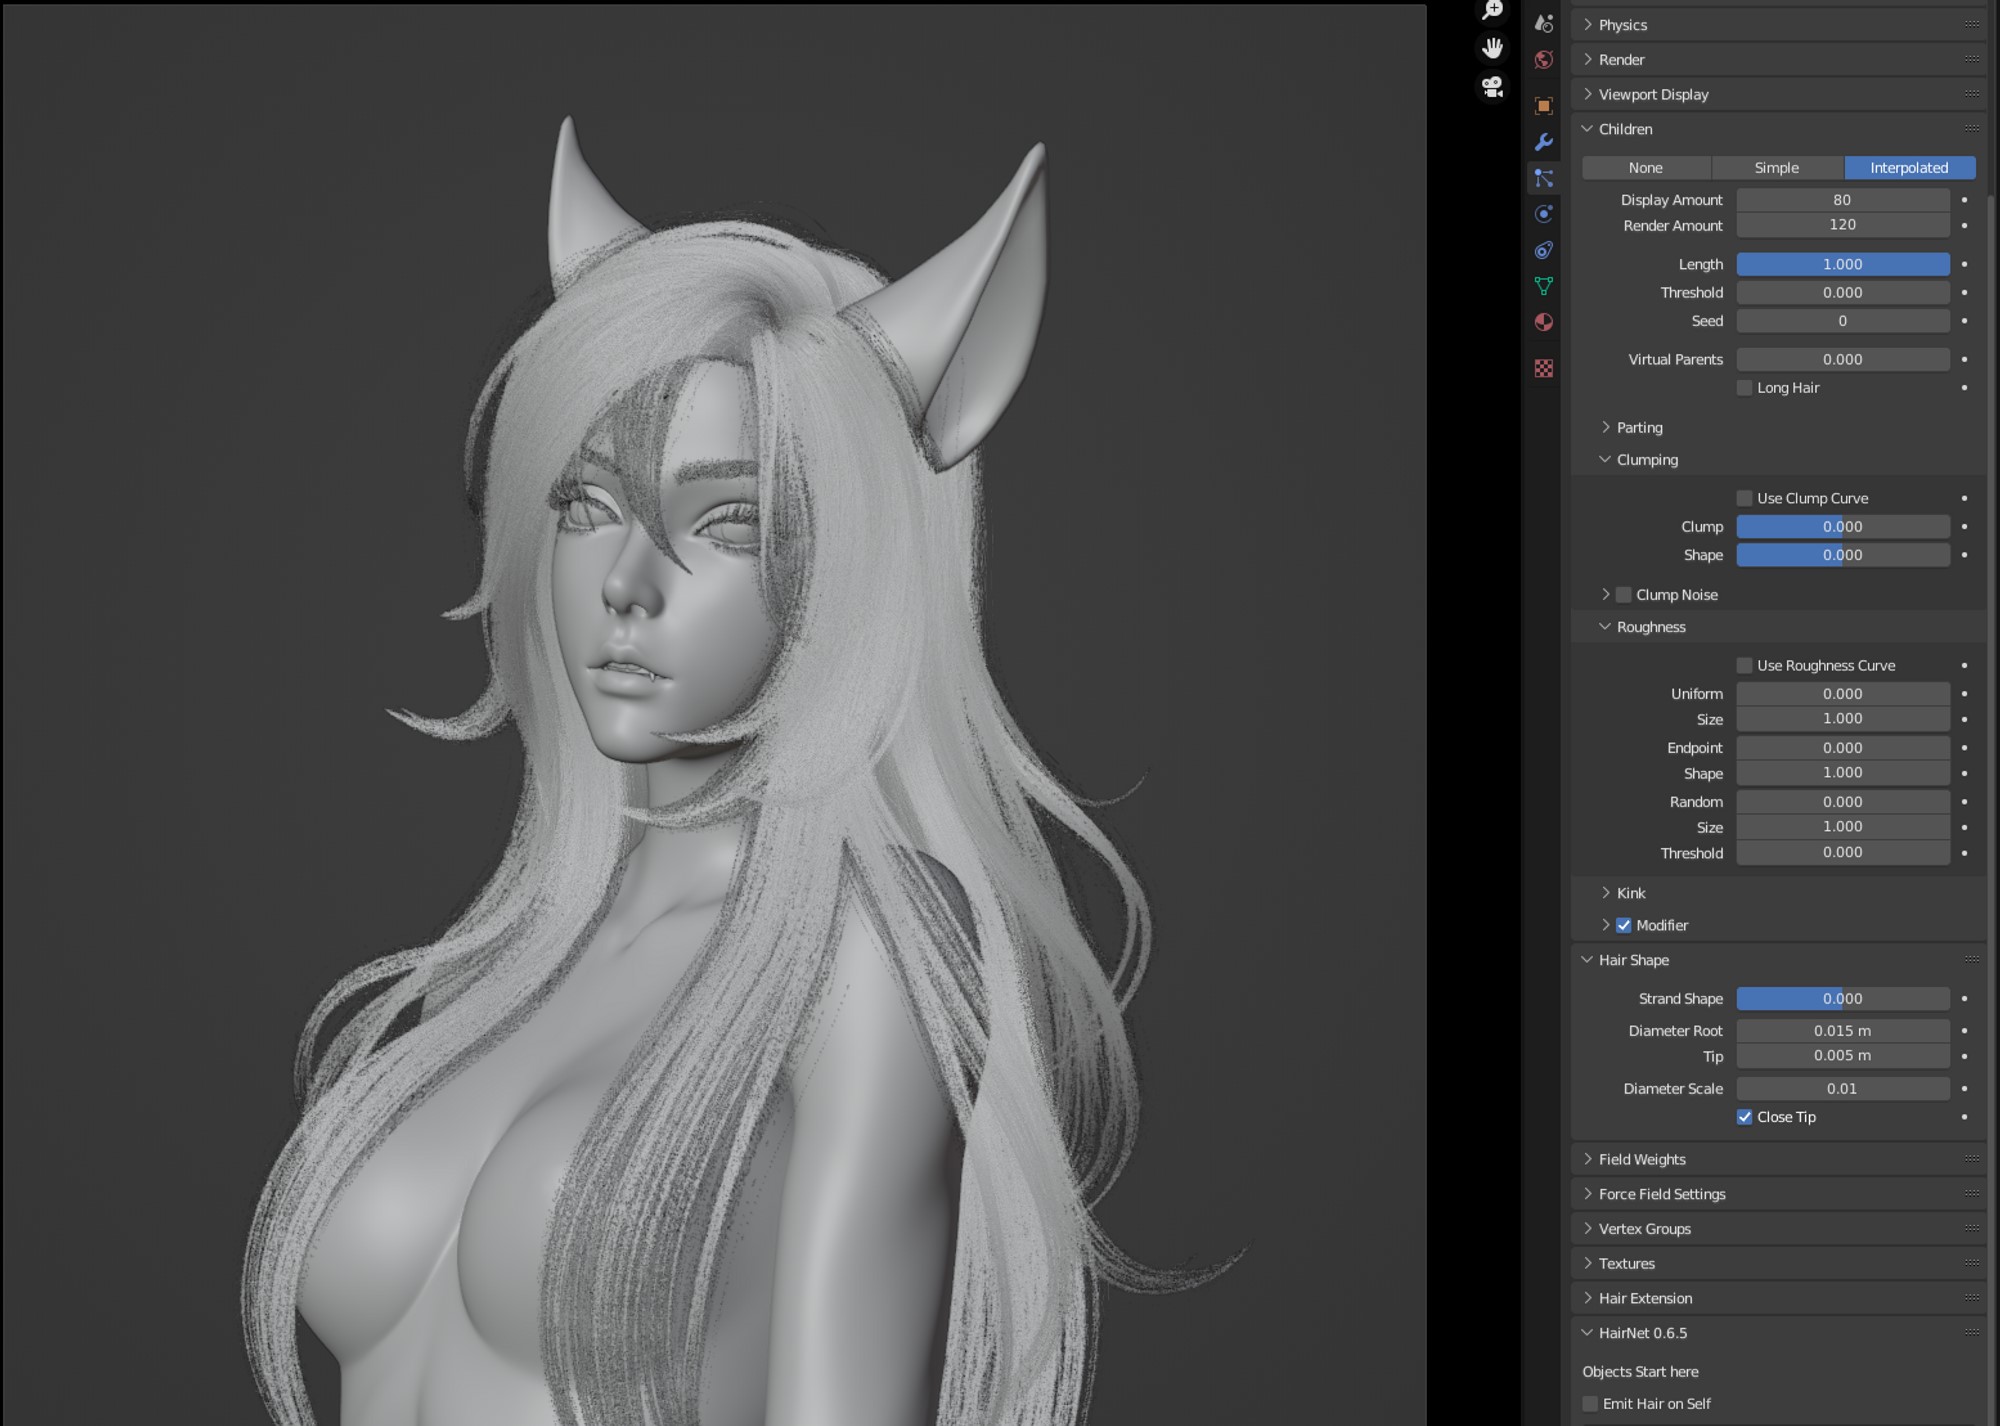
Then, I transformed the extracted edge loops right into a Hair Particle Information utilizing the HairNet addon.
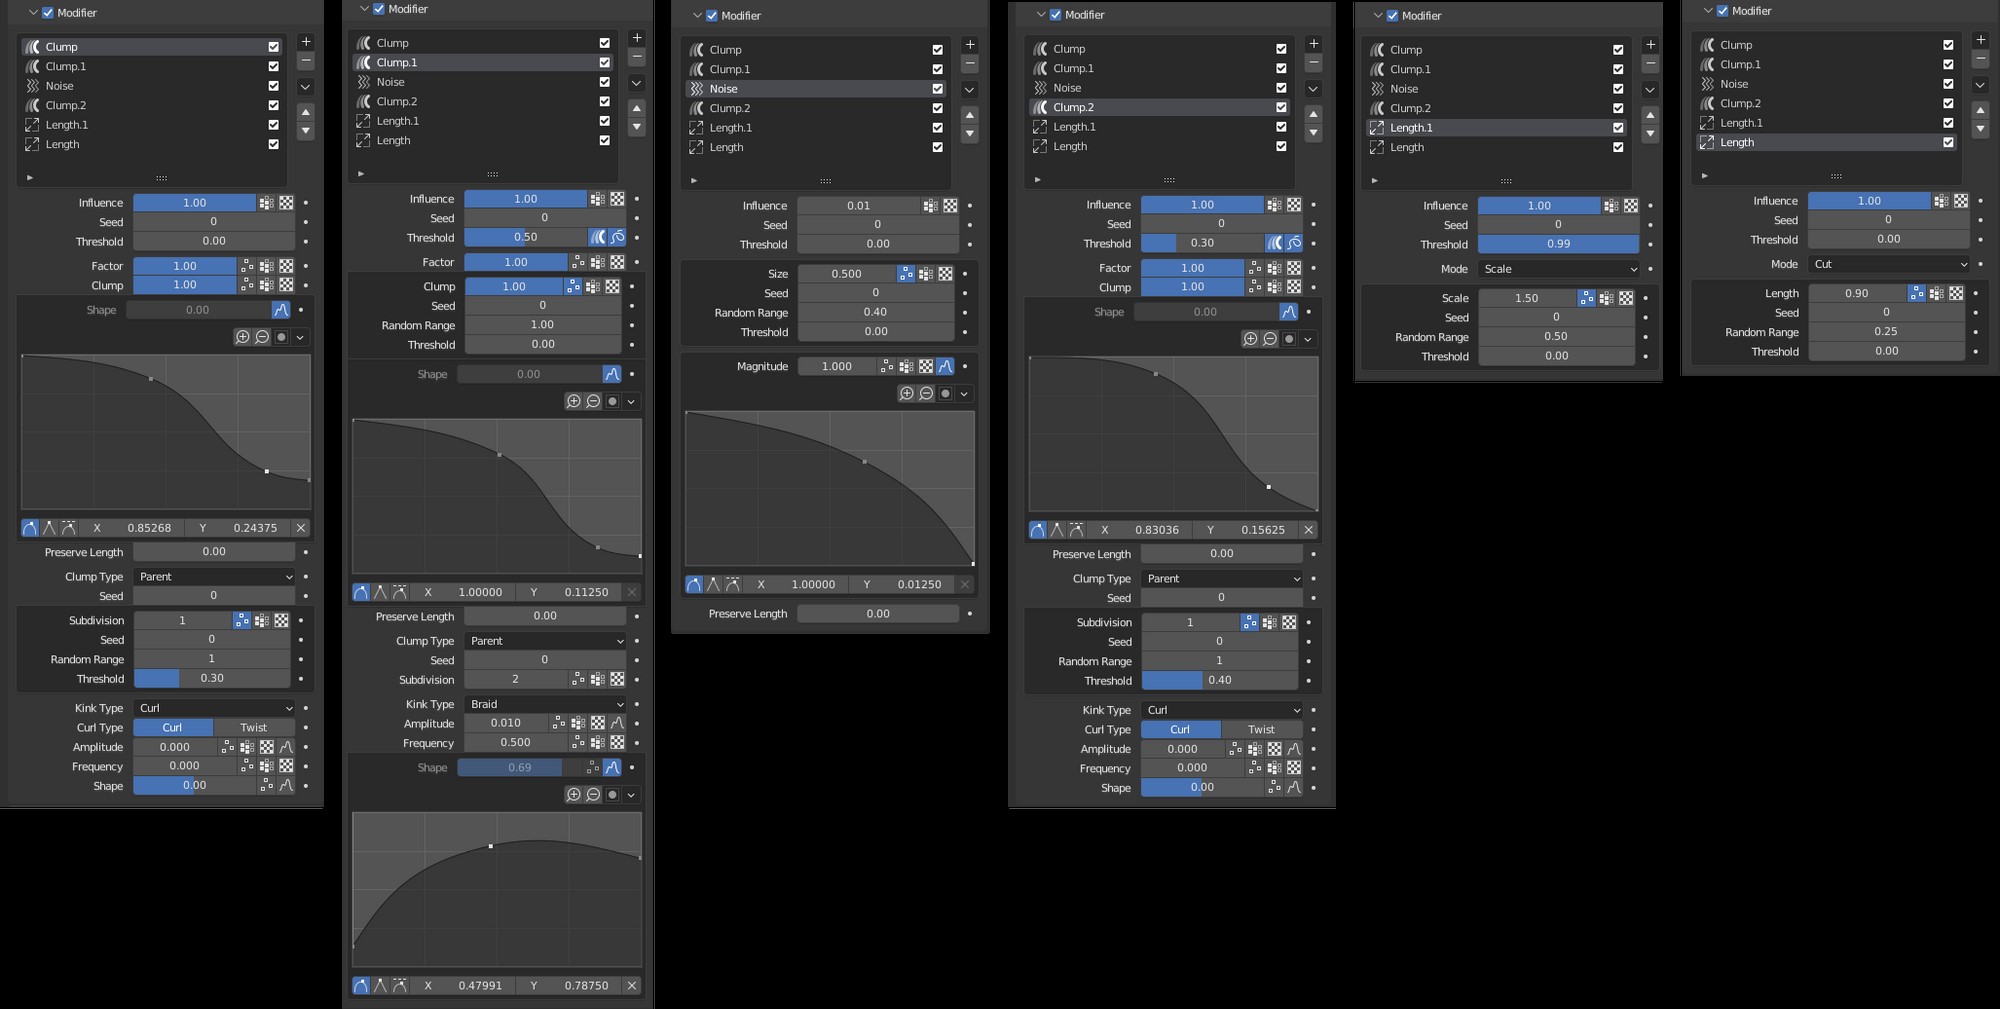
I adjusted the Clump and Roughness values of the Hair Particles as desired.
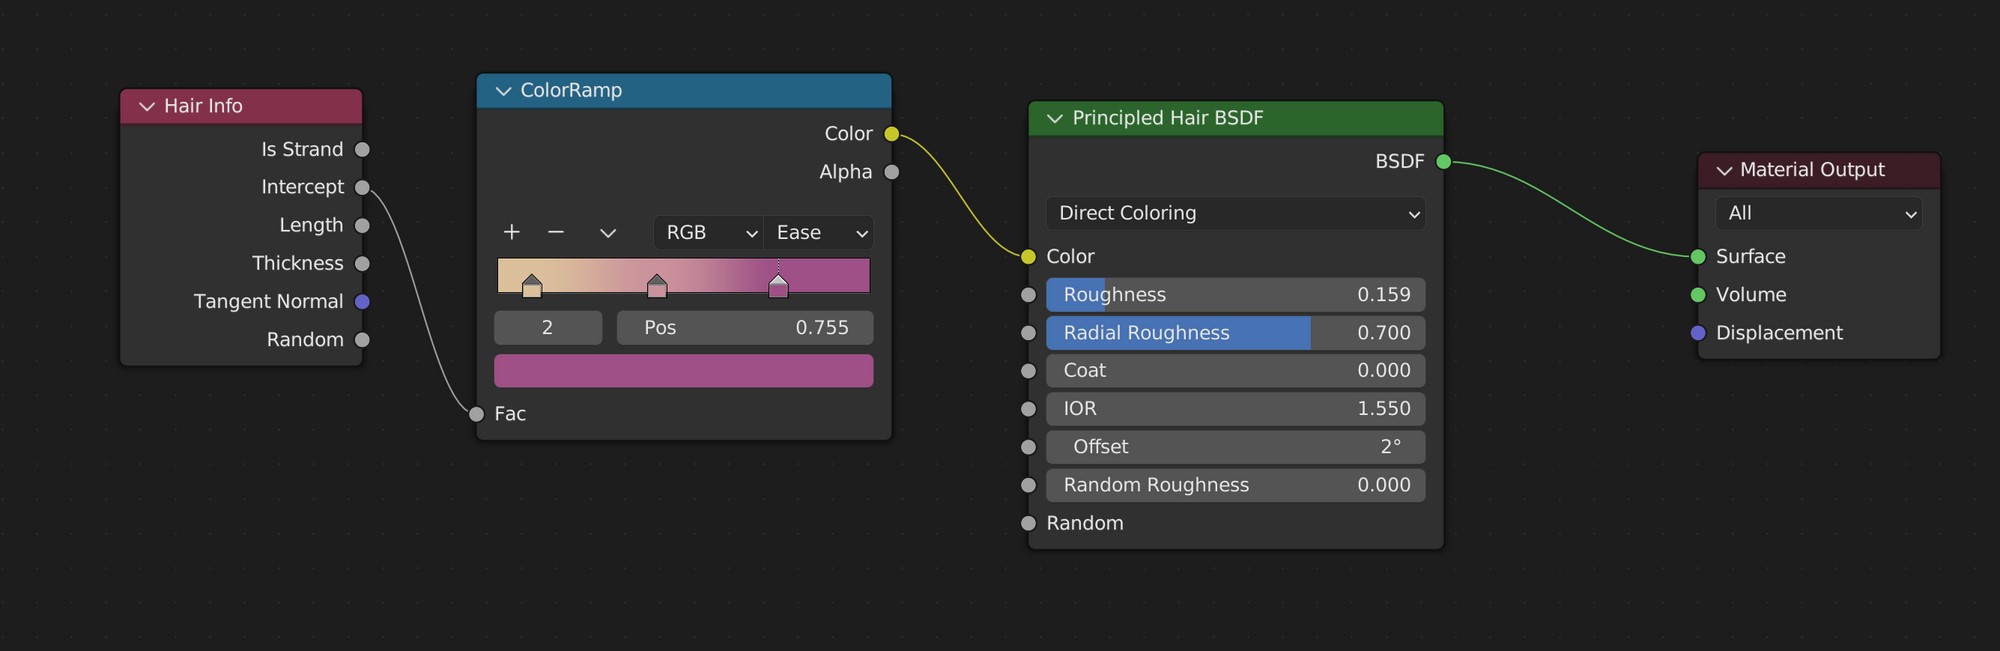
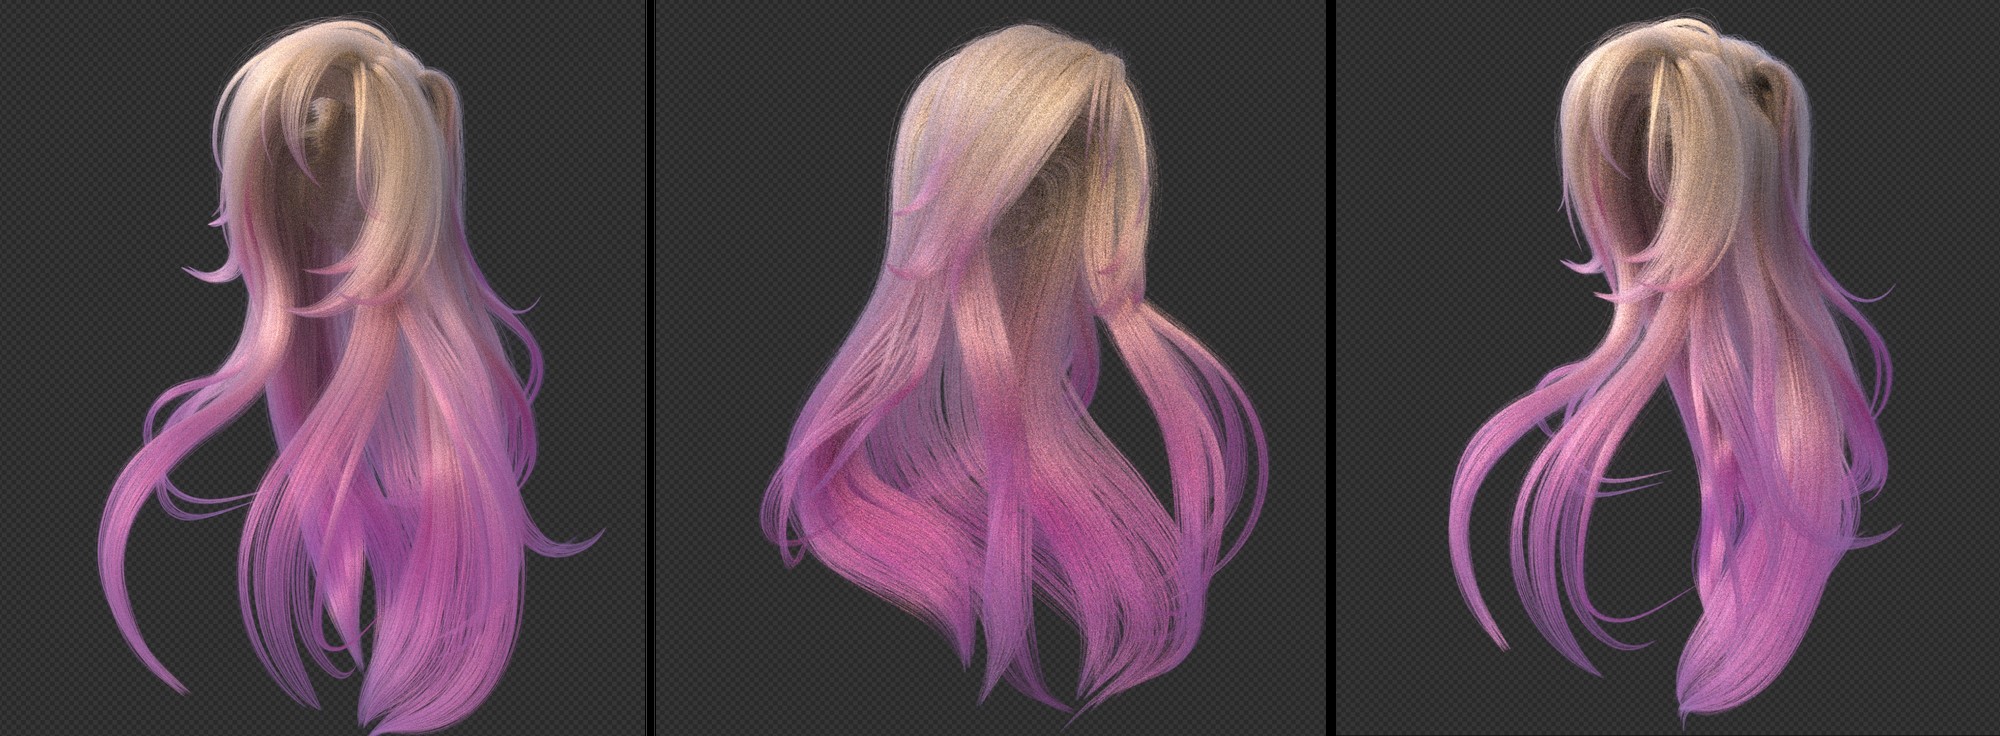
The Hair materials utilized a gradient impact to the ideas of the hair utilizing the Hair Information node. 5.
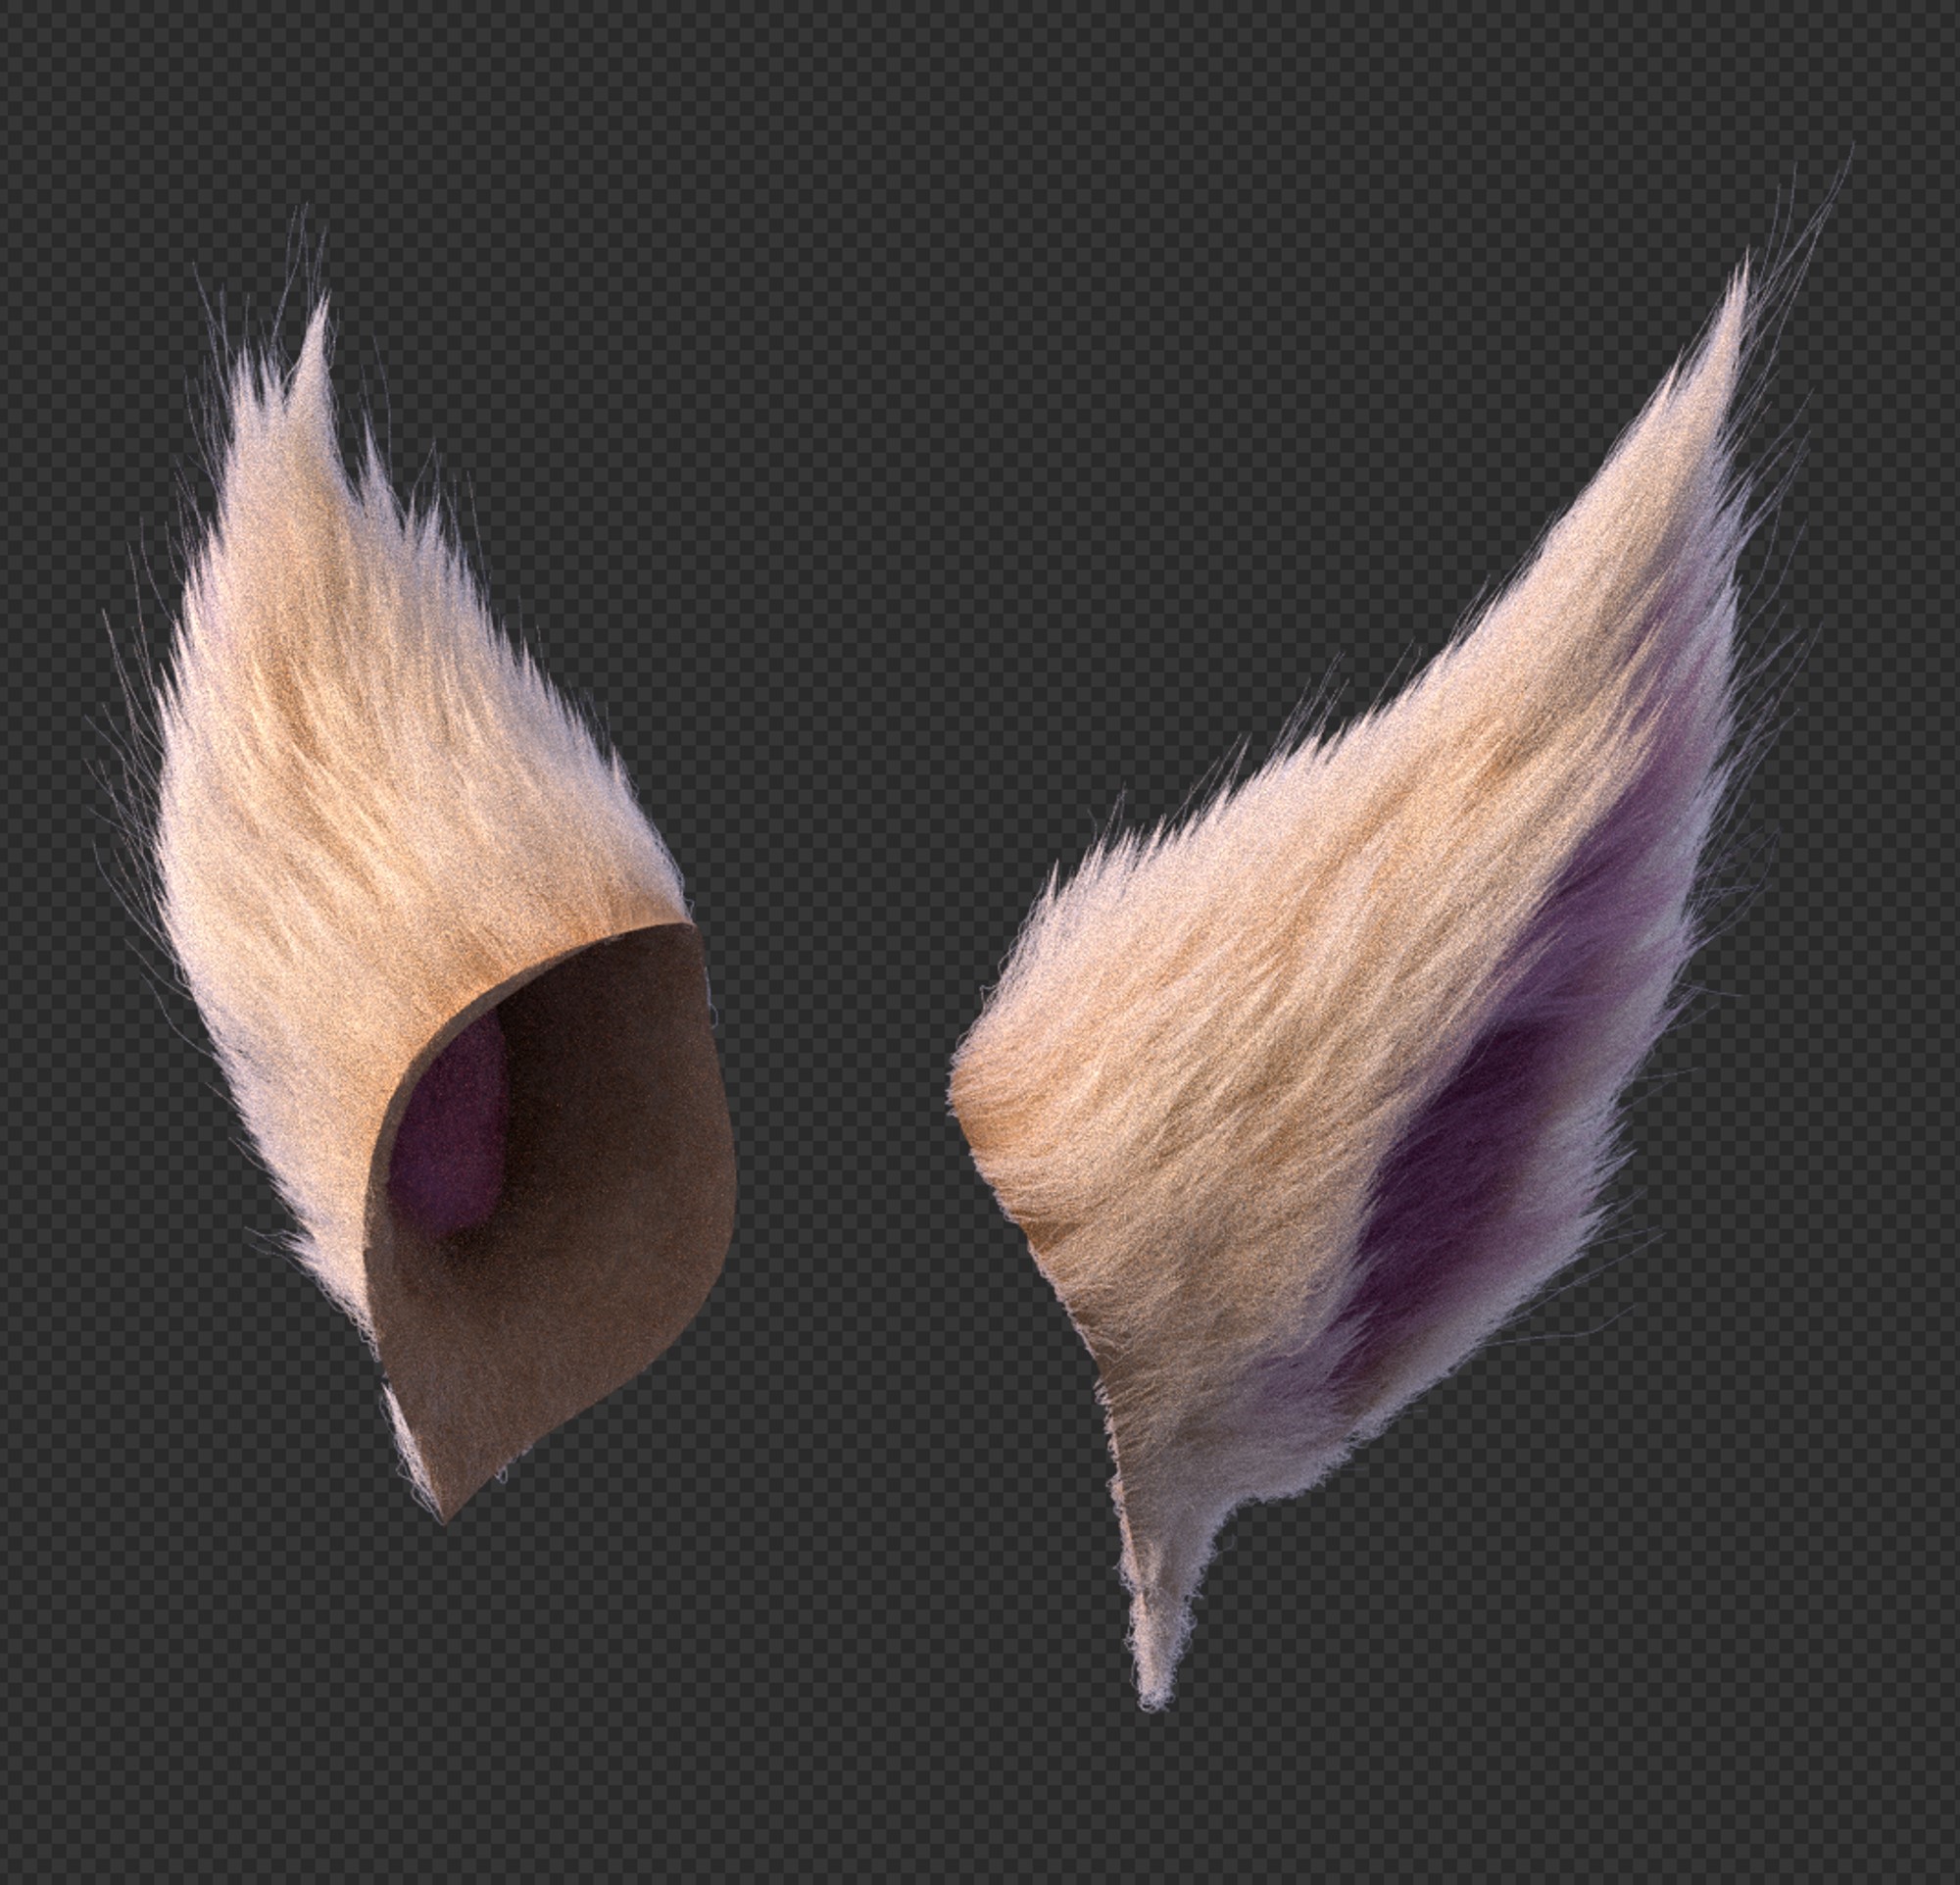
FUR
For the fur on the fox’s ears, I used the Hair Brush addon. First, place Hair Guides on the ear mannequin and use the Comb Brush to create the stream.

From the Hair particle settings, apply the modifiers of the Hair Brush addon.
Specifically, I used the Size modifier to make a few of the hair longer to present the hair a fluffy look.
CLOTHES
The garment mannequin was created in Marvelous Designer for the general form.
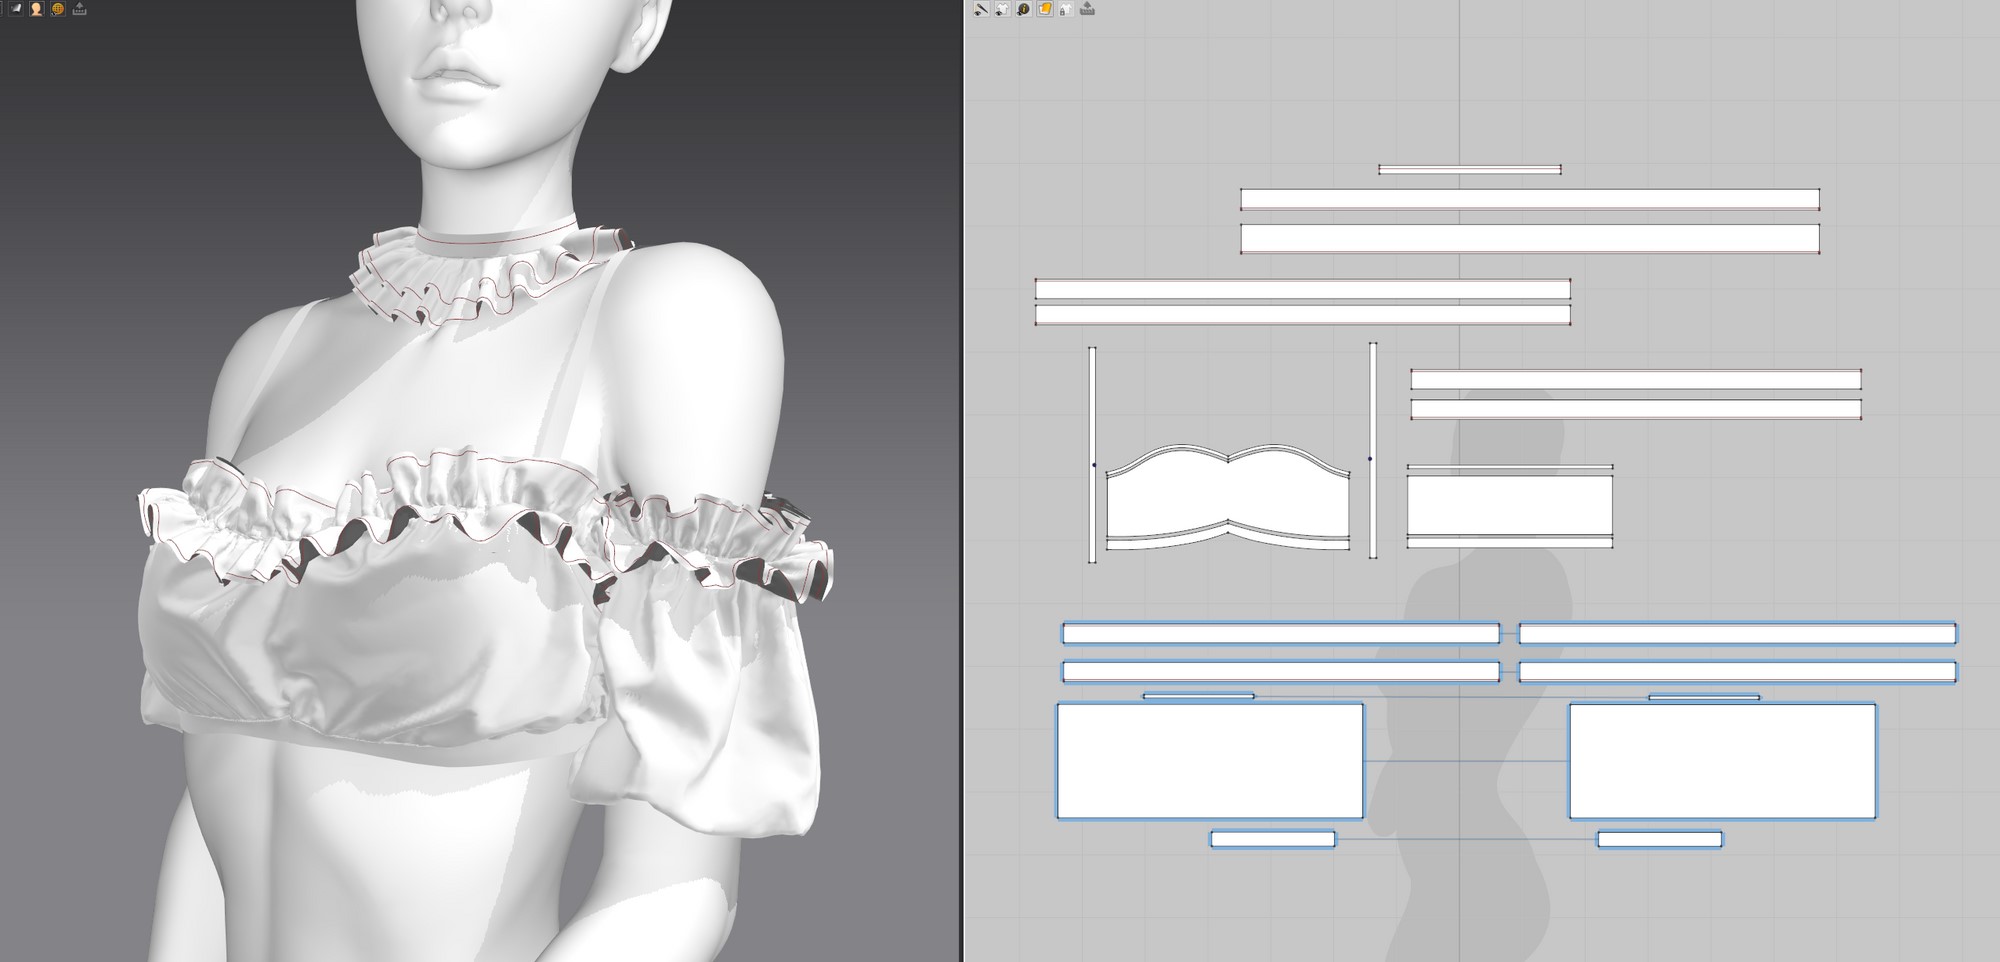
The mannequin was then imported into ZBrush the place Panel Loop was used so as to add thickness and alter the form.
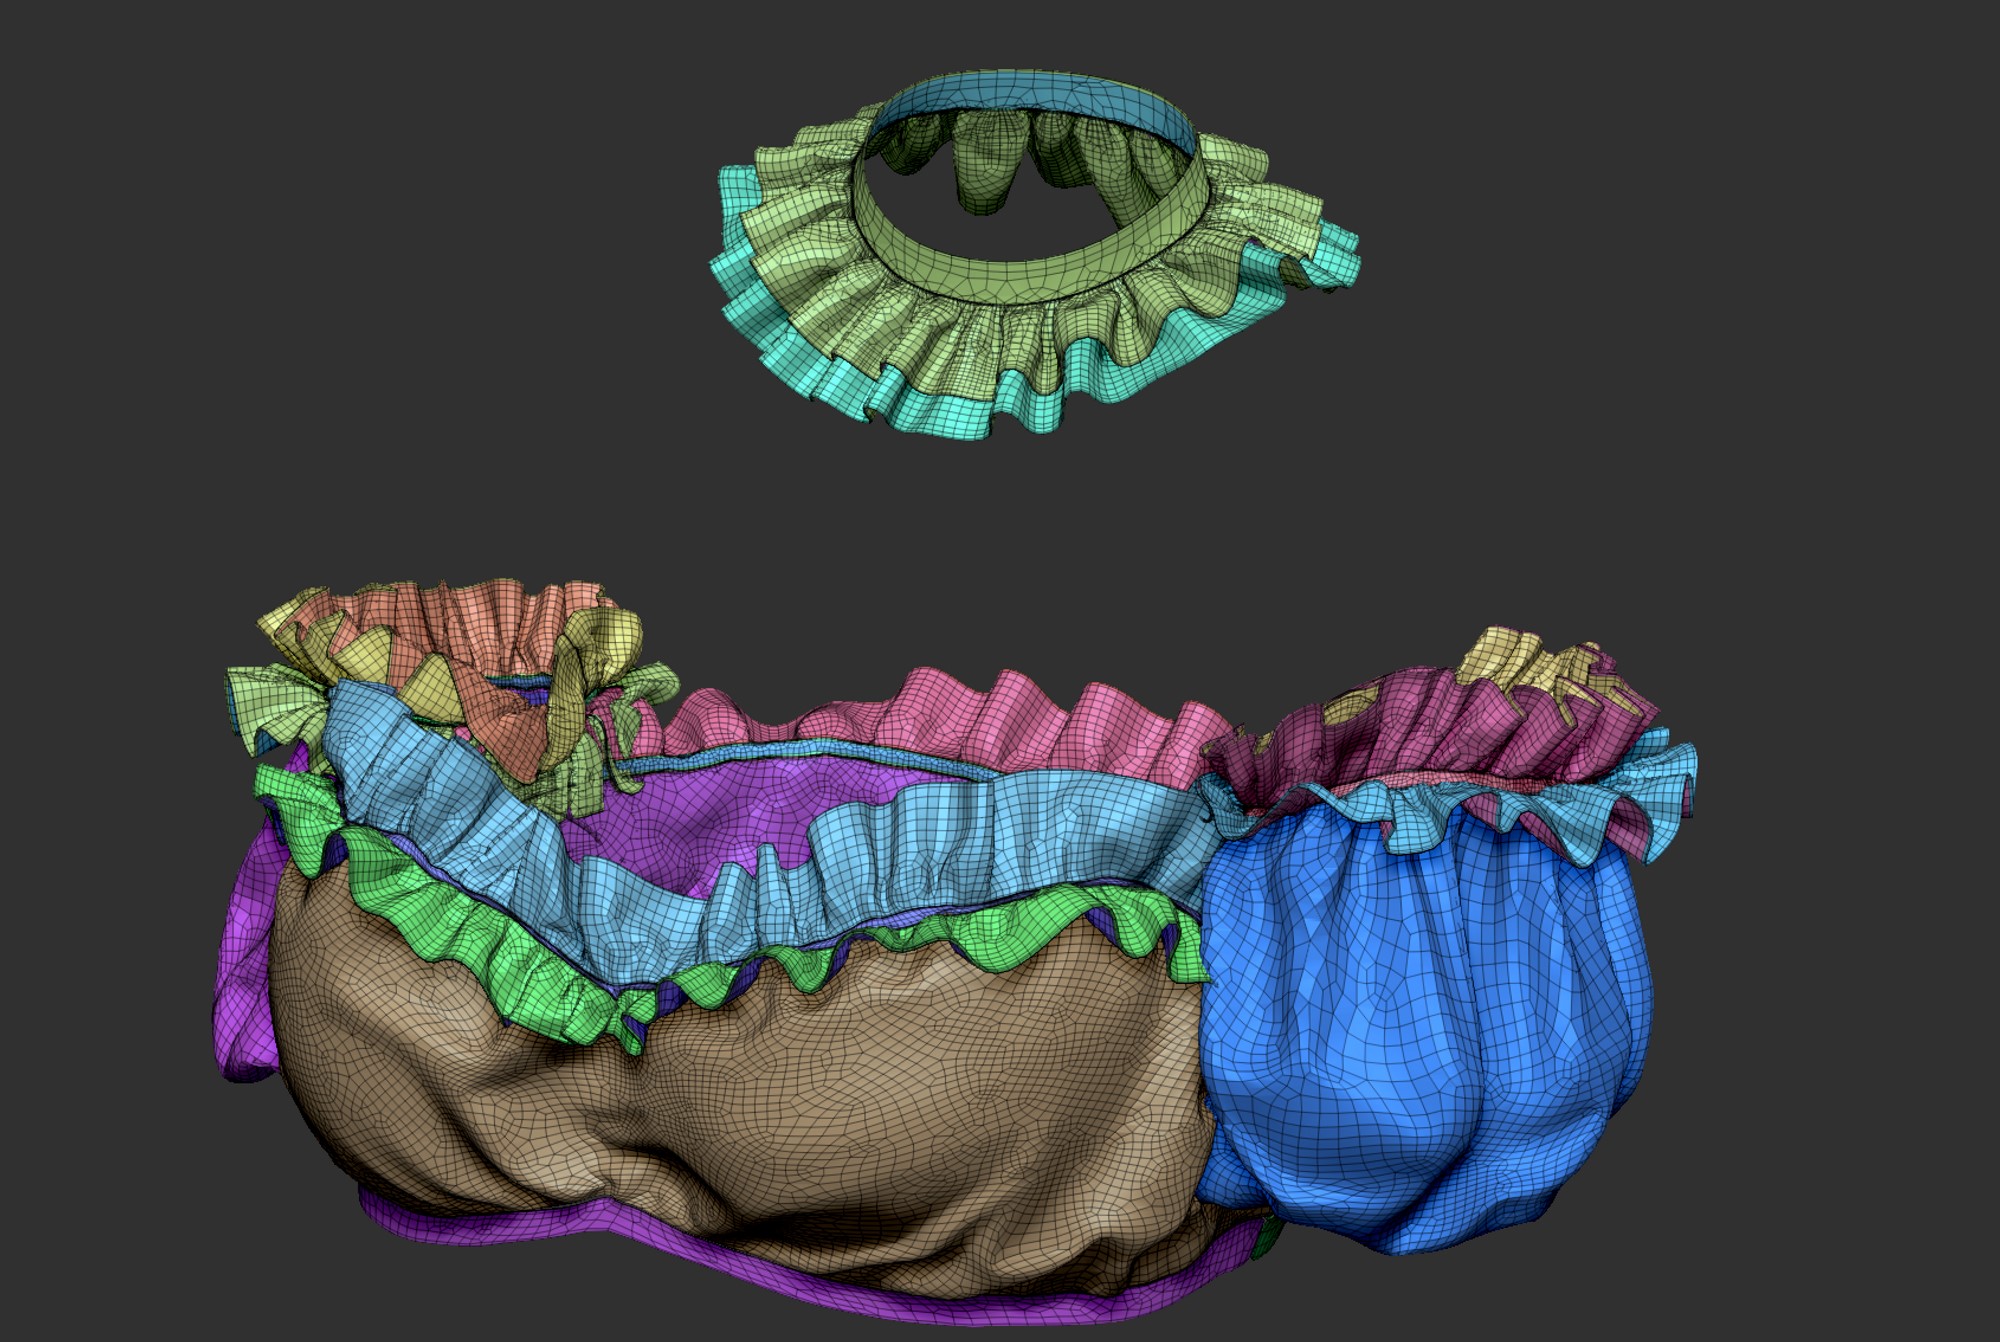
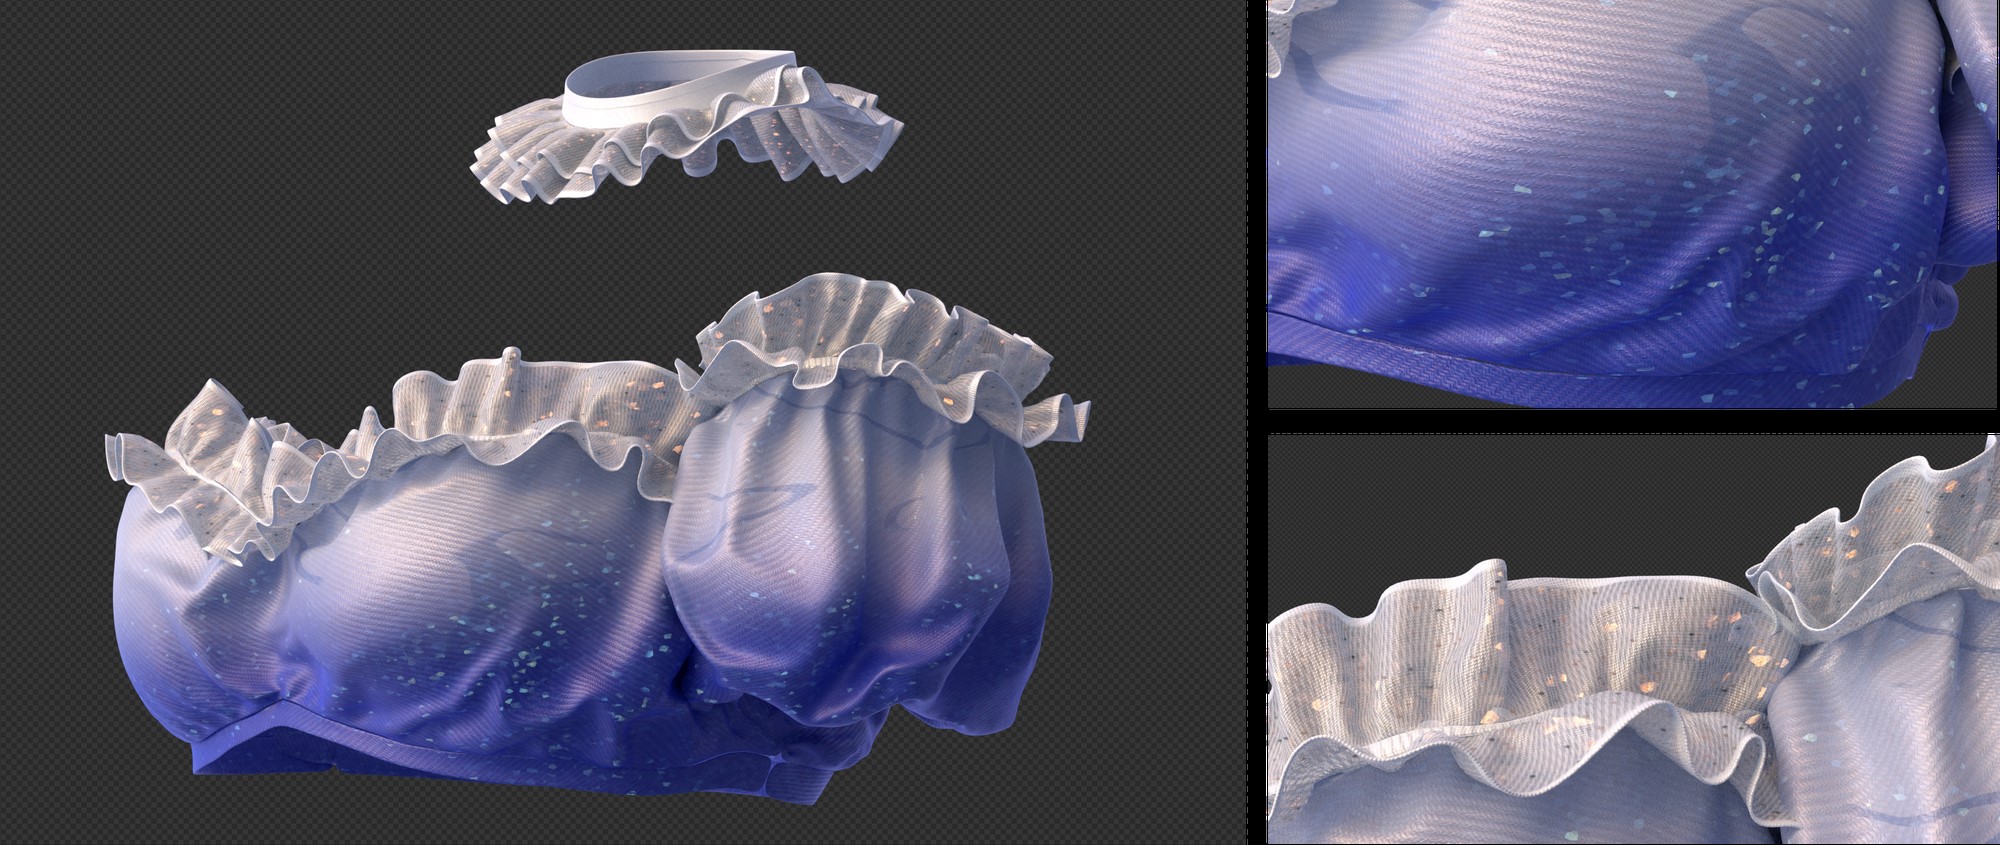
The material materials was created in Blender by including patterns utilizing the Gradient and Noise nodes, and a tileable material texture was used so as to add a weave sample.

The glitter was created utilizing this tutorial as a reference.
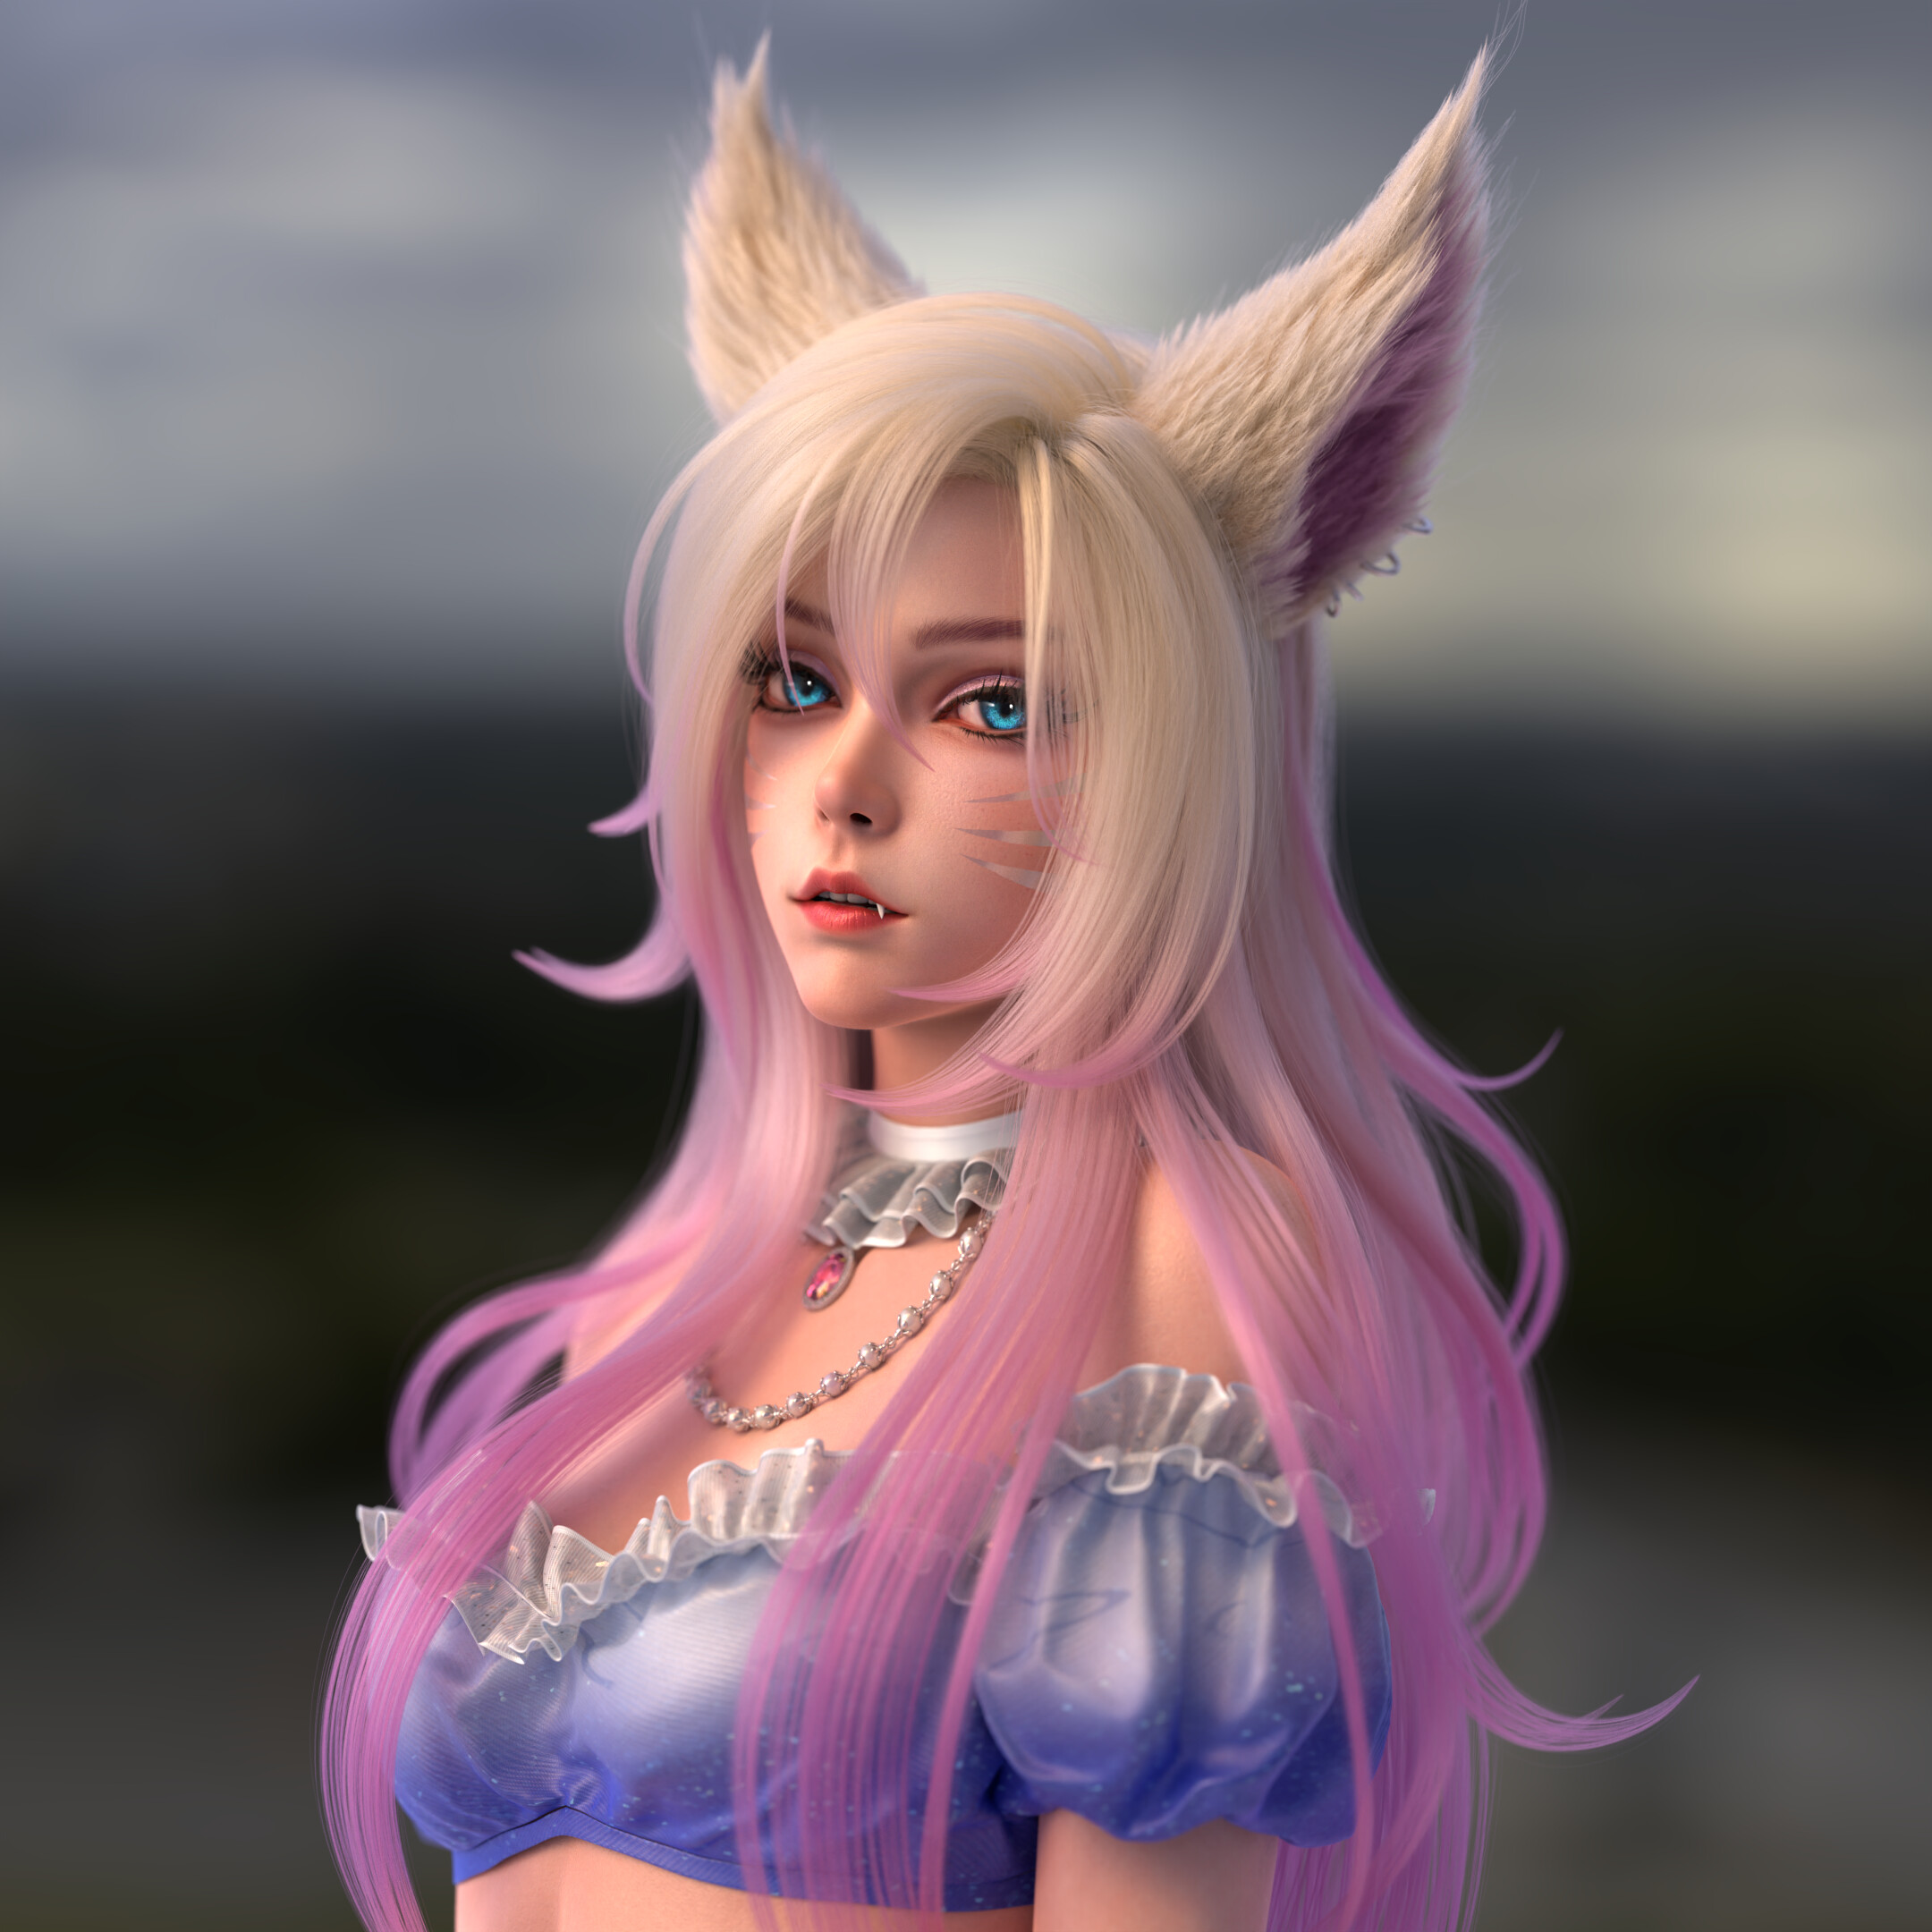
POST-PROCESSING
The rendered picture was post-processed utilizing Photoshop. The eclipse background was created utilizing this tutorial.

And eventually, added the particles, the gradient, and coloration grading. And accomplished!

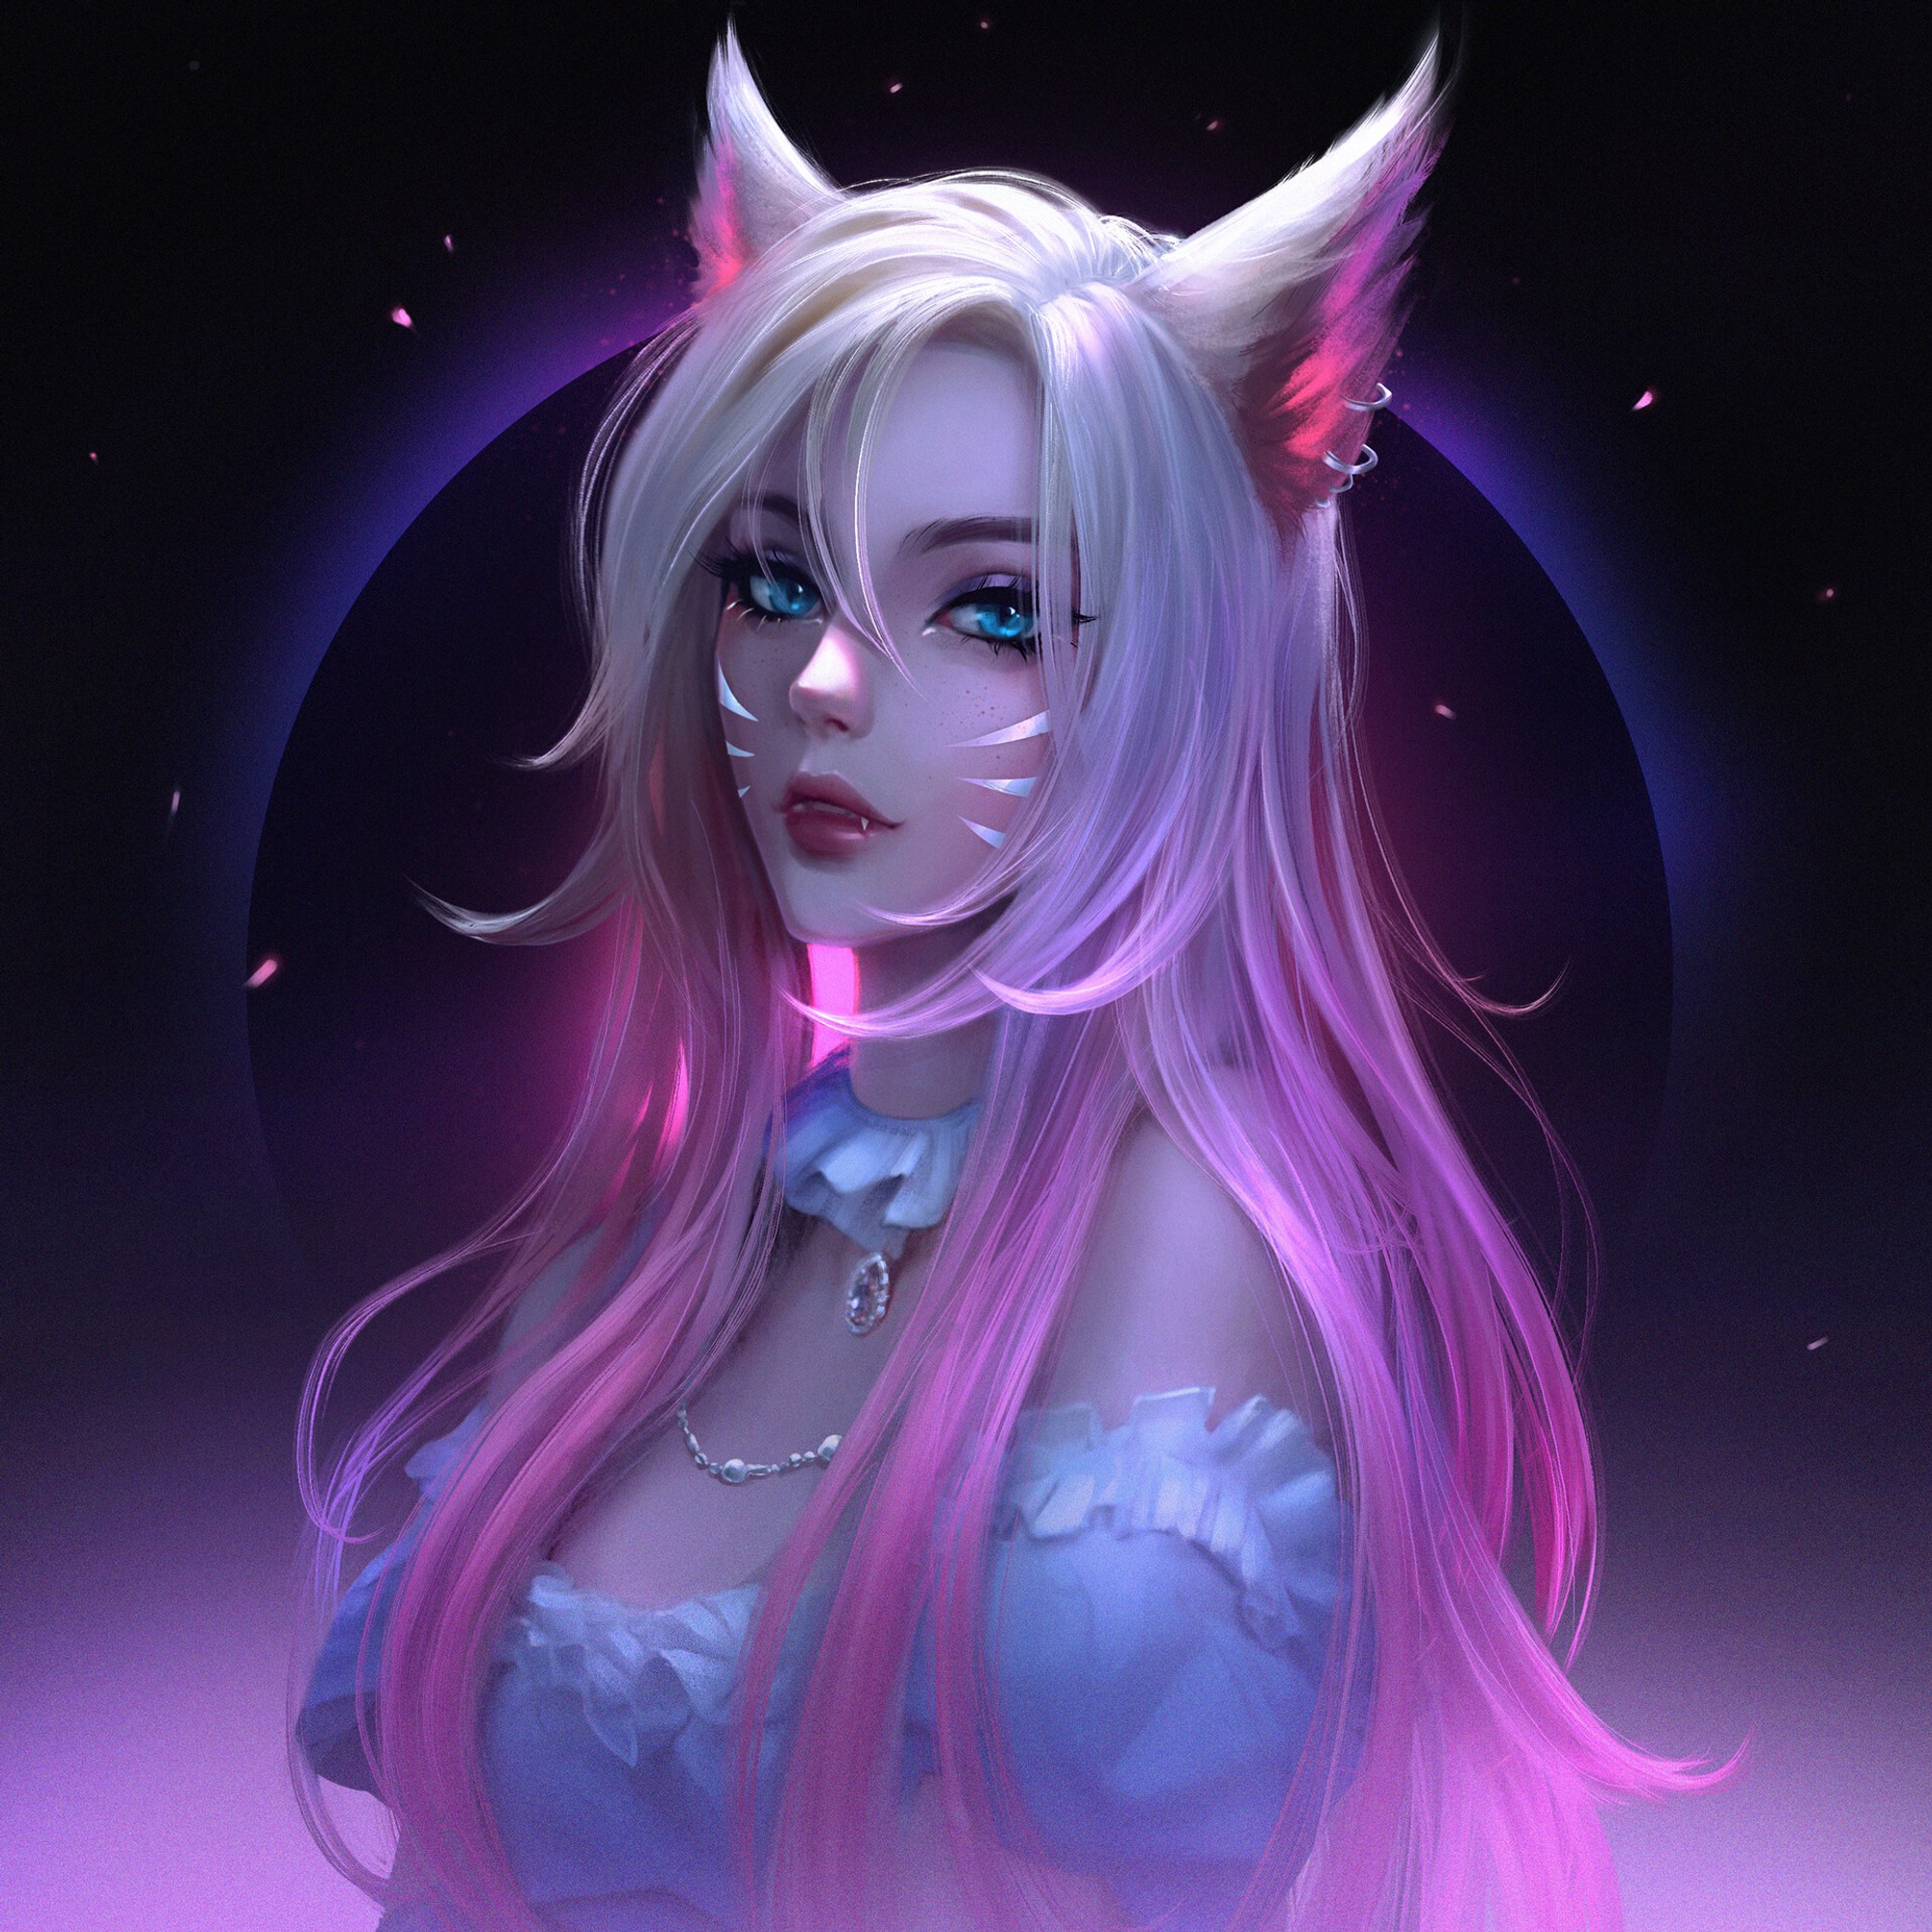
AHRI FROM LEAGUE OF LEGENDS
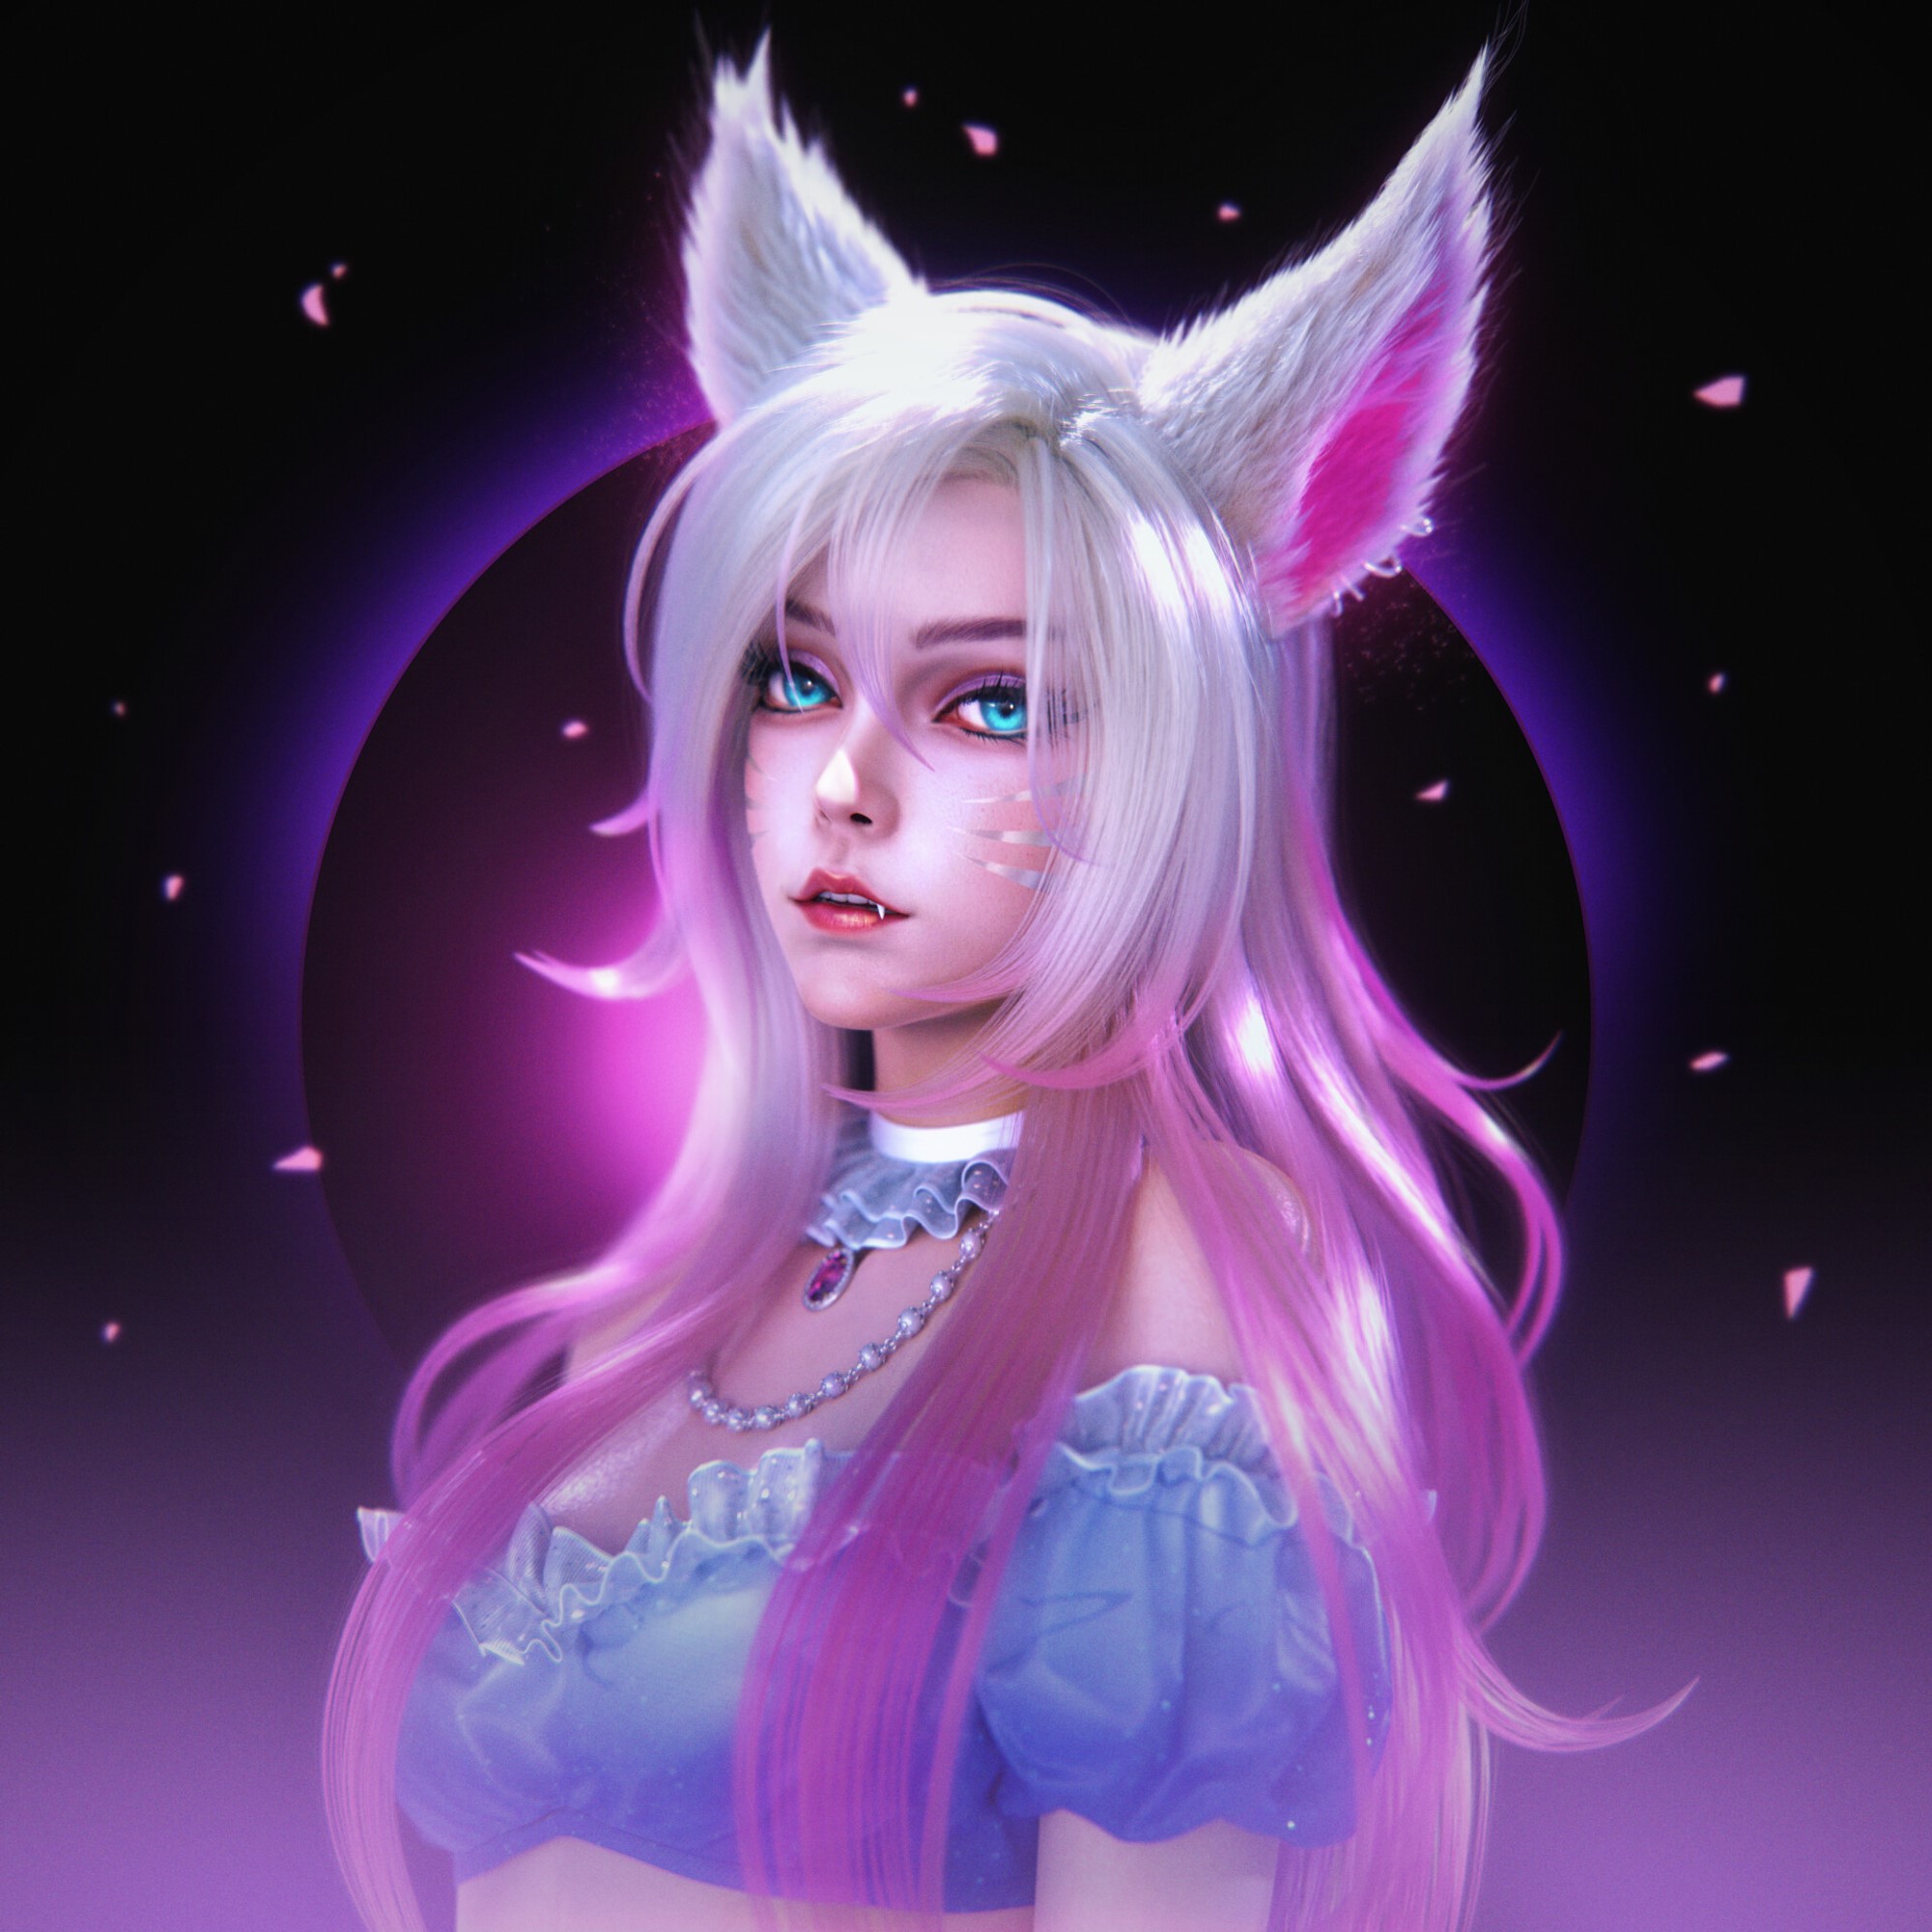
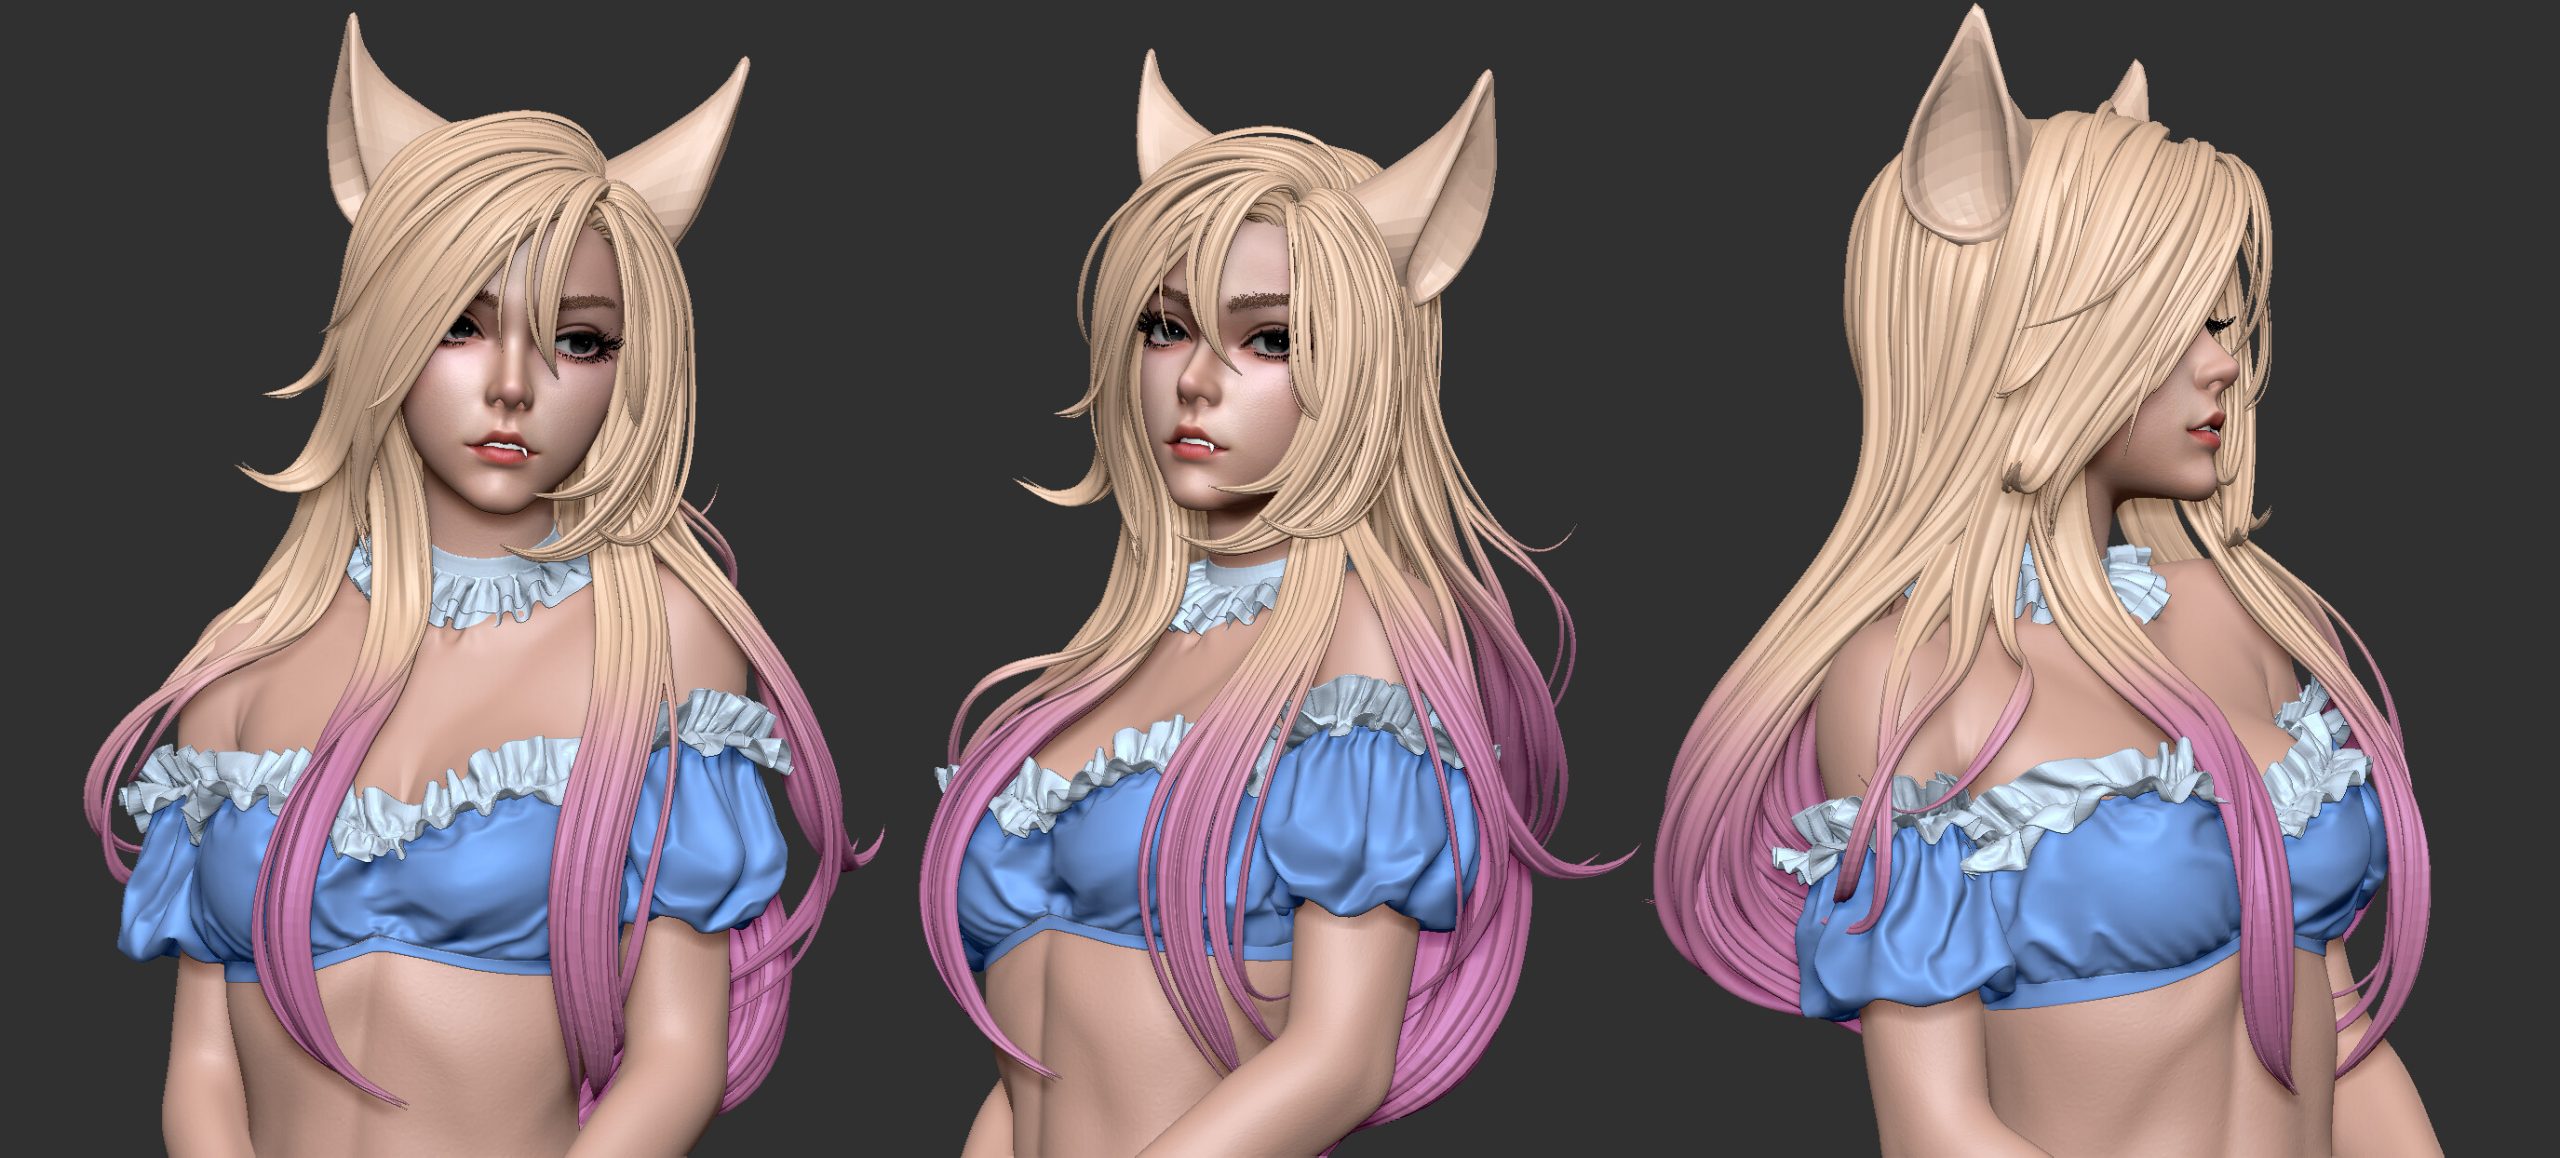
That is it. I hope I’ve been in a position to reproduce her appeal.
Lastly, I want to really thank Mr.Fufu for his affected person and insightful suggestions.
In regards to the Artist

Takumi Hayakawa, a software program engineer by day and a 3DCG fanatic by evening, from Japan.