
When you’ve got a mirrorless or DSLR digital camera and also you’re questioning what video settings for YouTube movies are finest, you’re in the precise place. Have you ever been asking your self questions like What are the precise video settings? How can I be certain I appear to be a professional in my movies, even when I’m not a professional?
Effectively, I’ve bought you coated! I’ll present you my fundamental YouTube setup for speaking head video utilizing a Canon R 10 mirrorless digital camera. These settings work for any digital camera. They’re fairly common, so let’s dive in!
Watch the Video: Easy Video Settings for YouTube Movies (Any Digital camera)
Primary Digital camera Setup for YouTube Movies
I gained’t scare you with digital camera jargon. We’ll start in computerized mode, then share handbook mode methods. The fundamental setup is identical whether or not you’re taking pictures in auto or handbook.
That is for YouTube newcomers beginning with digital camera movies. I’m displaying solely the fundamentals, not each menu merchandise. It’s common for any digital camera model.
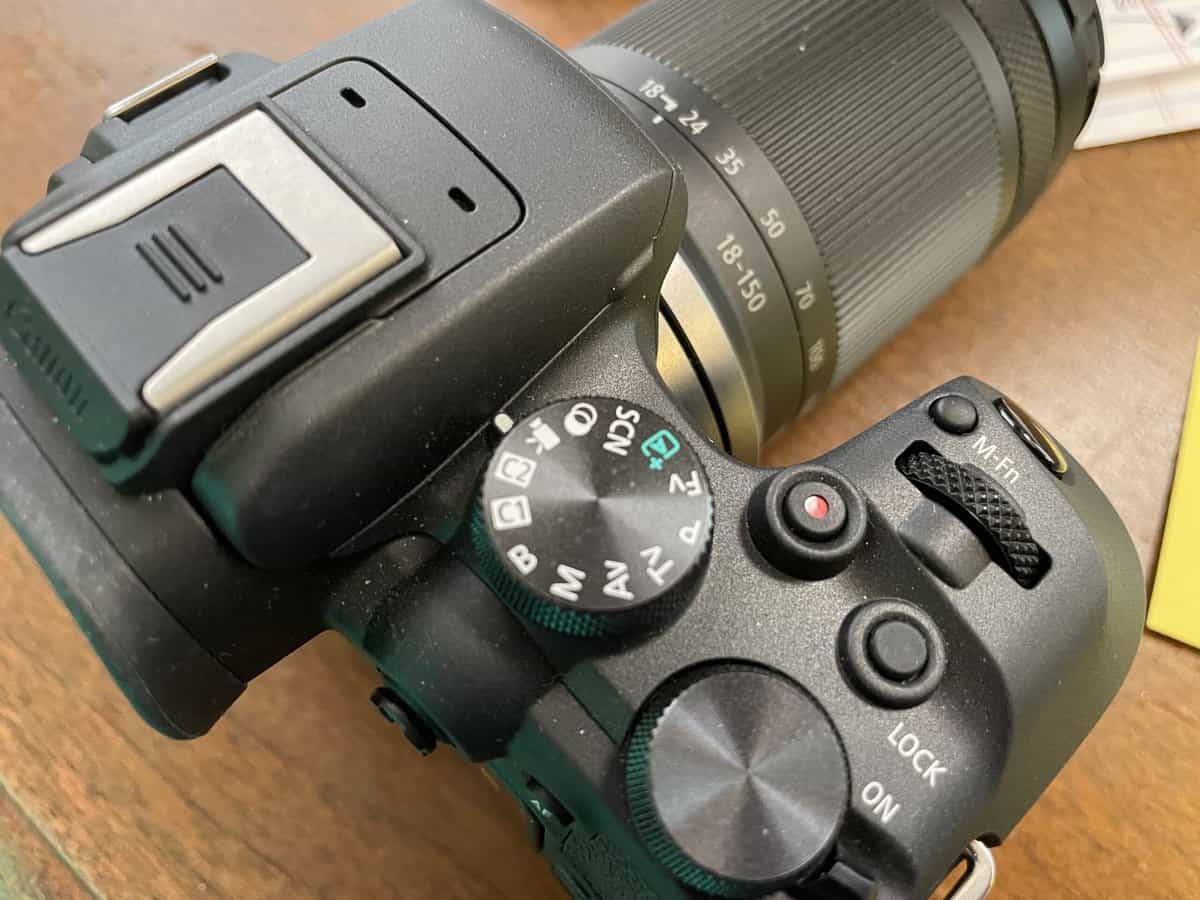
First, be certain your digital camera is in video mode, not photograph mode. On my Canon, I’ve it set to that little video digital camera on the mode dial on the prime. This might sound apparent! If you happen to use your digital camera usually for images and movies, or it’s new, it will not be in video mode. You’ll know when you possibly can’t discover the settings.
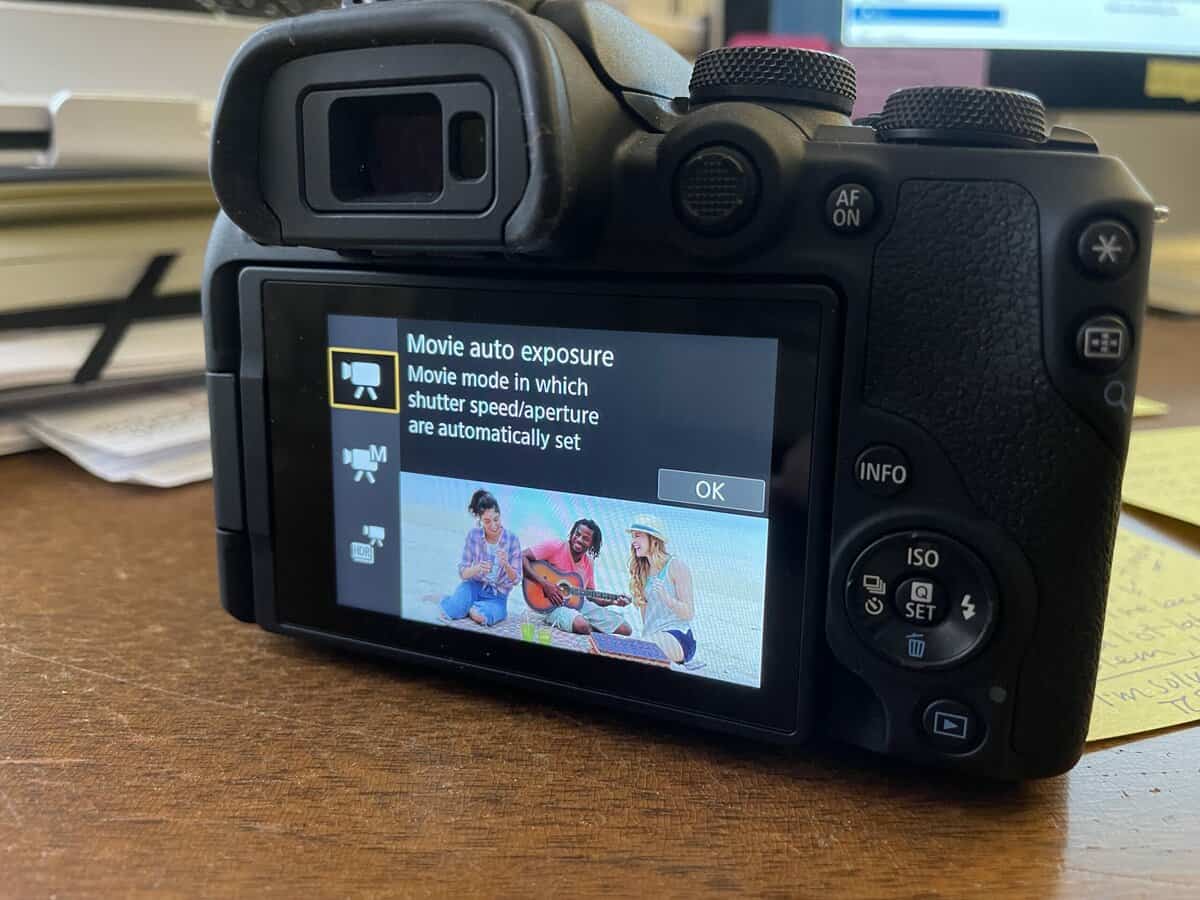
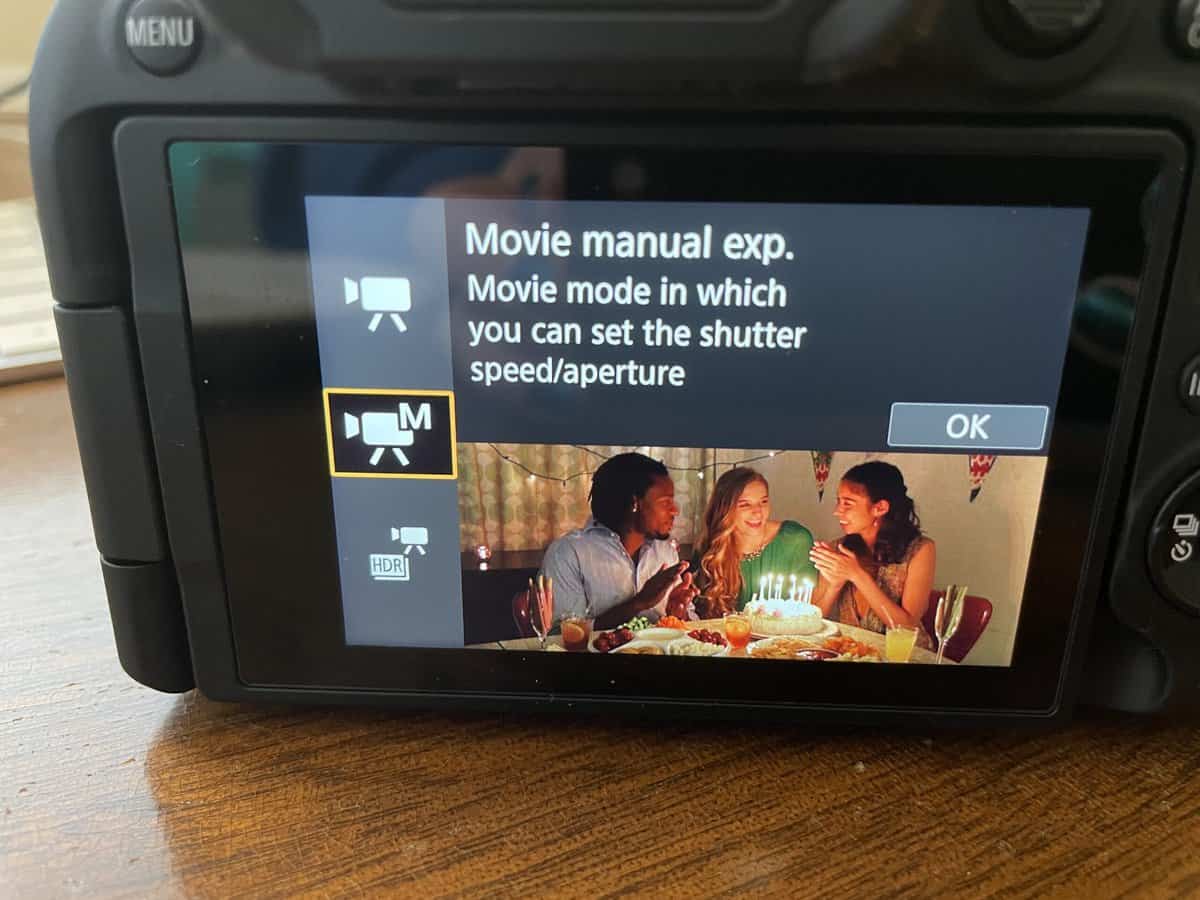
If you happen to’re utilizing a Canon and your menu setup is much like mine, you’ll see the taking pictures mode choice. Ensure it’s set to film auto publicity, not the one with the “M” which might be handbook. That means, all of our computerized settings are arrange.
Necessary: If you happen to’re unsure the place to seek out these settings, it’s finest to look at the entire video on the prime of this put up or click on right here to look at on YouTube.
Set Decision and Body Fee
To set the decision and body price, faucet on the “film report measurement” choice. The choices out there listed below are vital for video high quality and your personal private preferences. For a fundamental YouTube video, akin to a speaking head video, I stick to 1080p decision and 30 frames per second.
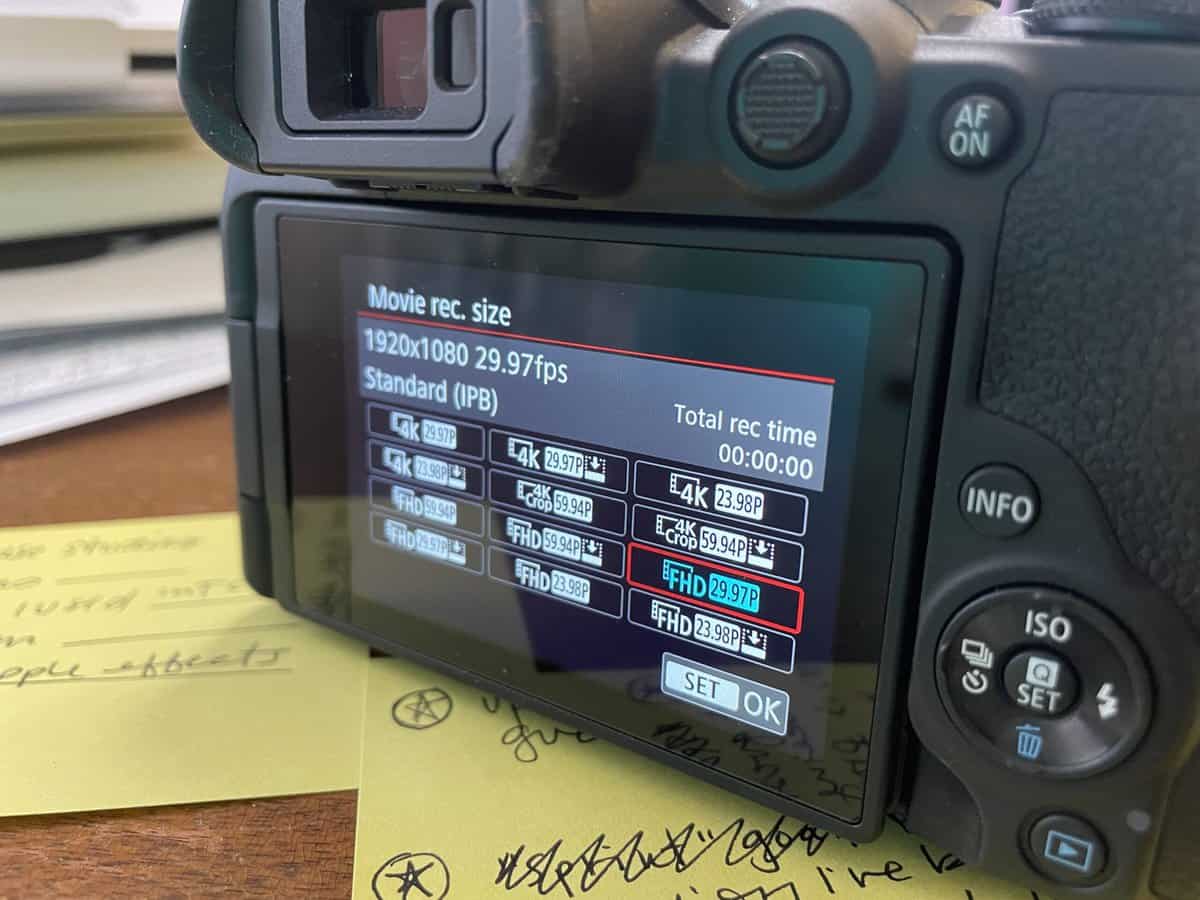
On my digital camera, you possibly can see that I’ve chosen FHD 29.97, which shoots at 1920 by 1080 pixels and 29.97 frames per second, which is 30 FPS. In case your digital camera can shoot in 4k, you possibly can select to shoot in 4k, however the file sizes might be bigger, and it’d take longer to edit. Subsequently, it’s finest to stay with 1080p, particularly for those who’re simply beginning out.
Sound Recording Settings
When filming a video, it’s important to think about the sound high quality. If you happen to’re utilizing the onboard mic of your digital camera, bear in mind that it’ll decide up all of the sounds within the room, together with undesirable noises like wind, HVAC, and even barking canines down the street!
If you happen to’re far-off from the digital camera, it’s going to battle to select up your voice, which may end in poor sound high quality.
Whereas it’s finest to make use of an exterior mic just like the DJI wi-fi mic, particularly for those who plan to vlog or report from a distance. When utilizing an exterior mic, it’s essential to set the recording to handbook and modify the settings. Recording good audio throughout filming is far simpler than attempting to repair it later.
Associated: DJI Mic Settings for YouTube Movies
White Stability Settings
Subsequent, let’s focus on the white steadiness setting. The white steadiness setting is essential as a result of it determines the colour temperature of your video. By leaving it on auto, the digital camera will modify the colour temperature primarily based on the lighting within the room, providing you with a extra pure look. Nonetheless, for those who choose to mess around with the white steadiness, you are able to do so, but it surely’s vital to take into account that completely different lighting circumstances could require completely different white steadiness settings.
Personally, I maintain my white steadiness on AWB (Auto White Stability) as a result of I just like the look that if offers me in my house and I don’t must fiddle with the settings for each video.
Auto-Focus is finest for “Speaking Head” model Movies
Auto-focus is especially important for speaking head-style movies. With auto-focus, you possibly can set your digital camera to trace your face and maintain it in focus, even for those who transfer again or forth. That is particularly helpful when making a speaking head video as a result of it ensures that your face stays in focus. Some cameras have superior options like eye detection, which can monitor your eyes and guarantee they continue to be in focus all through the video.
Bear in mind: If you happen to’re unsure the place to seek out these settings, watch the video on the prime of this put up or click on right here to look at on YouTube.
Video System: NTSC vs PAL
It’s essential to pick out the precise video system setting to make sure your video will not be solely completely uncovered but additionally matches your nation’s body price. In case you are in america, set your digital camera to NTSC, and if you’re within the UK, set it to PAL. You might not know which one to make use of, and that’s nice… a fast Google search will do the trick. If you choose the incorrect video system, you’ll not have the identical body price choices.
Taking pictures Movies in Auto Mode
If you happen to’re new to taking pictures movies, begin with the fundamentals by protecting your digital camera to auto mode. It’s that straightforward! You may arrange your shot, flip in your lights, and simply begin recording. It could take some observe earlier than you’re feeling snug with the look of your video.
When your digital camera is in Auto Taking pictures mode, your digital camera will mechanically modify your ISO, shutter velocity, and aperture (f-stop), making certain your video is completely uncovered.
Recording YouTube Movies in Guide Mode
If you wish to take your video to the following stage, you possibly can swap to handbook mode. Whereas many discover handbook mode daunting, it’s not as sophisticated because it sounds. The truth is, for those who ever realized in regards to the “publicity triangle” for pictures, the idea is identical however nowhere close to as sophisticated! That’s since you don’t normally must continuously change settings as you report.
In handbook mode, you possibly can modify taking pictures settings akin to shutter velocity, aperture, and ISO. You too can see for those who’re appropriately uncovered with the meter on the digital camera display.
Taking pictures Settings for Speaking Head YouTube Movies
Now let’s discuss in regards to the taking pictures settings to your speaking head YouTube video. I frequently use my Canon M50 Mark 2 with a Sigma 16-millimeter lens, as it’s wonderful for speaking head movies (and tremendous inexpensive, so far as cameras and lenses are involved).

In this YouTube video, I present that my video is uncovered properly and share my handbook video settings. However how do you obtain an expert look with out being an expert? Effectively, all of it begins with understanding the publicity triangle, which is made up of shutter velocity, f-stop (aperture), and ISO.
Shutter Pace for YouTube Video
This can be a fairly simple one! You may consider the shutter velocity by doubling your body price. In case you are taking pictures at 30 frames per second, your shutter velocity must be 1/sixtieth of a second. You don’t have to regulate that or change it in any respect (ever!) until you modify your body price. Simply set it and overlook it!
F-Cease (aka Aperture)
As soon as your shutter velocity is ready, transfer on to your f-stop. Your lens determines the aperture, which impacts the quantity of sunshine and focus in your body. Decrease f-stop numbers (like f/1.4) permit extra gentle into the digital camera, making lenses with a decrease f-stop nice for an at-home studio state of affairs the place chances are you’ll not have a ton of studio lights.
Decrease f-stops additionally create a shallow depth of subject, which blurs the background, including depth to your video. I LOVE a blurry background, however my workplace is tiny! So as a way to create depth (and blur), I exploit a decrease F-stop. I normally have my F-stop set to about 2.0.
Now the lens in your digital camera could not go that low. Usually, you need your f-stop to be between 1.8 and three for a speaking head video, but it surely actually does rely in your house, your setup, and your preferences.
ISO
The final setting to set for taking pictures movies is ISO. ISO impacts your digital camera’s sensitivity to gentle, and for the highest quality, you wish to maintain your ISO as little as doable. Because of this it’s the LAST setting within the publicity triangle… as a result of you possibly can’t change your shutter velocity (because it’s dependent in your body price), and you utilize your f-stop to get the look you need. The ISO will get your publicity proper… however bear in mind your digital camera wants gentle as a way to do its factor! So in case your ISO must be above 400 or 600, you would possibly wish to look into investing in some studio lights.
In conclusion, organising your digital camera for creating YouTube movies will not be as tough because it appears. These fundamental settings are common, it doesn’t matter what model of digital camera you’re utilizing. If you happen to’re a newbie, stick to those settings for now, and as you turn out to be extra snug creating movies, you possibly can experiment with extra superior settings.