INTRODUCTION
Hey once more, it is Lasse (WK042)! Not a lot has modified since my final Behind-the-Scenes article on BlenderNation (Behind the Scenes: The Look), besides that I now have a further half-year of expertise with Blender and different 3D software program, totaling 2.5 years. Because the final time, I’ve expanded my expertise with Substance Painter, taken my first small steps with Unreal Engine 5, and began utilizing World Creator.
INSPIRATION
The inspiration for this render got here from being caught on a bigger challenge and the workflow I’ve began to make use of in that one, which concerned the creation of the panorama and texture masks with World Creator. On the similar time, I had not “revealed” a render for fairly a while as a result of I had devoted numerous time to asset modeling and texturing for some freeware mods for Microsoft Flight Simulator 2020, so I actually wished to create one thing.
The thought for the clearing in a forest, appearing as a framing backdrop for some focal aspect, had been on my record for a very long time. So, I used it to concentrate on a smaller challenge for which I may nonetheless use the World Creator workflow and acquire extra expertise with it for the bigger challenge that I had gotten caught on.
REFERENCES
As at all times, the method began with gathering reference pictures for what I had in thoughts. This time, I did not go into minuscule particulars. As an alternative, I used to be on the lookout for references for the general look and feel of what I had in thoughts and to function inspiration alongside the way in which.

The reference board.
LANDSCAPE
Subsequent, I proceeded to create the panorama in World Creator and exported the peak map, in addition to the feel maps for the completely different components and options (equivalent to slope, concavity, convexity, sediments, and so forth.) of the panorama to Blender, which I used to recreate the panorama and the remainder of the challenge.

The World Creator Panorama.
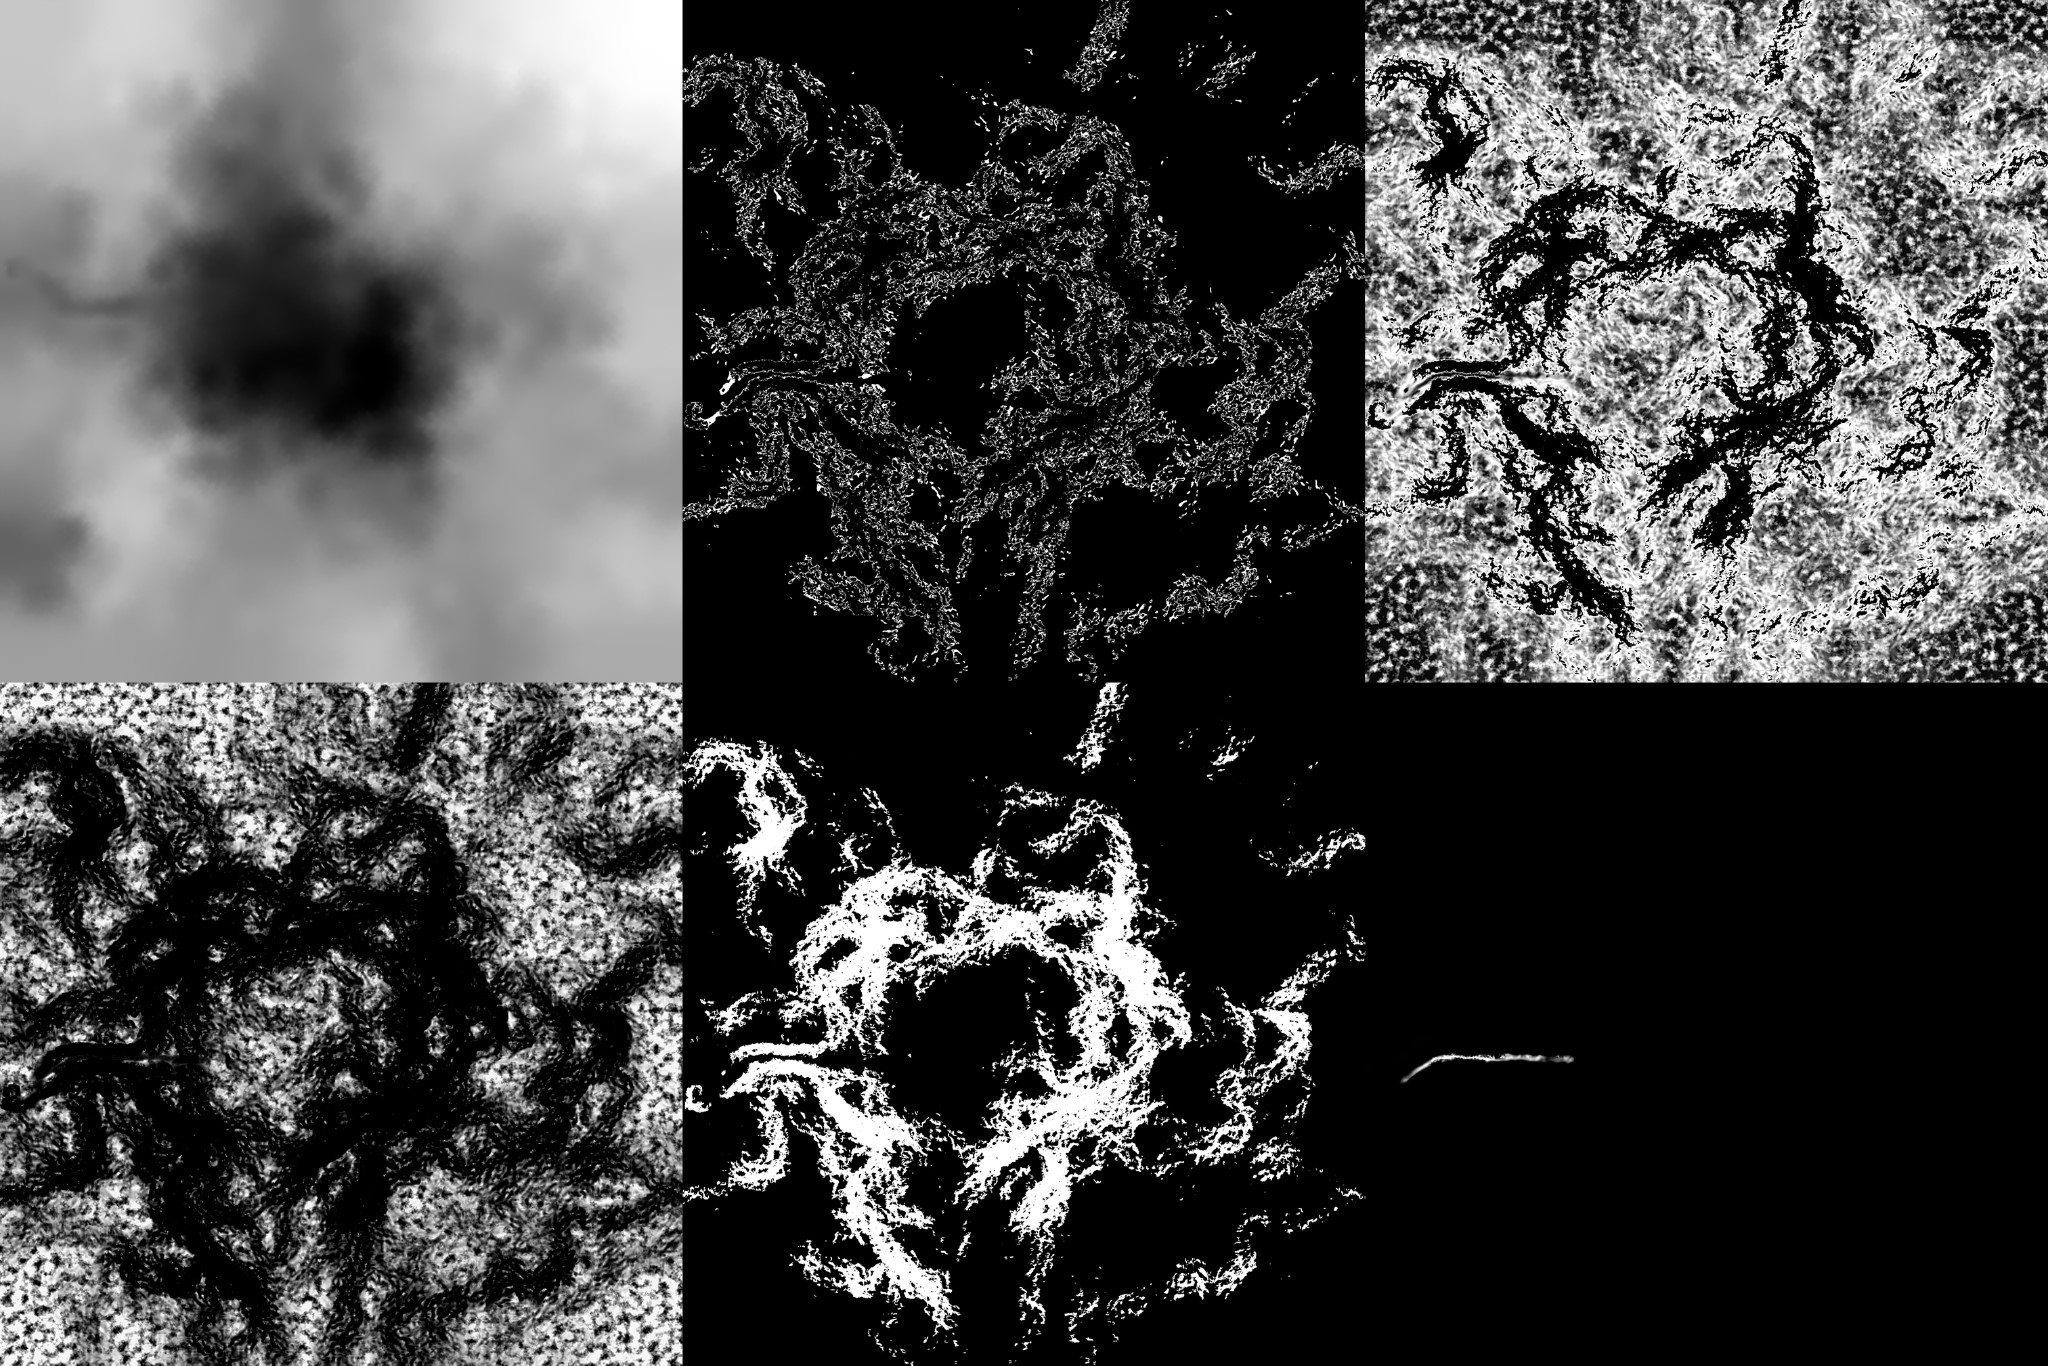
The World Creator Maps (heightmap on high row left).
BLOCK-OUT
As soon as I had arrange the panorama aircraft, I made a fundamental block-out to find out a great digital camera angle and the place to put the primary components of the scene. At this stage, the scene was deliberate as a pure nature render with none human components in it.
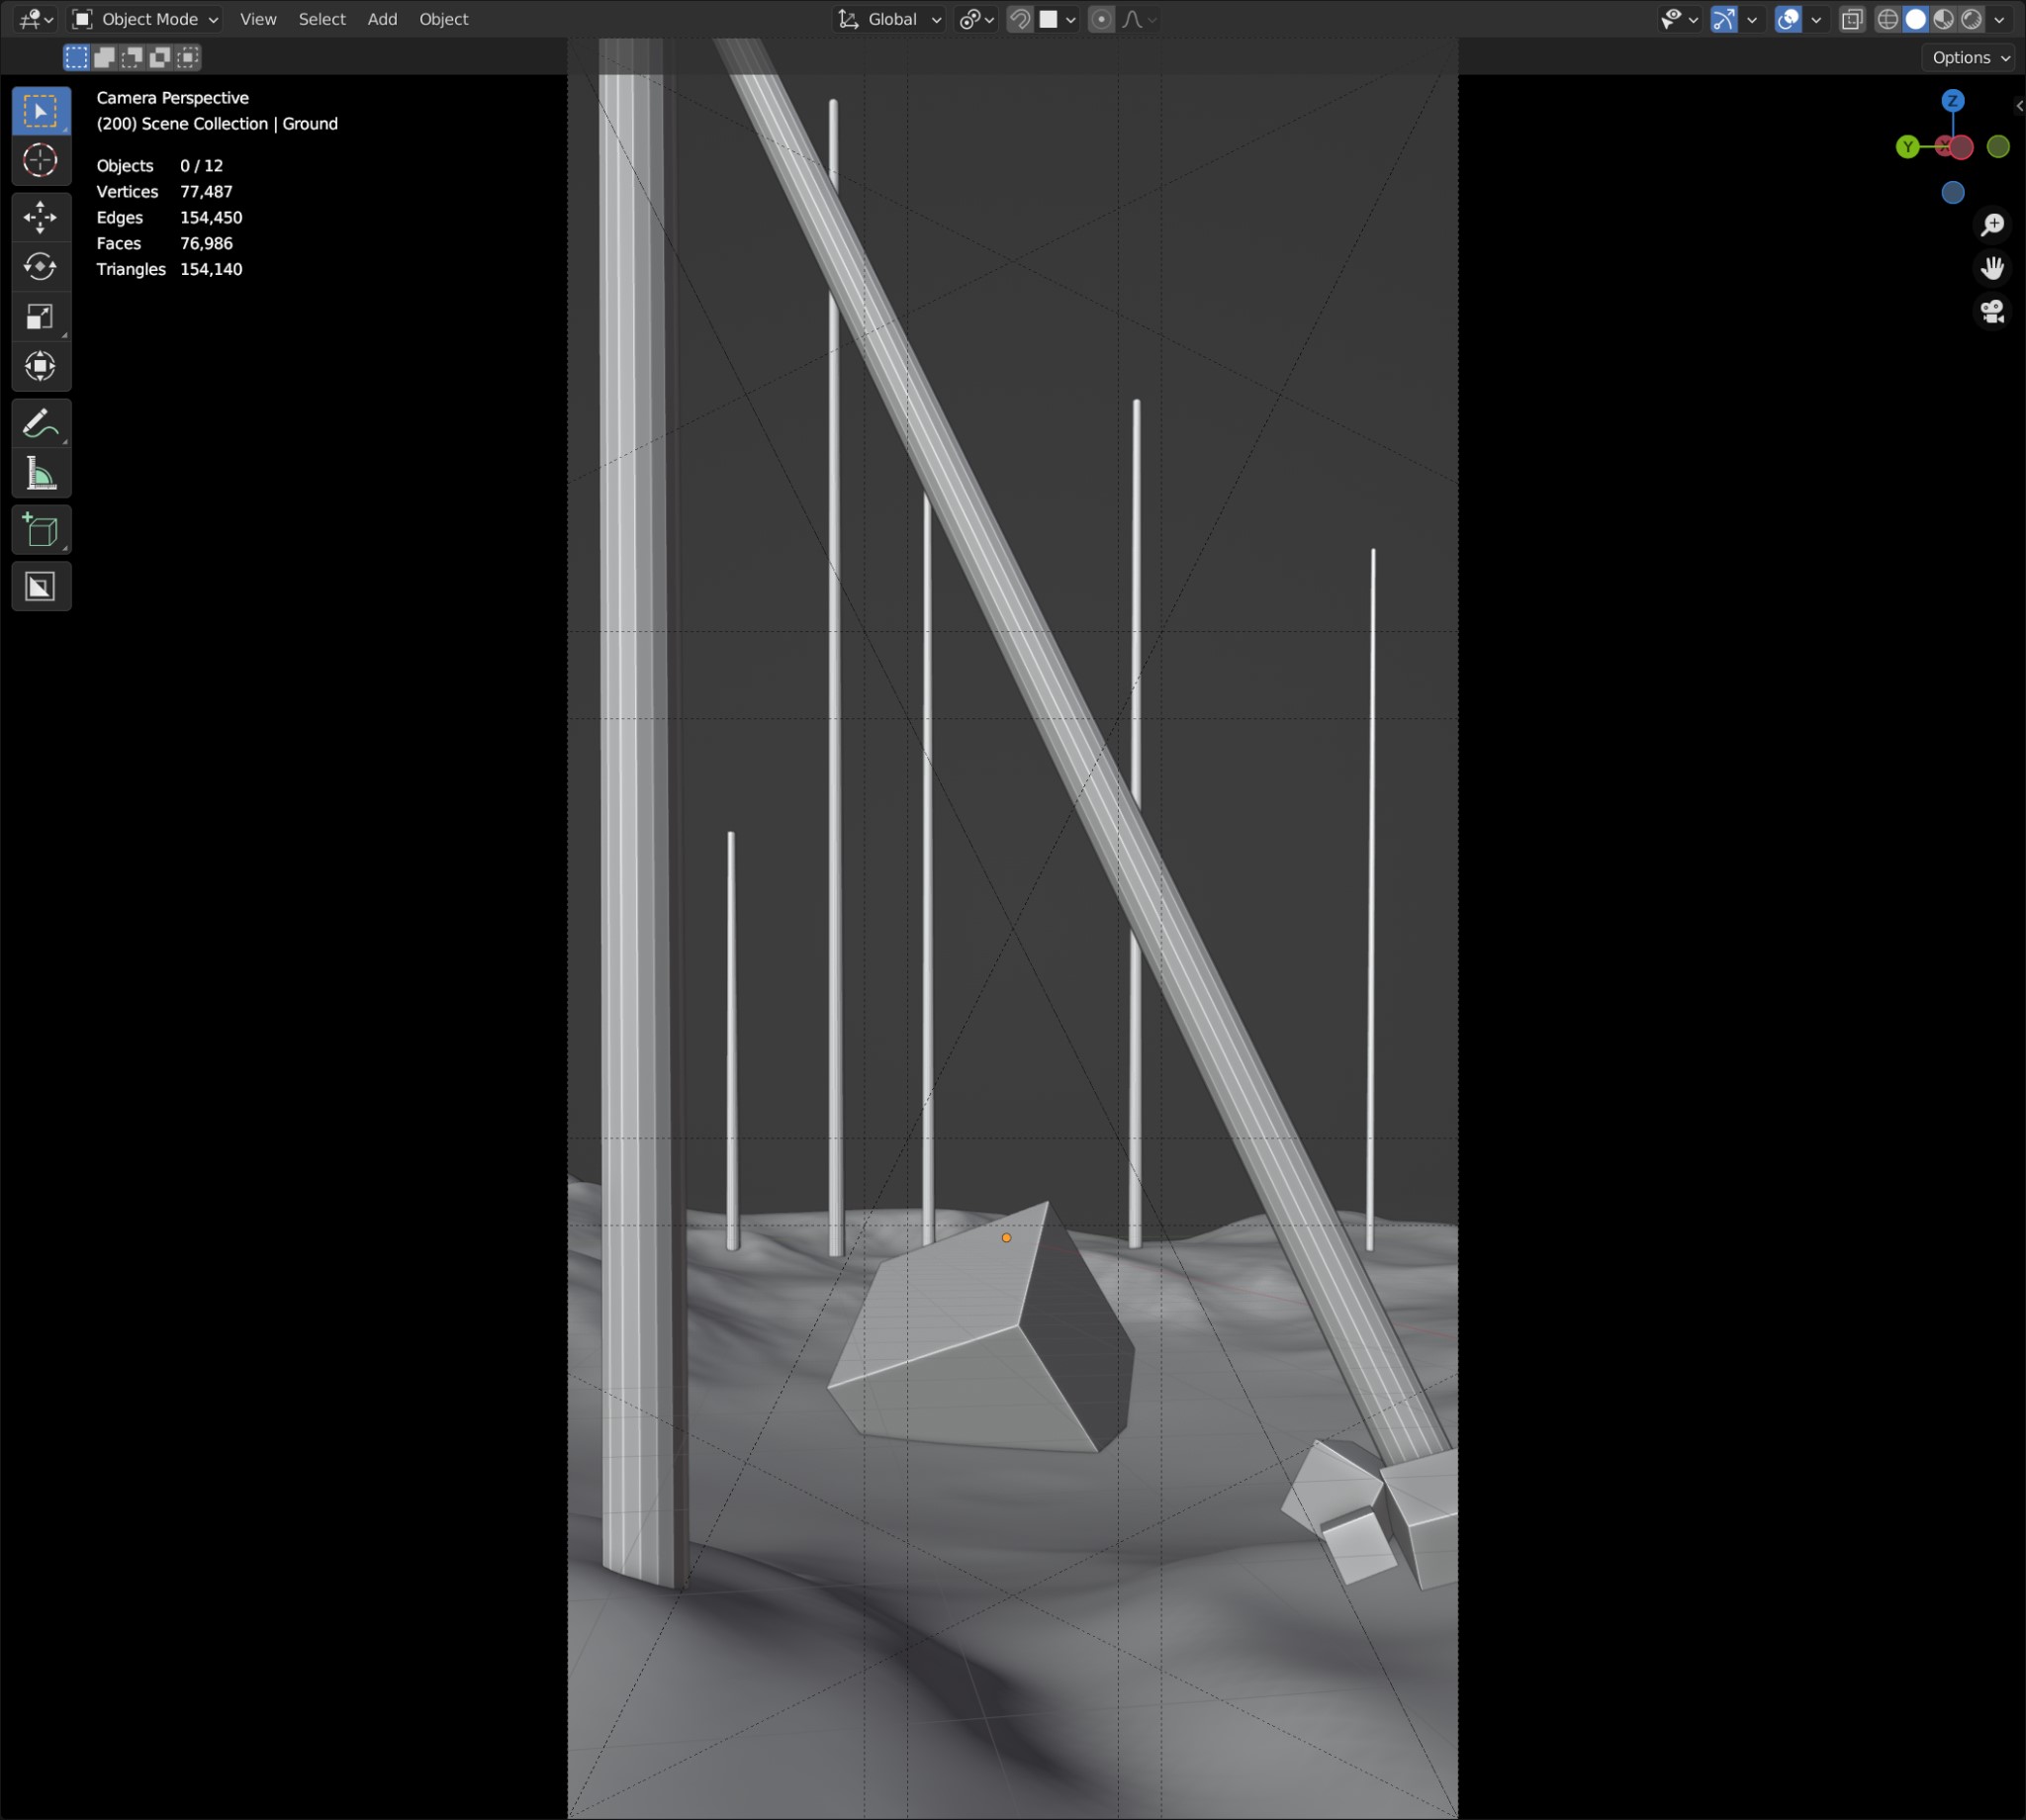
Easy scene block-out.
GROUND TEXTURING
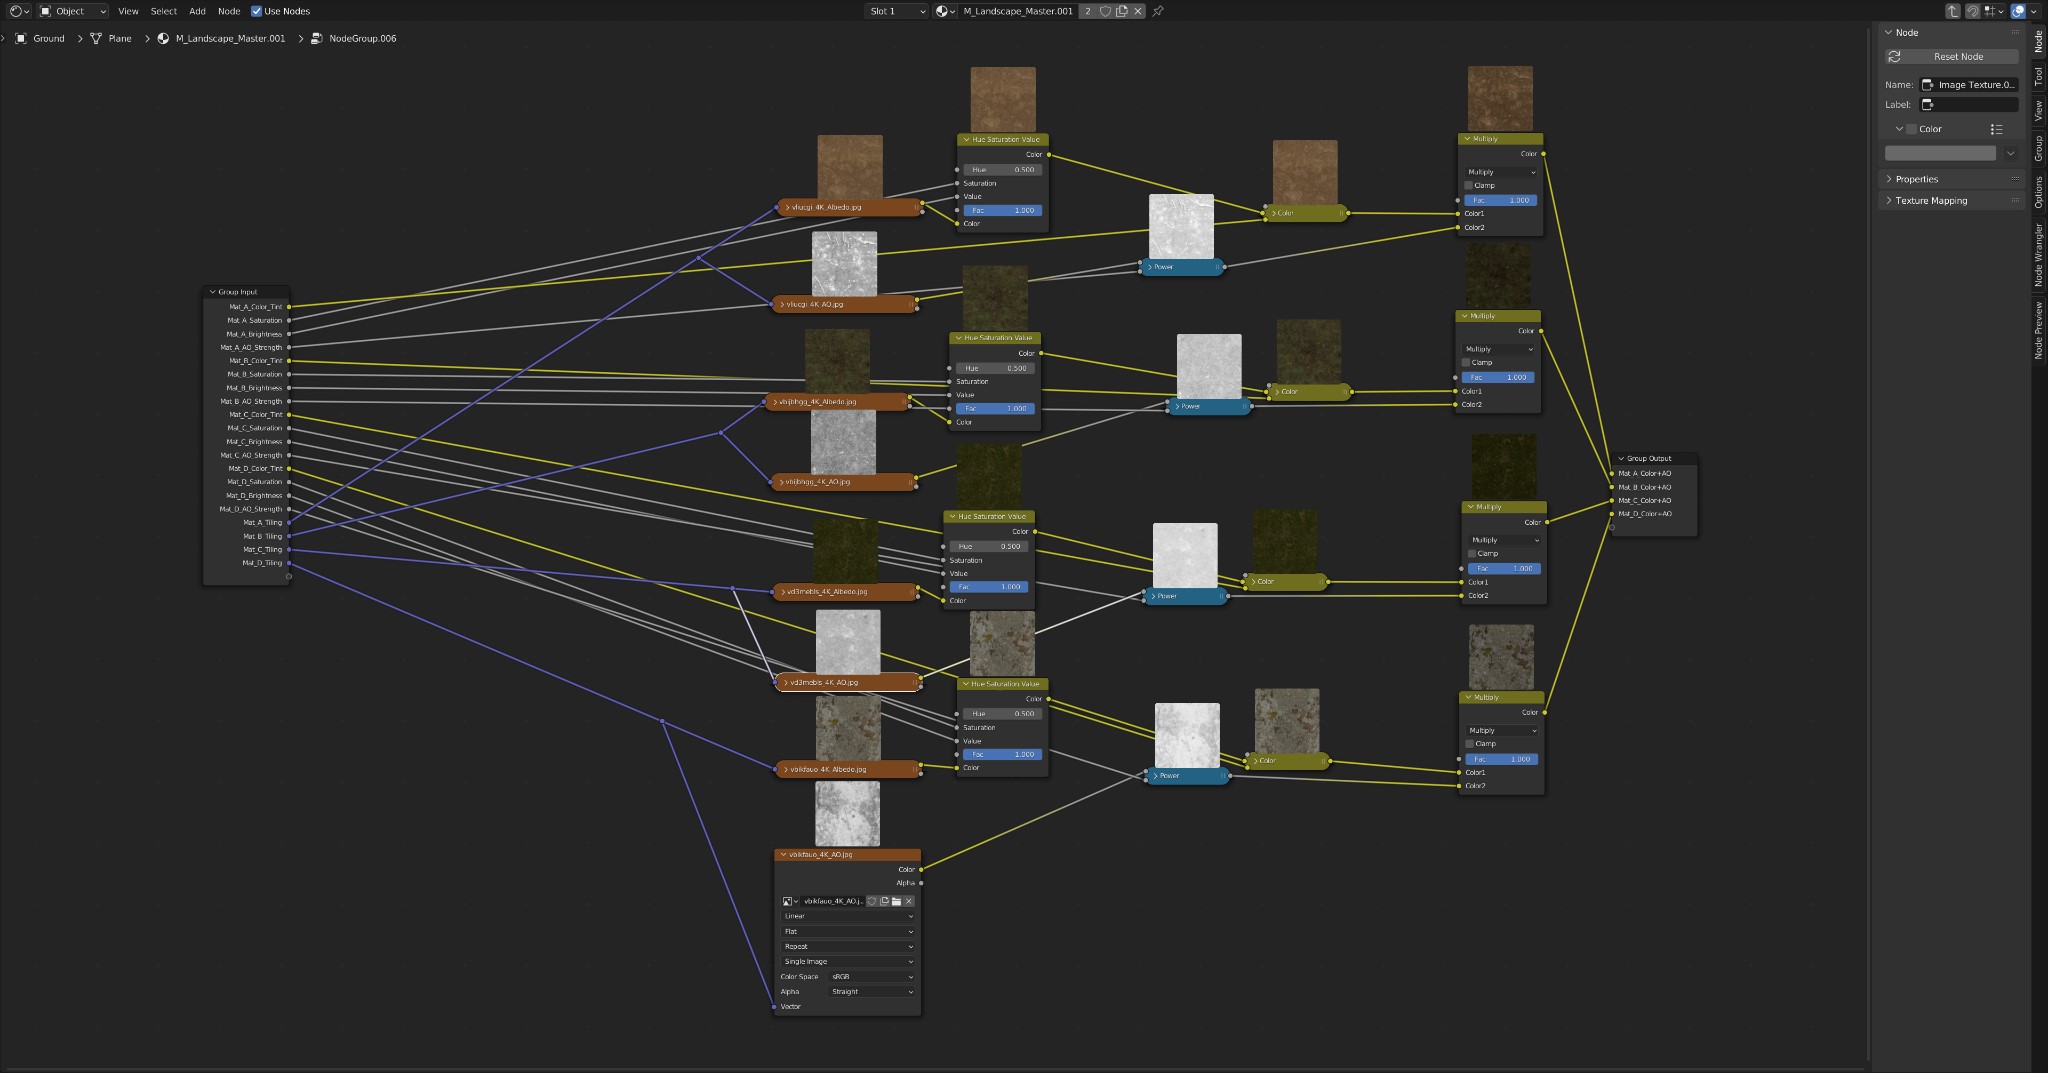
Once more, I paid numerous consideration to the texturing of the bottom aircraft, regardless that I knew that numerous it might be lined with foliage within the closing render. I used this challenge to fine-tune my panorama mix grasp materials with strategies I’ve discovered from establishing grasp supplies in Unreal Engine 5, and in an effort to get the shader noodle soup beneath management in addition to including extra accessible performance.
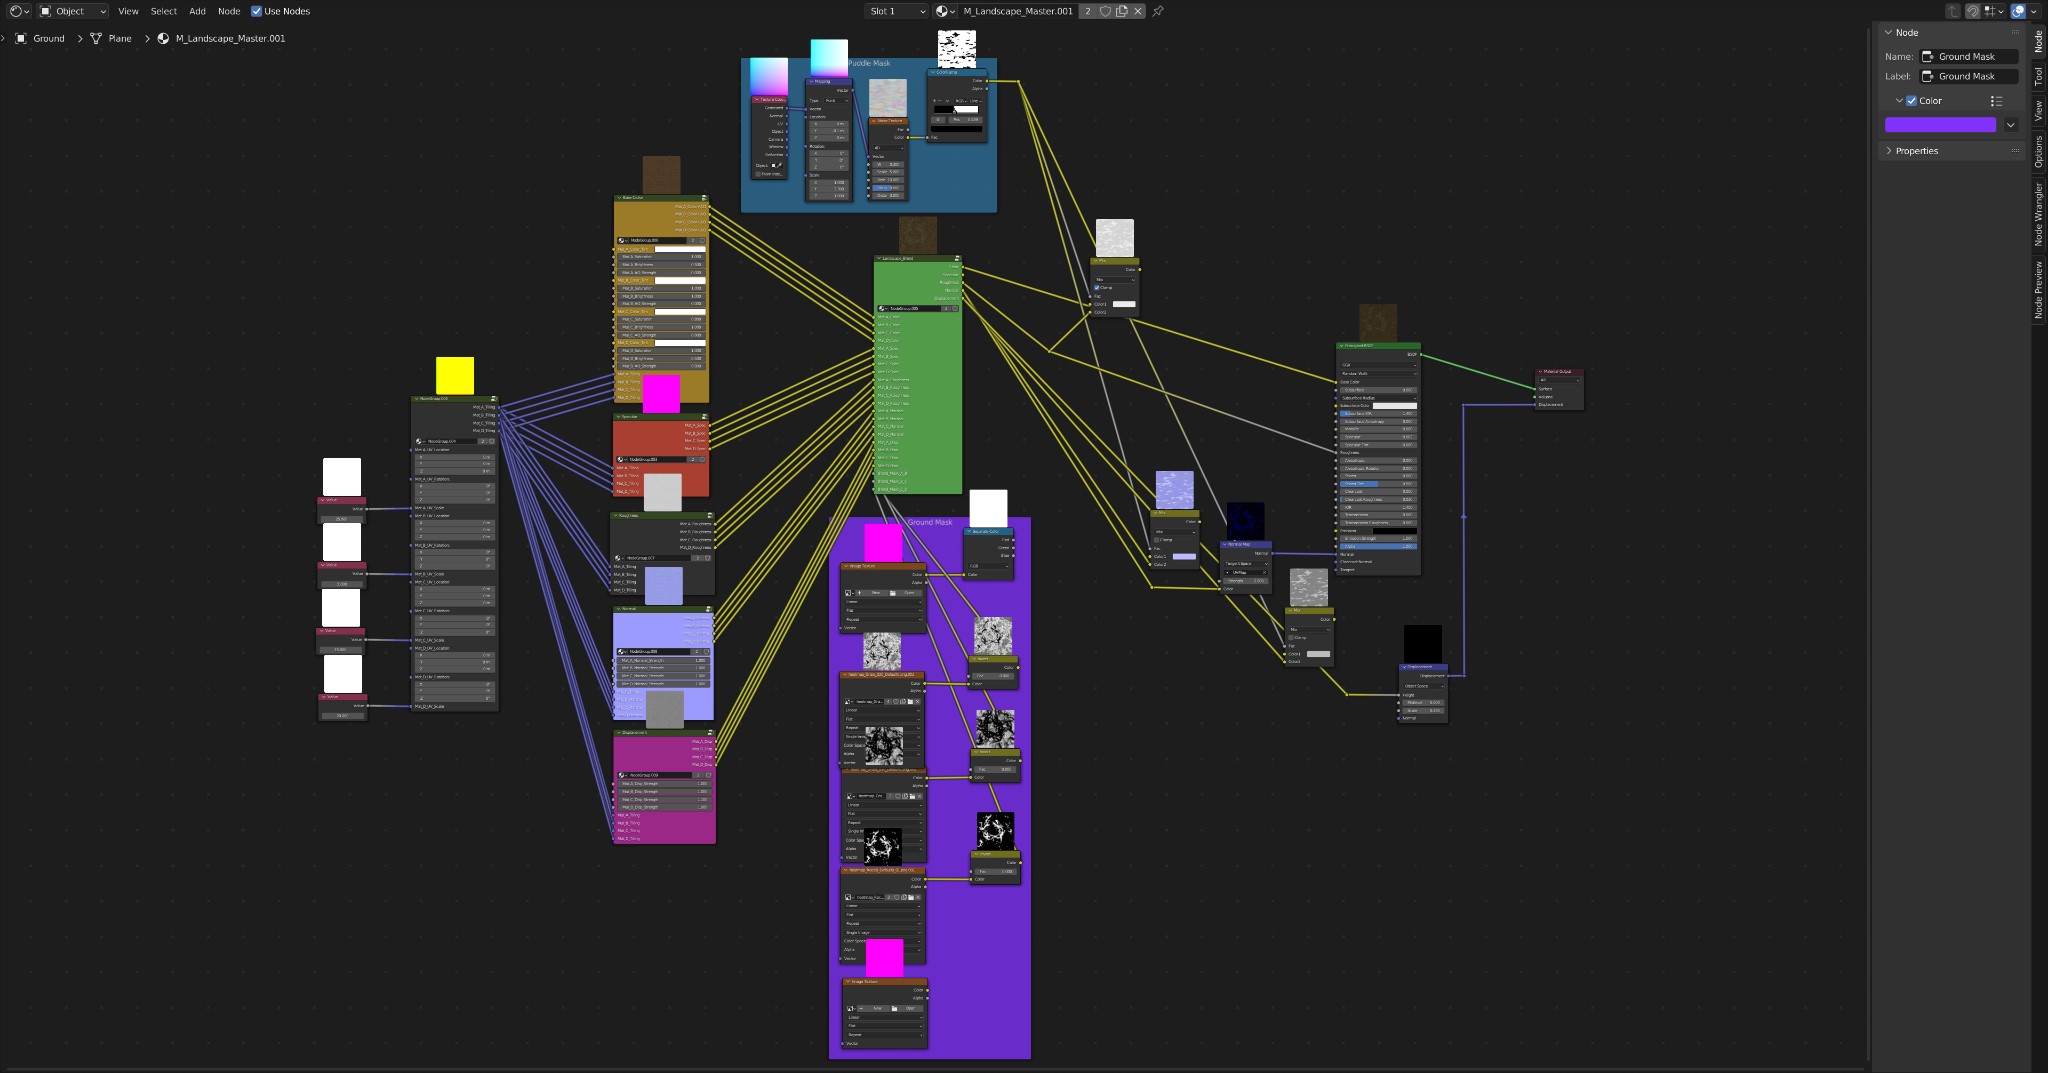
Panorama grasp materials setup.
This grasp materials is ready as much as mix between 4 completely different supplies with the assistance of texture masks that I can export from World Creator. As well as, it has a slot for a custom-painted masks, however I did not want to make use of it right here. Additionally, the puddle masks was not helpful for this challenge. I uncovered some frequent adjustment parameters to be accessible from exterior the node teams (i.e., colour and brightness changes, AO energy, regular and displacement energy, and so forth.)
I am certain there are smarter methods of setting these up, however for now, it really works fairly properly. If you understand how to optimize such a setup, please let me know.
To be able to add extra depth to the bottom, particularly within the foreground, I micro-displaced the bottom aircraft, along with the general top map displacement, with the assistance of an adaptive subdivision floor modifier, making use of the blended materials top maps within the shader.
Base colour & AO group.
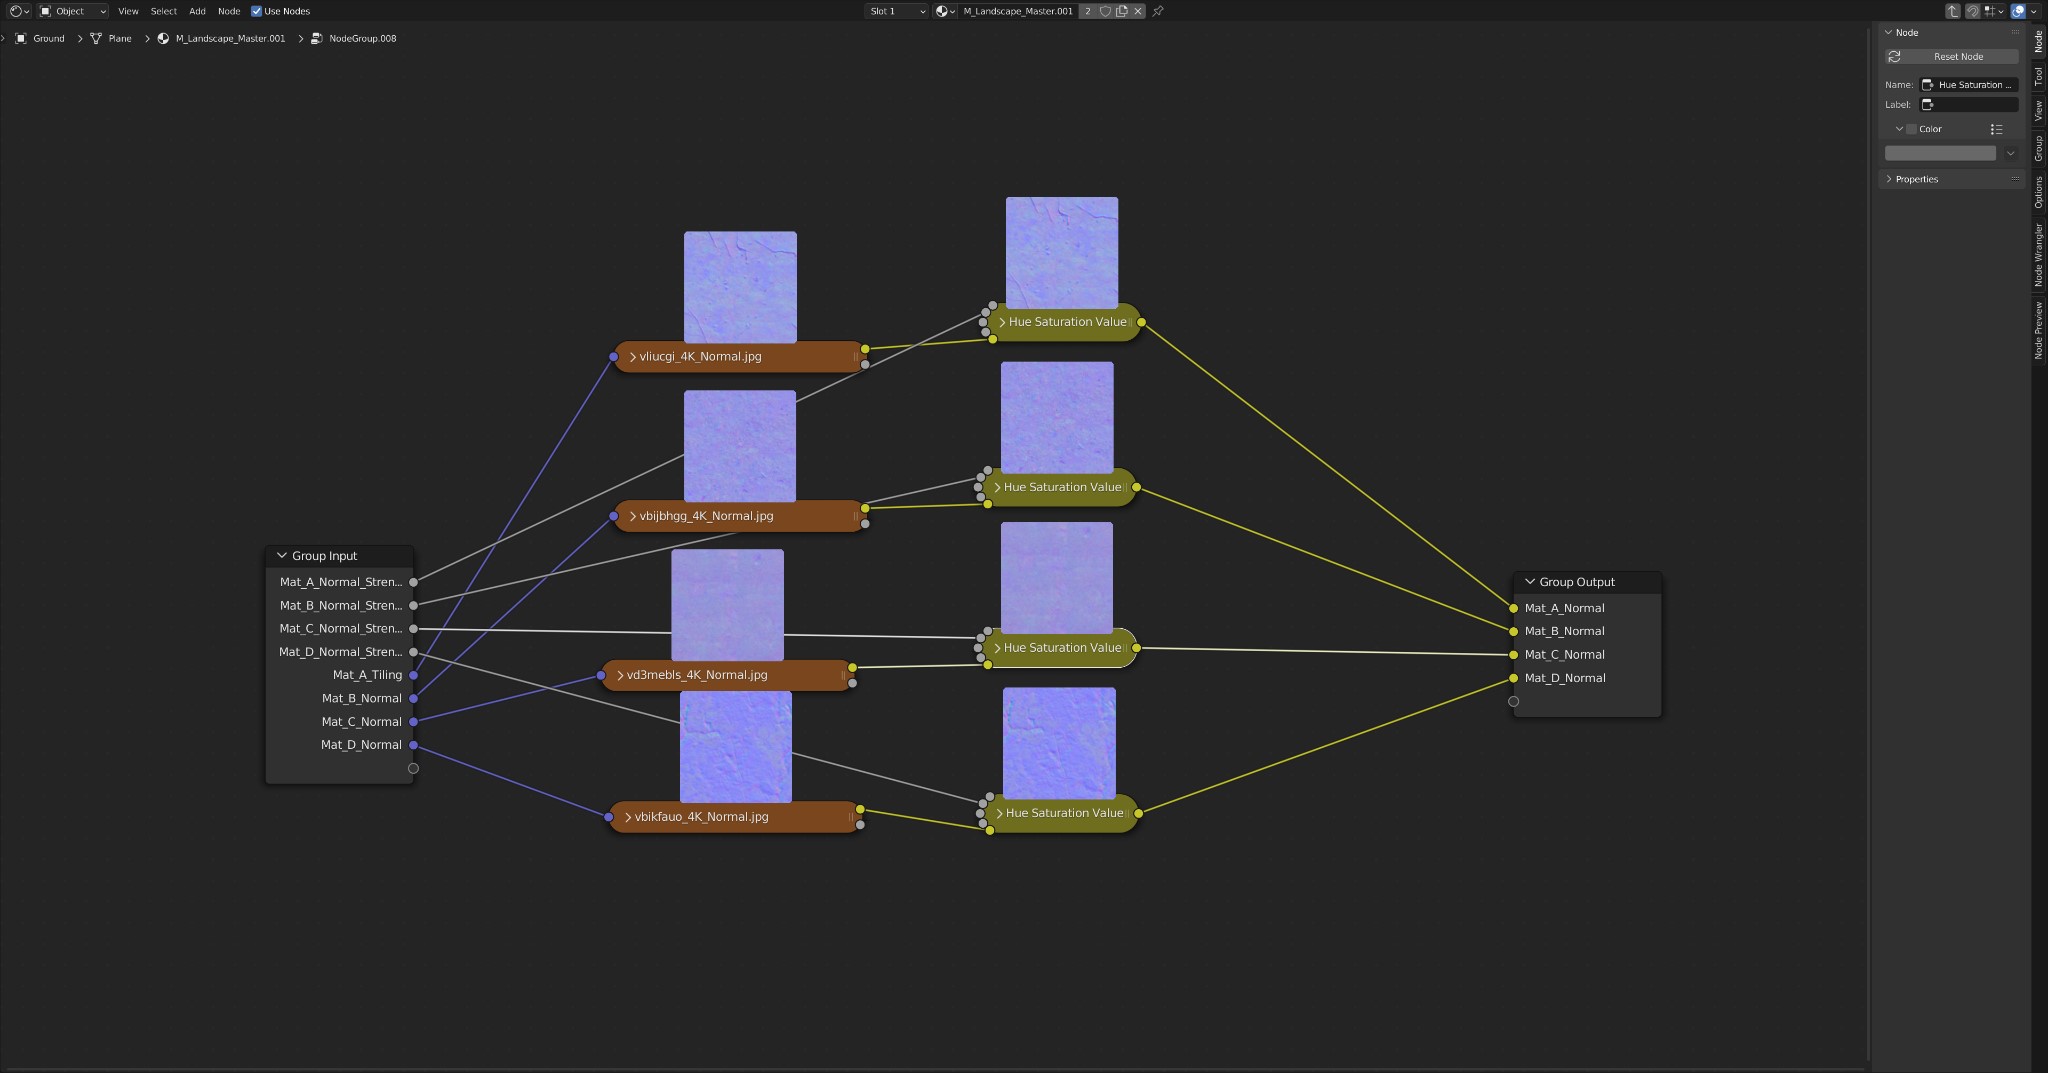
Regular map group.
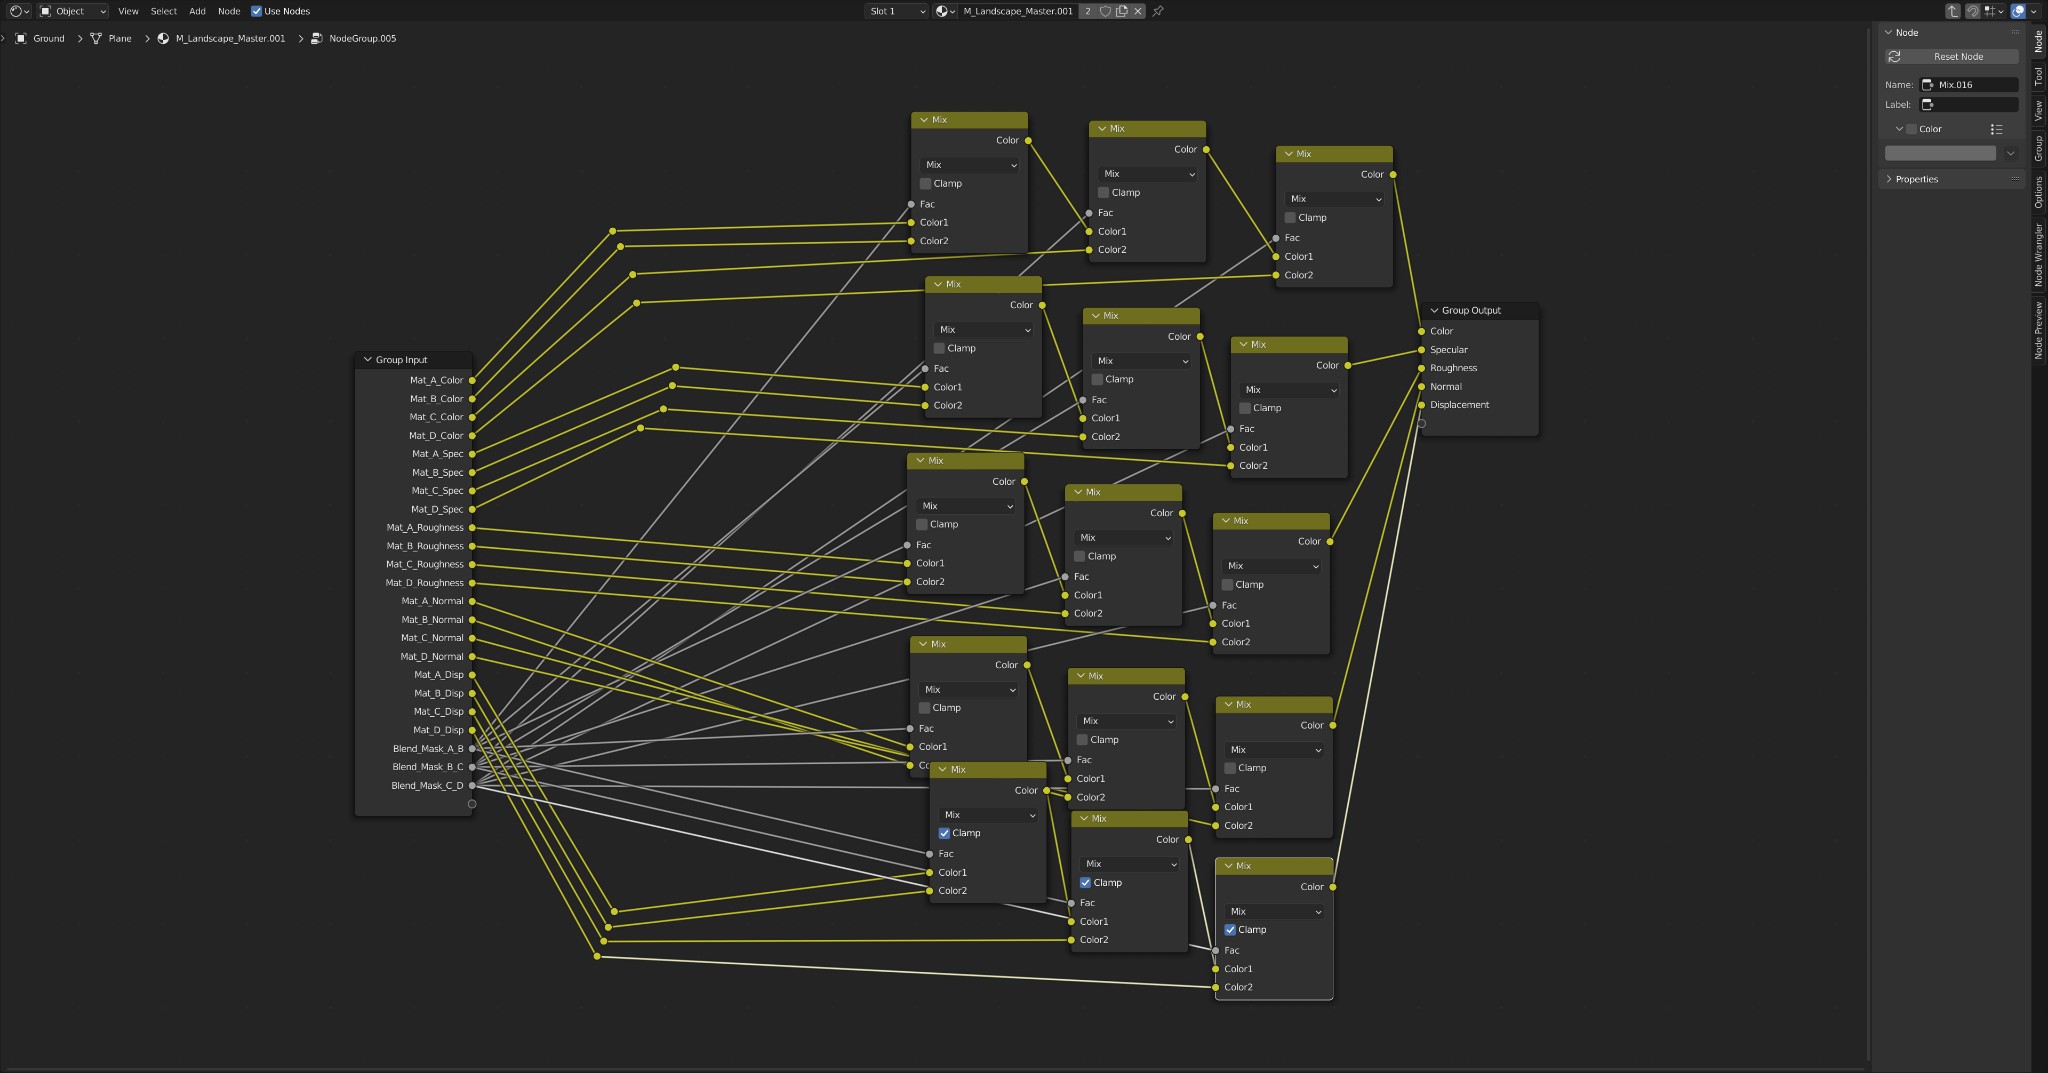
Masks mix group.
LIGHTING
For the lighting setup, I used a complete of six lights. The primary mild is a reasonably sturdy highlight in a bluish colour that I positioned proper above the clearing dealing with straight down. The primary highlight is complemented with two extra spotlights to brighten up the boulder and the timber within the background. I additionally used two space lights to loosen up the trunks within the foreground, which in any other case would have been utterly black. Lastly, I used a degree mild to assist the emissive hearth shader brighten the realm round it.
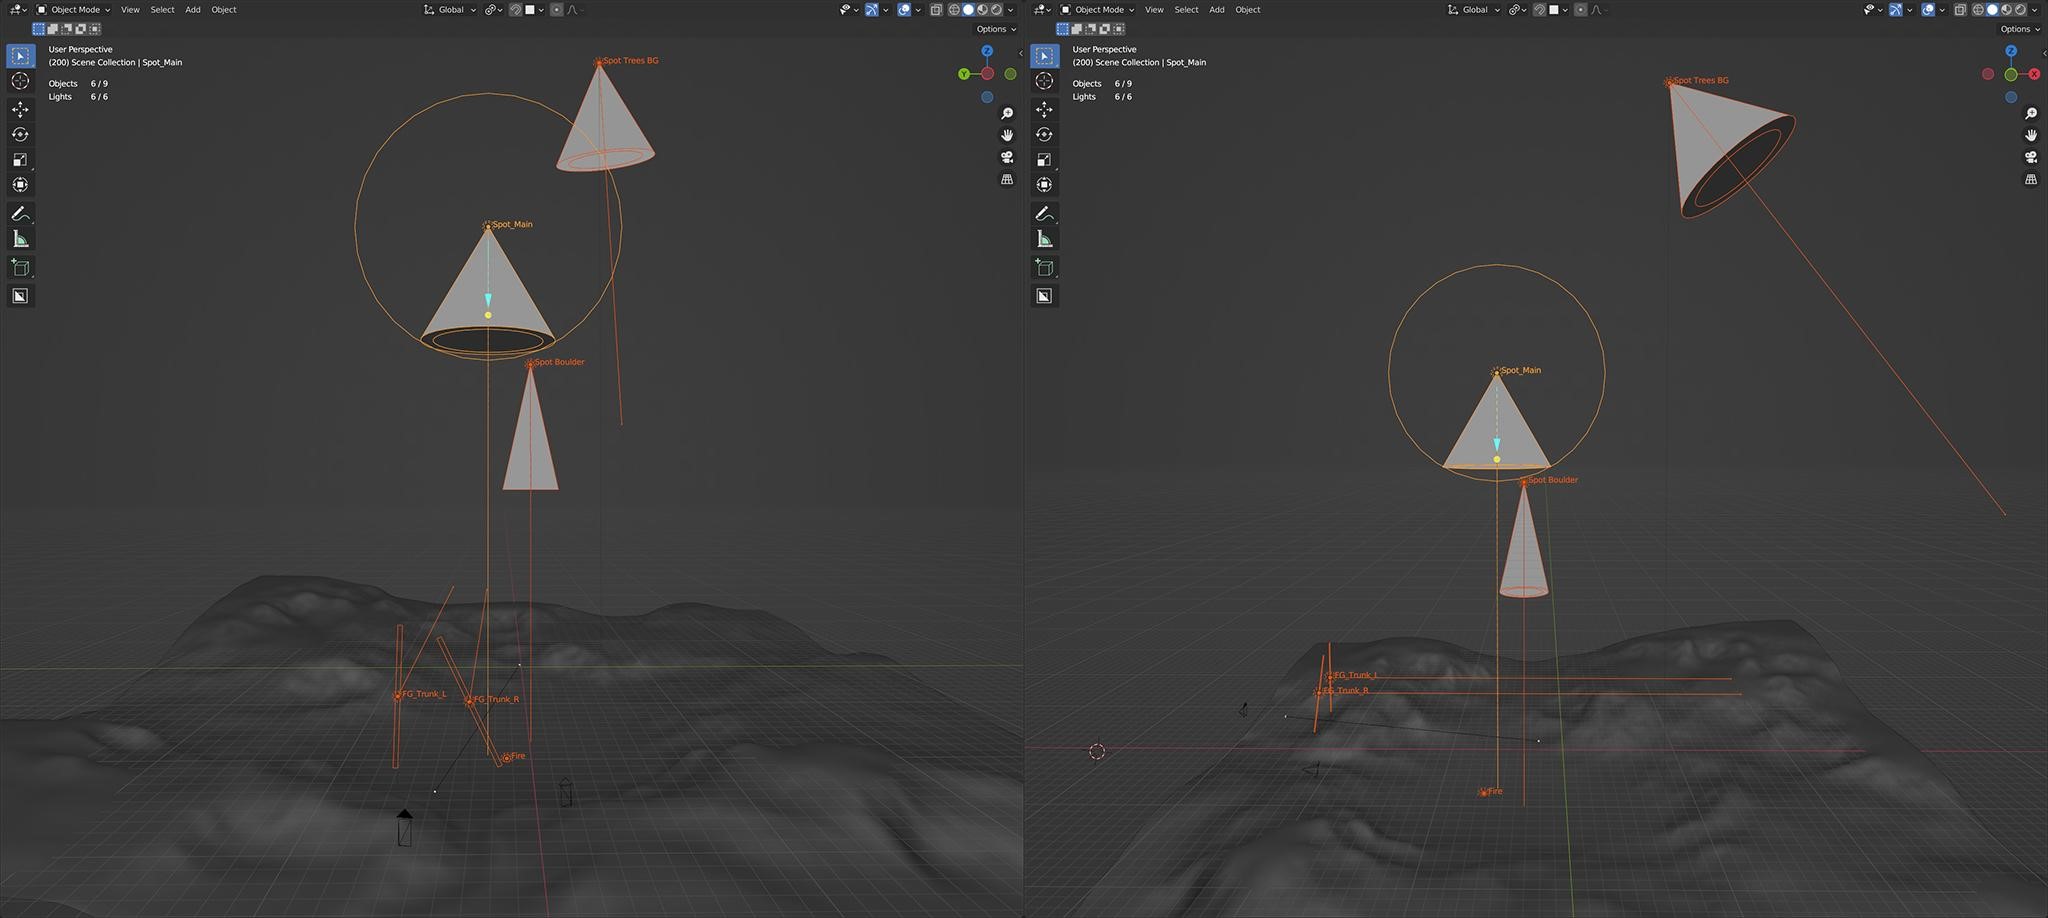
Lighting setup. Entrance view on the left. Facet view on the precise.
VEGETATION
For the vegetation, I primarily used vegetation and tree packs that I purchased from Evermotion final 12 months. The fashions are tremendous detailed, which makes them relatively performance-heavy. I needed to spend a while decimating the geometry whereas nonetheless sustaining the shapes and texture mapping. Additionally, I needed to alter the supplies to work with my lighting setup.
For the background timber, I used easy 2D billboard timber that I created myself from the tree pack I used. I made an orthographic entrance view render of among the timber with clear background enabled and mapped that picture to the planes used within the background.
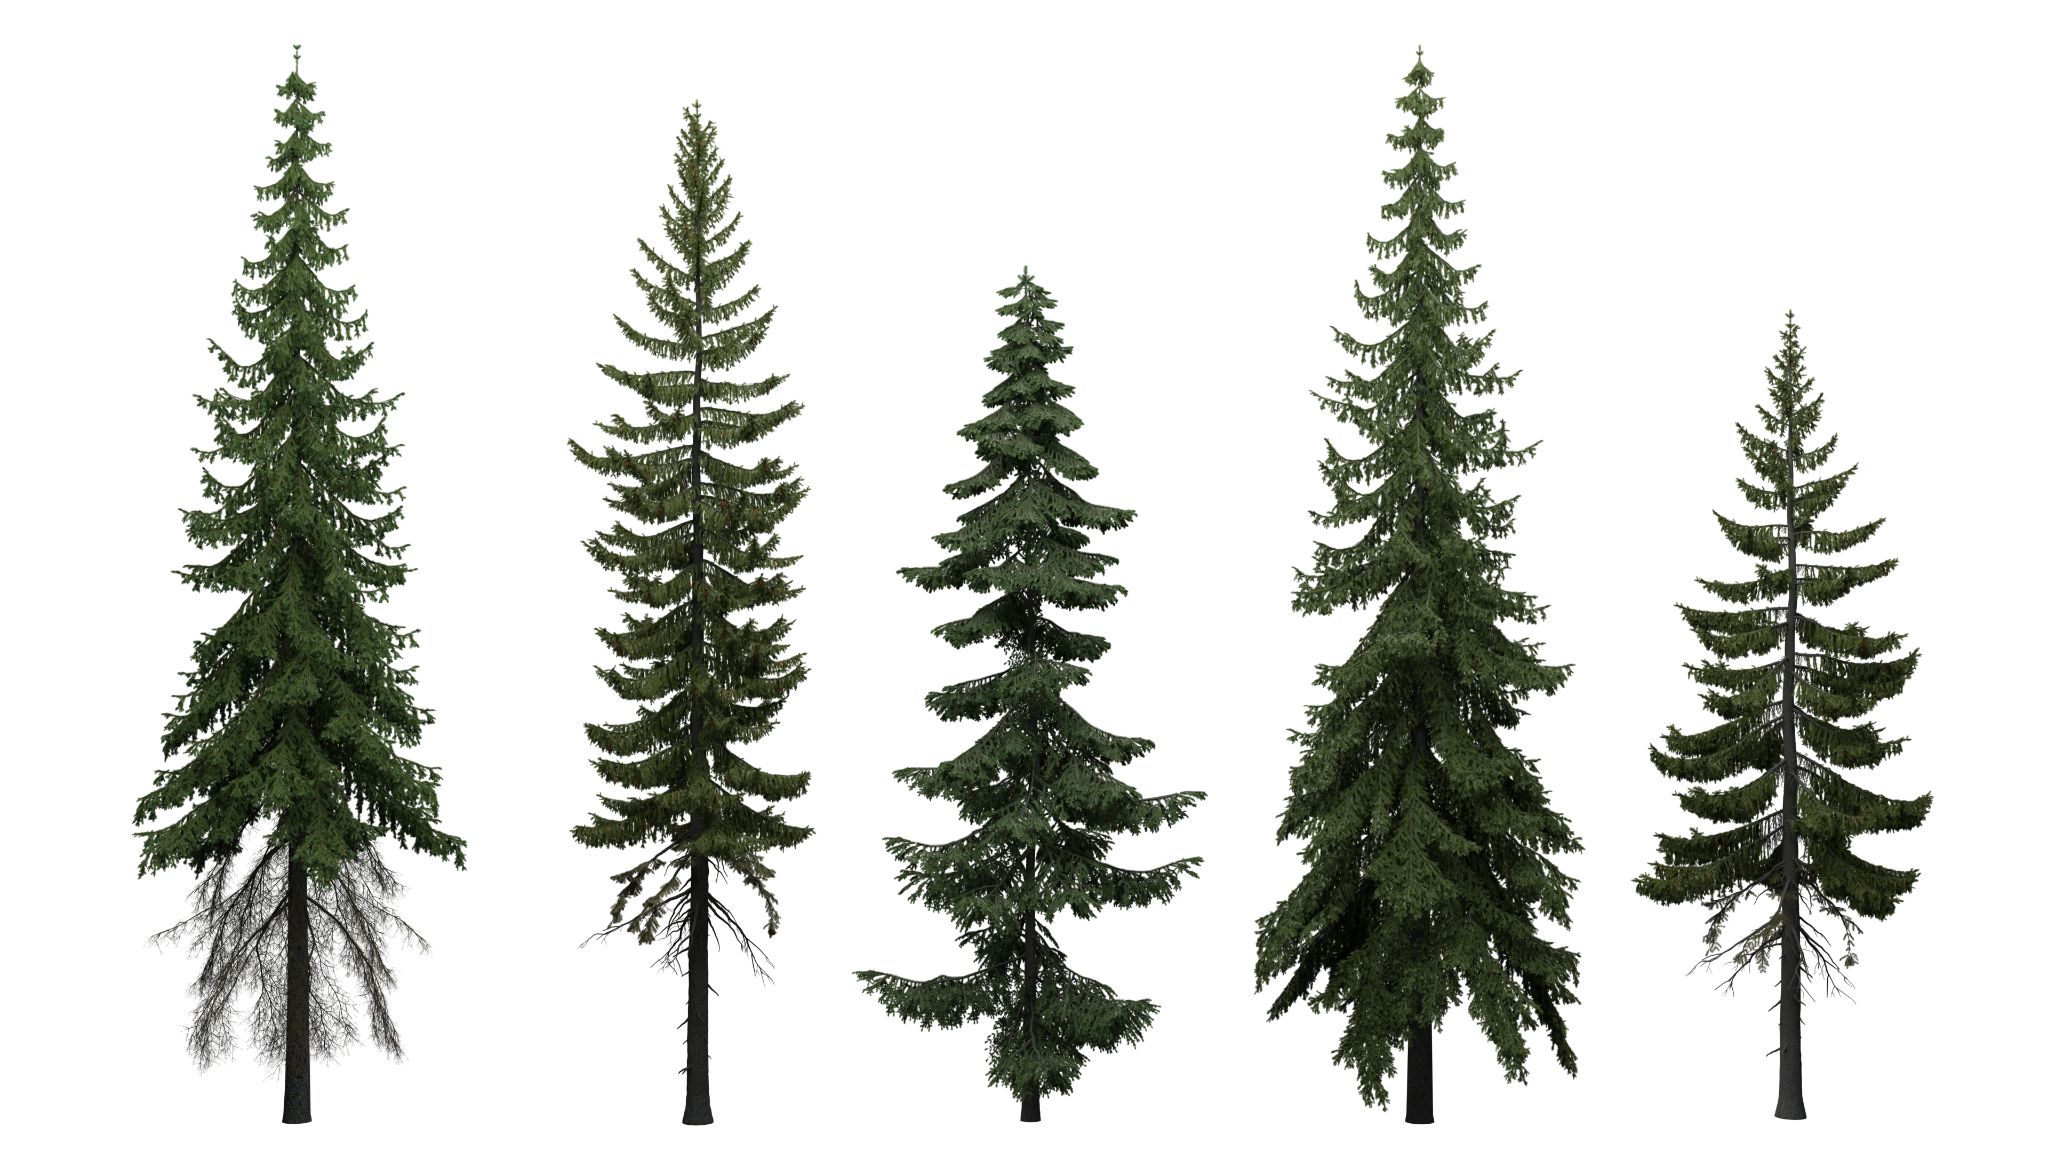
Tree billboard texture.
For the scattering of the vegetation, I closely relied on the add-on Geo-Scatter by BD3D from Blender Market. I used a dozen scatter methods for the varied plant teams (timber, shrubs, grass, particles) and positioned and eliminated another crops by hand as ending touches.
POST-PROCESSING
I saved the render as a multilayered exr file, which I took to Photoshop to do some colour correction, compositing, and post-processing. For instance, I used the AO render cross to spice up the ambient occlusion in some components of the render to higher combine some objects into the world. I additionally lightened up the path resulting in the small camp to extend its position as an eye fixed lead.
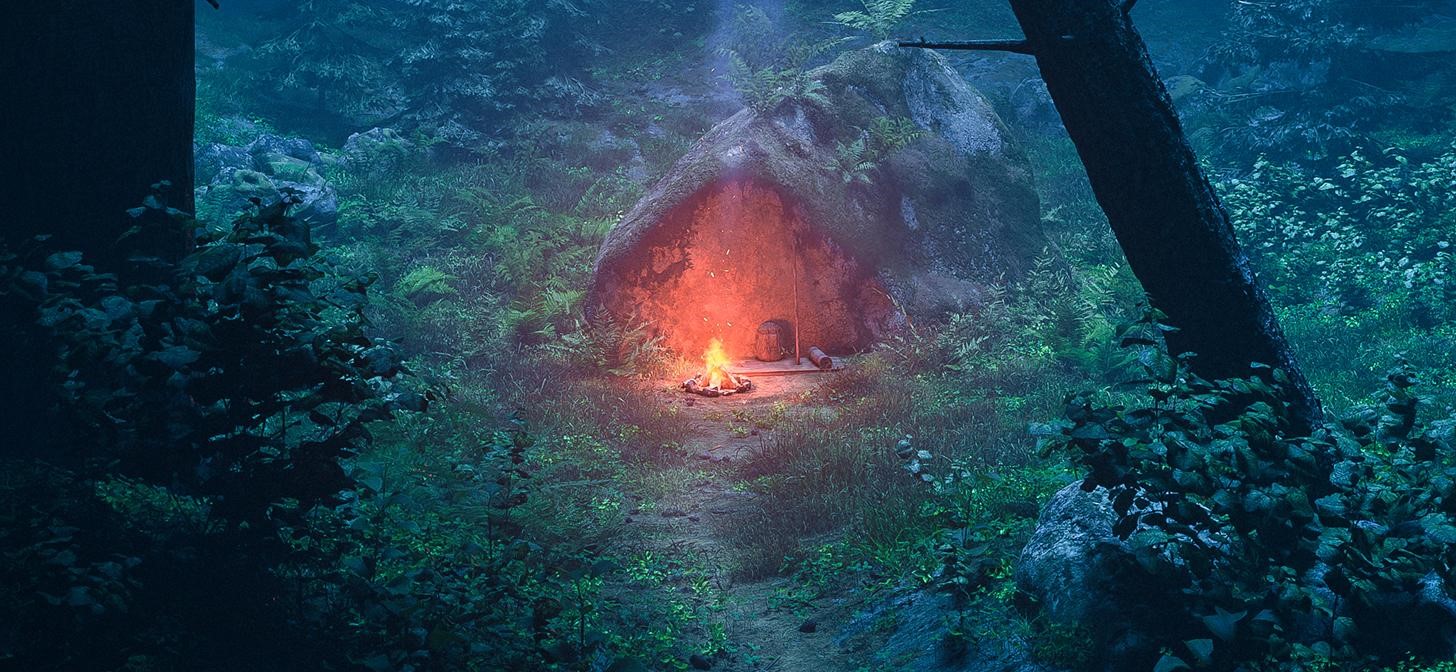
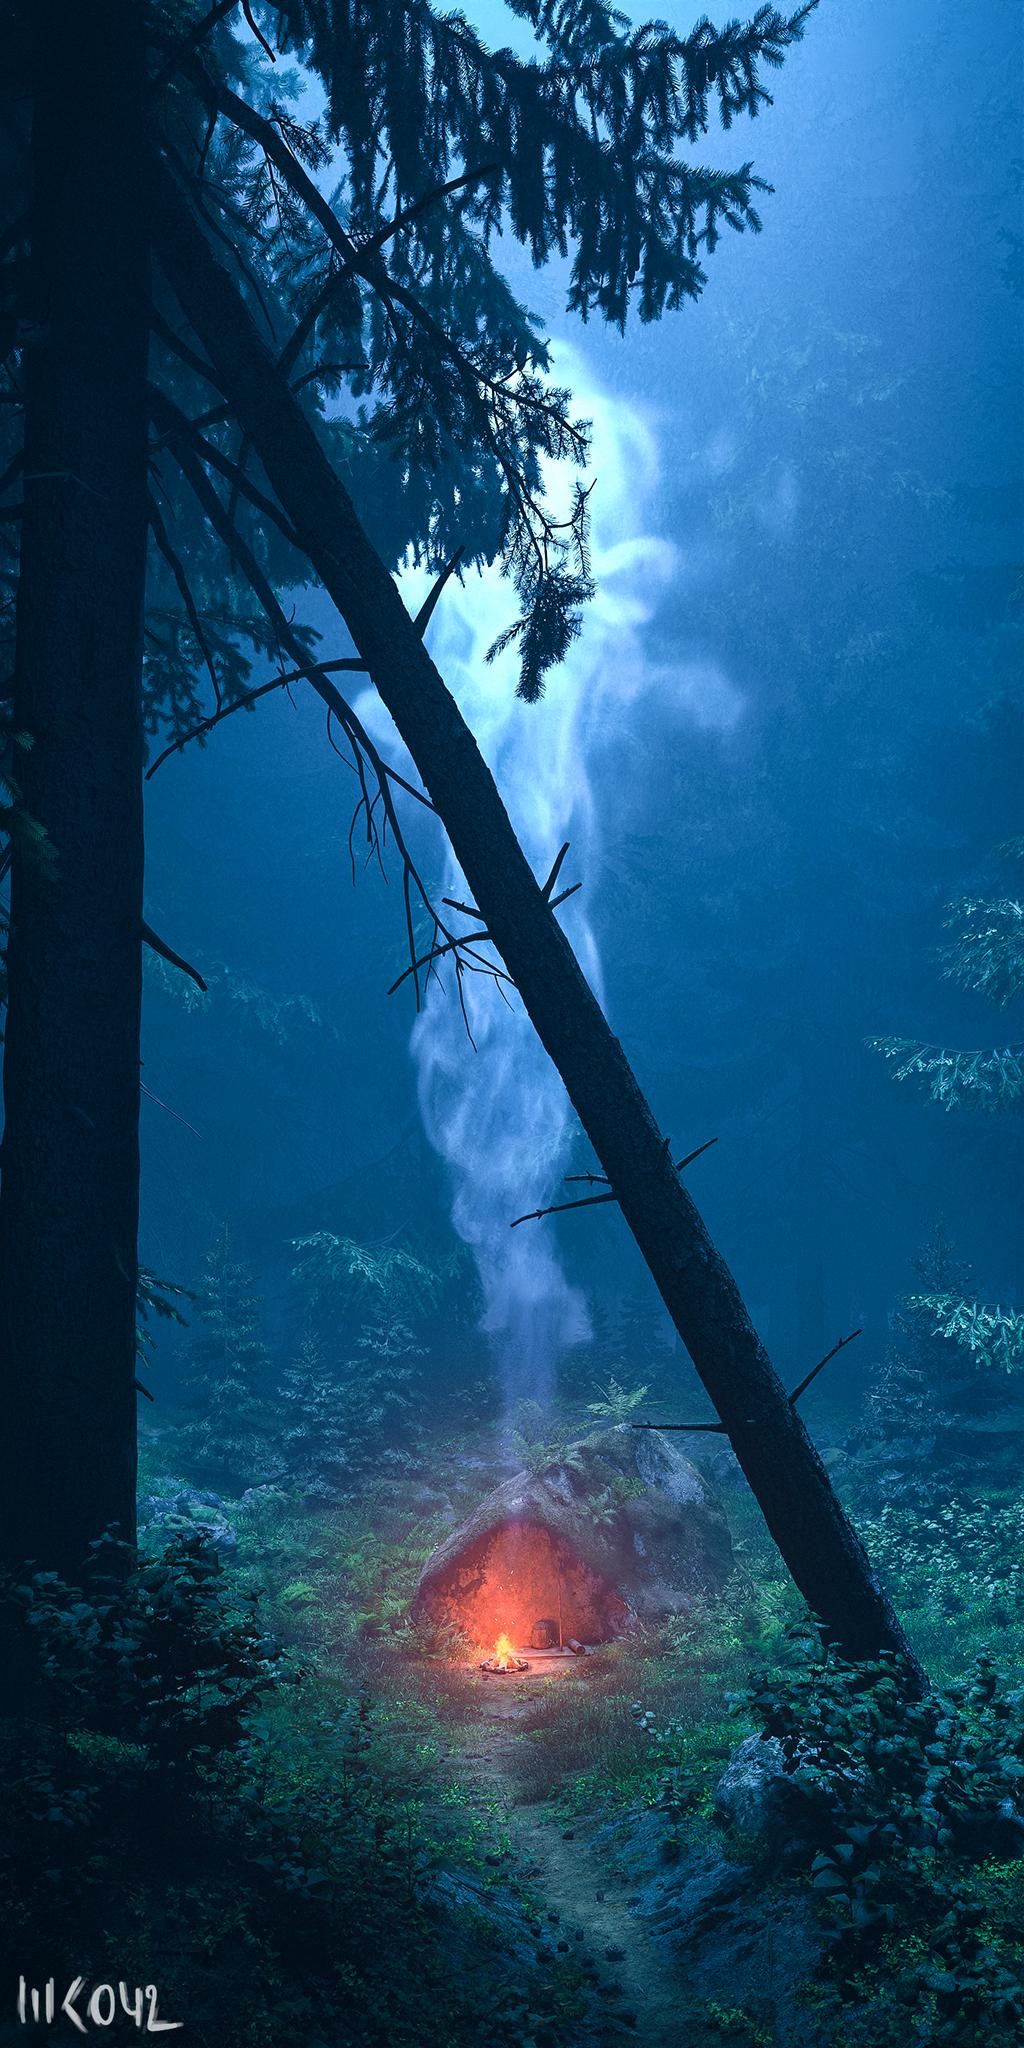
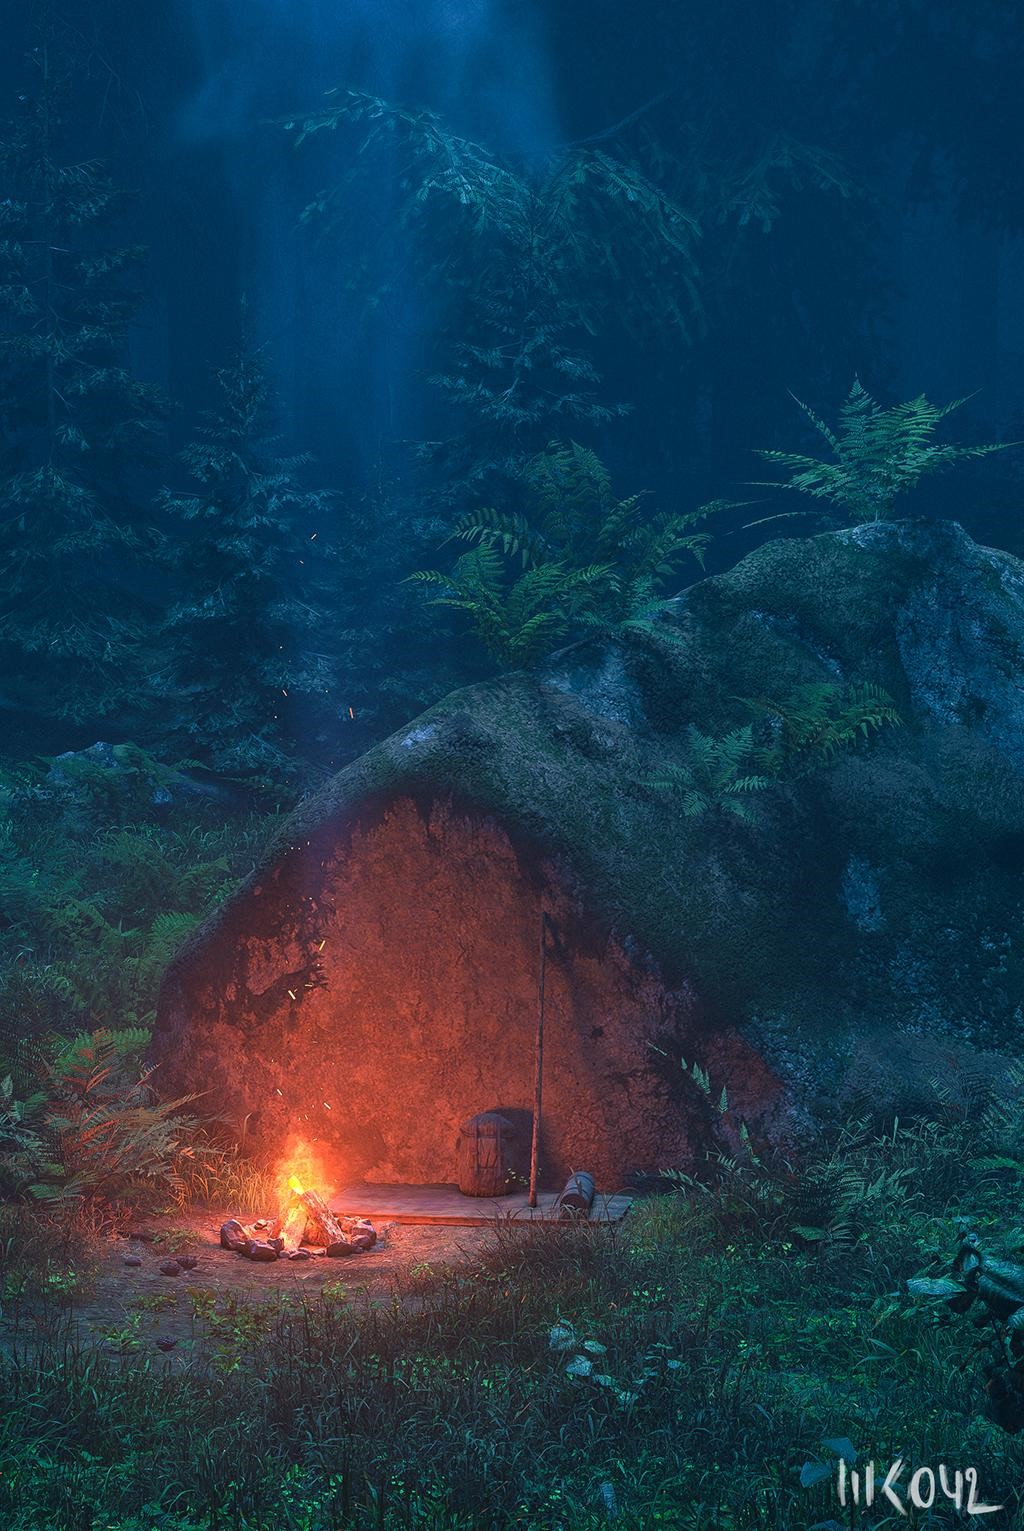
THE RANGER’S CAMP
When you have any questions or feedback, please be happy to contact me through my social media accounts. I’m at all times blissful to debate and reply questions.
Thanks for studying!
Concerning the Artist
Lasse, aka. WK042, a 3D fanatic and freelance artist dwelling in Leipzig, Germany. At present increasing his expertise within the 3D world and dealing on his portfolio.