
The Good Approach to Auto Rig Gentle, Inflexible, & Combined Armor Items
José Antonio Tijerín


José Tijerín is a digital illustrator, 3D sculptor, and creator of video video games resembling “Pricey Althea” accessible on Steam. His content material pack “We’re Besties” and “We’re Homies” are presently on the market within the Reallusion content material retailer.
CC4 with AccuRIG: a gateway to new potentialities
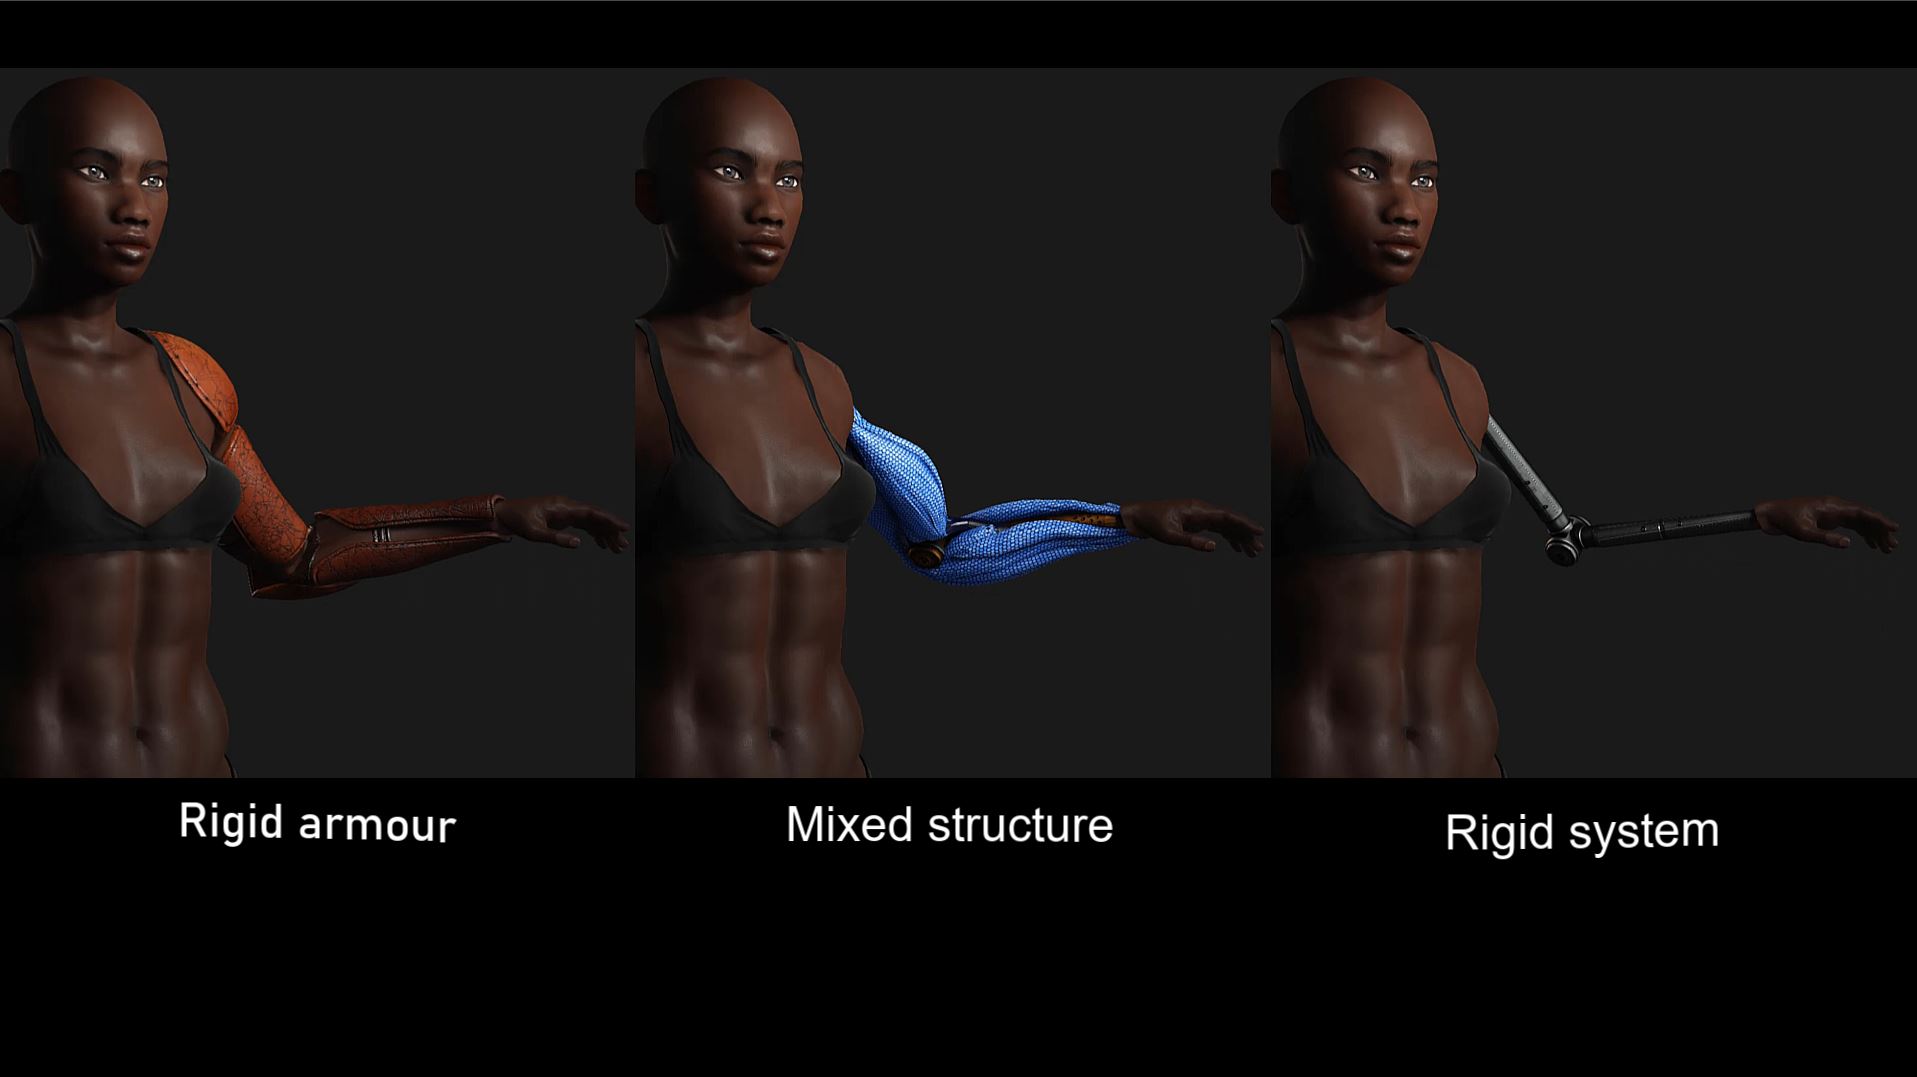
AccuRIG in Character Creator 4 is crucial device we’ll be utilizing for this tutorial. This device is designed to rig characters rapidly and simply and lets us skip a whole lot of guide processing in 3D applications like Maya. To create this tutorial, I’ve divided the character into three classes: inflexible armor, combined construction, and inflexible system. This makes it straightforward to grasp and analyze the widespread errors for every class.

Sort I: The inflexible armor
Let’s discover a number of methods to appropriately combine totally different elements to make a go well with of armor. For this tutorial, I’ll be working with the “Polish Hussar Armor” that may be discovered on the Tijerin Artwork Studio Sketchfab web page. Let’s begin with the straightforward minor elements of the armor, such because the tassets and vambraces.
First go to the Create to entry the Equipment menu and import these armor elements. Because the armor is split into elements, we must choose them one after the other to transform them into equipment utilizing the namesake button. Now, we’ve to go to the decrease a part of the Modify window to seek out the Connect part and hyperlink the armor elements with their corresponding bones.
This methodology is probably the most optimum for attaching inflexible elements to the character, however it isn’t at all times beneficial. I counsel individually importing the armor elements so that every half could be given the required consideration and impartial issues could be corrected as they come up.


Because of the enhancements in Character Creator, we will examine for issues whereas the character strikes with out having to depart this system. There can be instances when the armor items intersect with different fashions and in these situations you’ll need to edit the geometries instantly so it doesn’t proceed to occur.
Inflexible components, like those utilized right here, are broadly used to enrich material and leather-based clothes and provides a putting contact of selection to our character. Let’s discuss concerning the armor components which might be extra difficult, a lot in order that they require rigging such because the helmet for this specific character.
1. Helmet armor


Helmets are normally composed of 1 or two items, however this specific helmet has a number of items on the again. This is a chance to benefit from as a result of the decrease half collides with the armor that we’ve not but positioned. We are able to deal with this downside by rigging this half in a 3rd occasion 3D software. This time, we’re going to import it not as an adjunct however as a prop in order that we will introduce the bone system with no hitch.
The remainder of the method is identical as these used for earlier armor elements. As you may see, we now have full management over the helmet and might stop it from intercepting different armor items. We’re going to additional develop this answer for the animation part in order that it goes past simply fixing issues and takes us a step additional within the animation of the character.
2. Chest armor
Now’s the time to put the chest armor, which presents a fragile problem. On this case, we’ve a one-piece breastplate that can be positioned in the identical vogue as the primary amor elements. Any such armor could be very constrictive on the physique, so we should chorus from animating the bones of the higher backbone and lift the arms greater than 180 levels. The preferred methodology, attributable to its versatility, is to separate an higher half to guard the thorax and a decrease half for the abdomen.
3. Shoulder armor


For the shoulder pads, I connected the decrease a part of the arm in the identical approach I did the primary elements of the armor. For the higher half, I added a few bones like I did for the helmet. The cellular elements of a standard armor are normally joined along with leather-based straps, and usually, they’re lined by metallic. This armor, nevertheless, options straps which might be seen and I’ll should be cautious to restrict the versatile areas to the shoulders.
It’s price mentioning that futuristic armor present in video video games usually include inflexible elements which might be sewn onto versatile elements. Any such design can save on polygons and eradicate lots of the issues talked about earlier than, however we’ll discover this later.
By attaching the bones to the armor, we get a number of potentialities for animation. We are able to appropriate the place of the shoulder pads as was accomplished for the helmet. As well as, we will have these items leap whereas he’s driving on his mount. It must be apparent by now that including bones to the armor requires some forethought, particularly concerning the character’s vary of motions and the way the armor will react in type.
4. Scabbard of the sword and equipment
Let’s now study the scabbard, which is normally a prop for adornment, however we will do extra with it by rigging it to make it purposeful. To perform this, I add bones alongside the size of the leather-based scabbard to have it curve with the sword. As soon as arrange, the sword, regardless of its curvature, can easily slide out and in of the sheath.


Within the act of sheathing a sword, one hand holds the scabbard and the opposite hand inserts the sword. So we must always take into account including a bone to connect with the hand. If we wish to get fancy, we will export the props in FBX format together with its animation into Character Creator. On high of this, we will additionally add a spring impact in order that the soldier can sway whereas he walks and have that momentum switch to the sword whereas it’s sheathed. As soon as accomplished, I proceed to make some corrections and add the remainder of the armor, equipment, and textures to make it prepared for animation in iClone.
Now that we’ve seen what this method can do for us, I’ll discover two extra strategies that blend inflexible with tender components within the second a part of this tutorial collection. Do go to the YouTube channel to proceed watching and please subscribe for extra nice tutorials.
Learn on ‘Learn how to Auto Rig Cyborgs with Character Creator AccuRIG – Half 2‘
Study extra :
• Tijerín Artwork (José Antonio Tijerín) https://www.artstation.com/tijerinart
• Tijerín Artwork Studio on Steam (video video games) https://retailer.steampowered.com/app/2058230/The_Evil_Furry/
• Character Creator https://www.reallusion.com/character-creator/obtain.html
• iClone https://www.reallusion.com/iclone/obtain.html
• Reallusion https://www.reallusion.com/