INTRODUCTION
Whats up there, my title is Debargha Maschatak. I’m from India and presently finding out in my third 12 months for my B.Tech pursuing Laptop Science. I’m an enormous cinephile, and my ardour for motion pictures and the artwork of filmmaking has launched me to the world of 3D artwork. I’m a self-taught 3D artist with 2.5 years of expertise in Blender. I create 3D renders and animated brief movies for my YouTube channel.
INSPIRATION
My inspiration for this render got here from the truth that I’ve began taking driving classes just lately, and it’s sort of onerous to benefit from the full expertise in these busy city streets surrounded by noise and distractions. So, I discover myself daydreaming about how peaceable and poetic it should really feel to drive by way of a quiet and lonely street in the course of nowhere, surrounded by stunning timber whereas a relaxed breeze is catching the tip of my hair, and my favourite music is taking part in.
I additionally wished to showcase the truth that the world will carry on altering round you, however do not let that affect the vacation spot you set to drive to.
REFERENCES
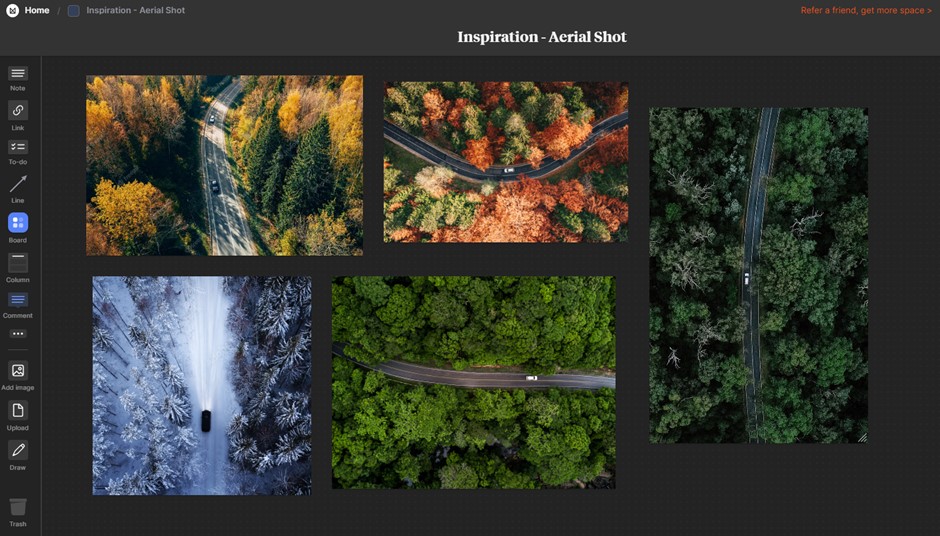
As a 3D artist, our primary goal is to faux actuality. So, it is of utmost significance to know and acknowledge the truth which we try to recreate. I at all times begin my manufacturing by gathering references. To finest match the psychological picture I had of the composition I wished to make, I looked for aerial views of automobiles on forest roads in numerous seasons.
Listed here are a few of the references I gathered:
PROCESS
I began by including a airplane that will act as the bottom and the bottom of the render.
Then, I went by way of the catalog of timber that got here with the Botaniq Blender add-on. I had in thoughts that I used to be going to painting 4 totally different seasons in my render:
- Summer season
- Autumn
- Fall
- Winter
I do know Autumn and Fall are the identical factor, however I took some artistic liberty as I wished to showcase Autumn each when timber had been totally bloomed and in addition when the timber had been utterly barren (i.e. Fall).
TREES
I selected two kinds of timber for every of the person renders. Listed here are the names of the timber used:
- Winter – Larix-decidua_A_winter & Picea-abies_A_winter
- Summer season – Picea-rubens_A_summer & Tilia-europaea_B_summer


- Autumn – Acer-pseudoplatanus_T_autumn & Citrus-limon_A_autumn (Colours barely altered utilizing nodes).
- Fall – Acer-pseudoplatanus_C_autumn & Acer-pseudoplatanus_C_autumn


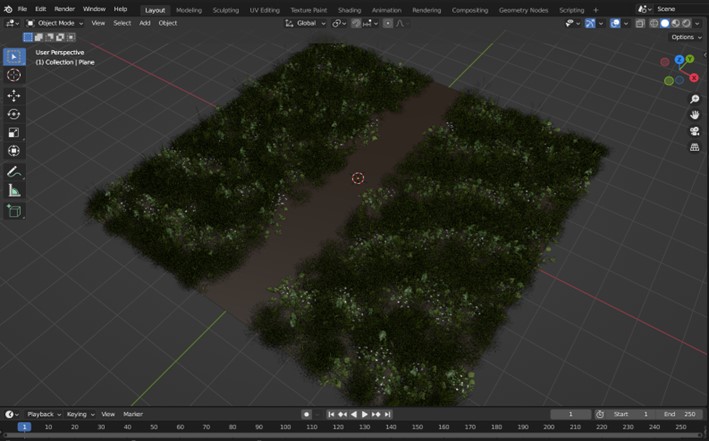
PARTICLE SYSTEMS
After finalizing my timber, I created two particle techniques, one for the airplane consisting of grass and small flowers, and one other for the timber themselves.
I put each kinds of timber in a set and scattered the gathering as an entire over the airplane. Every scene has 170-220 timber. I used vector teams to change the particle techniques in order that the timber don’t spawn on the street.
ROAD
Subsequent, I began engaged on the street. I created a separate rectangular airplane and curved it utilizing a Bezier curve (linked it with the Curve modifier). I obtained the street texture from Poliigon and utilized it after UV unwrapping.
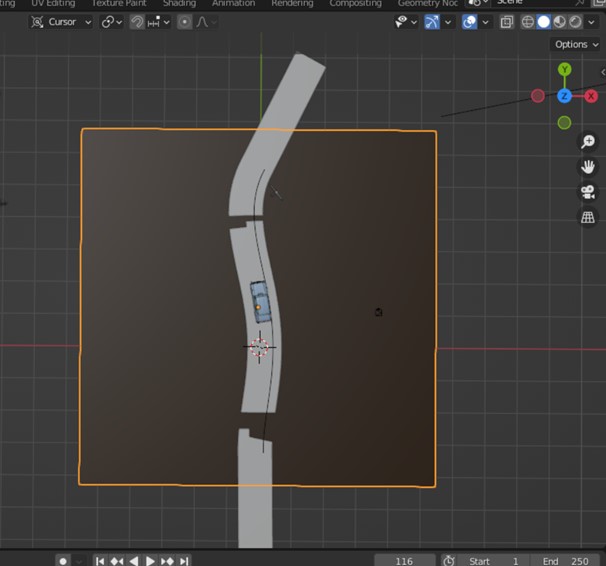
As soon as the street was positioned nicely within the scene, I grabbed a automotive mannequin that I had used for one in all my earlier renders and imported it into the scene and positioned it on the heart of my composition. The one factor left now was the lighting.
LIGHTING
The lighting of the scene was extraordinarily essential because it needed to be the identical for all 4 seasons or it wouldn’t match nicely within the remaining composition the place all 4 renders had been to be put collectively. For the lighting I first obtained a 4k HDRI of a sunny day from PolyHaven. The HDRI itself wasn’t sufficient, so I added a solar lamp with depth set to 4. I adjusted the colour in order that it blended with the HDRI. I angled the solar lamp in order that it created some attention-grabbing shadows with the timber.
POST PROCESSING
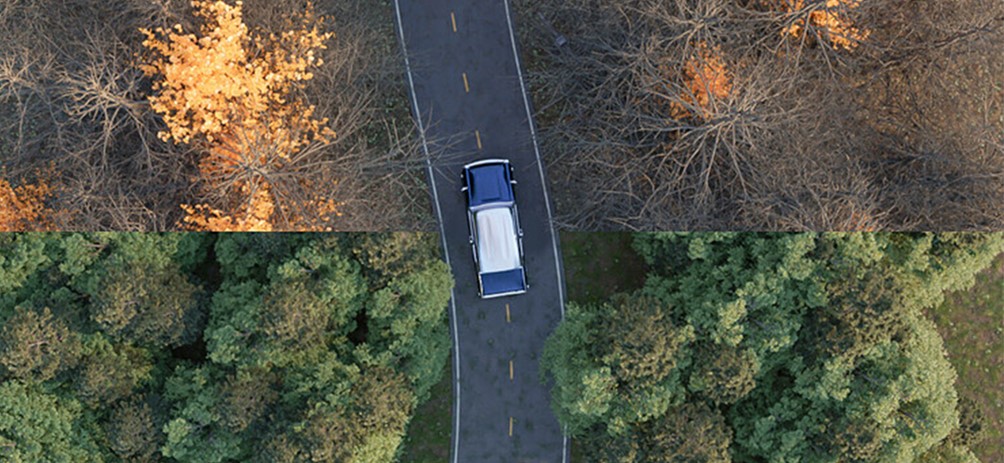
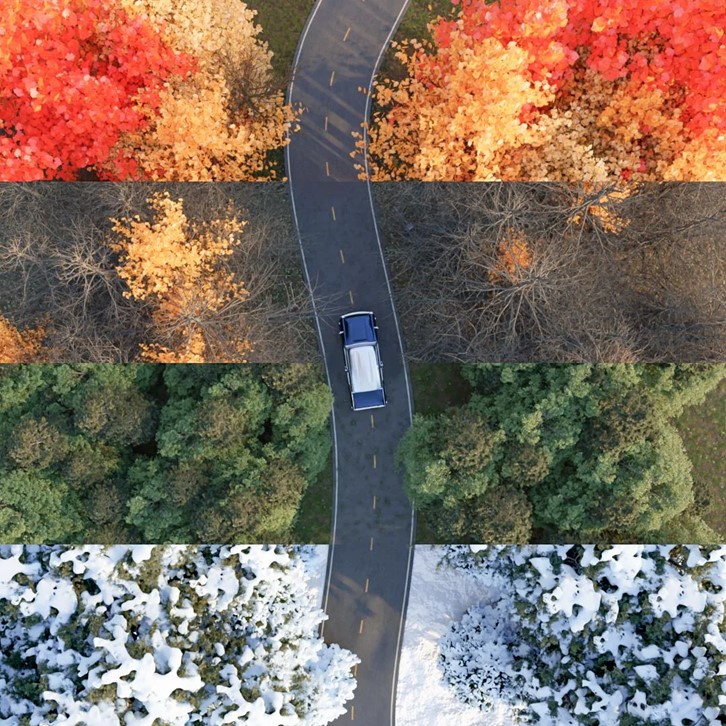
After rendering out the entire 4 seasons individually, I opened them in Adobe Photoshop. I cropped each to 25% and layered them on this horizontal method:
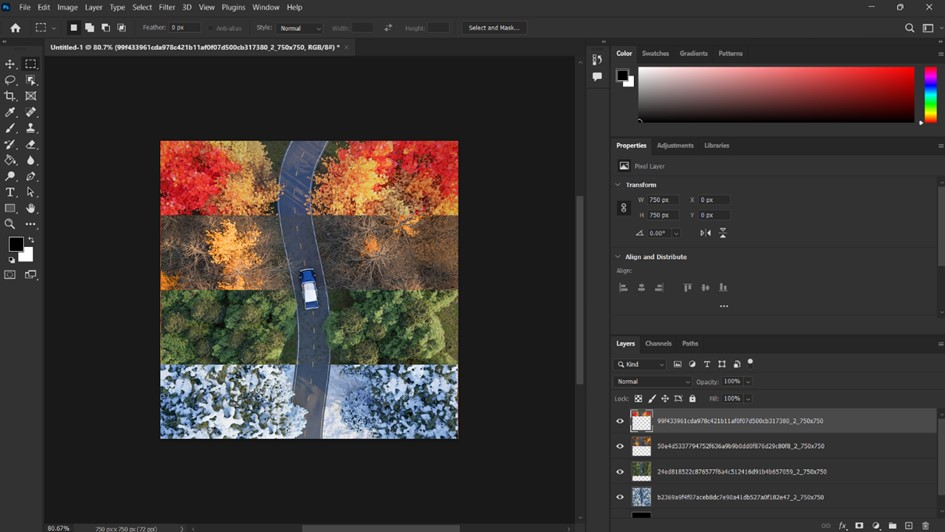
Then I exported this picture and opened it in Adobe Lightroom the place I color graded the complete composition and added a little bit of lens distortion on the edges.
And in any case of that, right here’s what I got here up with.
DRIVING THROUGH THE SEASONS
Listed here are the 4 totally different renders individually :


And that is it. Thanks for studying my article.
I hope you’ve a pleasant day!
In regards to the Artist
Debargha Maschatak, a 3D artist and filmmaker from India. He’s presently working independently making 3d renders and animated brief movies.
