Button is among the interplay objects in ActivePresenter 9. Content material creators often use it to redirect learners to particular content material, or play/pause a media file when learners click on it. On this tutorial, let’s study extra about it.
This tutorial covers:
Add a Button Object
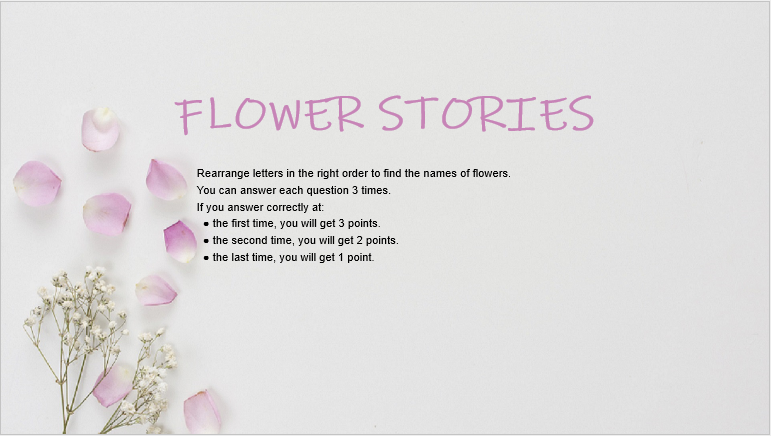
For instance, you create an eLearning recreation with the title slide like this:
Now, you need to add a Begin button in order that learners can navigate to the content material slide when clicking it. To try this, observe the steps under:
- Open the Insert tab > Button, or open the Residence tab > Interactions > Button.

- Click on anyplace on the Canvas, or maintain and drag the mouse cursor on the Canvas then launch it.
Observe: If you want so as to add buttons to a number of slides, you need to use Batch Operations or Slide Grasp options:
- Click on the ActivePresenter button on the highest left nook > Venture > Batch Operations > Insert Objects… Then, choose the Object Sort and slide quantity/vary you need to add a button.
- Open the View tab > Slide Grasp > Insert Placeholder > Button.
Customise Button Objects
Listed here are what you are able to do to customise the inserted button:
- Change form: Open the Format tab > Change Form > choose one form from the checklist.
- Resize the button: Drag the resizing handles, or change the Width and Top values within the Properties pane > Dimension & Properties tab > Rework.
- Reposition the button: Drag and drop the button to anyplace you need. In addition to, you need to use the Alignment function to set it at a exact place.
- Customise Fill, Line, Shadow: Choose a built-in type from the Fast Kinds part of the Format tab. In any other case, you are able to do it your self utilizing instruments within the Model Instruments part of the Format tab, or within the Model & Results tab of the Properties pane.
- Edit Textual content: Click on on the default textual content to enter a brand new one.
Work with A number of States of Button Objects
A button comes with 4 built-in states by default which management their look when learners work together with it.
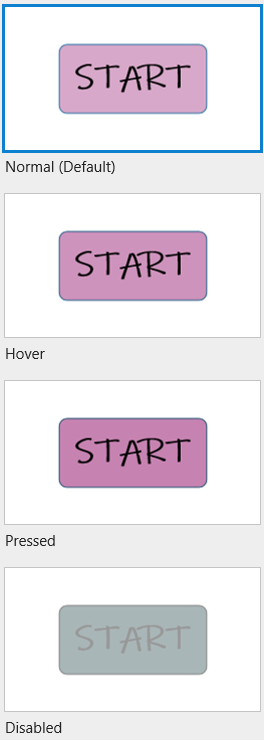
- Regular: That is the preliminary state when it first seems within the output. You may edit this state, however you may’t delete it.
- Hover: The state when learners hover over it.
- Pressed: The state when learners click on on it.
- Disabled: The state when it’s disabled. On this state, the button remains to be seen to learners, however they can not work together with it.
In addition to, you may edit these states or add extra states if needed.
Add Suggestions Messages
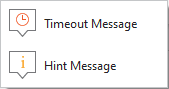
Button objects do not need any default suggestions messages like others. However, ActivePresenter 9 permits you to add them if you need. There are two kinds of suggestions messages which can be out there so as to add: Timeout Message and Trace Message:

- Timeout Message will probably be proven when learners don’t full an motion within the predefined time.
- Trace Message will seem when learners hover the mouse over it.
So as to add these messages, choose the button, open the Questions tab > Message. Alternatively, right-click the button > Insert > choose a message from the checklist:
After that, you may customise suggestions messages as you would like.
Add Occasions – Actions
To make any object interactive, it’s important to add occasions – actions to it. Button objects are the identical. By default, a button object doesn’t have any occasions – actions. Nonetheless, while you add suggestions messages to it, ActivePresenter 9 will robotically add occasions – actions to make the message show within the output.
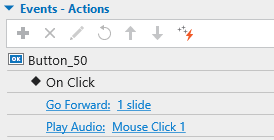
Within the above instance, when learners click on the Begin button, the presentation will navigate to the following slide. Plus, the mouse click on audio will play concurrently. To try this, choose the Begin button and navigate to the Properties pane > Interactivity > Occasions – Actions > add the On Click on occasion > add the Go Ahead and Play Audio actions as follows:
In addition to, ActivePresenter 9 affords 7 different kinds of occasions that assist the button work the way in which you need.
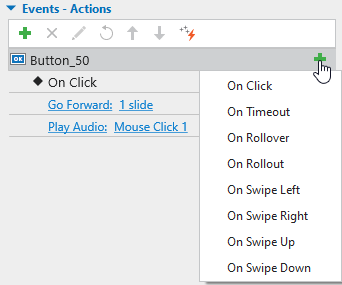
- On Timeout: Happen when learners don’t reply inside the time restrict.
- On Rollover: Happen when the mouse rolls over it.
- On Rollout: Happen when the mouse rolls out of it.
- On Swipe Left: Happen when learners swipe throughout it to the left on the contact display screen.
- On Swipe Proper: Happen when learners swipe throughout it to the precise on the contact display screen.
- On Swipe Up: Happen when learners swipe throughout it to the highest on the contact display screen.
- On Swipe Down: Happen when learners swipe throughout it to the underside on the contact display screen.
That’s the way to add and work with button objects in ActivePresenter 9. Obtain the most recent model proper now and make your programs extra interactive.

In addition to, observe our Tutorials web page and YouTube channel for extra useful articles and movies.
See extra: