
INTRODUCTION
Expensive reader, I hope this text finds you properly!
My identify is Andrej Jandrić, and I am a 24-year-old self-taught 3D character modeler from Zagreb, Croatia. I am a graduate of the School of Graphic Arts, and my dream is to work in an animation studio in the future.
I have been modeling for five years now, and I am very loyal to Blender. The abundance of enjoyable tutorials, programs, and an enormous group has stored me engaged on this wonderful software program. For the previous couple of years, I have been focusing totally on character modeling and design.
Come and take a dive with me into this breakdown of the piece I’ve created known as “Cheers!”.
INSPIRATION
Whereas scrolling via Pinterest, I got here throughout a really intriguing sketch. It had a chic man in a swimsuit with a scheming, charming sort of look, toasting along with his martini. What I actually beloved about this sketch was the quantity of character the character had, and the drawing was very strong when it comes to shapes and varieties. I instantly knew that I wished to mannequin him!
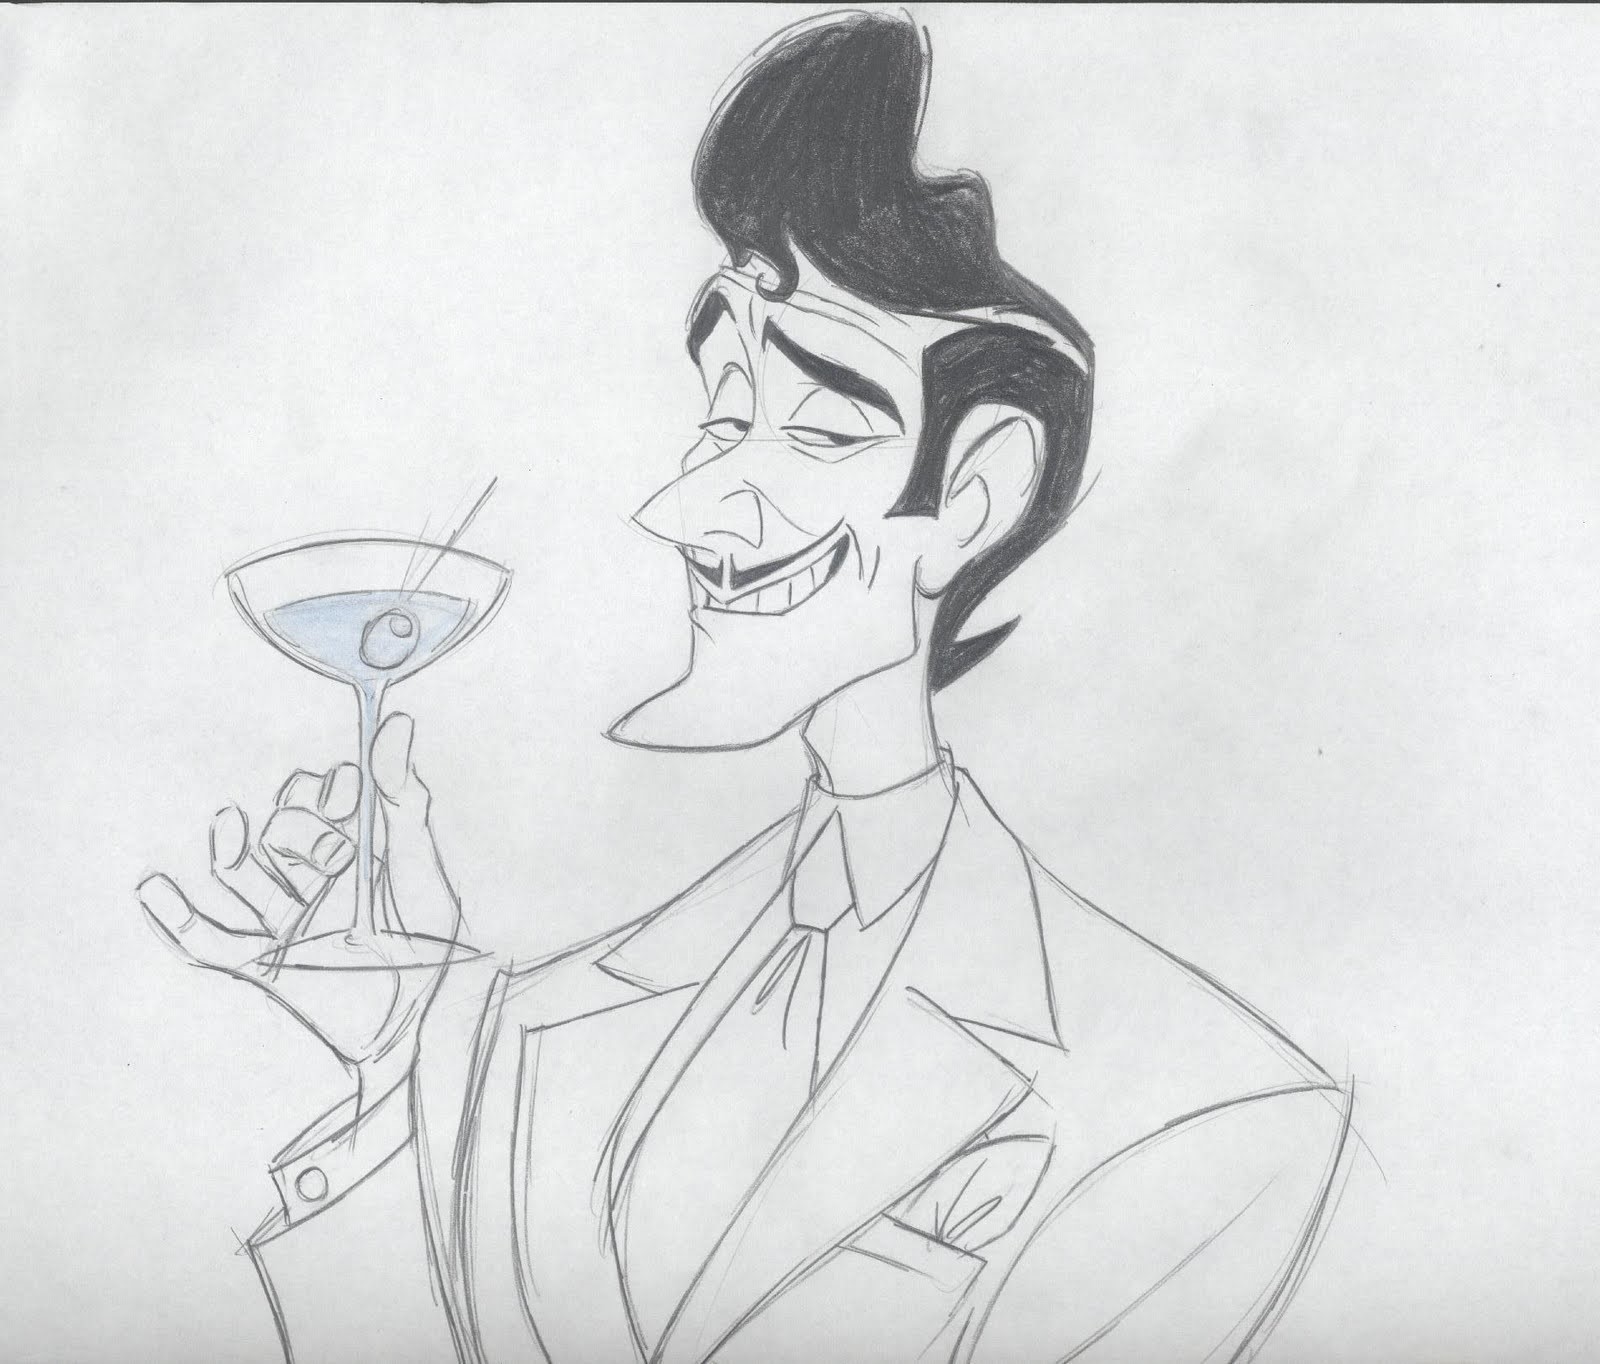
Sadly, I could not discover the unique artist. The Pinterest description did not have any references, and a Google reverse picture search did not give me any outcomes. Nevertheless, contemplating the model of the drawing, it might have been made by Sandro Cleuzo, though I do not wish to give any false credit.
SCULPTING
The sculpting part of the workflow is my favourite! It means that you can roughly form out your character, and with some primary vertex colours, it is easy to visualise it early on.
I begin with low decision, and as I sculpt and add extra element, I improve the geometry. It is a good suggestion to maintain sure components separate for the aim of simpler retopology and texturing. Essentially the most noticeable half that I’ve stored separate is the arm. Since we do not actually see the character’s decrease components, it wasn’t essential to merge the arm and the physique.
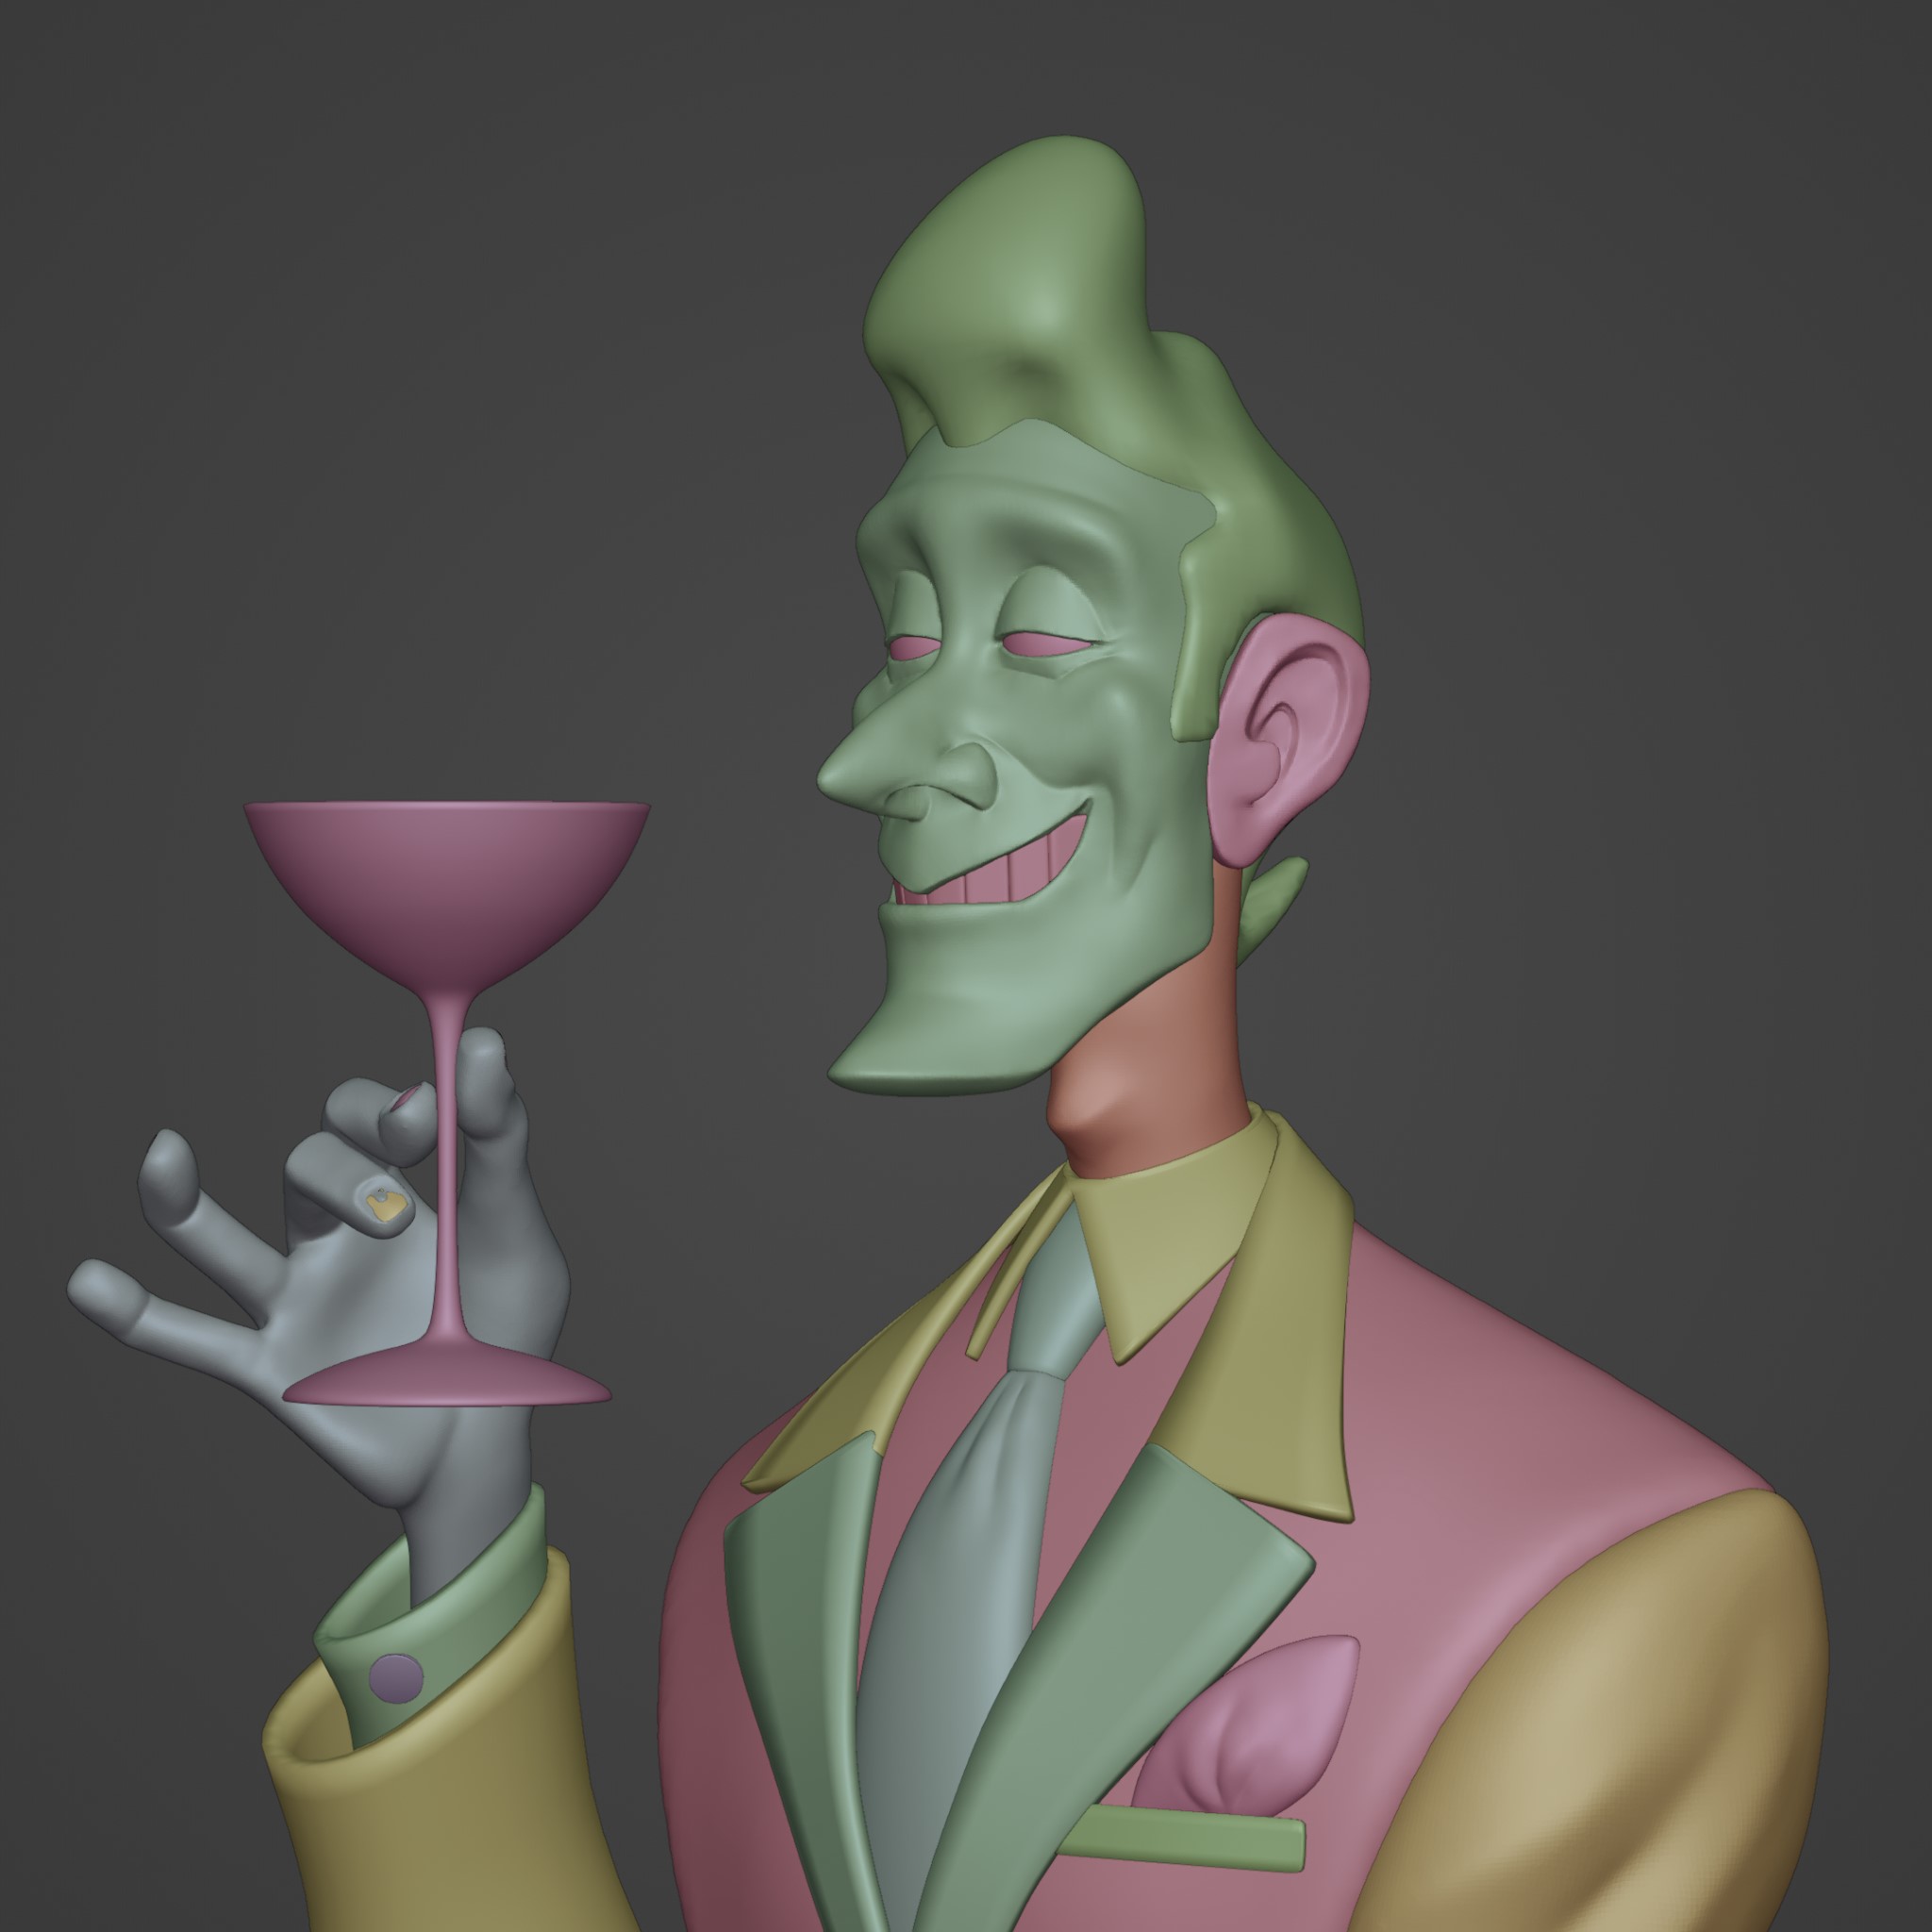
At this level, I am conserving every part symmetrical. It is a lot simpler to unwrap and texture the character that approach. Symmetry is the artist’s greatest buddy! Later, with regards to organising the scene and including particulars, I will introduce asymmetry to the expression.
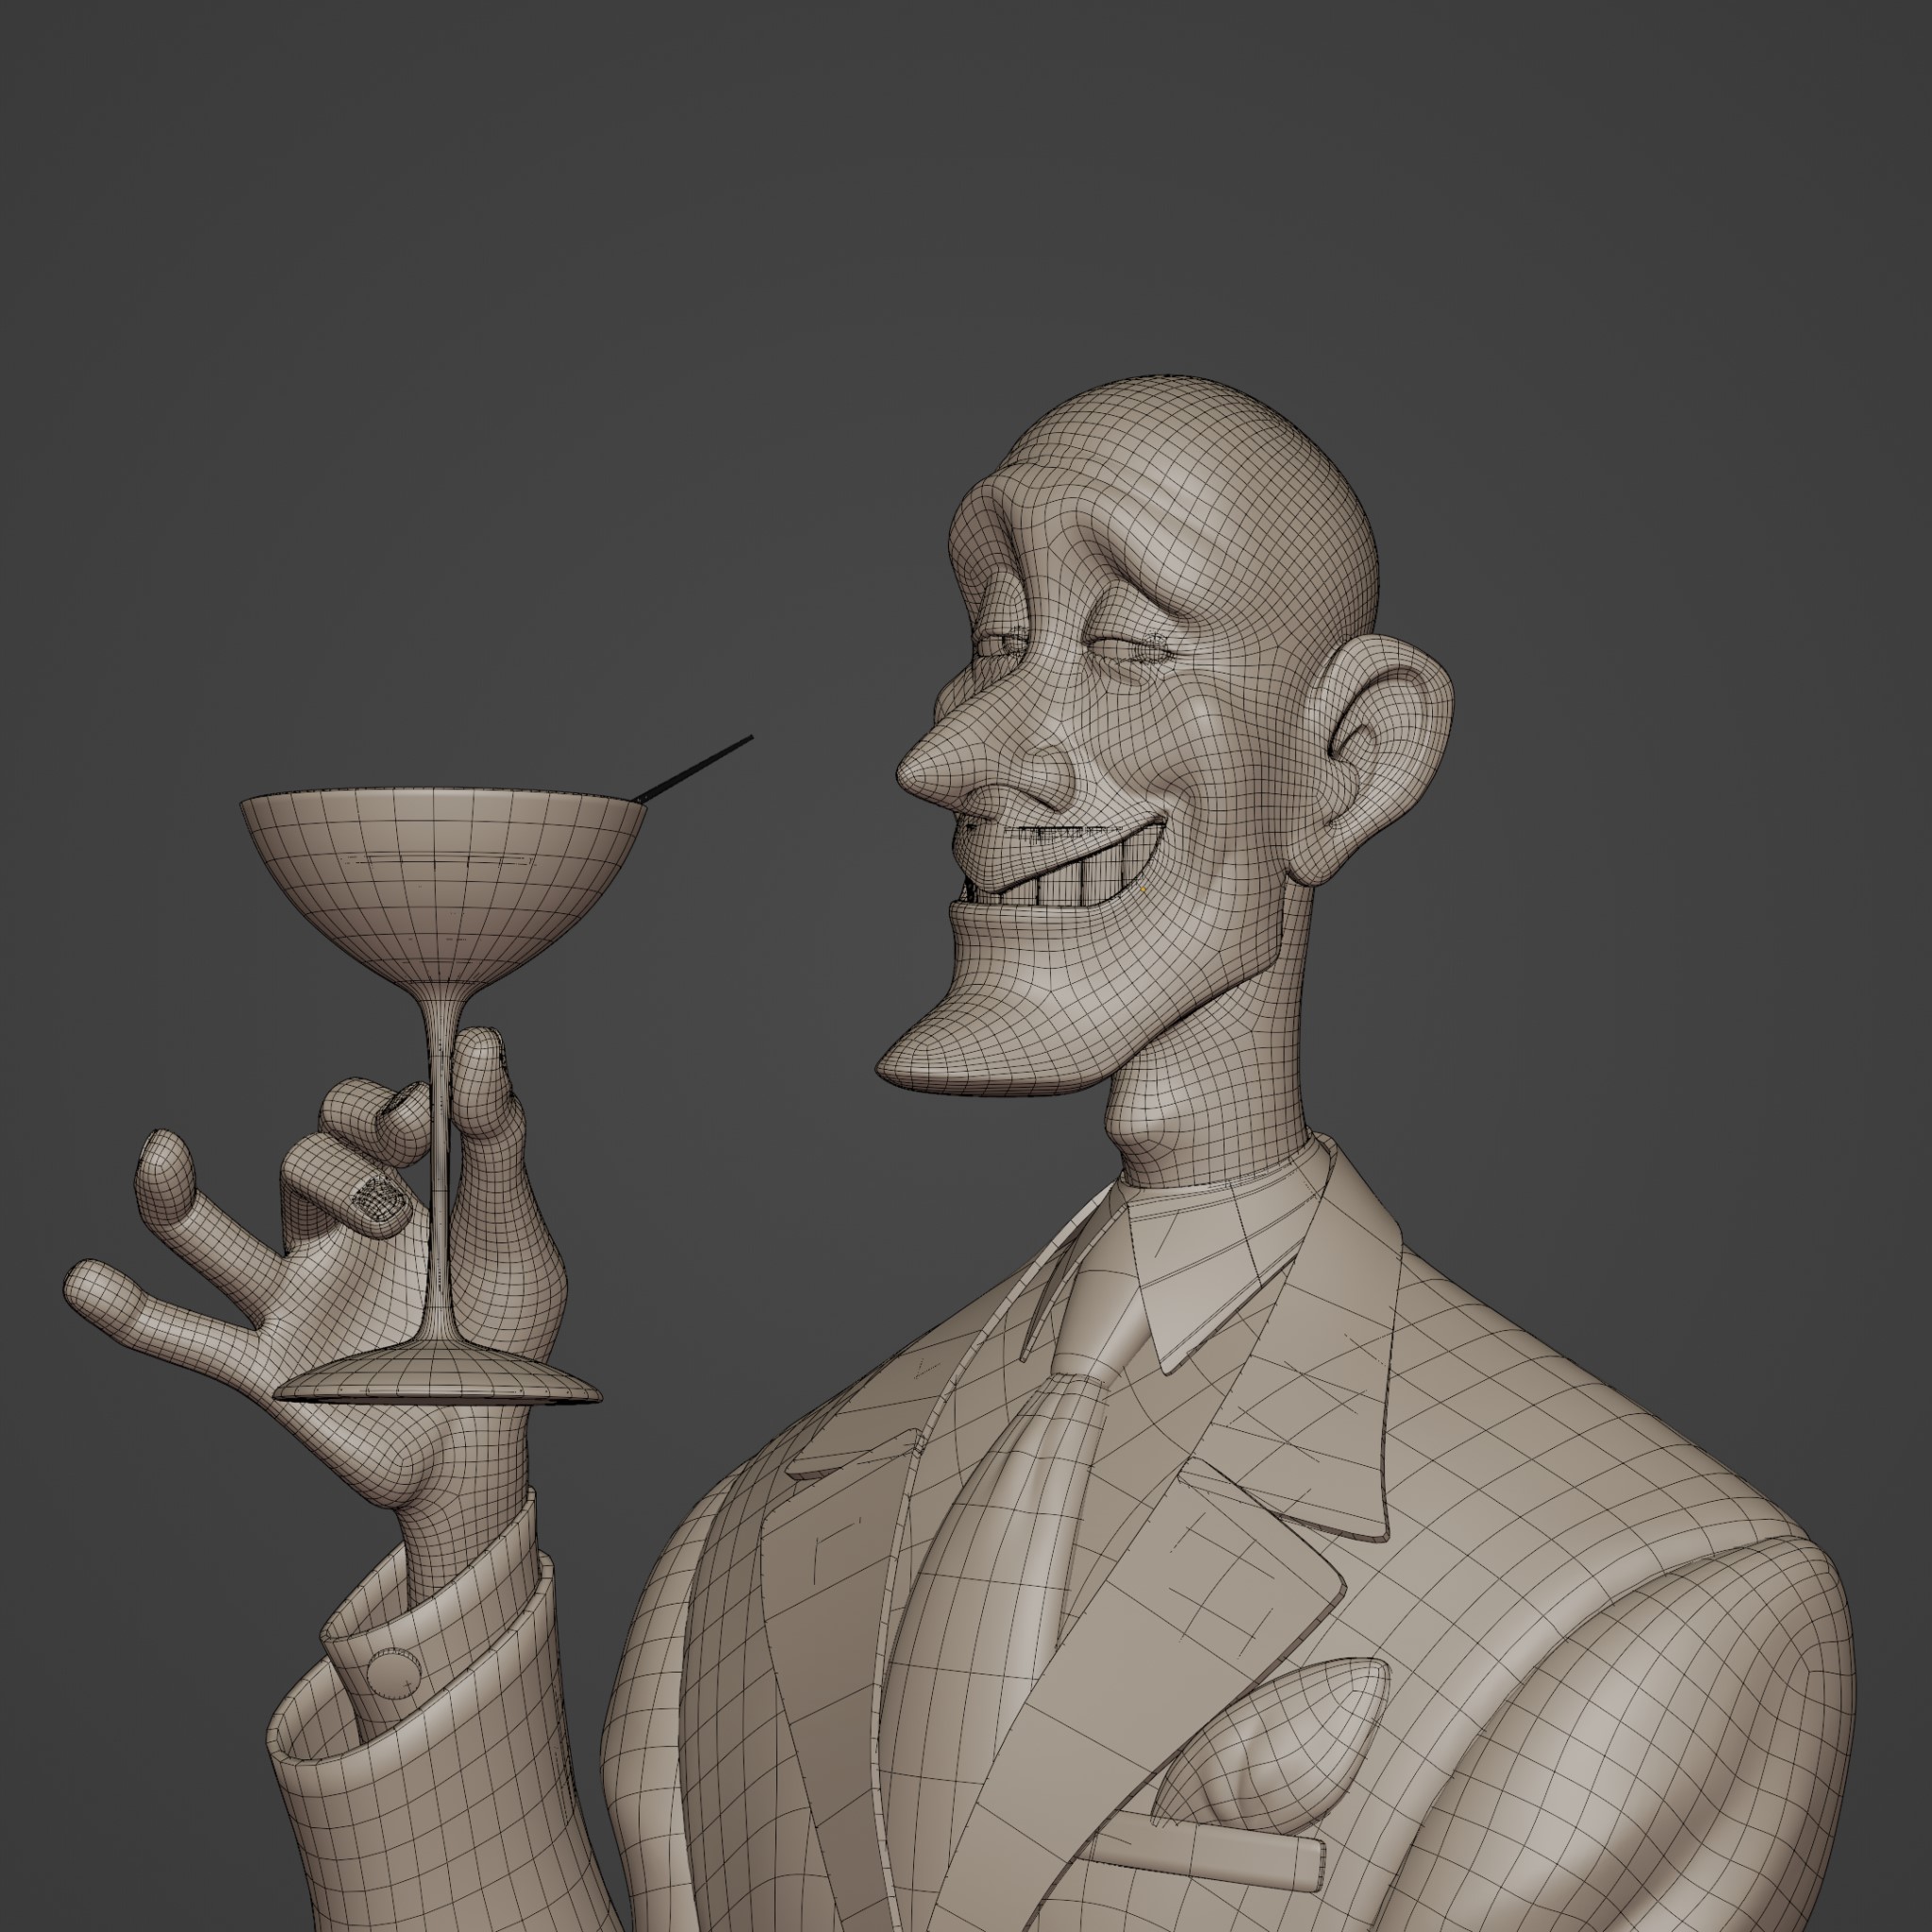
RETOPOLOGY
Retopology is a type of steps that each sculptor hates! Effectively, possibly the phrase “hates” is somewhat too robust, but it surely’s definitely a really lengthy and tedious course of, particularly if I do know that I will not rig and animate the character. That being stated, I have a tendency to make use of the best invention in human historical past – the Quad Remesher addon. I completely love this plugin and use it on a regular basis as a result of it delivers glorious ends in a matter of seconds!
TEXTURING
Texturing characters is at all times a enjoyable course of. It is the half the place you may actually present your consideration to element. The purpose for this character was to make him clear and tidy. I mixed texture portray, procedural shading, and free PBR textures to arrange supplies for this man. I took a while to experiment and play with it till I used to be pleased with the ultimate outcomes.

On the whole, I used a primary setup for shading, together with coloration maps, roughness/specular maps, and regular maps. For the pores and skin, I spent extra time on coloration and roughness by texture portray, whereas for the conventional map, I solely used a procedural noise texture.
GROOMING
The hair grooming half was very irritating at first, however the outcomes have been definitely rewarding. Previous to this mannequin, I had some minor expertise with the hair system in Blender, however nothing too fancy. So I took this challenge as a chance to degree up my grooming abilities. There was a whole lot of trial and error throughout this course of, and I needed to tweak many values within the settings. I used to be simply taking part in with it and looking for what works for this character and suits my workflow.
Throughout this time, I did a whole lot of rendering and took the prospect to play with the colours, particularly for the outfit.
RENDERING PHASE
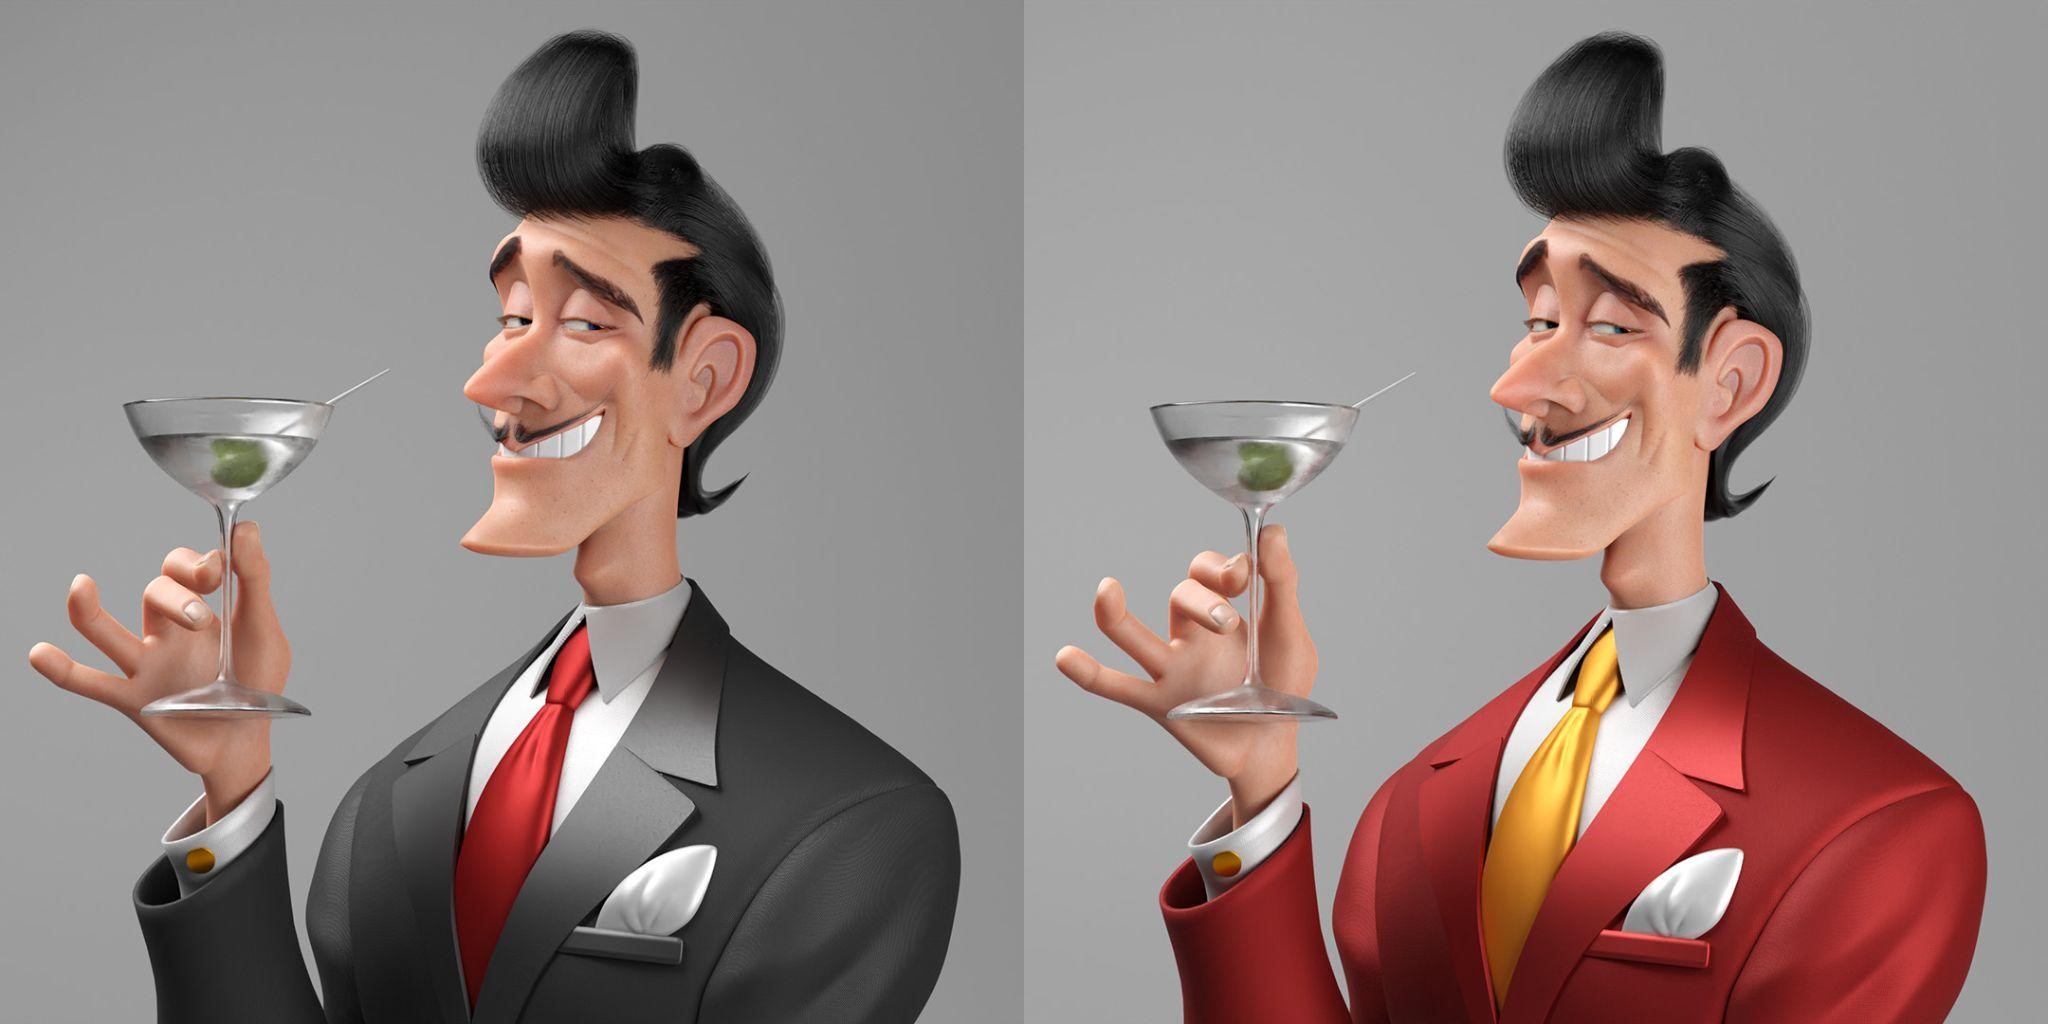
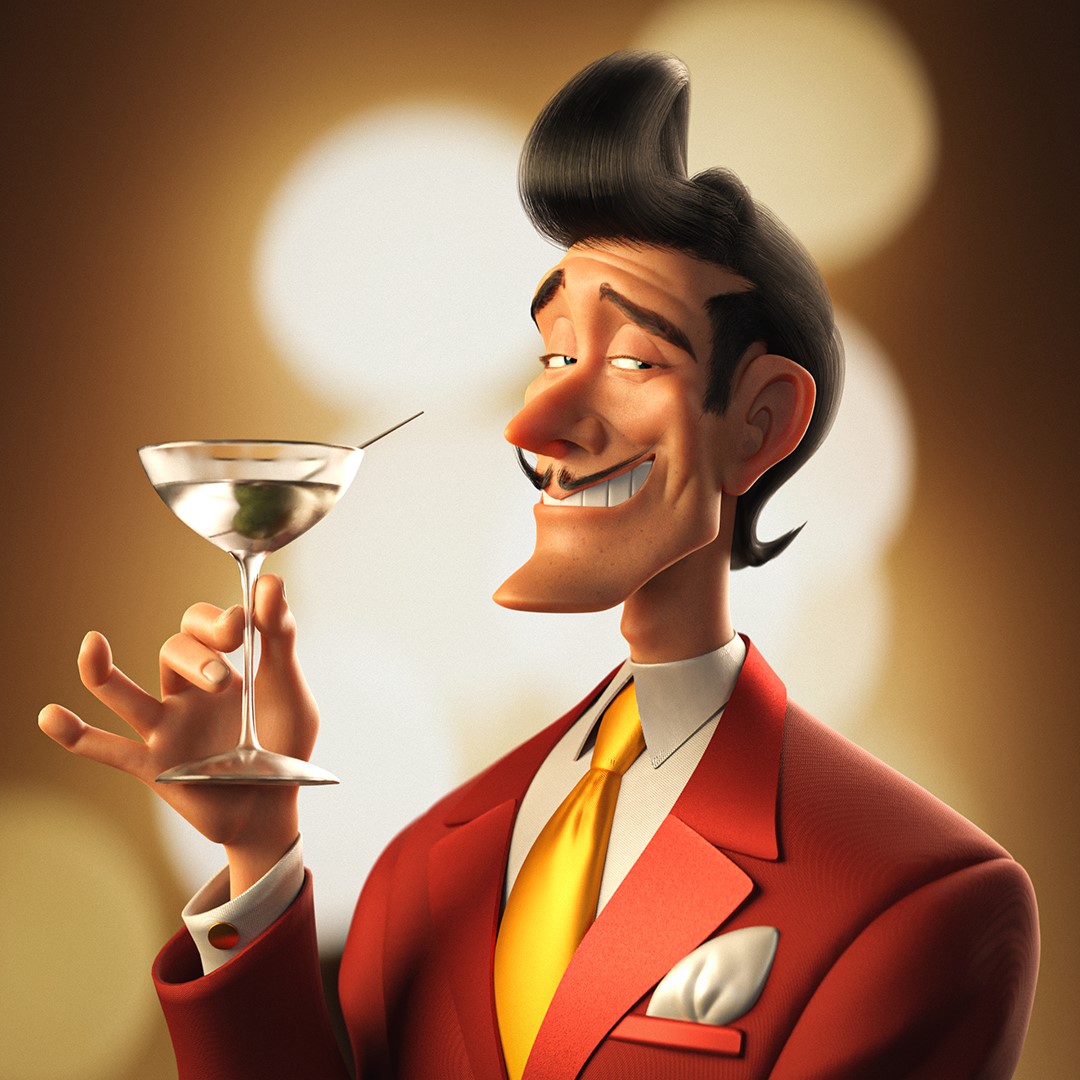
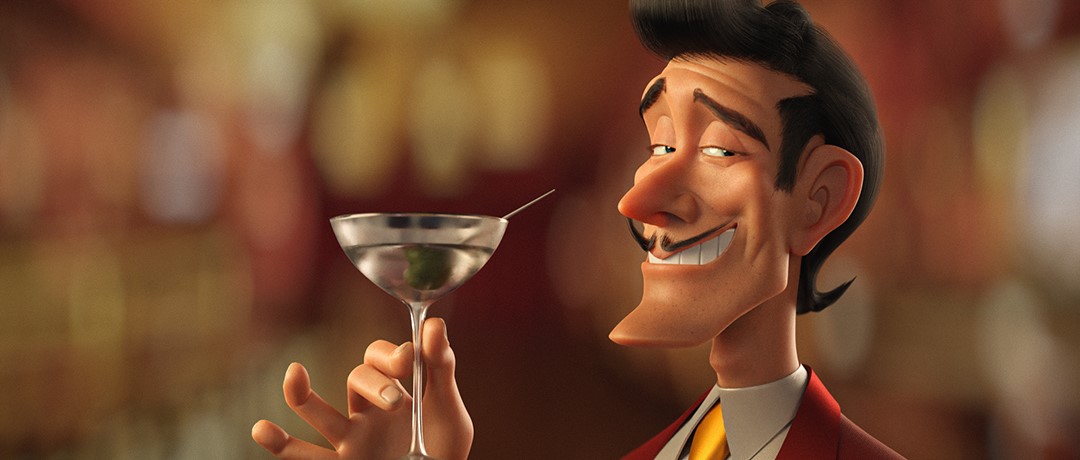
And eventually, the rendering part! When this man, I feel most individuals would agree that he is in some form of luxurious inside. One other factor I knew I wished was a cinematic search for the ultimate render. Contemplating these targets, I began experimenting with numerous sorts of lighting and framing.
In the long run, I ended up with two backgrounds, each sort of luxurious with heat lights, and two sorts of framing. One sq. framing for social media and one widescreen framing for that cinematic look.
RENDER – Cheers!

Thanks on your time. I hope you loved studying this text and located it helpful. I even have a thread on one other art work intimately on Blender Artists which you would possibly discover fascinating. It is known as Agent 327: Operation Opera Home, made for the “Make a Splash in Amsterdam” problem on Blender Artists.
Have a cheerful day!
In regards to the Artist
Andrej Jandrić, a 3D character designer and modeler. Aspires to work on 3D characteristic movies.