INTRODUCTION
My identify is Jeremy Andzembe Diagne, and I am a 3D character artist from Kyiv, Ukraine. I all the time beloved drawing after I was a child. I drew utilizing conventional and digital strategies, however my father launched me to 3D graphics after I was 19 years previous, and it was love at first sight. He modified my life!
My first 3D program was Blender model 2.49, and I used to be self-taught when there weren’t as many tutorials on YouTube as there are actually. I’m self-taught and did not take any lessons to be taught; this ultimately taught me to search for options by myself. Now I work within the pc video games trade, and my favourite software for work is Blender.
INSPIRATION
My inspiration, after all, was the Netflix TV present “Arcane.” I actually favored Mel’s character design and character. The group at Riot did a very good job on her picture, and I made a decision to attempt to re-imagine her with slightly extra realism.
It was vital for me to offer myself a brand new problem and create a personality from the world of Arcane moreover Jinx, who’s the most well-liked character. I needed to mix all of the information and expertise I had gathered over time and create a personality utilizing new instruments in Blender that I had mastered.
COMPUTER HARDWARE
Here’s a little bit about my {hardware},
I take advantage of a MSI GP76 Leopard laptop computer with an eleventh gen Intel(R) Core i7-11800H 2.30GHZ processor, and an NVIDIA GeForce RTX 3080 with 8GB of GPU RAM. Moreover, I’ve 32GB of RAM.
TOOLS
I used ZBrush for sculpting and Substance Painter for texturing. Then, I used Blender for the remainder, which incorporates micro detailing, grooming, UV modifying, modeling, rendering, and compositing. I additionally used Photoshop to shine some renders.
REFERENCES
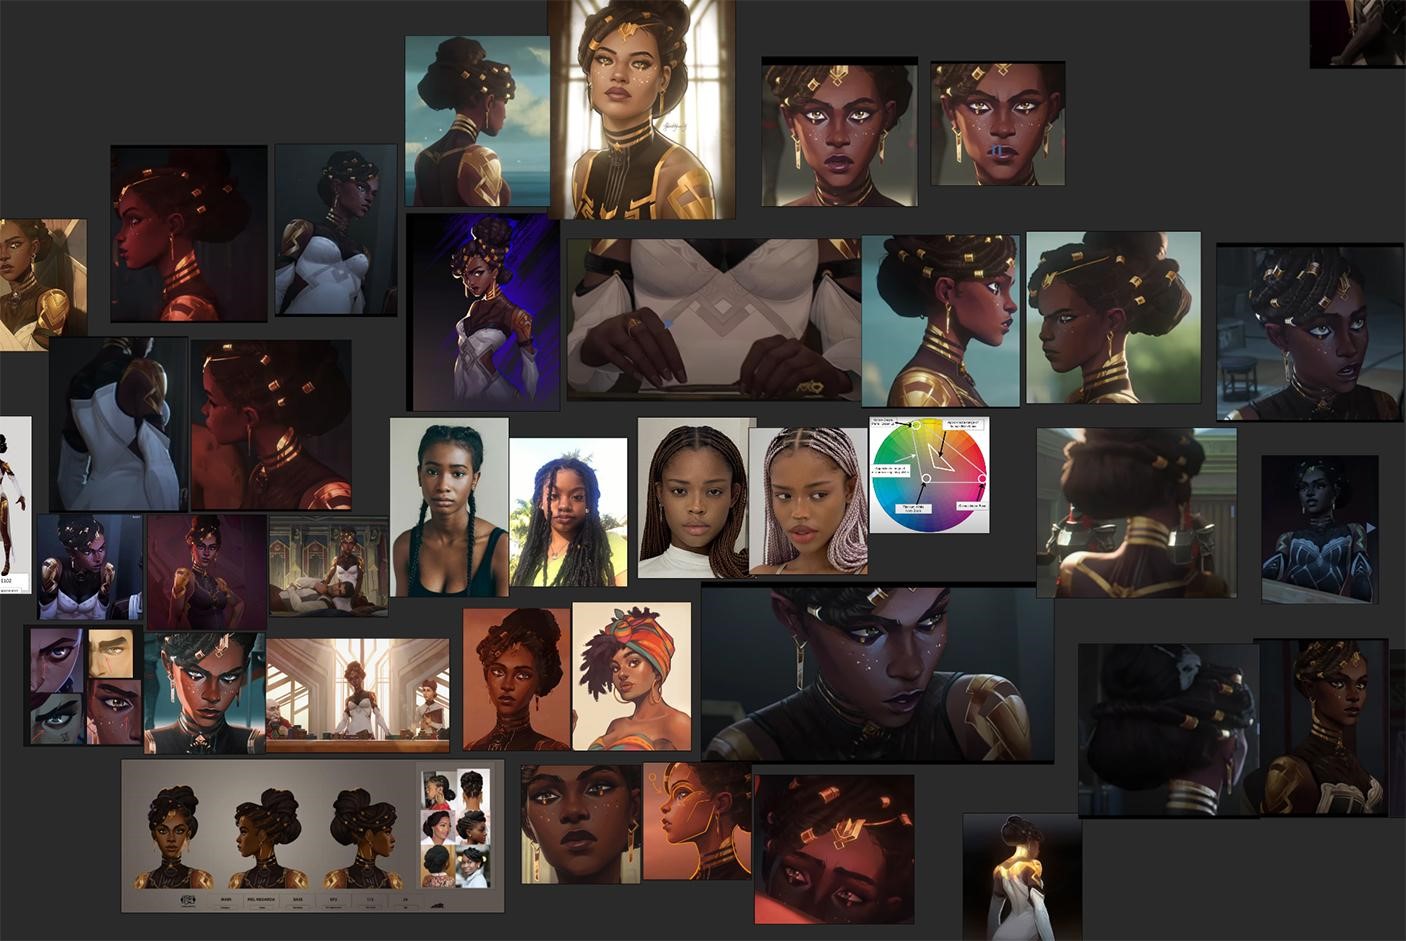
Work begins with accumulating references. I searched for lots of scenes with Mel and made prints from completely different angles and lighting, in addition to freely accessible work by different artists. Once you take a look at the movie from an expert perspective, you begin to discover many new particulars that you do not see when watching it usually.
SCULPTING
For private tasks, I all the time love to do all the pieces from scratch. I took a easy sphere as a foundation and began with the pinnacle. It is crucial for me to get into character and comply with the types and shapes. I persist with the rule of going from normal to particular.
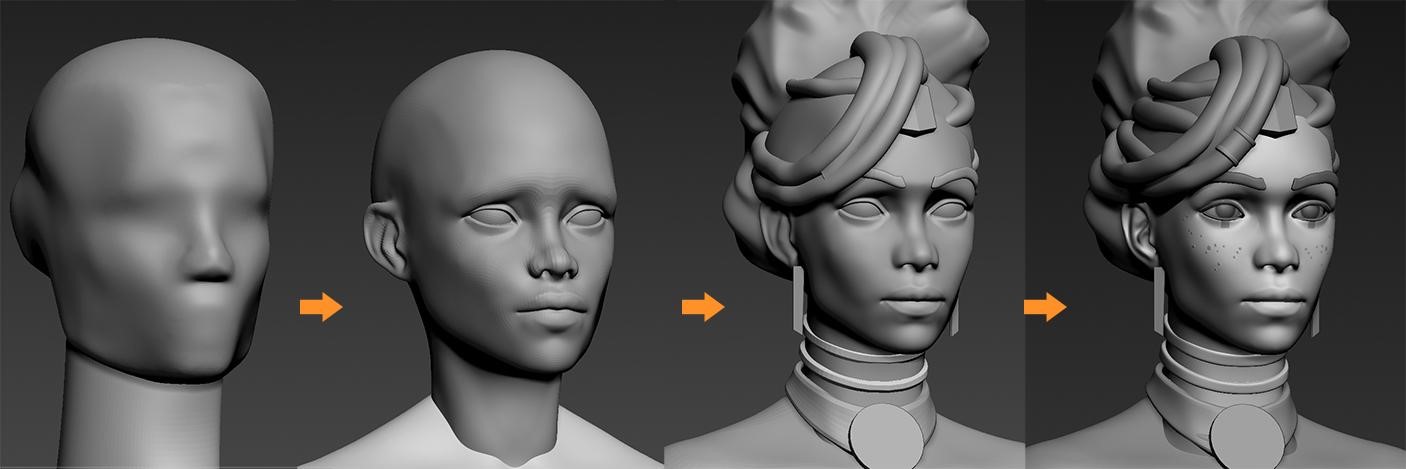
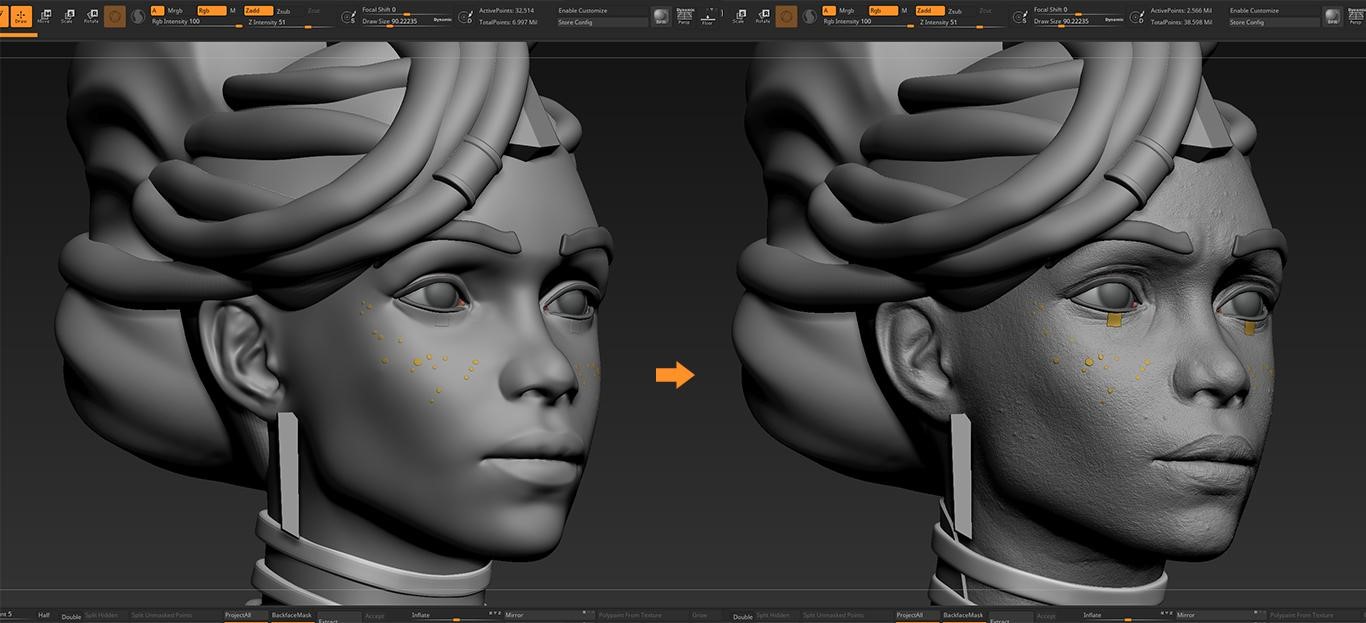
As soon as I perceive the bigger shapes I’ve created, then I can proceed to the main points, which offer aid to the eyes. The subsequent purpose was so as to add wrinkles, pores, and micro particulars to the face. To keep away from sculpting all the main points by hand, I used the XYZ texture and projected it into Blender.
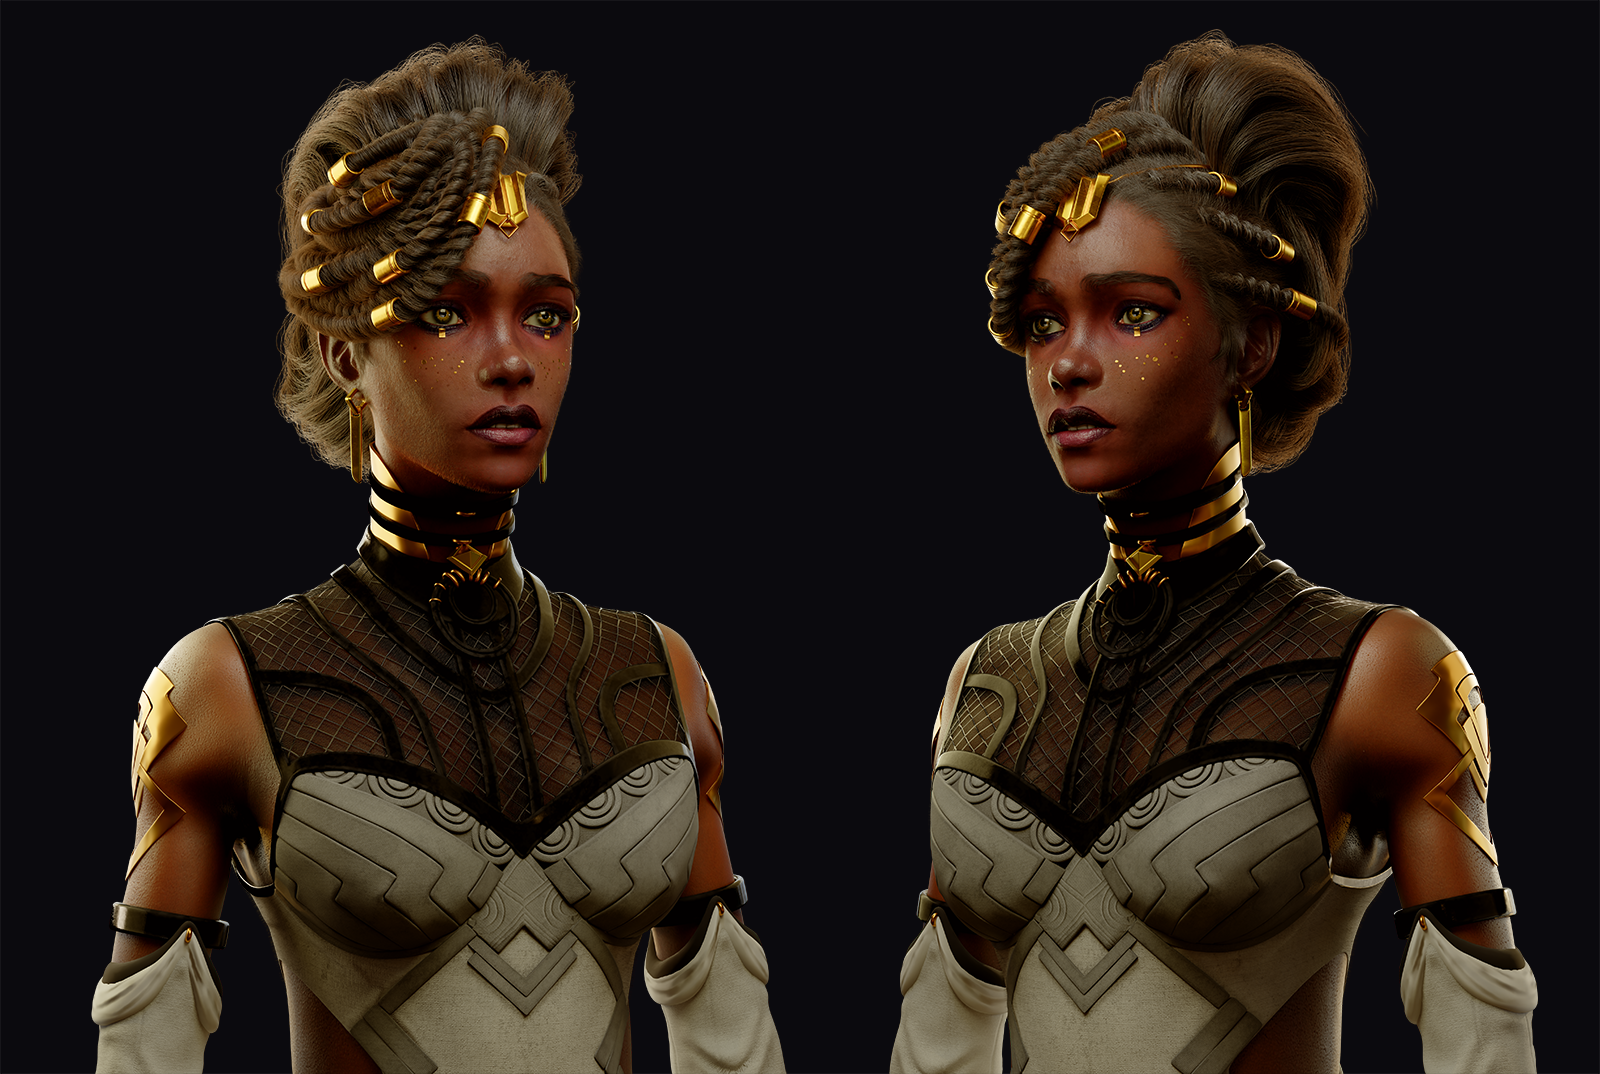
After engaged on the face intimately, I moved on to the remainder of the physique and clothes. I added shade and applicable supplies to boost the character’s look.
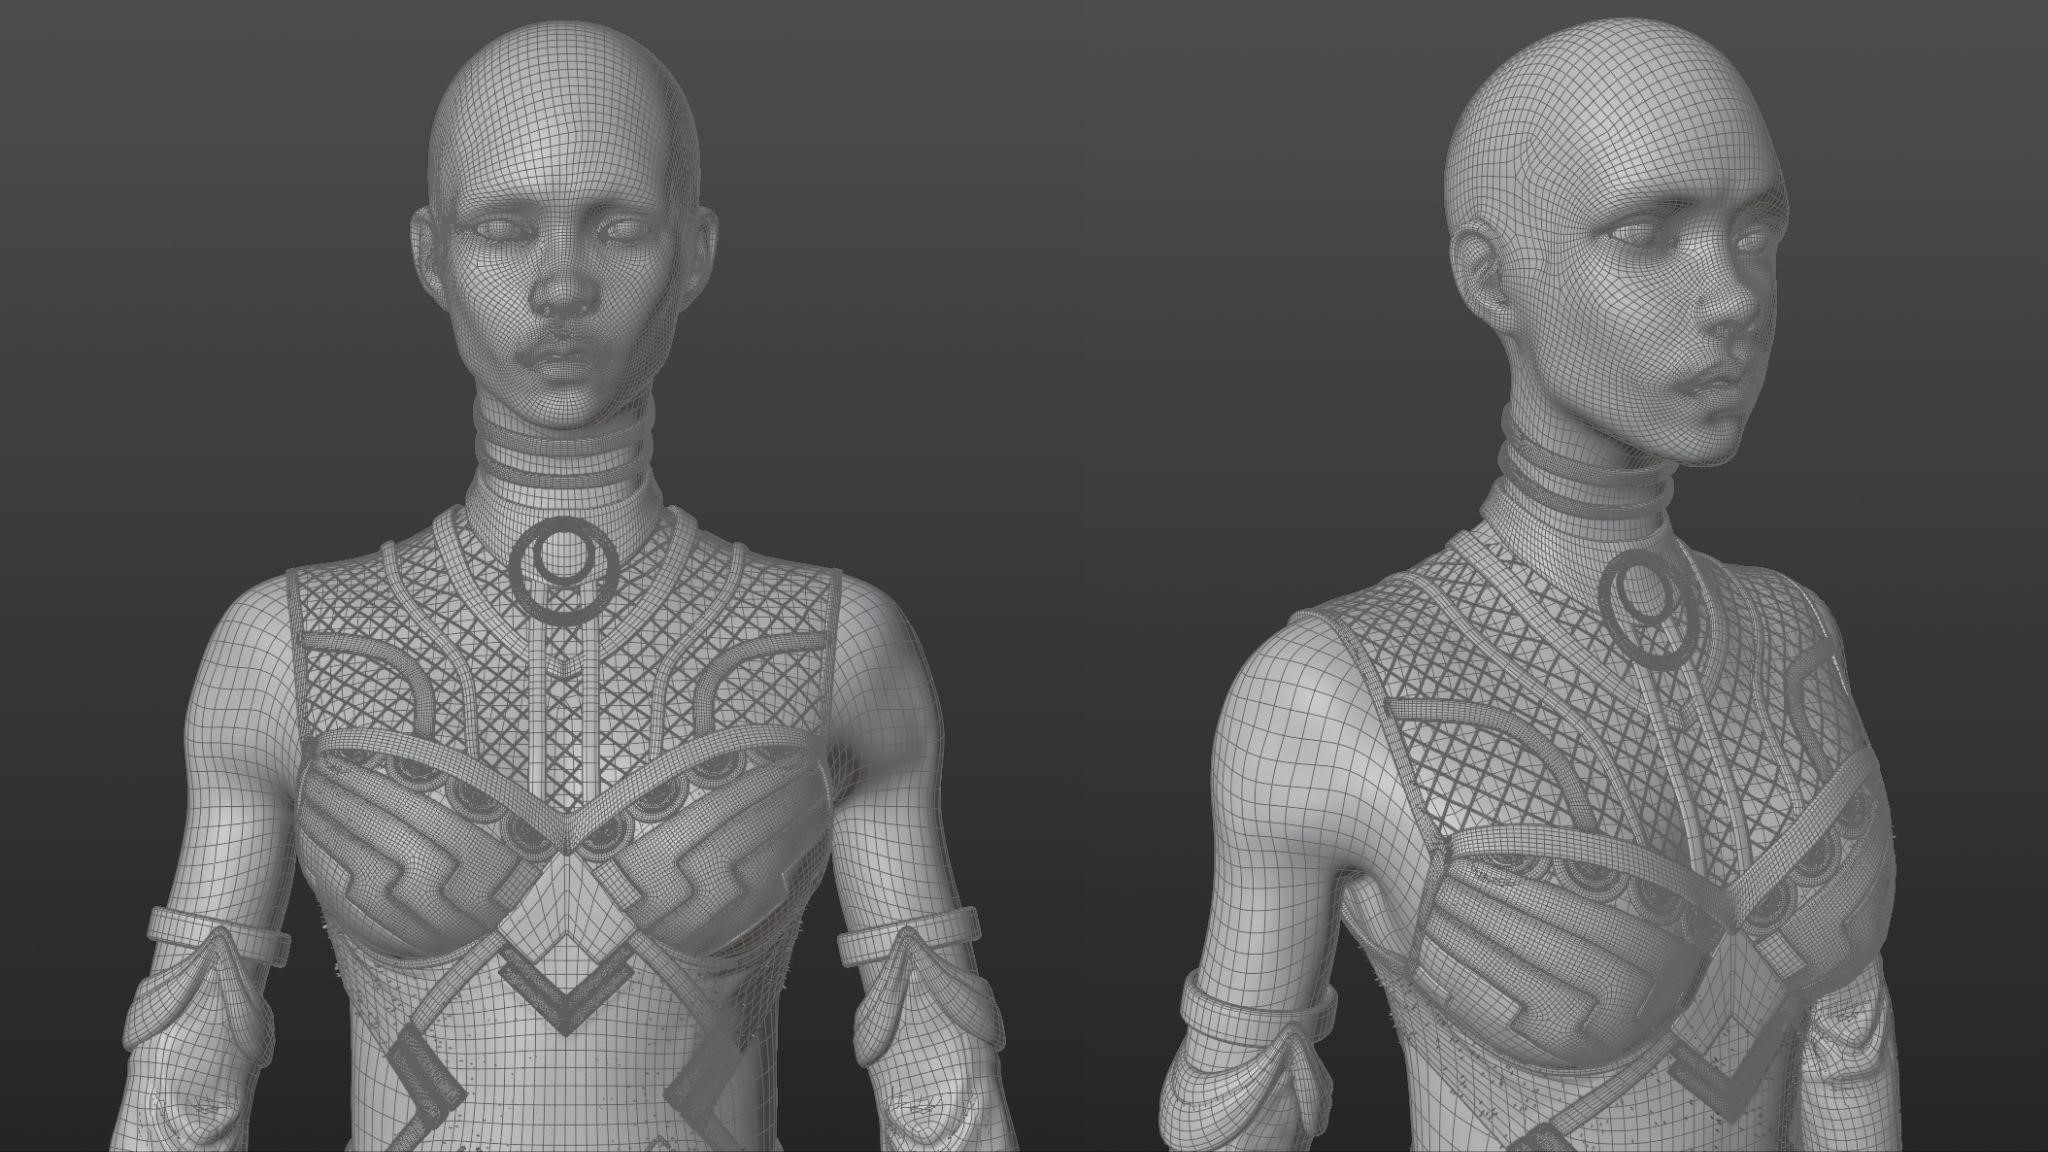
RETOPOLOGY
I used Blender for retopology, dealing with all the outfit and equipment. I then accomplished the UV unwrapping course of and added some subdivisions to retain sure particulars and switch displacement maps to the material, preserving folds and wrinkles.
DETAILS
I exported the ZBrush show card for additional work in Blender, which preserved all of the character’s particulars whereas decreasing file dimension throughout the course of.

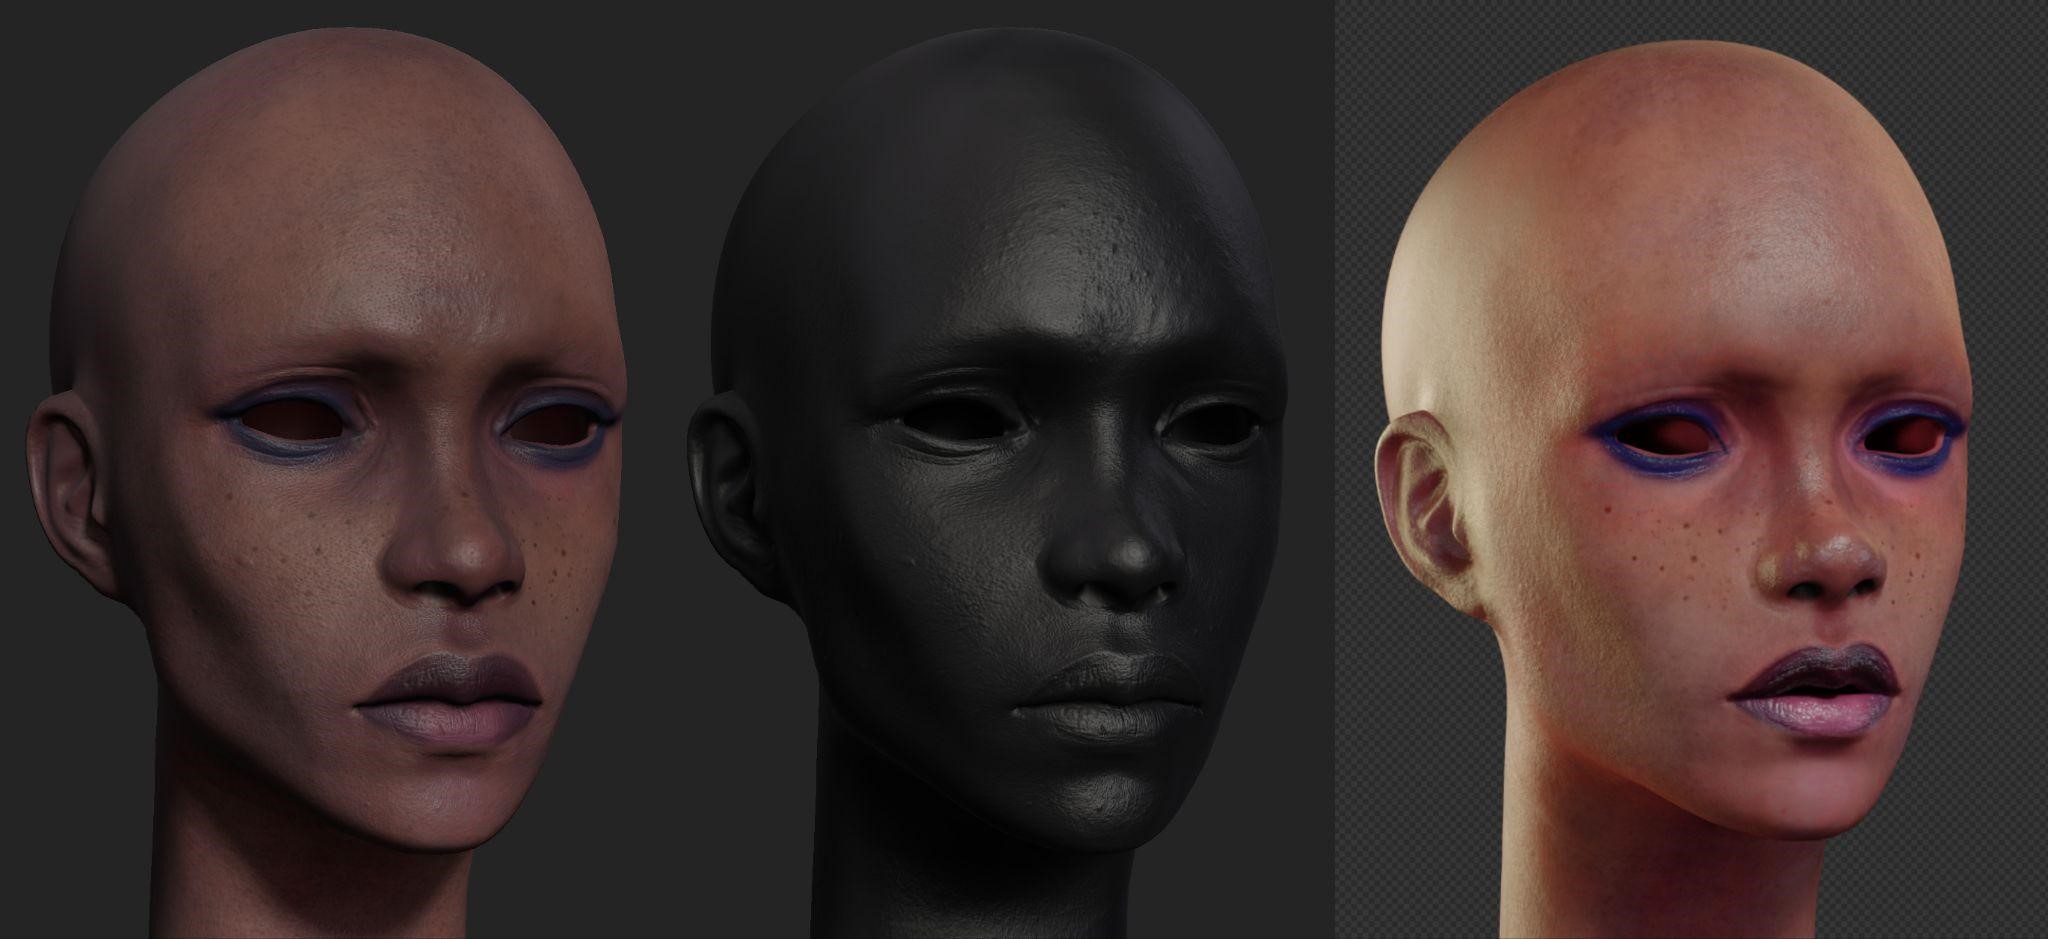
TEXTURES
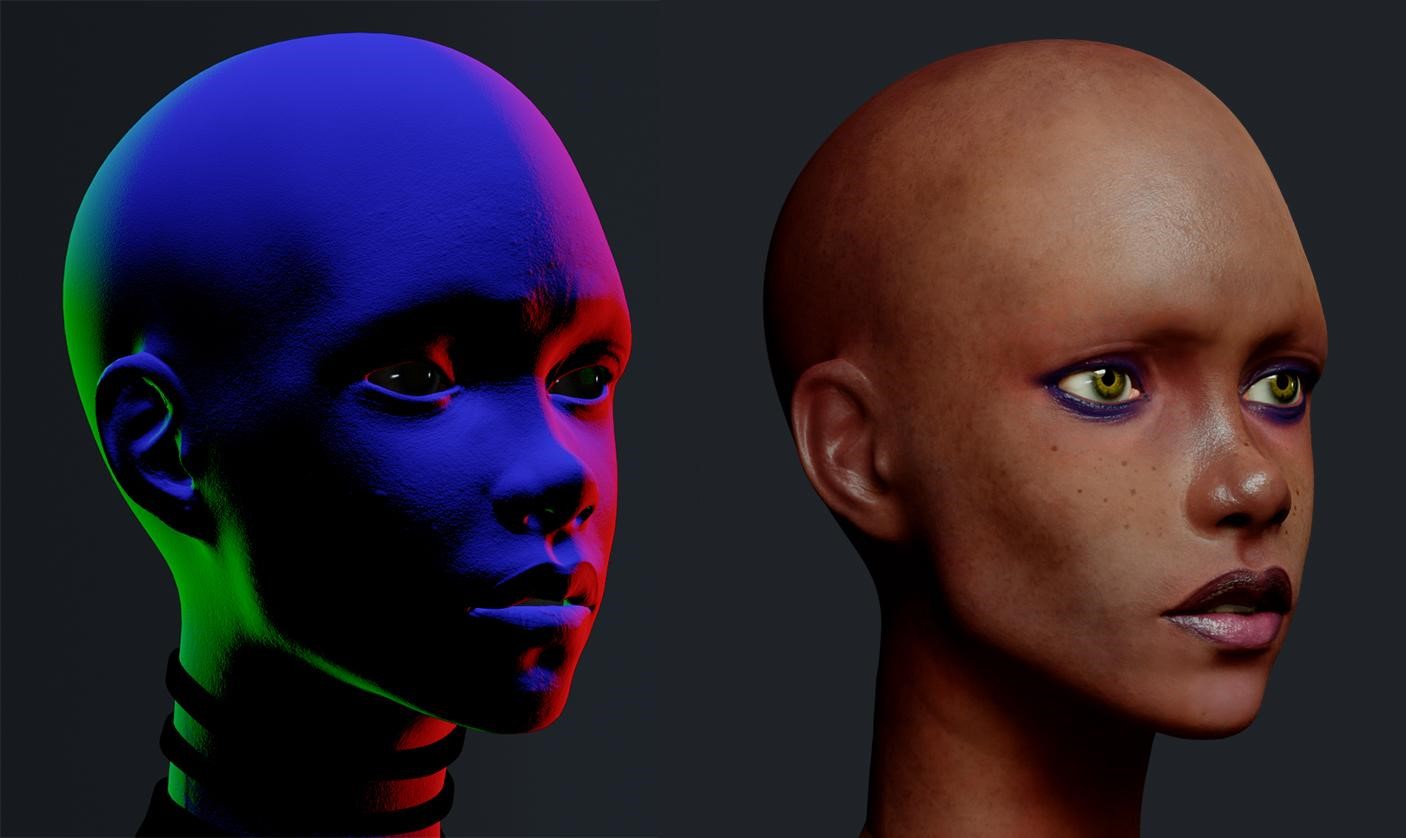
I created the pores and skin and clothes textures in Substance Painter, the place I additionally adjusted the roughness.

I painted the SSS Masks in Blender, which is actually the scattering shade map used for Subsurface Coloration within the Pores and skin Shader.
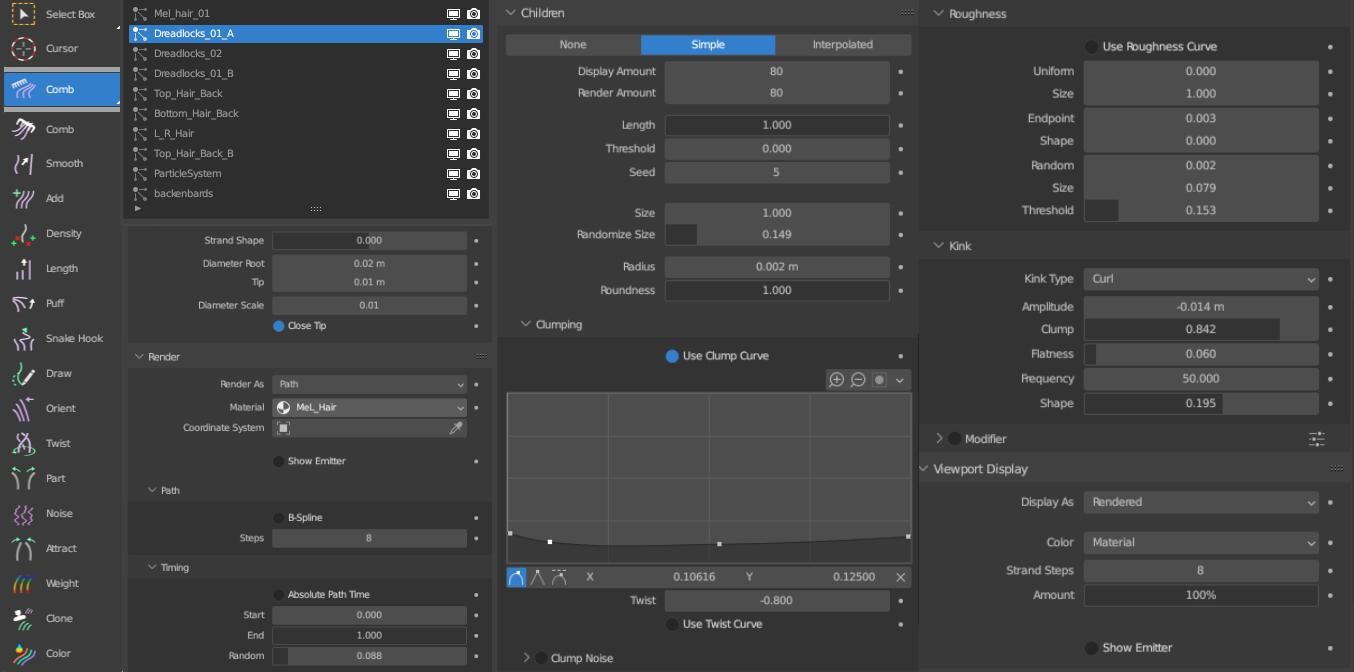
HAIR
I used the VFX Grace addon, which is a paid software however considerably hastens hair work. I utilized a number of instruments inside the addon for hair combing and styling.
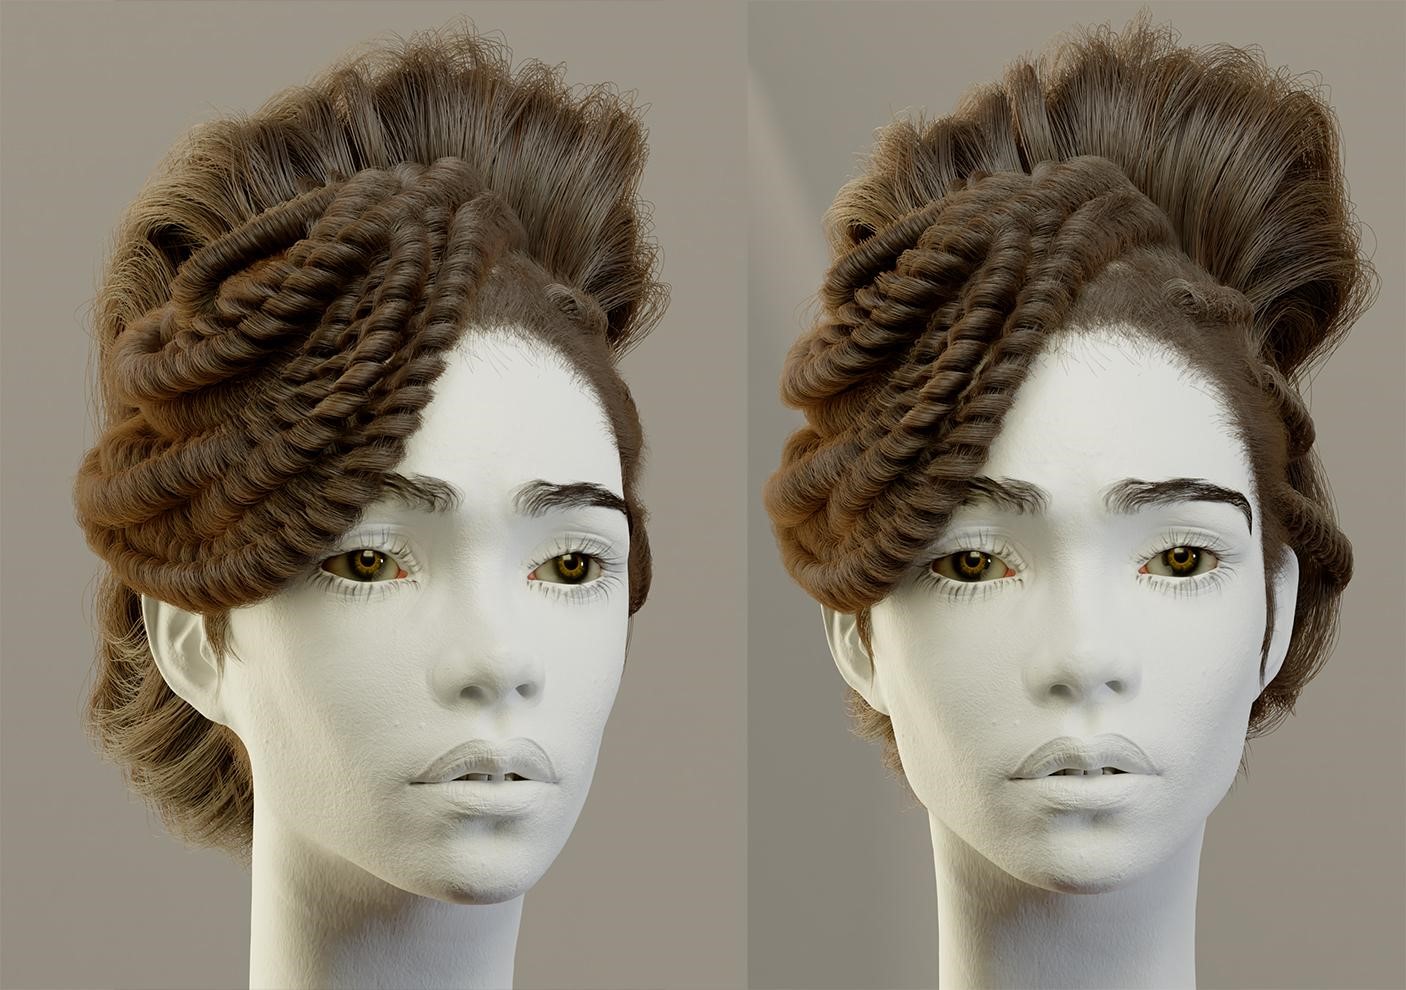
To take care of group in my work, I created a slot for every sort of hair in a single modifier window, making it simpler for me to modify between slots. As typical, I created a base for hair extensions, which means I made a scalp and divided it into teams of hair bundles.
MATERIAL
For creating the supplies, I made a decision to make use of the parametric technique. I achieved shade variations and pupil patterns for the eyes and pores and skin utilizing the node shader system.
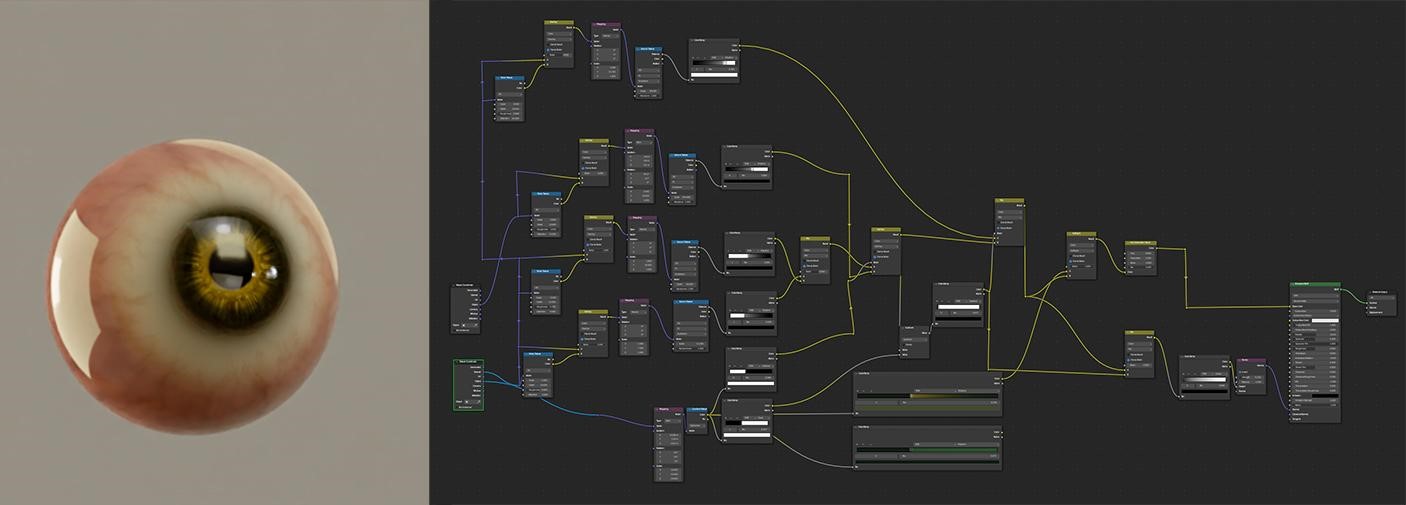
Moreover, I integrated node normals so as to add pore particulars to the pores and skin.
This allowed me to regulate the dimensions and depth at any time.

LIGHTING
I used two lights for this scene and an HDRI with minimal depth. To realize comfortable shadows and light-weight with out harsh transitions, I mixed an space gentle with a aircraft that had transparency and translucency utilized. I choose utilizing a number of gentle sources for fill, draw, and distinction.
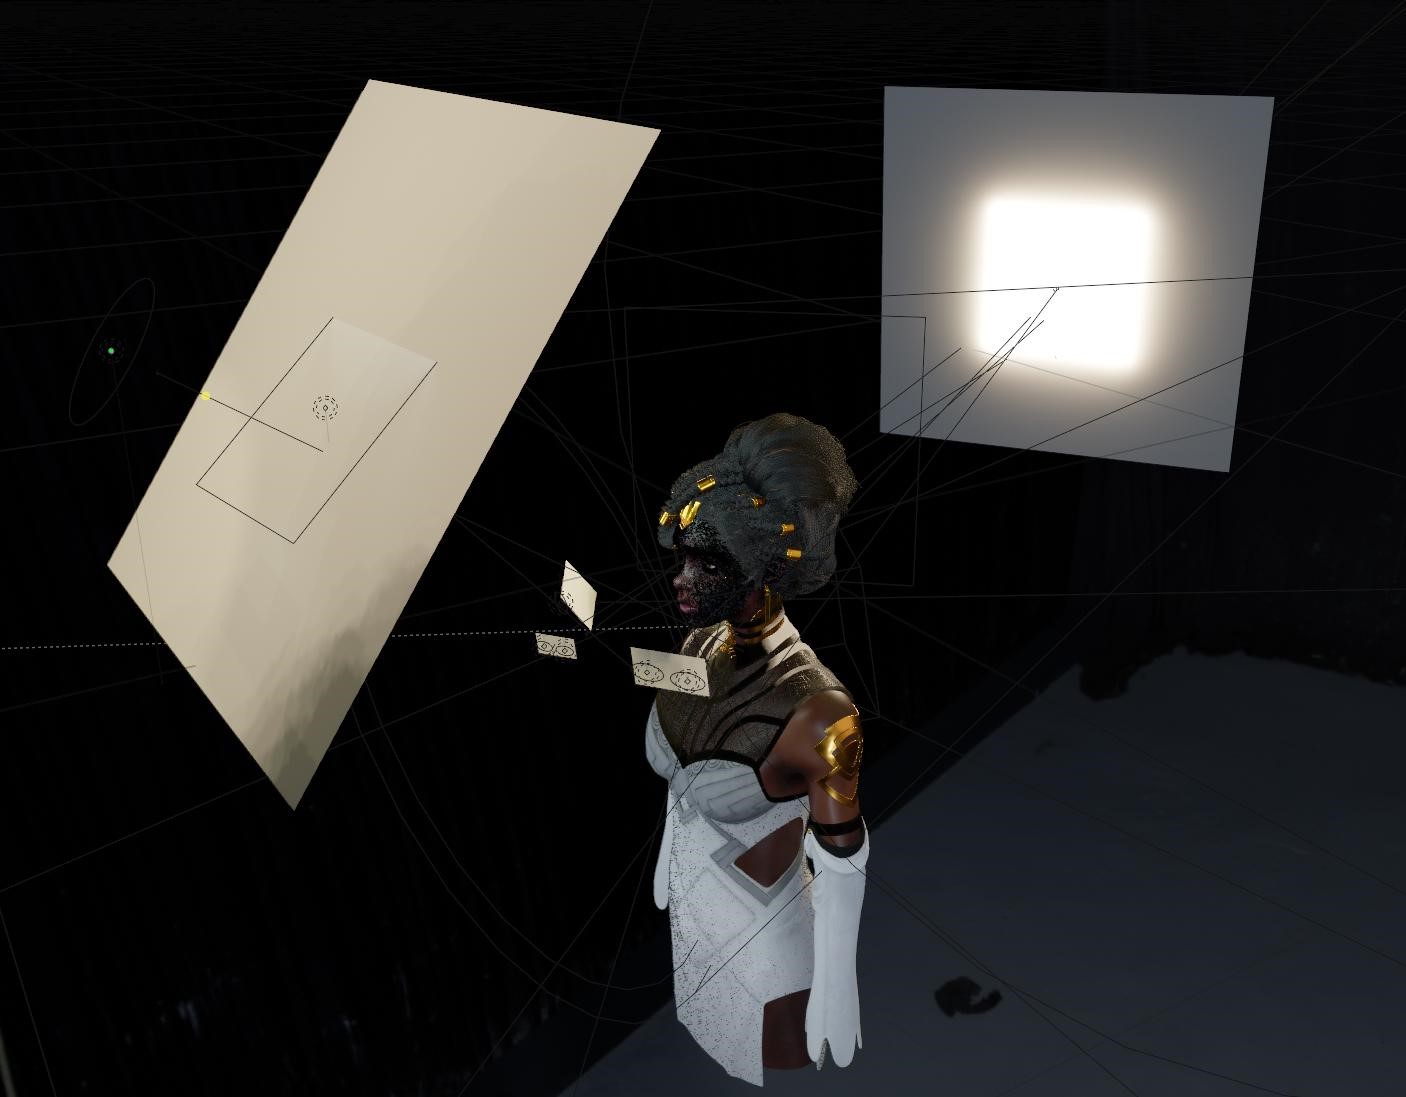
My images expertise got here in useful for this undertaking, and I used to be fairly happy with the outcome.
RENDERING
I rendered the scene in Blender’s rendering engine, Cycles, with 1024 samples. I used the Optix denoiser and a decision of 2048 x 2048, scaled to 250%. It took roughly 20-25 minutes on my 3080 GPU.
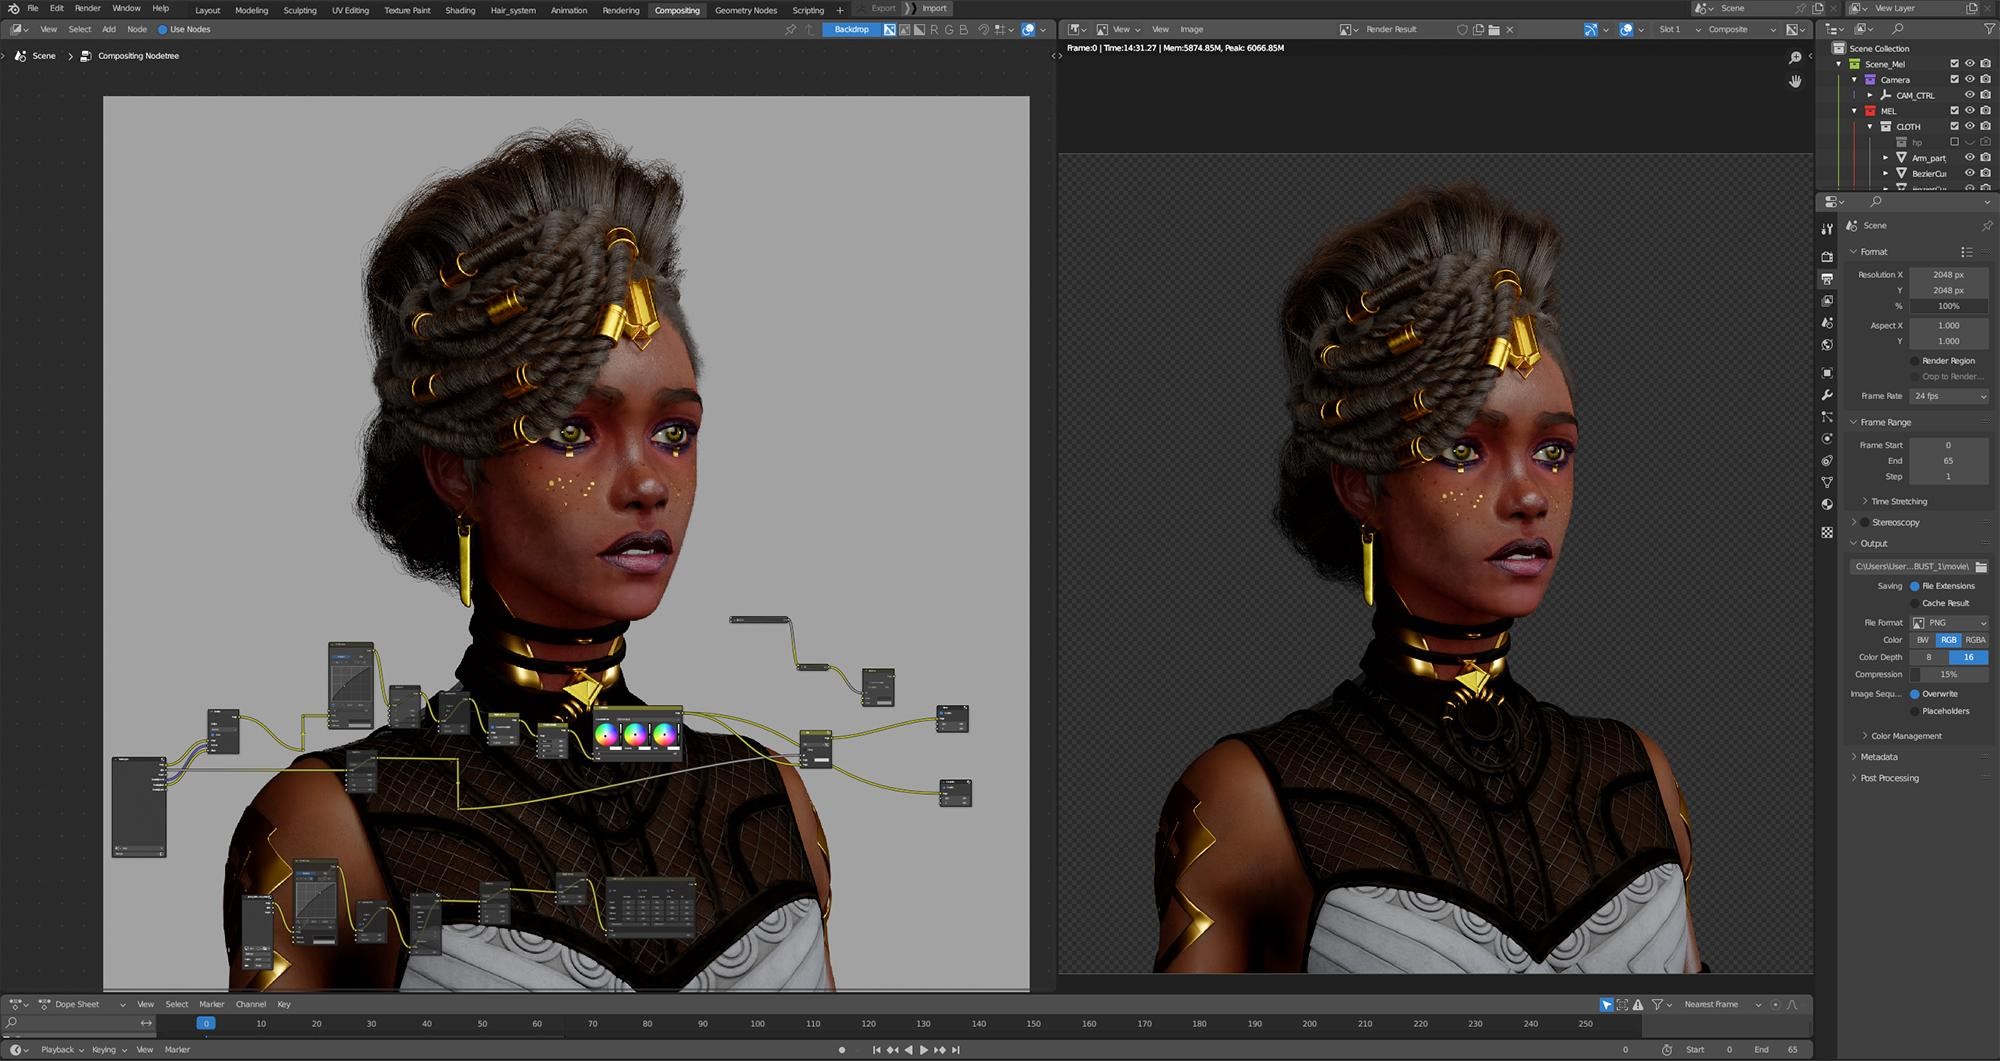
COMPOSITION
I rendered the output with transparency in Blender in order that I may add the background later. I carried out the composition and ultimate touches inside Blender. I added a radial gradient for the background and utilized results comparable to chromatic aberration, sharpness, grain, and a delicate glow.
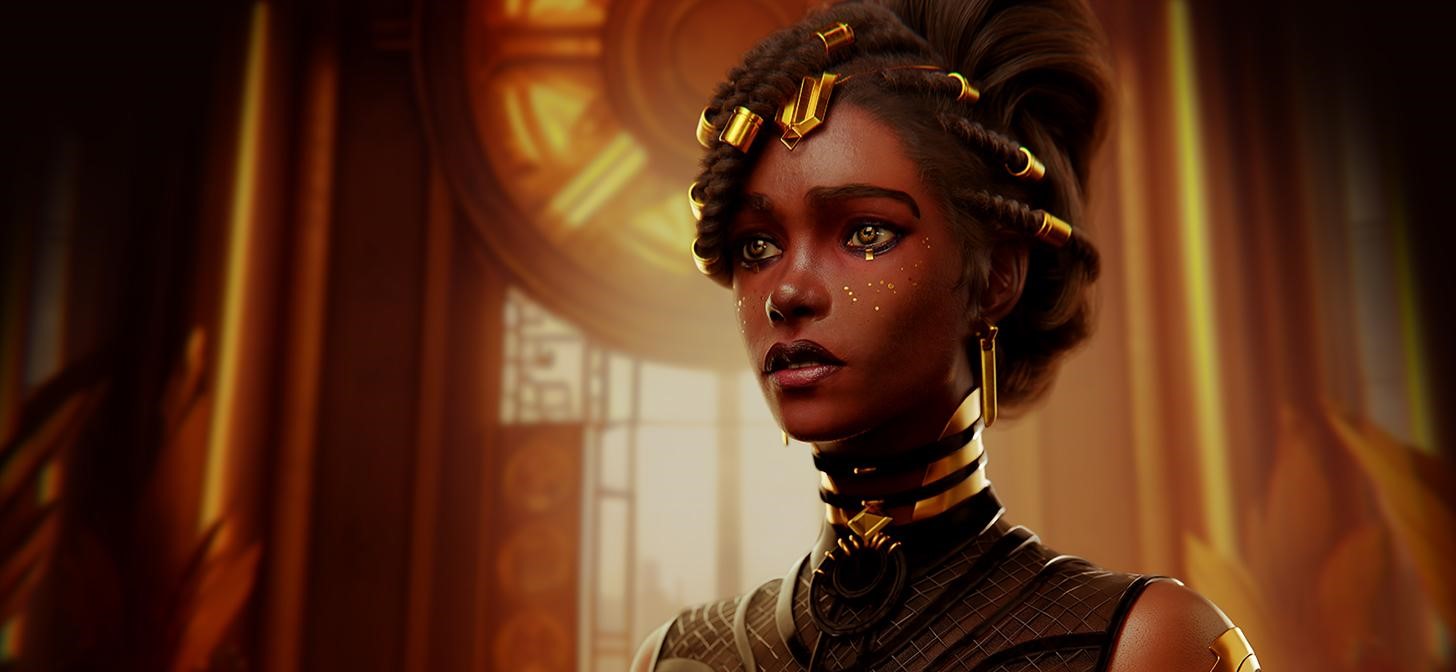
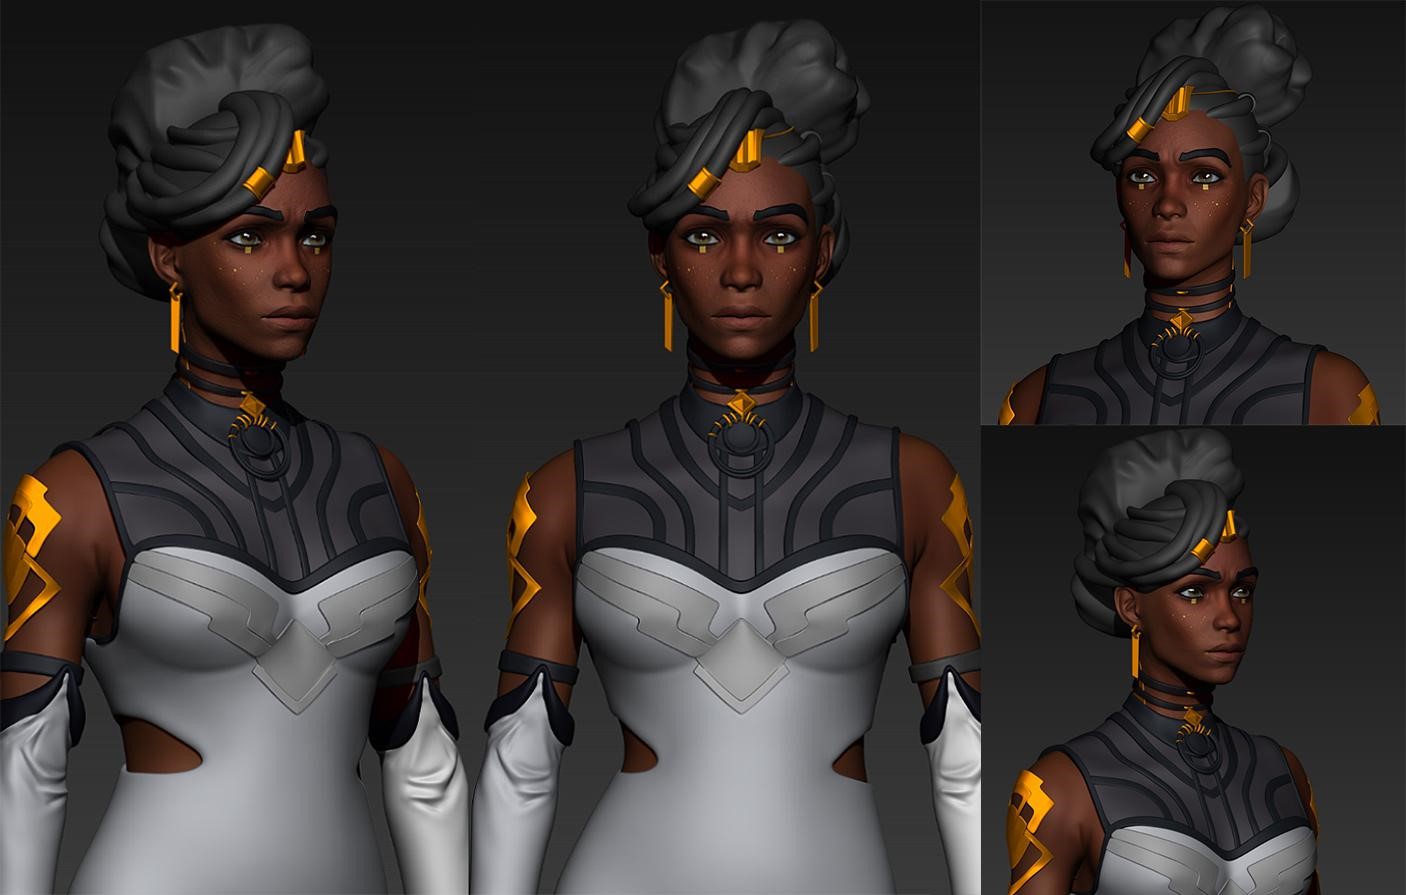
RENDER – Mel Medarda
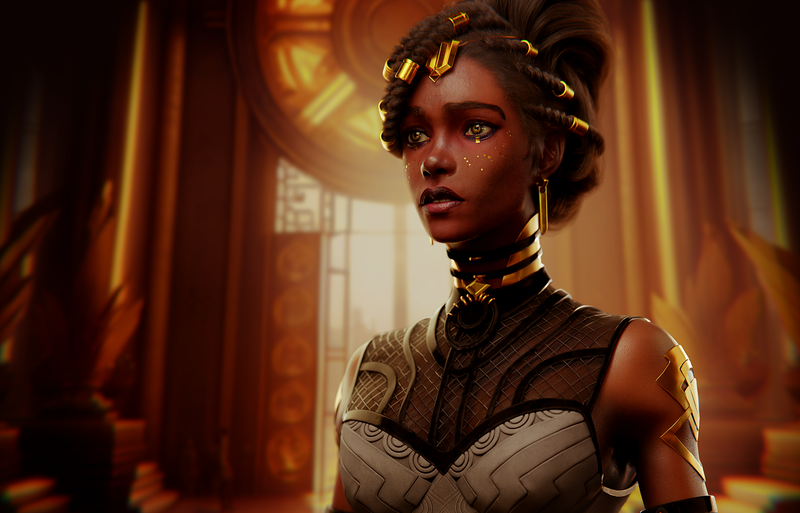
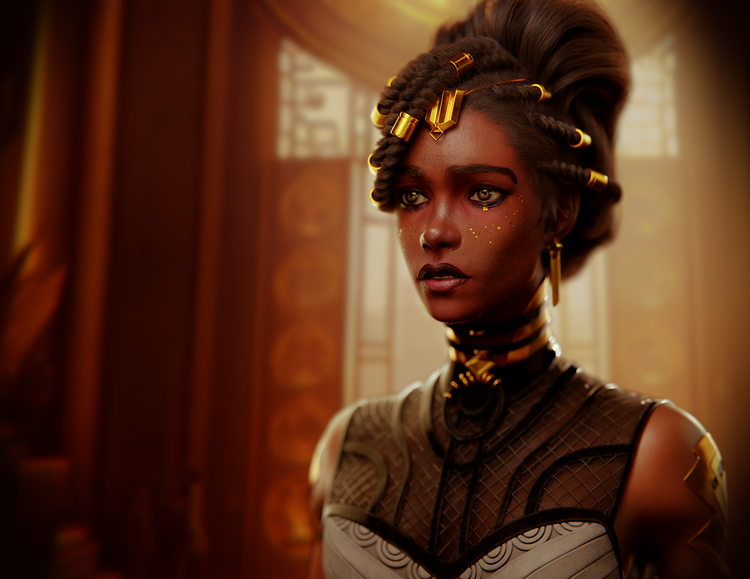
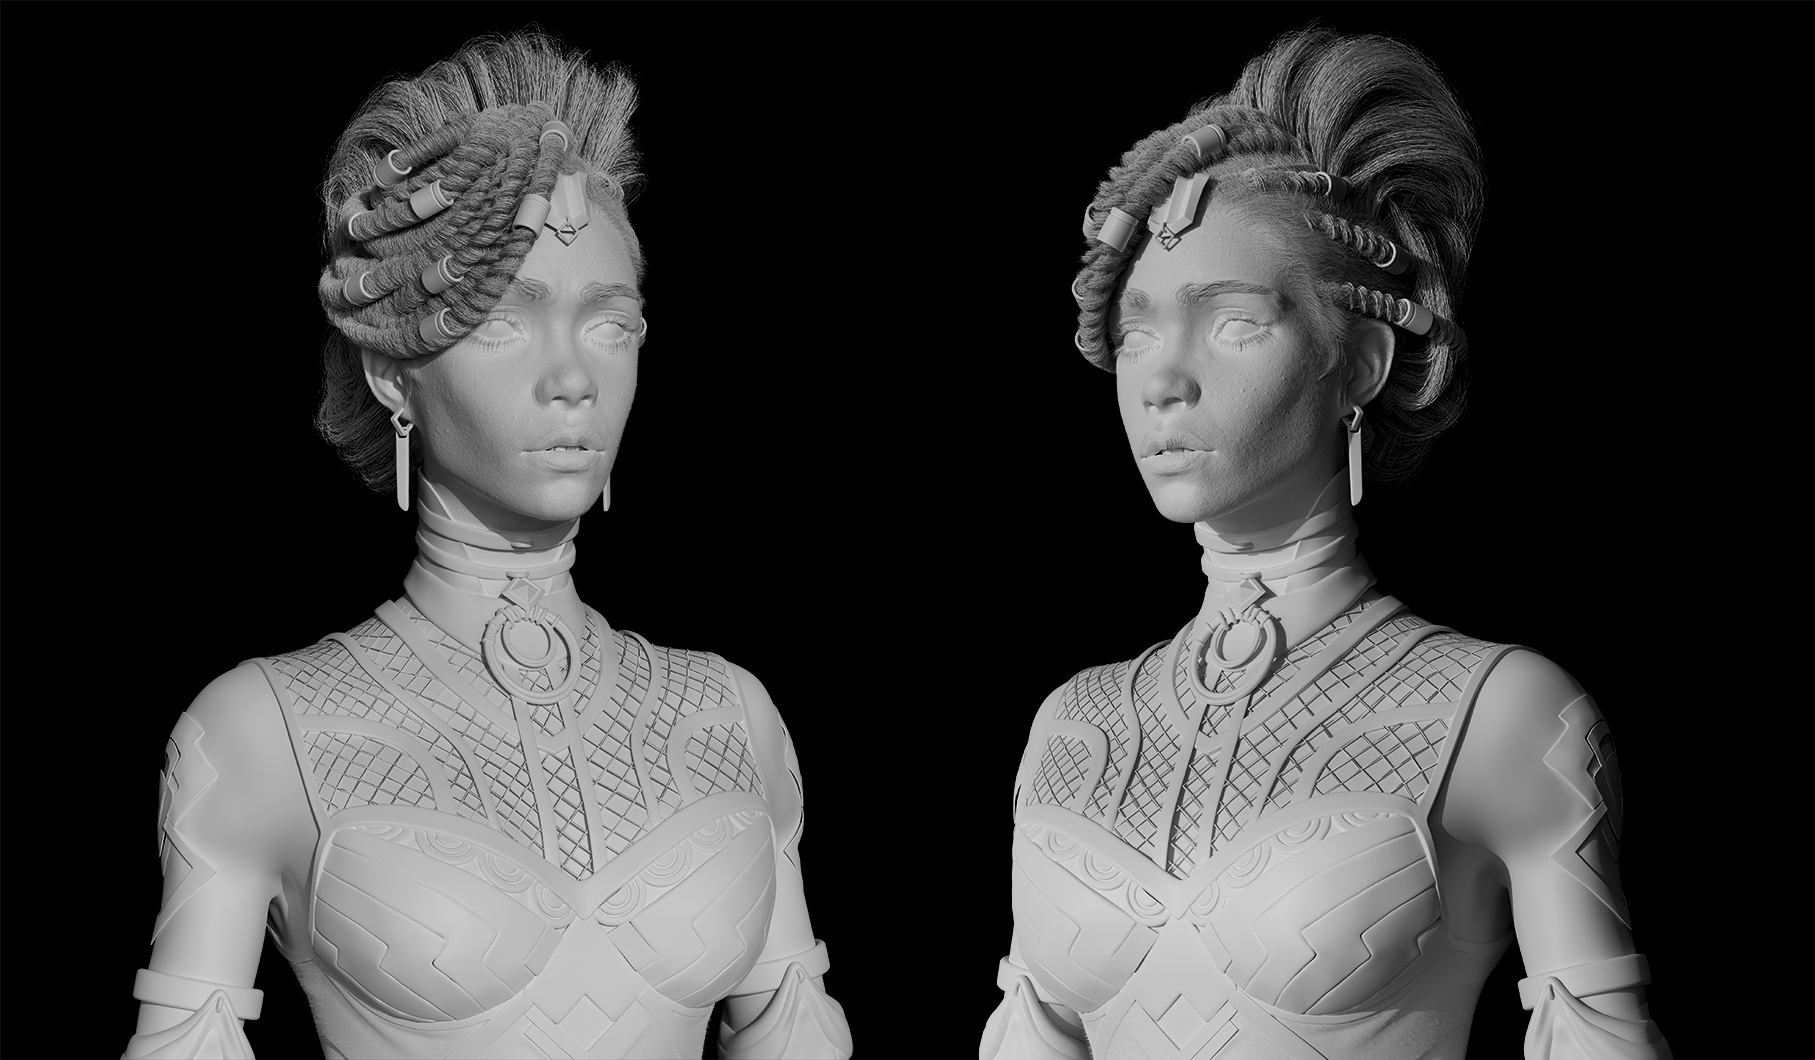
I’m extraordinarily glad with the ultimate outcome this time as a result of, after a very long time, I used to be in a position to obtain a portrait that intently resembles the likeness I supposed.
Thanks for studying. Be at liberty to ask any questions, and in case you like my work, comply with me on social media. Have day!
In regards to the Artist
Jeremy Andzembe Diagne, is a self-taught 3d character artist from Kyiv, Ukraine.
