When designing eLearning programs, generally, you might want to make use of checkboxes and radio buttons. These two interplay objects enable customers to pick a number of choices from a predefined record. Let’s discover ways to work with them in ActivePresenter 9.
This tutorials covers:
Insert Checkboxes/Radio Buttons
Do as follows to insert one:
- Open the Dwelling tab > Interactions or Insert tab > Checkbox/Radio Button.

- Click on wherever on the Canvas, or maintain and drag the mouse cursor on the Canvas then launch it.
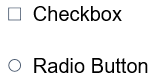
Then, these objects will seem on the Canvas with the default textual content like this:
Click on on the default textual content to enter a brand new textual content. Moreover, you’ll be able to format textual content attributes reminiscent of font, paragraph settings, alignment, and indentation.
Customise Checkboxes/Radio Buttons
The newly inserted object seems with the default format. Its shade could also be totally different relying on the theme shade. Nonetheless, you’ll be able to change it if you need. The Format tab supplies you with many properties to customise:

- Change Form: Change the form their form.

- Present Toggle Button: Present or conceal the toggle buttons. This feature is on by default. When you flip it off, the Checkbox Kinds/Radio Kinds and Checkbox Instruments/Radio Instruments shall be not out there.
- Change its kinds: Click on on the underside arrow to show the Checkbox Kinds/Radio Kinds gallery and choose the brand new type that you really want.
- Change colours: Click on the corresponding choices within the Checkbox Instruments or Radio Instruments part to vary the background, border or mark shade.
You possibly can set the custom-made checkbox/radio button because the default one. On this means, the newly added object will inherit the modifications. To do this, right-click it > Set as Default Checkbox/Set as Default Radio Button.
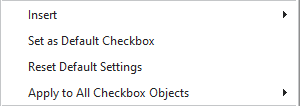
Alternatively, if you wish to apply the modifications to all current ones in that venture, right-click it > Apply to All Checkbox Objects/Apply to All Radio Button Objects > Model.
Work with A number of States
A checkbox/radio button object comes with 8 built-in states. They management its look when customers work together with it.
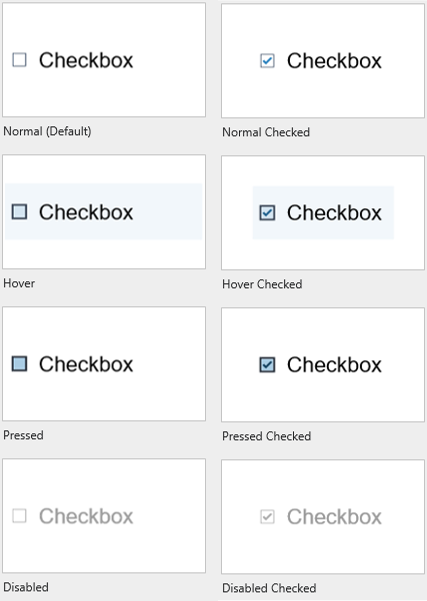
- Regular (Default): That is the preliminary state when it first seems within the output.
- Hover: The state when customers hover the mouse over it.
- Pressed: The state when customers click on on it.
- Disabled: The state when it’s disabled. On this state, it’s nonetheless seen to customers, however they can’t work together with it.
- Regular Checked, Hover Checked, Press Checked, Disabled Checked: These are the states of chosen checkboxes or radio buttons.
You possibly can customise these built-in states or add extra states if crucial.
For extra data, see The best way to Change States of Objects.
Insert and Customise Suggestions Messages
You possibly can add two suggestions messages to a checkbox/radio button. They’re Timeout Message and Trace Message:

- Timeout Message will seem when customers don’t full an motion within the predefined time.
- Trace Message will seem when customers hover the mouse over it.
So as to add a message, open the Questions tab > Message > Timeout Message/Trace Message. Or, right-click the checkbox/radio button object > Insert > Timeout Message/Trace Message.
After that, you’ll be able to customise suggestions messages as you want.
For extra data, please discuss with The best way to work with Suggestions Messages.
Add Occasions – Actions
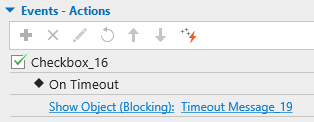
In contrast to some interactive objects, these objects don’t have default occasions – actions. However if you happen to add suggestions messages to them, ActivePresenter 9 will mechanically add occasions – actions to make the message proven within the output.
Moreover, you’ll be able to add new occasions – actions to make them interactive the way in which you need. To do this, choose it > Properties pane > Interactivity > Occasions – Actions > click on the plus button and choose an occasion.
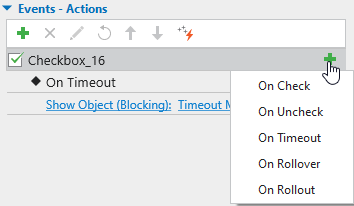
- On Uncheck: Happen when customers uncheck it.
- On Examine: Happen when customers test it.
- On Timeout: Happen when customers don’t reply inside the specified time.
- On Rollover: Happen when the mouse rolls over it.
- On Rollout: Happen when the mouse rolls out of it.
Then, proceed including actions to the occasions, and situations to every motion if crucial.
That’s tips on how to insert and customise checkboxes and radio buttons in ActivePresenter 9. Obtain ActivePresenter and make your course extra interactive.

Moreover, comply with our Tutorials web page and YouTube channel for extra useful articles and movies.
See extra: