
1. Start Your HTML Electronic mail Doc
To start with, it’s value mentioning the place I pulled a few of the sources from.
Now, as we mentioned within the earlier tutorial, you’ll want to start your HTML e mail template with an HTML doctype, and the proper language on your subscribers. On this case we’re going to use the HTML5 doctype, set our language to English with <html lang="en">, and likewise embrace the XML and Microsoft Workplace namespaces (the xmlns bits). We’re going to want these a couple of traces down, as I will clarify.
1 |
<!DOCTYPE html>
|
2 |
<html lang="en" xmlns="http://www.w3.org/1999/xhtml" xmlns:o="urn:schemas-microsoft-com:workplace:workplace"> |
3 |
<head>
|
4 |
<meta charset="UTF-8"> |
5 |
<meta identify="viewport" content material="width=device-width,initial-scale=1"> |
6 |
<meta identify="x-apple-disable-message-reformatting"> |
7 |
<title></title>
|
8 |
<!--[if mso]>
|
9 |
<noscript>
|
10 |
<xml>
|
11 |
<o:OfficeDocumentSettings>
|
12 |
<o:PixelsPerInch>96</o:PixelsPerInch>
|
13 |
</o:OfficeDocumentSettings>
|
14 |
</xml>
|
15 |
</noscript>
|
16 |
<![endif]-->
|
17 |
<type>
|
18 |
desk, td, div, h1, p {font-family: Arial, sans-serif;} |
19 |
desk, td {border:2px stable #000000 !vital;} |
20 |
</type>
|
21 |
</head>
|
22 |
</html>
|
There are fairly a couple of issues within the code above, but it surely’s the naked minimal it is advisable guarantee your remaining e mail renders fantastically in all places.
Firstly, we’ve a couple of meta tags to make sure the precise textual content encoding, viewport scaling throughout completely different cellular gadgets, and one to cease Apple from adjusting the scale in a wierd manner of their mail apps.
Beneath the <title></title> tag you will see some code between <!--[if mso]> and <![endif]-->. Putting code inside these two tags implies that solely Microsoft Outlook on Home windows will apply it (mso = ‘Microsoft Outlook’). And in there, we’ve a small quantity of XML that can make sure that PNG photos show on the proper measurement in Outlook on Home windows. The xlmns settings that we put within the html tag ensures this code will get interpreted correctly.
Beneath that, we’ve a type tag with simply a few CSS guidelines. The primary units the font for all our fundamental parts, and that is for the advantage of Gmail webmail, which can override our font settings except we embrace this. If you find yourself altering your fonts later, remember to make the change right here too.
Lastly, we’re together with desk, td {border:2px stable #000000 !vital;} which can draw a border on all the pieces. That is purely in order that we are able to see what we’re doing as we construct, and we’ll take away it on the finish.
With that sorted, we are able to begin constructing the remainder of the construction.
2. Create the Physique and Important Desk
First, we’ll add an total construction for our e mail, beginning with a <physique> tag. Add the code beneath immediately beneath the </head> tag:
1 |
<physique type="margin:0;padding:0;"> |
2 |
<desk position="presentation" type="width:100%;border-collapse:collapse;border:0;border-spacing:0;background:#ffffff;"> |
3 |
<tr>
|
4 |
<td align="heart" type="padding:0;"> |
5 |
Hiya! |
6 |
</td>
|
7 |
</tr>
|
8 |
</desk>
|
9 |
</physique>
|
You may see the margin and padding on the physique tag are set to zero to keep away from any surprising house.
We’ve additionally added a desk with a width of 100%. This acts as a real physique tag for our e mail, as a result of the physique tag is typically eliminated by e mail purchasers. Apply any ‘physique’ background color that you simply need to this desk tag.
All our tables might be set to position="presentation". This makes them extra accessible, because it tells display readers to deal with it as a visible desk, not a knowledge desk.
We have now set border-collapse to collapse, and each border and border-spacing to zero to keep away from any surprising house within the desk.
You will discover we’re utilizing <td align="heart">, and for those who’re already accustomed to HTML you may be questioning why, since align is definitely a deprecated HTML property. We use it as a result of e mail purchasers fluctuate so extensively of their degree of CSS assist, and sometimes we nonetheless want to make use of deprecated HTML to make sure all the pieces shows correctly in all places. On this occasion, it’s as a result of Outlook for Home windows doesn’t obey margin:0 auto; in CSS to heart issues.
Lastly, ensure you all the time set the padding in your desk cells to zero within the inline kinds, e.g. <td type="padding:0;">, in any other case e mail purchasers will all add their very own quantity of padding. After we do add padding ourselves, we are able to regulate this worth, but when there isn’t a padding to be utilized to any of the perimeters, it’s essential to explicitly set it to zero.


A Notice on Utilizing CSS Padding Shorthand
When utilizing CSS padding on desk cells, you’ll be able to reliably write it 3 ways. Both specify one worth, e.g. padding:20px which can apply 20 pixels of padding to each aspect of your cell (prime, proper, backside and left), or specify padding in pairs, i.e. padding: 10px 20px, which can add 10 pixels padding to each prime and backside, plus 20 pixels to each left and proper. If neither of these are appropriate, it is best to declare each aspect, i.e. padding: 10px 10px 0 5px. In all instances it’s essential to set every worth, even when a few of them are zero. Moreover, solely specifying three values can have unpredictable outcomes throughout e mail purchasers.
Padding works reliably on desk cells in all e mail purchasers, however if you’re having hassle with padding, there isn’t a have to resort to spacer GIFs. In a pinch you should use spacer divs or spacer cells. Simply embrace a non-breaking house character ( ) inside, set an identical top and line top, and remember to embrace mso-line-height-rule:precisely which can guarantee Microsoft Outlook for Home windows renders it on the pixel-perfect measurement. (In case you are creating horizontal house, it is advisable specify a width as a substitute of top, and should have to additionally add font-size:0;.) Right here is an instance or a spacer cell inside a row:
1 |
<tr><td type="line-height:10px;top:10px;mso-line-height-rule:precisely;"> </td></tr> |
And here’s a spacer div:
1 |
<div type="line-height:10px;top:10px;mso-line-height-rule:precisely;"> </div> |
Including the Important Desk
Now let’s place a desk of 602 pixels huge contained in the container desk.
600 pixels is a protected most width on your emails to show comfortably inside most desktop and webmail purchasers on most display resolutions, and we’re including 2 pixels so we are able to have a 1 pixel border across the outdoors, which provides a pixel on both aspect.
We’ll substitute our little ‘Hiya!’ greeting with this desk.
1 |
<desk position="presentation" type="width:602px;border-collapse:collapse;border:1px stable #cccccc;border-spacing:0;text-align:left;"> |
2 |
<tr>
|
3 |
<td type="padding:0;"> |
4 |
Hiya! |
5 |
</td>
|
6 |
</tr>
|
7 |
</desk>
|
Nice! Now we’ve our outer desk, and our fundamental content material desk sitting inside, prepared for some rows of content material.


3. Create the HTML Electronic mail Template Construction and Header
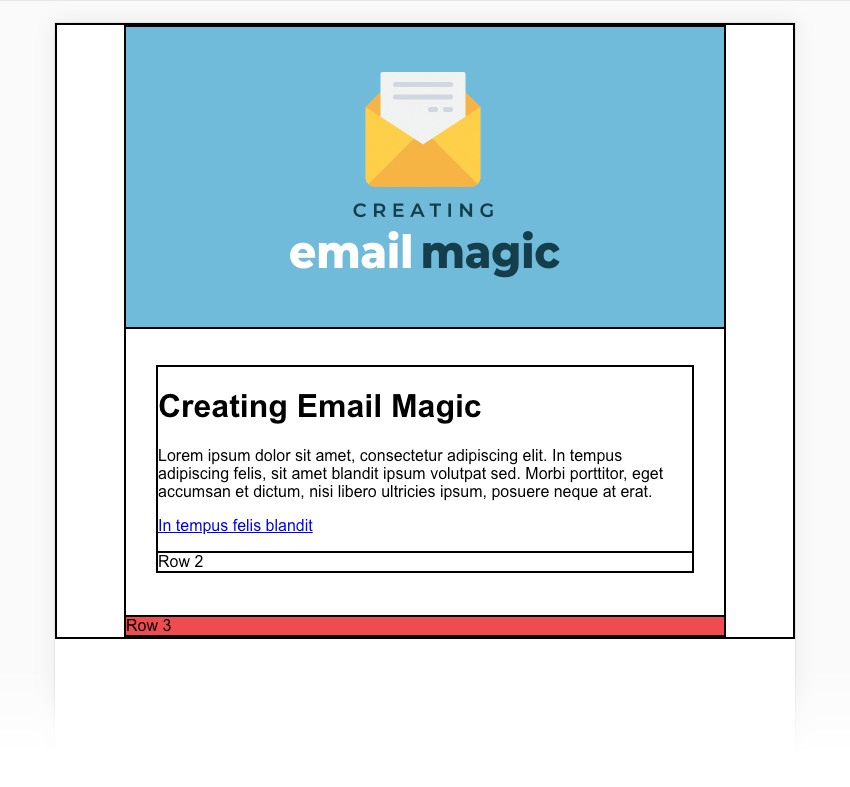
In our e mail design we are able to see that the structure is split into a couple of logical sections, so we’ll create a row for every.
Let’s duplicate the one row within the final desk we added in order that we’ve three in complete, by copying all the pieces between (and together with) the <tr> and </tr> and pasting it two occasions beneath.
I’ve modified the ‘Hiya!’ textual content to learn Row 1, Row 2 and Row 3 so it ought to now appear like this:
1 |
<desk position="presentation" type="width:602px;border-collapse:collapse;border:1px stable #cccccc;border-spacing:0;text-align:left;"> |
2 |
<tr>
|
3 |
<td type="padding:0;"> |
4 |
Row 1 |
5 |
</td>
|
6 |
</tr>
|
7 |
<tr>
|
8 |
<td type="padding:0;"> |
9 |
Row 2 |
10 |
</td>
|
11 |
</tr>
|
12 |
<tr>
|
13 |
<td type="padding:0;"> |
14 |
Row 3 |
15 |
</td>
|
16 |
</tr>
|
17 |
</desk>
|


Now we’ll color them in line with the design by including a background CSS property to the type tag. At all times bear in mind to make use of the complete six characters of a hexadecimal code like #ffffff, as three character shorthand like #fff gained’t all the time work in all e mail purchasers.
1 |
<desk position="presentation" type="width:602px;border-collapse:collapse;border:1px stable #cccccc;border-spacing:0;text-align:left;"> |
2 |
<tr>
|
3 |
<td type="padding:0;background:#70bbd9;"> |
4 |
Row 1 |
5 |
</td>
|
6 |
</tr>
|
7 |
<tr>
|
8 |
<td type="padding:0;"> |
9 |
Row 2 |
10 |
</td>
|
11 |
</tr>
|
12 |
<tr>
|
13 |
<td type="padding:0;background:#ee4c50;"> |
14 |
Row 3 |
15 |
</td>
|
16 |
</tr>
|
17 |
</desk>
|


Okay, subsequent up in our e mail design we’re going to concentrate on Row 1. On the cell, let’s change the padding from 0 to 40px 0 30px 0. Then contained in the cell we’ll insert our picture:
1 |
<td align="heart" type="padding:40px 0 30px 0;background:#70bbd9;"> |
2 |
<img src="photos/h1.png" alt="" width="300" type="top:auto;show:block;" /> |
3 |
</td>
|
At all times specify the width of your photos utilizing the HTML width attribute relatively than CSS, e.g. width="300" as seen above, relatively than type="width:300px;". If you happen to do not, Microsoft Outlook for Home windows will show your picture at its bodily measurement.
We have now additionally set the picture top to auto to keep away from any squishing, and show to block, which prevents gaps from showing beneath it in some e mail purchasers.
Lastly, in case your picture comprises vital info that is not talked about in your e mail’s textual content, remember to add an outline of it to the alt tag in order that will probably be introduced by display readers to these utilizing them.
Notice: Photographs do not all the time load and alt textual content isn’t all the time visually displayed as a fallback, so any essential info ought to all the time be included as stay textual content in your e mail relatively than being embedded in a picture.
And that’s our HTML header finished!


4. Create the Content material Space
Transferring on from the header, let’s now consider our HTML e mail’s content material space. First off, we’ll add some padding to the Row 2’s cell in order that the desk inside has some house round it, as per our design, in order that it now seems like this:
1 |
<tr>
|
2 |
<td type="padding:36px 30px 42px 30px;"> |
3 |
Row 2 |
4 |
</td>
|
5 |
</tr>
|


Now we’ll substitute the ‘Row 2’ textual content with one other desk to nest our fundamental content material inside. When constructing HTML e mail utilizing tables, we have to nest them as a result of colspan and rowspan aren’t extensively supported throughout e mail purchasers.
1 |
<desk position="presentation" type="width:100%;border-collapse:collapse;border:0;border-spacing:0;"> |
2 |
<tr>
|
3 |
<td type="padding:0;"> |
4 |
Row 1 |
5 |
</td>
|
6 |
</tr>
|
7 |
<tr>
|
8 |
<td type="padding:0;"> |
9 |
Row 2 |
10 |
</td>
|
11 |
</tr>
|
12 |
</desk>
|
We’ve set the width of this desk to 100%. It’s good apply to make use of share widths relatively than utilizing a pixel worth wherever potential as a result of this can show you how to additional down the observe if you wish to make your e mail responsive, and even for those who merely want to regulate the width of your e mail in a while. Share widths will routinely adapt to a brand new container measurement, whereas pixel widths would all have to be individually up to date.


Now we’ll add our content material to the highest row, which is a heading, a paragraph of textual content, and a remaining paragraph with a hyperlink inside. At this stage, we aren’t including any styling in any respect to those parts.


Change the ‘Row 1’ textual content with the next:
1 |
<h1>Creating Electronic mail Magic</h1> |
2 |
<p>Lorem ipsum dolor sit amet, consectetur adipiscing elit. In tempus adipiscing felis, sit amet blandit ipsum volutpat sed. Morbi porttitor, eget accumsan et dictum, nisi libero ultricies ipsum, posuere neque at erat.</p> |
3 |
<p><a href="http://www.instance.com">In tempus felis blandit</a></p> |
Subsequent we’re going so as to add our two columns of content material to Row 2. As a result of we wish a spot in between these two cells, we’ll create a three-column desk with an empty cell between the 2 outer columns. There are a couple of methods to create this structure, however this one is essentially the most dependable for our functions.
As a lot as I like to stay to percentages, when you’ve gotten content material that could be a particular measurement, it may be difficult to transform it to a share (on this instance, the columns could be 48.1% which might turn out to be complicated). Because of this, since our two photos are 260px huge, we’ll create columns which can be additionally 260px huge, with a 20px margin cell within the center. (This may complete 540px, which is the 600px width of our desk minus the padding of 30px on both aspect.) Be sure you zero your font-size and line-height and add a non-breaking house character within the center cell.
We’ll additionally set the vertical-align to prime for each cells in order that they may vertically align to the highest, even when one column has extra textual content than the opposite. The default vertical alignment is center.
Change ‘Row 2’ with this desk:
1 |
<desk position="presentation" type="width:100%;border-collapse:collapse;border:0;border-spacing:0;"> |
2 |
<tr>
|
3 |
<td type="width:260px;padding:0;vertical-align:prime;"> |
4 |
Column 1 |
5 |
</td>
|
6 |
<td type="width:20px;padding:0;font-size:0;line-height:0;"> </td> |
7 |
<td type="width:260px;padding:0;vertical-align:prime;"> |
8 |
Column 2 |
9 |
</td>
|
10 |
</tr>
|
11 |
</desk>
|


Now let’s add our photos and content material to these columns. Margins are very nicely supported on <p> tags throughout all e mail purchasers, so we’ll wrap our textual content and pictures in <p> tags and regulate the spacing between them utilizing margin later after we add all our textual content styling.
Let’s add content material to Columns 1 and a pair of in order that the entire desk now seems like this:
1 |
<desk position="presentation" type="width:100%;border-collapse:collapse;border:0;border-spacing:0;"> |
2 |
<tr>
|
3 |
<td type="width:260px;padding:0;vertical-align:prime;"> |
4 |
<p><img src="photos/left.gif" alt="" width="260" type="top:auto;show:block;" /></p> |
5 |
<p>Lorem ipsum dolor sit amet, consectetur adipiscing elit. In tempus adipiscing felis, sit amet blandit ipsum volutpat sed. Morbi porttitor, eget accumsan dictum, est nisi libero ultricies ipsum, in posuere mauris neque at erat.</p> |
6 |
<p><a href="http://www.instance.com">Blandit ipsum volutpat sed</a></p> |
7 |
</td>
|
8 |
<td type="width:20px;padding:0;font-size:0;line-height:0;"> </td> |
9 |
<td type="width:260px;padding:0;vertical-align:prime;"> |
10 |
<p><img src="photos/proper.gif" alt="" width="260" type="top:auto;show:block;" /></p> |
11 |
<p>Morbi porttitor, eget est accumsan dictum, nisi libero ultricies ipsum, in posuere mauris neque at erat. Lorem ipsum dolor sit amet, consectetur adipiscing elit. In tempus adipiscing felis, sit amet blandit ipsum volutpat sed.</p> |
12 |
<p><a href="http://www.instance.com">In tempus felis blandit</a></p> |
13 |
</td>
|
14 |
</tr>
|
15 |
</desk>
|
Right here we’ve set the width of the photographs utilizing the HTML width attribute once more, identical to we did after we inserted the header picture.


5. Type the Electronic mail Template Footer
Now we’ll add our padding to the footer row.
1 |
<tr>
|
2 |
<td type="padding:30px;background:#ee4c50;"> |
3 |
Row 3 |
4 |
</td>
|
5 |
</tr>
|


Inside that cell, we’ll substitute the ‘Row 3’ textual content with one other desk to get two columns, every 50% huge, with the left set to align="left" and proper to align="proper" in order that the content material in every might be pinned to these sides and provides us a balanced e mail design.
1 |
<desk position="presentation" type="width:100%;border-collapse:collapse;border:0;border-spacing:0;"> |
2 |
<tr>
|
3 |
<td type="padding:0;width:50%;" align="left"> |
4 |
Left Column |
5 |
</td>
|
6 |
<td type="padding:0;width:50%;" align="proper"> |
7 |
Proper Column |
8 |
</td>
|
9 |
</tr>
|
10 |
</desk>
|


Change ‘Left Column’ with a paragraph of textual content:
1 |
<p>® Somebody, Someplace 2021<br/><a href="http://www.instance.com">Unsubscribe</a></p> |
We’ll create one other little desk for our social media icons, because it’s one of the best ways to get essentially the most exact spacing that renders correctly in all places. Change the ‘Proper Column’ textual content with the desk beneath.
You will discover we aren’t specifying a desk width, and that is in order that the width of the desk might be decided by the cells inside. They’re every 38px huge (the width of our icons) plus 10px padding on the left.
1 |
<desk position="presentation" type="border-collapse:collapse;border:0;border-spacing:0;"> |
2 |
<tr>
|
3 |
<td type="padding:0 0 0 10px;width:38px;"> |
4 |
<a href="http://www.twitter.com/"><img src="photos/tw.png" alt="Twitter" width="38" type="top:auto;show:block;border:0;" /></a> |
5 |
</td>
|
6 |
<td type="padding:0 0 0 10px;width:38px;"> |
7 |
<a href="http://www.fb.com/"><img src="photos/fb.png" alt="Fb" width="38" type="top:auto;show:block;border:0;" /></a> |
8 |
</td>
|
9 |
</tr>
|
10 |
</desk>
|


And there we’ve it; our HTML e mail template structure is full!
6. Type the Textual content
Styling the textual content inside our HTML e mail template is a extremely vital step. First, let’s take a look at the highest row of content material with our h1 and introductory textual content.
Necessary Notice when utilizing Paragraph and Heading Tags
When utilizing paragraph and heading tags (p, h1, h2, and so on.) it’s essential to specify your prime and backside margin settings, in any other case every e mail shopper will apply their very own wildly completely different default margins to those parts. You additionally want to ensure your prime and backside margins are set to zero if you don’t need any in any respect, by which case you’d set your heading to margin:0;. If you happen to solely desire a backside margin, it is best to nonetheless set the highest margin to zero, e.g. margin:0 0 10px 0;.
With that in thoughts, we’ll set our desired margins on all our tags, and we additionally need to set the textual content color to be #153643, which we are able to apply to the cell, as all the pieces inside will inherit that color. After these adjustments, the entire cell seems like this:
1 |
<td type="padding:0 0 36px 0;colour:#153643;"> |
2 |
<h1 type="font-size:24px;margin:0 0 20px 0;font-family:Arial,sans-serif;">Creating Electronic mail Magic</h1> |
3 |
<p type="margin:0 0 12px 0;font-size:16px;line-height:24px;font-family:Arial,sans-serif;">Lorem ipsum dolor sit amet, consectetur adipiscing elit. In tempus adipiscing felis, sit amet blandit ipsum volutpat sed. Morbi porttitor, eget accumsan et dictum, nisi libero ultricies ipsum, posuere neque at erat.</p> |
4 |
<p type="margin:0;font-size:16px;line-height:24px;font-family:Arial,sans-serif;"><a href="http://www.instance.com" type="colour:#ee4c50;text-decoration:underline;">In tempus felis blandit</a></p> |
5 |
</td>
|
You will discover above that we’ve additionally set the font-family on each particular person h1 and p factor, and also you may be questioning why we won’t simply set this on the physique or desk tag. It is because some webmail purchasers will override your font for those who do not set them inline on every paragraph or heading factor. There are different issues and approaches to this concern, however for simplicity’s sake and to make sure our e mail renders completely in all places at this stage, we’ll set it inline on every factor.
Now, transferring all the way down to our two-column space, add the colour to every of the 260px huge cells in order that they each appear like this:
1 |
<td type="width:260px;padding:0;vertical-align:prime;colour:#153643;"> |
As above, we’ll add some textual content styling and margins to our paragraphs and hyperlinks, and set a base font measurement to all the desk. All collectively, the desk now seems like this:
1 |
<desk position="presentation" type="width:100%;border-collapse:collapse;border:0;border-spacing:0;"> |
2 |
<tr>
|
3 |
<td type="width:260px;padding:0;vertical-align:prime;colour:#153643;"> |
4 |
<p type="margin:0 0 25px 0;font-size:16px;line-height:24px;font-family:Arial,sans-serif;"><img src="photos/left.gif" alt="" width="260" type="top:auto;show:block;" /></p> |
5 |
<p type="margin:0 0 12px 0;font-size:16px;line-height:24px;font-family:Arial,sans-serif;">Lorem ipsum dolor sit amet, consectetur adipiscing elit. In tempus adipiscing felis, sit amet blandit ipsum volutpat sed. Morbi porttitor, eget accumsan dictum, est nisi libero ultricies ipsum, in posuere mauris neque at erat.</p> |
6 |
<p type="margin:0;font-size:16px;line-height:24px;font-family:Arial,sans-serif;"><a href="http://www.instance.com" type="colour:#ee4c50;text-decoration:underline;">Blandit ipsum volutpat sed</a></p> |
7 |
</td>
|
8 |
<td type="width:20px;padding:0;font-size:0;line-height:0;"> </td> |
9 |
<td type="width:260px;padding:0;vertical-align:prime;colour:#153643;"> |
10 |
<p type="margin:0 0 25px 0;font-size:16px;line-height:24px;font-family:Arial,sans-serif;"><img src="photos/proper.gif" alt="" width="260" type="top:auto;show:block;" /></p> |
11 |
<p type="margin:0 0 12px 0;font-size:16px;line-height:24px;font-family:Arial,sans-serif;">Morbi porttitor, eget est accumsan dictum, nisi libero ultricies ipsum, in posuere mauris neque at erat. Lorem ipsum dolor sit amet, consectetur adipiscing elit. In tempus adipiscing felis, sit amet blandit ipsum volutpat sed.</p> |
12 |
<p type="margin:0;font-size:16px;line-height:24px;font-family:Arial,sans-serif;"><a href="http://www.instance.com" type="colour:#ee4c50;text-decoration:underline;">In tempus felis blandit</a></p> |
13 |
</td>
|
14 |
</tr>
|
15 |
</desk>
|
Lastly, we’ll type the footer. Firstly, we’ll add some font styling to the primary footer desk, inside our pink footer cell with the 30px padding, in order that it now reads:
1 |
<td type="padding:30px;background:#ee4c50;"> |
2 |
<desk position="presentation" type="width:100%;border-collapse:collapse;border:0;border-spacing:0;font-size:9px;font-family:Arial,sans-serif;"> |
Within the left column of this desk, we are able to replace our paragraph and hyperlink to incorporate type and color:
1 |
<p type="margin:0;font-size:14px;line-height:16px;font-family:Arial,sans-serif;colour:#ffffff;"> |
2 |
® Somebody, Someplace 2021<br/><a href="http://www.instance.com" type="colour:#ffffff;text-decoration:underline;">Unsubscribe</a> |
3 |
</p>
|
And on our social media icons, we’ll type every hyperlink to be white, in order that if the photographs do not load, any alt textual content might be seen on the pink background. Modify every hyperlink in order that they appear like this:
1 |
<a href="http://www.twitter.com/" type="colour:#ffffff;"> |
and
1 |
<a href="http://www.fb.com/" type="colour:#ffffff;"> |


And there we’ve it! Every part is in.
7. Run Some Checks
At this level, it is a good suggestion to run your HTML code by way of an e mail testing service like Litmus, or Electronic mail on Acid. Leaving the borders on all of the tables and cells will be useful to see what’s occurring in every e mail shopper. (Relying on how you might be testing your e mail, you may have to remotely host your photos first, and insert the complete distant URLs for every picture into your code. Check with your testing service’s web site to learn to check your HTML.)
Listed here are a few of my check outcomes from Electronic mail on Acid:


Now it is time to flip off the borders and see the e-mail design trying lovely. Within the type tag within the head, take away the road that reads:
1 |
desk, td {border:2px stable #000000 !vital;} |


And that’s it!
You’ve Created a Easy HTML Electronic mail!
Earlier than we name it a day, when you’ve got used any feedback in your CSS within the head of your file for any cause, do away with them. Some e mail purchasers can choke on CSS feedback so it’s wisest to not embrace them.
Now is an efficient time to do a remaining check with Litmus, or Electronic mail on Acid, after which your HTML e mail is able to ship!
Study Extra About HTML Electronic mail
To take what you’ve discovered to the subsequent degree! Try our Mastering HTML Electronic mail studying information for extra tutorials on HTML e mail templates, e mail design, coding responsive e mail, accessibility, advertising and marketing, transactional e mail, e mail service suppliers (ESPs), improvement workflow ideas, and extra!