INTRODUCTION
Hey everybody, my title is Beau Chapman, and I’m a 19-year-old 3D artist primarily based in Austin, Texas. Blender has been my passion since I used to be 10 years outdated once I was first launched to model 2.70 of the software program. Ever since then, I have been engaged on completely different initiatives and honing my inventive type.
Presently, I’ve no plans to work within the business and hope to maintain 3D as a device I can make the most of to specific myself in a productive method.
INSPIRATION
My type has been underneath growth for the final 9 years and can proceed to alter over time. Proper now, nonetheless, I draw plenty of inspiration from enjoyable compositions, colours, and settings. Many instances, this ends in a cell-shaded/non-photorealistic scene, and there’s positively a powerful affect from Studio Ghibli and the lo-fi type (examples under).

(Nonetheless from Spirited Away)

(Lo-fi piece by Andrea Jovanovic)
This specific scene was carried out for a gaggle at my college that gathers artists to develop works round a particular theme after which sells prints of these works in assist of a non-profit. The theme for this work was “Nurture the Soul,” and my purpose was to depict a second of peaceable solitude.
PROCESS
Nearly all the work for this scene was carried out in Blender. The very first thing I did after developing with the concept for my scene was to take a look at shade schemes. I made a decision on the favored pink, purple, and orange tones you see in a number of lo-fi works.
REFERENCES
After that, I wanted to resolve on a location, a step I might usually get caught on previously. It is immensely tough to conjure up a location out of skinny air, and I usually wrestle with mixing reference photographs to create a single scene. However fortunately, there isn’t any scarcity of areas right here on Earth, and with Google Avenue View, you possibly can virtually at all times discover one thing that matches your needs.

I wished to implement Japanese structure, so I dropped down into Osaka, Japan, and began wanting by way of the streets and alleyways, looking for a location I favored. Ultimately, I discovered the angle above.
MODELING
Now I used to be virtually prepared to start modeling this scene. The difficulty was that it is almost inconceivable to line up Blender’s digital camera with this actual angle, in any other case, you would be caught tweaking focal lengths and rotations for hours. I used the free software program FSpy to assist determine all these calculations for me.

Merely enter some axes and focal factors, and your work is finished. Blender has an exterior add-on that permits you to import FSpy extensions and arrange the orientation and focal lengths for you, so that is what I did.
General, this course of saves many hours, and I might advocate it in case you are trying to mannequin off of a reference picture on this method. I started modeling by blocking out the principle shapes.

Simply utilizing fundamental cubes, cylinders, and spheres to generate meshes that I might use to assist outline my shade tones and lighting scheme. Nothing too superior right here, it is so simple as it appears to be like.
MATERIAL
This level in growth is often reserved for organising lighting. Lighting is certainly one of, if not crucial components of making a scene. It may be a difference-maker and can repair sloppy modeling and supplies.
Nevertheless, the approach I am utilizing for materials renders most of my lighting decisions incorrectly. Cell shading in Blender EEVEE successfully decides the lighting for you, although it requires some mild supply for it to perform correctly. This is the easy node setup for the white colours.

The lighting itself is not truly purple and blue, however the materials is pressured to these shade tones regardless. The Coloration Ramp node decides the edge for which components of a mesh will probably be purple (areas that obtain much less direct mild) and which will probably be blue (areas that obtain extra). Setting the ramp sort to ‘fixed’ makes this a tough cutoff and creates that cell-shaded look.
It is vital to notice that every materials needs to be tweaked to your specs since you possibly can’t depend on lighting and shadow calculations to be carried out for you. Right here is an instance of one of many barely extra complicated supplies with the identical idea.

You possibly can see I added extra dimensions to the cell shading, and I blended it with a diffuse node to create some extra noticeable lighting interplay in a while once I add avenue lamps. This is similar approach used on the principle character to create highlights on the face and hair. Placing the steadiness between fully cell-shaded and realism is difficult and is one thing I am nonetheless working to good.
LIGHTING
Lighting did not must be difficult for this scene because it was basically being ‘faked’. Nevertheless, there are some vital issues to get proper.
Right here is the scene with full cell shading, and no mild sources allowed to work together.

You possibly can see it appears to be like uninteresting and darkish. To not fear, I can add in some lighting and diffuse results to the character and to the poles to spice it up.

This was an older model of the scene, and I toned it down for the ultimate lower, however you possibly can see the impact that letting some mild bounce off the objects within the scene could have whereas nonetheless sustaining its cell-shaded really feel. The lights on this scene are simply 4 level lamps (on the road lights and within the doorway) and a spot lamp (positioned behind the character for the rim lighting), however they make a world of distinction.
With the lighting and fundamental supplies arrange, I can add the character and fill the scene with particulars. A fast overview of some fundamental components is summarized under.
CLOUDS
The clouds are sculpted spheres utilizing the snake hook device to get the form I wished, and utilizing cell shading for the supplies.

WIRES
The wires have been added by including in a single vertex with a pores and skin modifier and constantly extruding alongside the strains within the reference picture.

The remainder of the small particulars have been added utilizing fundamental shapes. It was vital so as to add simply sufficient complexity that the scene was attention-grabbing to take a look at, however not an excessive amount of that it could be overwhelming. It is essential for composition functions that one leaves decently sized empty areas for the attention to relaxation, which is why I opted to depart a number of the partitions clean. Positioning element all through a scene is simply as vital as nailing the amount of element.
CHARACTER
The character was edited from a base mesh downloaded from Mixamo. They supply nice rigged characters which can be straightforward to pose, however usually do not match my actual needs, so I edit the mesh fairly closely.

After all of the items have been in place, I rendered, did some easy shade correction, and known as it carried out!
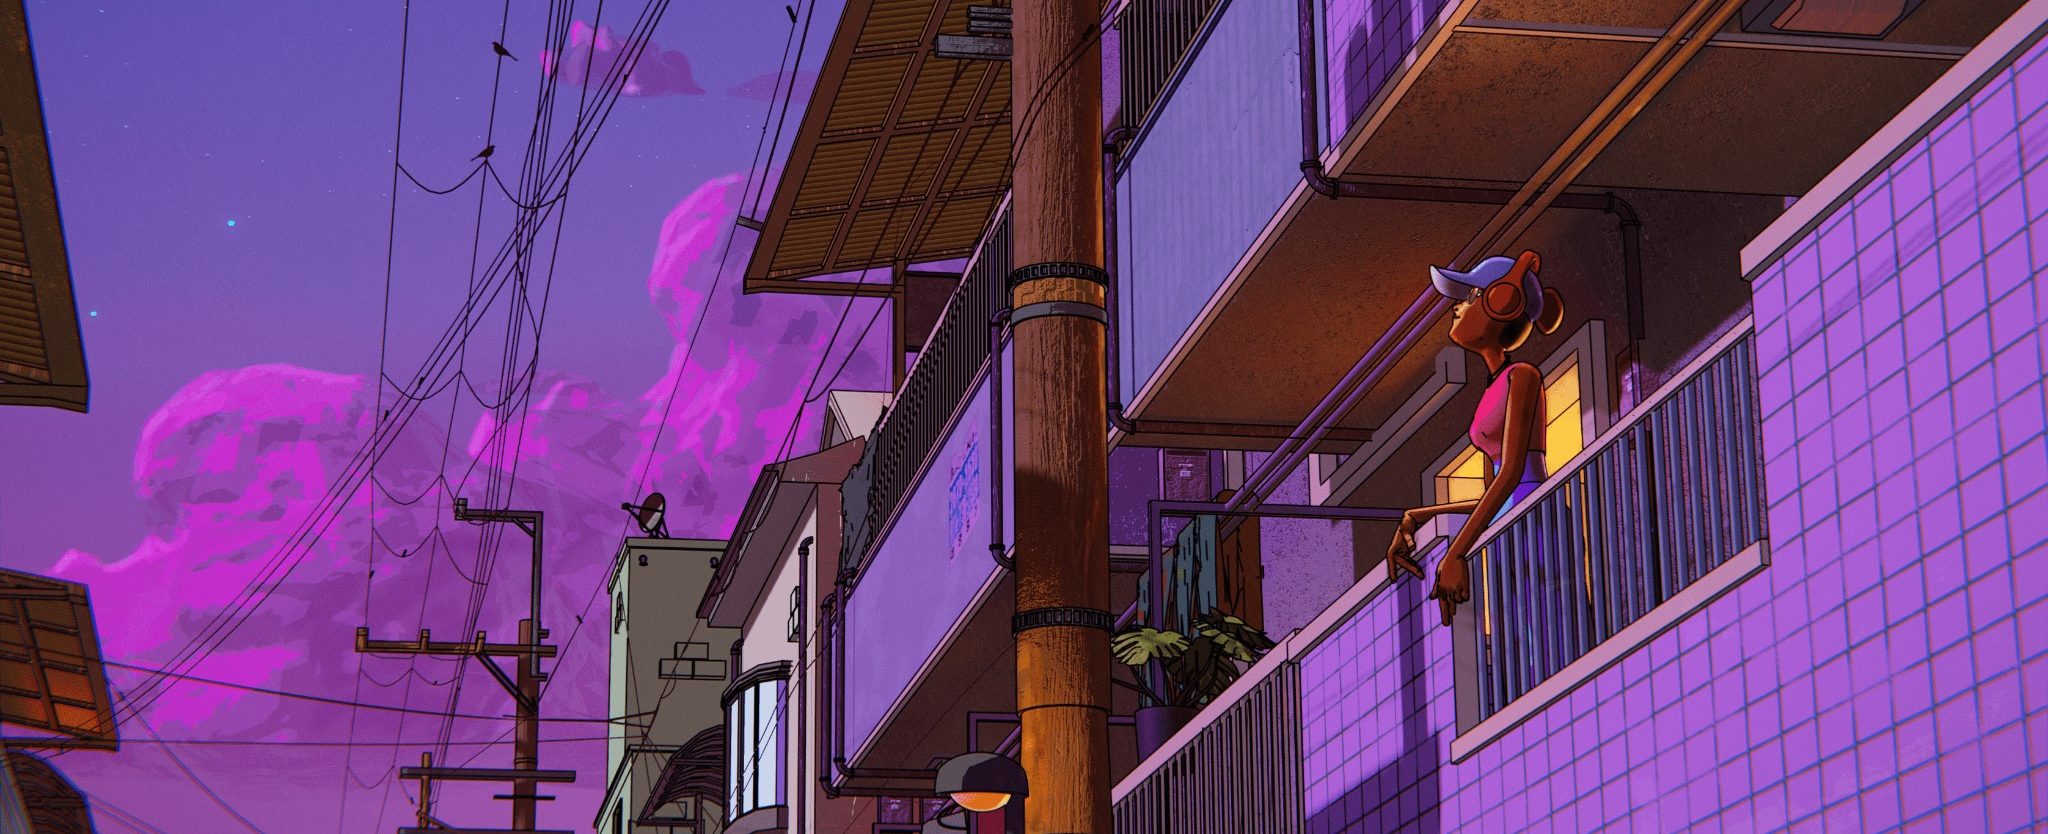
RENDER – Deep Breaths


Thanks a lot for studying this. I hope you discovered one thing helpful!
Have a pleasant day!
In regards to the Artist
Beau Chapman, a 3D artist in Austin, TX. He’s at the moment a scholar on the College of Texas at Austin.
