
The Calligraphic brushes in Adobe Illustrator mimic the feel and appear of a calligraphy pen nib. Let’s take its choices for a spin to get every thing you may from this brush kind as a calligraphy device.
Observe together with us over on our Envato Tuts+ YouTube channel to create your very personal calligraphy edit:

What You will Be taught
- Methods to make a calligraphic brush
- Methods to use the spherical brush choices
- Methods to make calligraphy brush strokes
- Methods to create flat brushes
- Methods to create angled flat brushes
- Methods to use a calligraphy brush in Illustrator
1. Methods to Make a Calligraphic Brush
Step 1
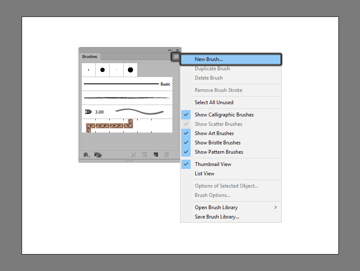
To start out making your Illustrator calligraphy brushes, create a New Doc, choose the Paintbrush Device (B), and open the Brushes panel in Illustrator. Choose choices and hit New Brush to do exactly that: create a brand new calligraphy brush in Illustrator.


Step 2
There is a particular setting in Illustrator to create calligraphic brushes. Choose Calligraphic Brush (likelihood is it is already chosen) and hit OK.


Step 3
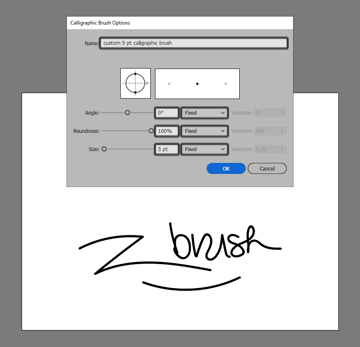
Let’s begin with a quite simple default-style brush. Identify it no matter you need. Set the Angle to 0°, Roundness to 100%, and the Measurement to no matter you’re feeling like utilizing (on this case 5 pt). Hold the drop-down bins of every choice at Fastened for now. Hit OK and take a look at your quite simple spherical brush with the Paintbrush Device (B). The comb stroke for calligraphy initiatives will make letters look full and fluid.


Step 4
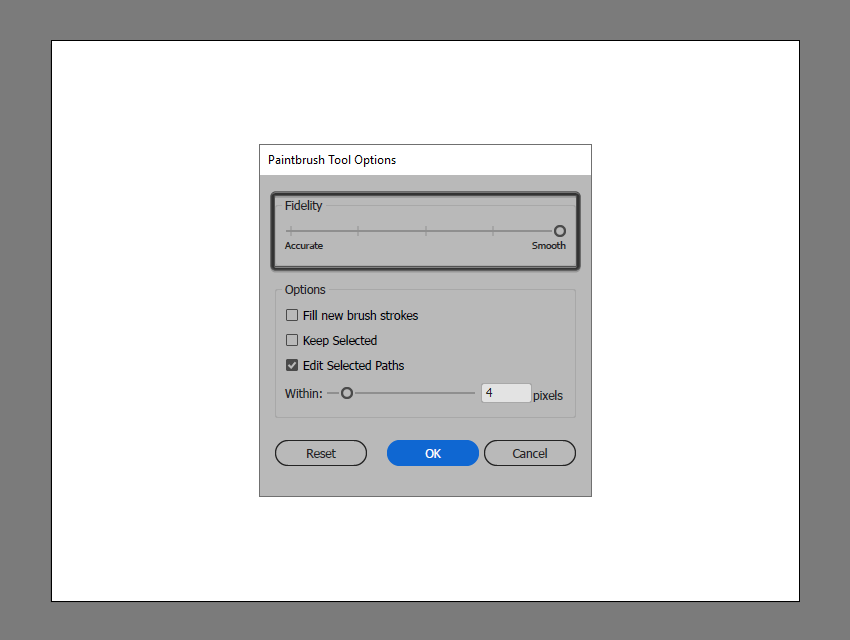
Hit Enter with the Paintbrush Device (B) chosen and you’ll take a look at the choices of the device which have some impact on the comb you’ve got created as properly. On this case, I’ve stored the Constancy to Clean so my paths are as fluid and clear as attainable.


2. Methods to Use the Spherical Brush Choices
Step 1
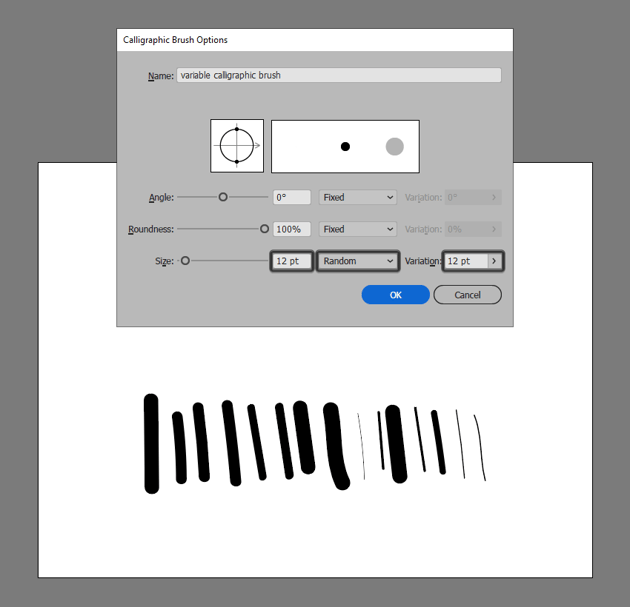
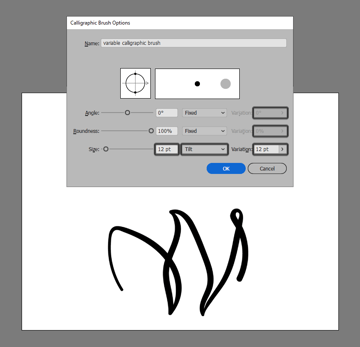
Now that we have accomplished the tremendous easy process of constructing a brand new brush, let’s learn to make calligraphy brush strokes. Within the occasion that you simply’d like for each path drawn to vary in dimension, choose Random from the drop-down menu subsequent to Measurement and transfer the Variation as much as 12 pt. Every line will probably be a special dimension from 1 pt to 12 pt.


Step 2
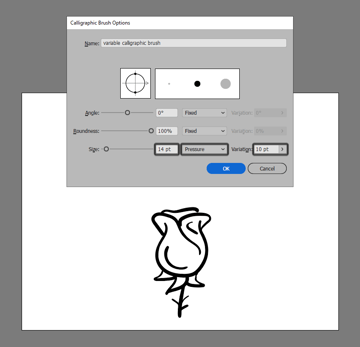
Most of the choices are solely helpful in case you’re utilizing a pressure-sensitive graphics pill. In case you change from Random to Tilt, you may discover that the angle at which you maintain your pill’s stylus impacts the scale of the comb’s line. This variation, in contrast to Random, adjustments all through a single path, quite than every new one.


Step 3
In case you change the drop-down menu to Strain, the scale will differ in line with how a lot stress you apply to your stylus’s nib when making a brush stroke for calligraphy functions. Once more, the variation exists inside a single path quite than with every new path. Utilizing the stress choice on your Calligraphic Brush is ideal for creating clear line artwork with thick and skinny line work that is still scalable (in contrast to making a calligraphy edit in Adobe Photoshop).


3. Methods to Create Flat Brushes
Step 1
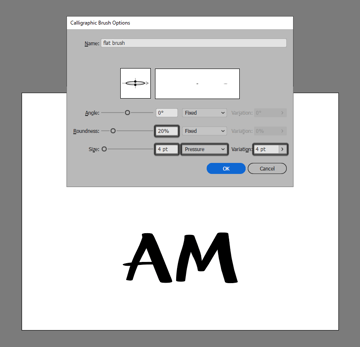
To create a flat brush cut back the Roundness when creating or enhancing the comb you are utilizing. Within the instance beneath, I’ve set the Roundness to 20%. The preliminary doodle beneath retains all choices as Fastened.

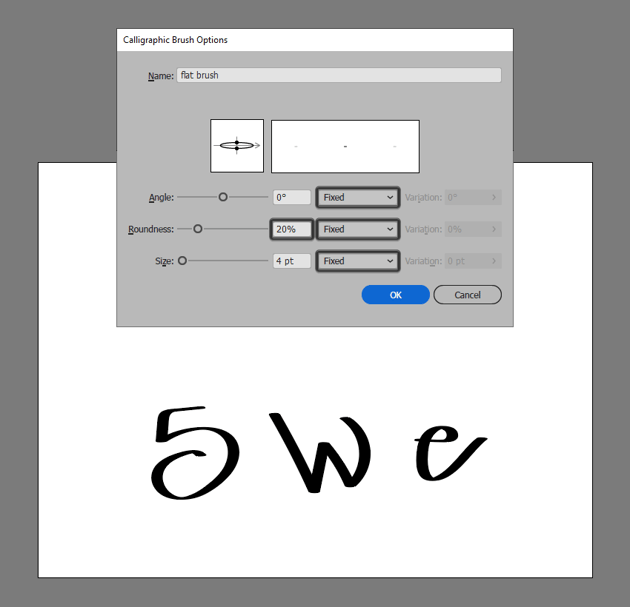

The second instance is with Strain enabled for dimension variance. I discover that though you may play with variations for the roundness too, a flat brush model is most helpful when the scale of the nib is the one variable of the work. This does depend upon what you are creating, nevertheless, so take that opinion with a grain of salt. Your calligraphy brush strokes might differ broadly relying on this setting.


Step 2
For instance, decrease the opacity of your brush both within the Transparency panel or on the high of Illustrator’s window when you could have the Paintbrush Device chosen. The flat brush is a superb device for sketching and portray with vectors. And as you may see from the Define view beneath, it is accomplished with a sequence of editable paths. In fact, it is also an ideal calligraphy device to imitate particular handwriting types.

4. Methods to Create Angled Flat Brushes
Step 1
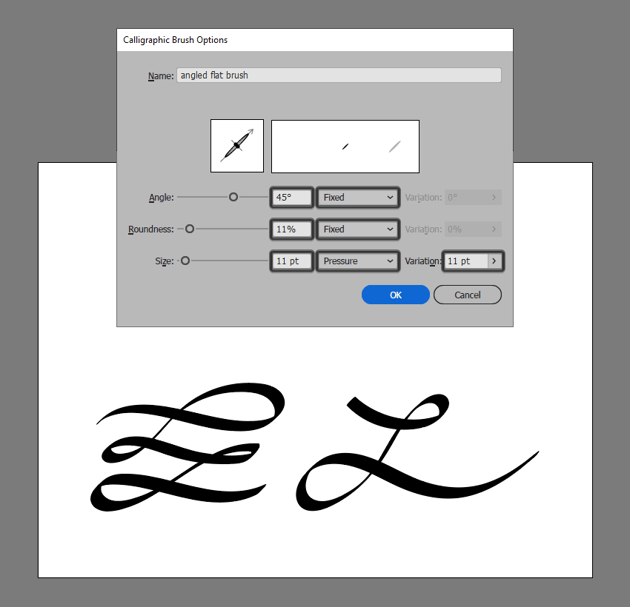
The final brush model we’ll go over is an Angled Flat Brush. You possibly can change the angle to no matter you need your Illustrator calligraphy brushes to be. Within the case beneath, I’ve set it to 45°.
I additionally modified the Roundness to 11%, am holding each Angle and Roundness Fastened, and have Measurement set to 11 pt, Strain, and with an 11 pt Variation. As you may see beneath, I discover this Calligraphic Brush to be wonderful for mimicking real-life calligraphy, good for hand-lettering, fancy get together invites, or any kind of chic brush stroke for calligraphy wants.


Step 2
I discover creating calligraphic lettering in vector kind permits for simple manipulation of the letters and prospers in addition to being able to print any time at any dimension with out loss to the standard of the picture. You are additionally capable of change the stroke dimension of your calligraphy edit while you resize the letter with out increasing the stroke (Object > Broaden) by deciding on a bigger stroke weight within the Strokes panel.


Step 3
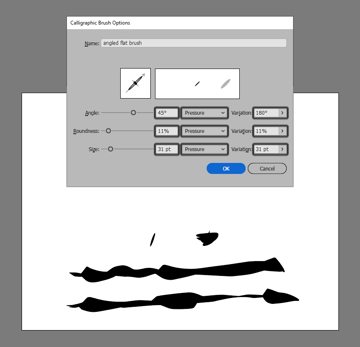
Lastly, let’s check out deciding on Strain for all three choices for the Angled Flat Brush. Within the instance beneath, I’ve the Angle set to 45° and the Variation at 180°, the Roundness set at 11% and the Variation at 11%, and Measurement at 31 pt and the Variation all the best way as much as 31 pt.
Beneath the choices, the primary line reveals the angled brush clicked with a mouse versus urgent down in a single place with a pill’s stylus. The second and third strains present all three choices at work with two paths and varied ranges of stress.


Now You Know Methods to Create Calligraphy Brushes!
The Calligraphic Brush is essentially the most fundamental of the 5 brush choices inside Adobe Illustrator, and it is usually a fairly helpful calligraphy device.
Enjoying with its choices and making a library of Illustrator calligraphy brushes not solely permits for extra customization inside your work, but additionally emphasizes using Illustrator as a drawing program versus being a device for pure design.
Superb Calligraphic Brushes From Envato Components
Do not forget you could all the time develop your brush library by heading over to Envato Components, the place you may discover an ideal number of vector brushes comparable to these:
1. Marker Illustrator Brushes (AI)
This skilled Illustrator calligraphy brush pack incorporates 25 high-quality digital marker brushes supposed for skilled designers, illustrators, and artists.


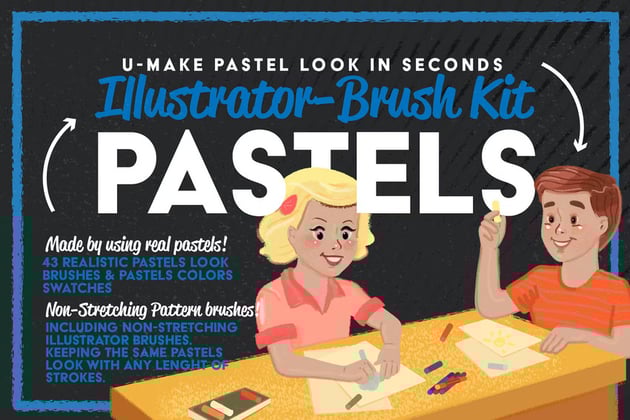
2. Pastels Brush Pack (AI)
On this set you’ll get 43 sensible pastel brushes and 25 pastel colours in 5 swatch teams for genuine pastel colours. You’ll love to use these calligraphy brush strokes in Illustrator on any form of undertaking, from illustrations for teenagers to grunge-style illustrations, comics, and sensible initiatives.


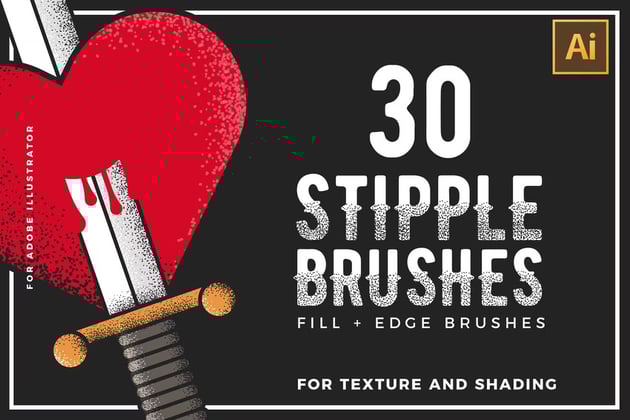
3. Stipple Brushes Pack (AI)
This can be the calligraphy device you want! Inside you’ll discover an enormous assortment of brushes appropriate for each calligraphy edit or design want—for instance, creating classic logos, illustrations, or backgrounds!


4. Classic Brush Pack (AI, EPS)
Utilizing these brushes is easy—simply lay down the strokes and choose an acceptable calligraphy brush in Illustrator from the Brushes panel. Save time through the use of multi-lined brushes to create your classic shading and textures to offer it that old-school engraving look.


5. Japan Brush Pack (AI)
This skilled Illustrator brush pack incorporates 39 high-quality Asian calligraphy brushes supposed for skilled designers, illustrators, and artists. Use every calligraphy brush in Illustrator to make your individual creations.


6. Nineteen Fifties Artist Brush Pack (AI)
Impressed by Nineteen Fifties illustration, these brushes have been made through the use of ink, outdated brushes, and the artist’s fingers. You need to use these brushes for vector work and line artwork too. Apply a singular brush stroke for calligraphy functions. They’re scanned in excessive decision, cleaned, and become vectors.


Or you need to use a few of these free Illustrator brushes:

Additional Develop Your Inventive Abilities
Simply completed going by way of this little article, and really feel like studying extra? Nicely, if that is the case, you are in luck, since I took the time to place collectively this record that ought to maintain you going for the next days.
Learn on to maintain enhancing your brush-related expertise, and maintain training with the wonderful calligraphic brushes accessible on Envato Components.