ActivePresenter 9 permits you to add new languages to closed captions so as to create subtitles for movies or initiatives in numerous languages. This function helps your content material be extra accessible for everybody no matter their language.
Add Closed Captions
So as to add closed captions, open the Insert tab > Closed Captions, or click on the CC button on the Timeline pane.

Then, a closed caption node will seem on the place of the Playhead on the Timeline pane. Concurrently, a closed caption editor seems on the Canvas so that you can sort the textual content.
For extra particulars, let’s see Learn how to Add CC to Tasks.
Add A number of Languages to Closed Captions
Add a New Language
Do the next steps so as to add a brand new language to closed captions:
Step 1: Choose a CC node within the Timeline pane.
Step 2: Go to the Insert tab > click on the drop-down arrow on the Closed Caption button > A number of Languages. Or within the Properties pane > Dimension & Properties > Basic > click on the Edit Language ![]() button.
button.
Then, the Edit Language dialog seems:
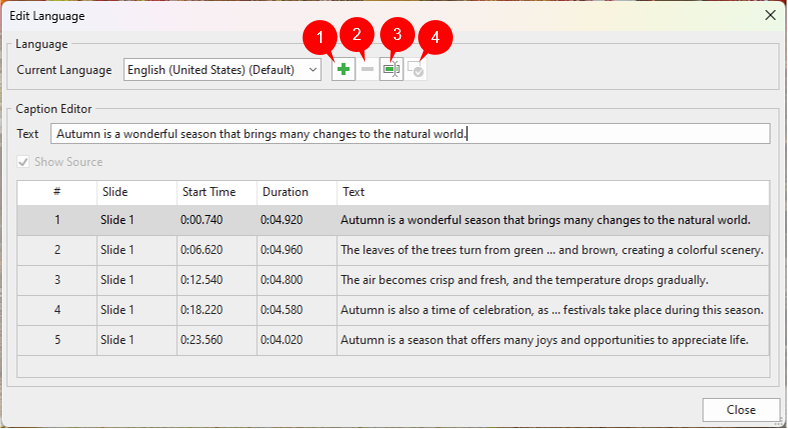
Step 3: Click on the plus button (1).
Step 4: Choose a language from the drop-down listing within the Add Language dialog that pops up.
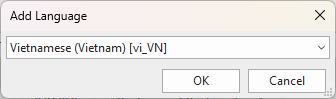
Then, click on OK to complete.
Repeat these steps so as to add extra languages as you need.
Handle New Languages
There are some choices that you may handle newly added languages:
- Take away a language: Click on the button (2).
- Rename a language: Click on the button (3).
- Set a language as default: Click on the button (4).
Edit New Languages
To edit a brand new language, do as follows:
Step 1: Choose a CC line within the dialog.
Step 2: Sort the textual content of the brand new language within the Textual content subject.

Within the dialog:
- Present Unique: Choose this checkbox to indicate the Supply subject.
- Revert: Revert the brand new language to the unique one.
- Add Line Break: Add the <br> tag to a textual content to interrupt it into new traces.
After that, the added textual content of the brand new language will change the outdated one within the chosen CC line.
Step 3: Click on Shut to use.
Allow the Closed Caption Toggle Button
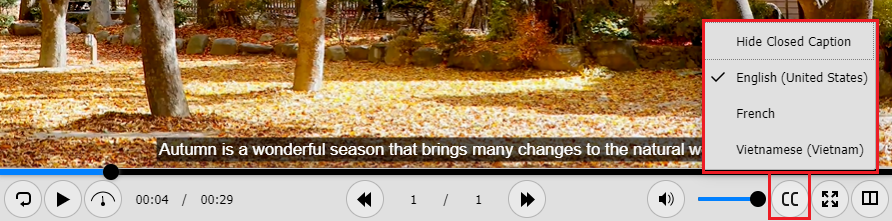
Toggle button permits you to disguise/present closed captions in addition to change them between a number of languages. To allow this button, open the Export tab > Participant Settings. Then, within the Participant Settings dialog, entry the Basic tab > Basic Parameters > Toolbar > choose the CC Button verify field > click on OK to save lots of the modifications.
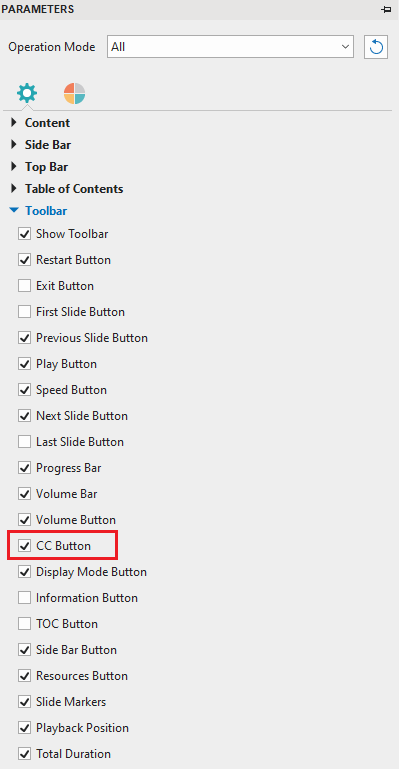
By doing so, the CC button will seem on the backside proper nook of the participant. Click on it to alter closed captions to a different language.
So, you’ve realized find out how to add new languages to closed captions in ActivePresenter 9. Obtain and do this wonderful function now.

Don’t overlook to go to our Tutorials web page and YouTube channel to get extra ActivePresenter 9 written and video tutorials up-to-date.
See additionally: