
Though the DJI Air 3 is a comparatively new drone, having been launched summer season of 2023, up to now it has acquired a number of firmware updates.
Firmware updates are important for drones as they oftentimes tackle and repair bugs, implement efficiency enhancements, and add new options.
This text and the included YouTube video will likely be a step-by-step information displaying replace the firmware on the DJI Air 3 and DJI RC 2 distant controller, which can at occasions additionally replace the firmware on the Air 3’s batteries.
Updating the Air 3’s Firmware
Whereas there are some that like to stick with the unique firmware their drones had been launched with, updating your Air 3’s firmware is helpful.
As talked about, new options, tweaks, and fixes are added over time. These updates enhance the person expertise. One such current enchancment to the Air 3 is the addition of Lively Monitor-360 Auto and different options.
DJI has been dedicated, currently, to implementing most of the options into the Air 3 that their prosumer strains have, extra particularly the Mavic 3 sequence.
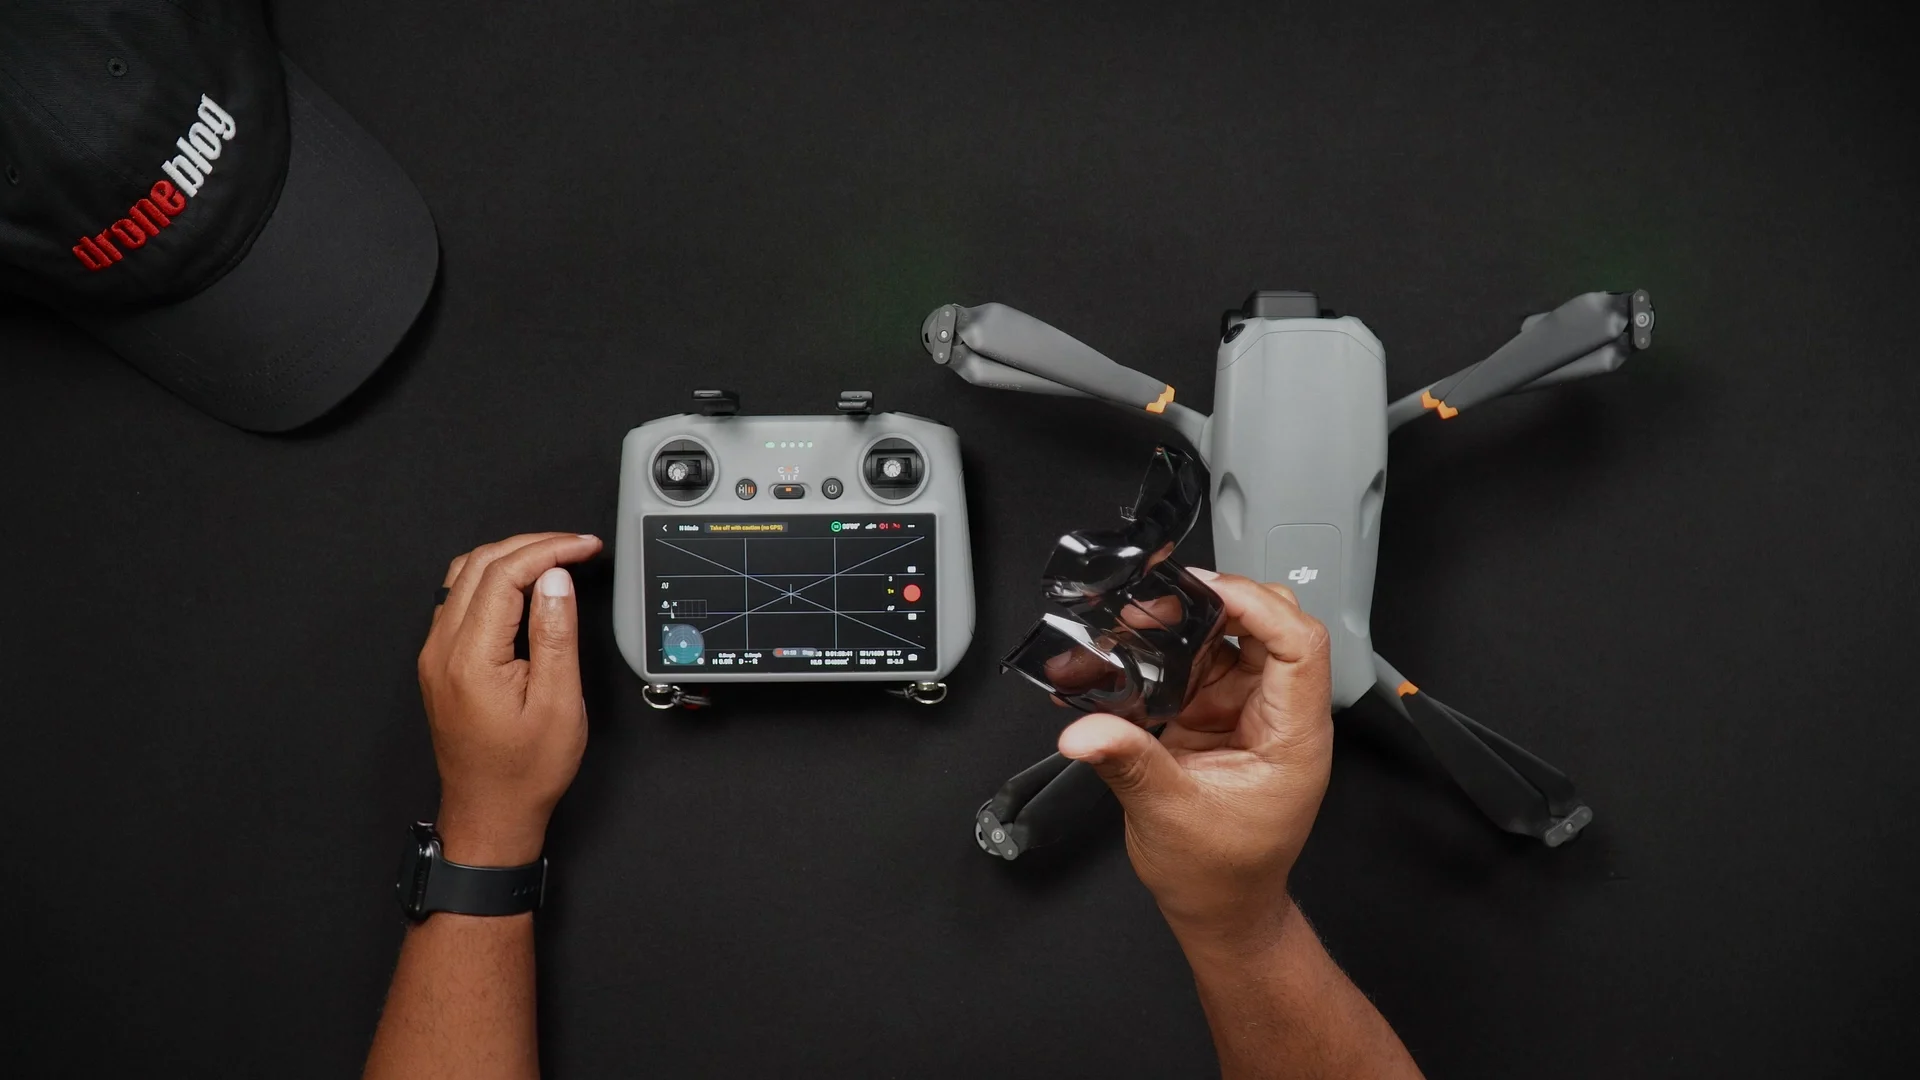
To replace the firmware in your Air 3, you’ll want your:
Moreover, as a basic rule of thumb, it’s suggested to have the Air 3 batteries and distant controller totally charged earlier than operating firmware updates.
The steps to replace the firmware in your Air 3 are as follows:
STEP 1: Earlier than turning the Air 3 on, take away the gimbal cowl. This can be sure that when the Air 3 is turned on, the motion of the gimbal is not going to be impeded and trigger errors.

STEP 2: After booting up your DJI RC 2, ensure you are related to a WiFi community. To verify this, go into your settings display screen by double-sliding down the notification shade. In case your WiFi just isn’t enabled, faucet the WiFi icon and anticipate a connection.
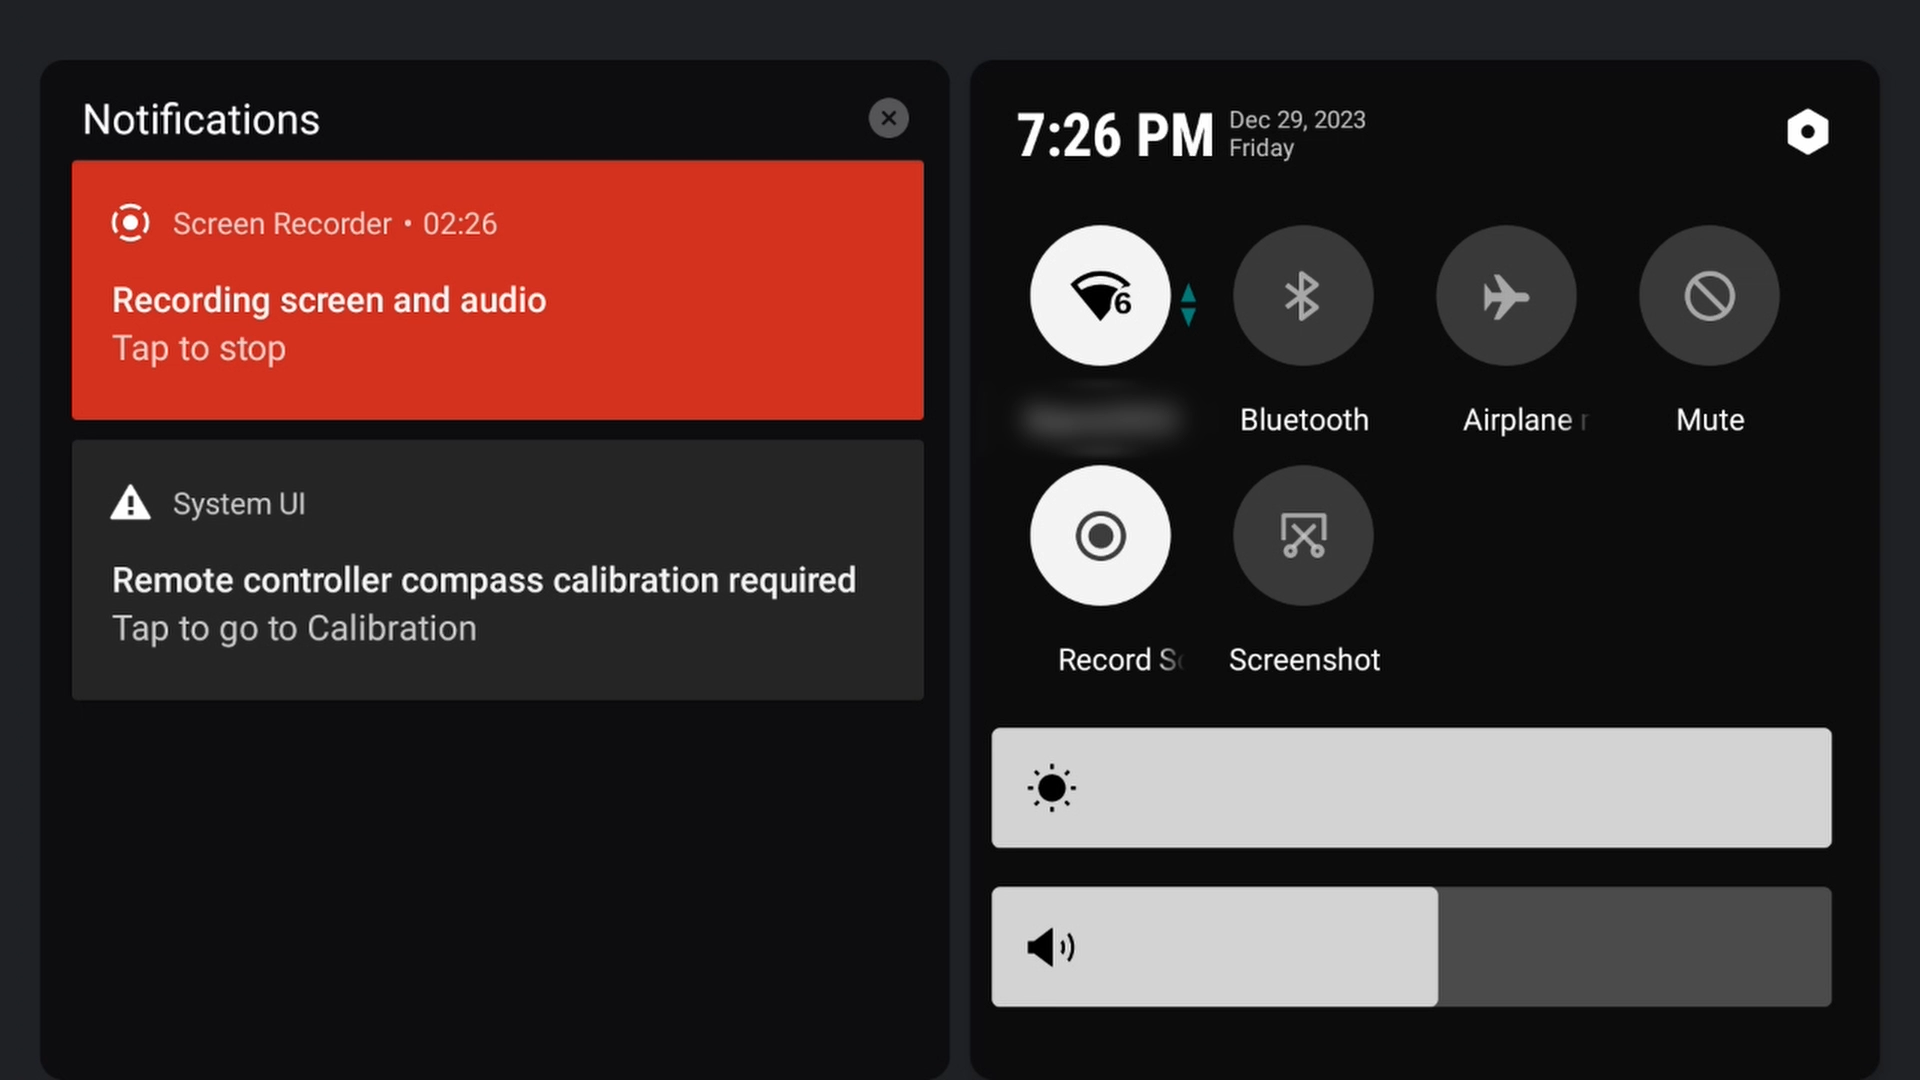
If you’re connecting to WiFi for the primary time, press and maintain the WiFi icon. This can convey you into the WiFi settings. Right here you’ll be able to connect with your most well-liked community.
STEP 3: Activate the Air 3.
STEP 4: If you happen to use your DJI RC 2 to additionally fly a Mini 4 Professional along with the Air 3, relying on which drone was flown final, chances are you’ll must scroll by way of the record of drones used and select the Air 3.
Choose the Air 3. Then select Go Fly.
If you happen to solely have the Air 3, you’ll most probably enter the DJI Fly Digital camera View display screen instantly.
» MORE: How you can Join the DJI Air 3 to a Laptop (Video)
STEP 5: From throughout the Digital camera View display screen, press the again button, which is able to take you to the Air 3 residence display screen.

Right here you will notice that there’s a firmware replace accessible. Select Set up.
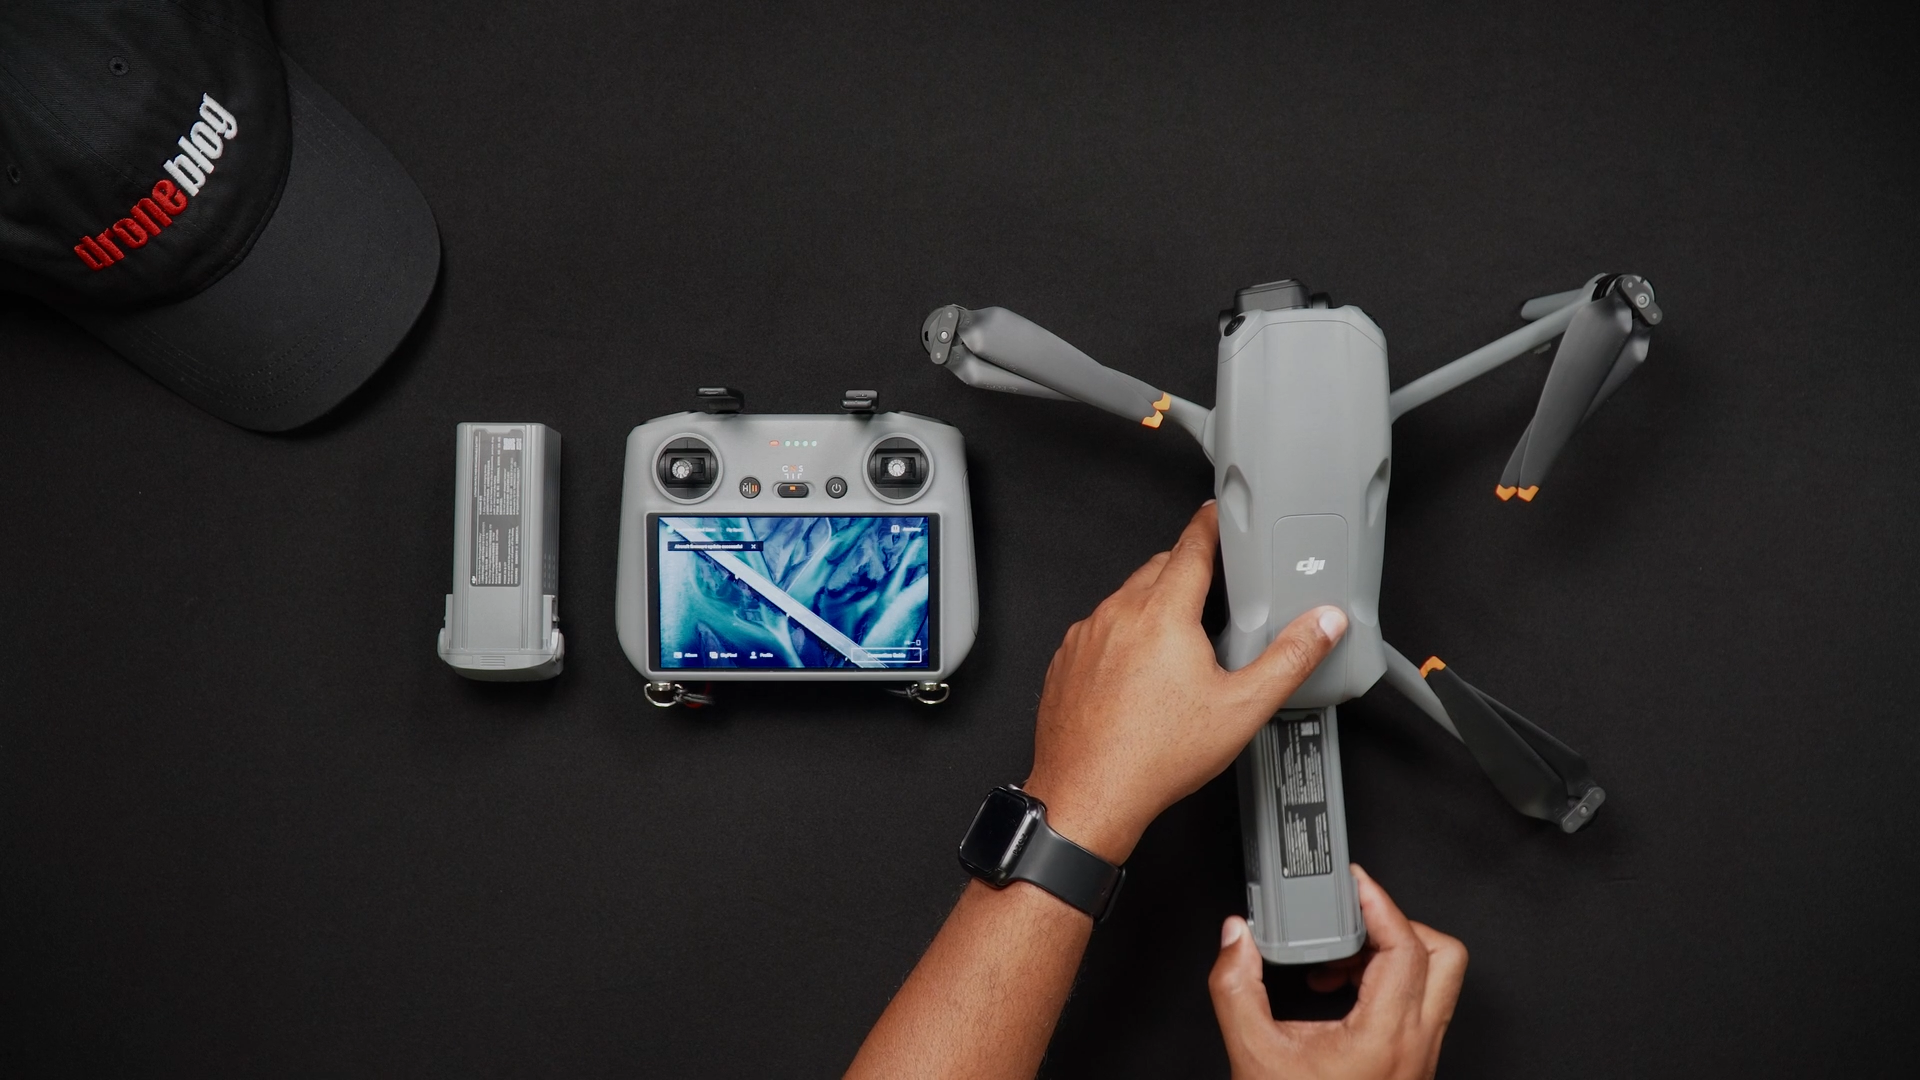
STEP 6: If you happen to haven’t already performed so, unfold the Air 3, so you’ll be able to insert the following set of batteries after the preliminary replace has been put in.
Throughout the replace course of, the lights on the Air 3 will flash varied colours. The DJI RC 2 may also reboot itself.
After the firmware has been put in and up to date, chances are you’ll must replace every battery that you just personal and use within the Air 3.
STEP 7: Flip off the Air 3, take away the battery that was initially within the Air 3 for the replace, and insert the following one. Flip in your Air 3.
STEP 8: Hit the again button after the Air 3 activates and goes into Digital camera View. If there’s a battery firmware replace, it is best to now see one other replace accessible (for the battery). Choose Replace.

You’ll then be dropped at a further display screen that claims “replace accessible”. Choose Replace right here, after which the Air 3 battery will replace.
It’s regular, whereas the battery is within the means of being up to date, that the Air 3 will reboot itself, presumably greater than as soon as.
After the battery has been up to date, you’ll obtain a message saying “Firmware replace profitable”. At this level, you’ll be able to exit the Replace display screen, returning again to the DJI Fly residence display screen.
If the Air 3 has not shut off at this level, you’ll want to show off the Air 3, insert a brand new battery, and boot up once more for every battery that you just personal. This can provoke the replace for the battery after which you’ll be able to repeat the aforementioned steps.
Relying on the variety of batteries you may have, this course of can take a couple of minutes.
Manually Checking for Firmware Updates
In case you have not been prompted robotically that there’s a new firmware accessible, you’ll be able to manually verify for updates, by doing the next:
With the DJI RC 2 turned on and related to your WiFi community, whereas on the DJI Fly residence display screen, merely go to Profile > Settings > Firmware Replace > Examine for Firmware Updates.

After the DJI RC 2 checks for the replace, if there may be none, you’ll obtain a message saying “Your firmware is updated”.
If there’s a new firmware replace, you’ll be alerted and can have the choice to run the replace.
» MORE: DJI Air 3 Grasp Pictures (All You Must Know with Video)