Jumper isn’t taking a break! Shortly after the discharge of the T20S, they’ve launched the T14, a radio that bears a placing resemblance to the Radiomaster Boxer and TBS Mambo however stands out with its distinctive options. On this overview, I’ll go over these options and examine the T14 to the Boxer and T20S, serving to you resolve which radio you need to get.

New to FPV? You’ll be able to be taught extra about FPV drone radio transmitters on this purchaser’s information: https://oscarliang.com/radio-transmitter/
The place To Purchase?
Get your Jumper T14 radio from these distributors:

Gimbal Choices
The Jumper T14 is out there in two variations: one with Corridor gimbals at $89.99, and a pricier one at $109.99 that includes RDC90 gimbals—present in high-end radios just like the Futaba T18MZ. Some argue that RDC90 gimbals present extra linear outputs than their Corridor counterparts, however in my expertise, I didn’t discover a major distinction in smoothness or management really feel.
For those who’re a kind of individuals who consider in “costlier is all the time higher” then by all means get the RDC90. Nevertheless, I believe the Corridor gimbals are completely high-quality for most individuals, particularly given their extra inexpensive price ticket.
Frequency Choices
The Jumper T14 comes geared up with an ExpressLRS inner module, providing three frequency decisions: 2.4GHz, 868MHz, and 915MHz. Personally I favor 2.4GHz — that’s the one I’m specializing in on this overview. Why? It presents distinctive vary that fits my wants (as much as tens of kilometers) and comes with notably smaller antennas in comparison with the decrease frequency 900Mhz choices. Study extra concerning the professionals and cons of those frequencies right here: https://oscarliang.com/expresslrs/#24GHz-vs-900MHz
Equipment
Within the field, yow will discover the next equipment:
- Neck strap
- Fast begin consumer handbook
- USB-C cable
- Spare springs for gimbals
- Two swap replacements
Just like the Boxer, it comes with a carry case. Nevertheless, it lacks a devoted gimbal/swap protector, as an alternative offering two easy foam rolls to guard the sticks.

Specs and Options
- MCU: STM32F407ZET6
- Display: OLED Show
- Display measurement: 2.42″ (decision 128*64)
- Rocker Stick Dimension: Customary
- Gimbals: Corridor sensor or RDC90
- Constructed-in RF: ExpressLRS (915MHz or 2.4GHz)
- Transmission energy: 1000mW (max 30dBm)
- Exterior module interface: commonplace JR module bay (JR / FrSKY / Crossfire suitable)
- TF card: built-in chip (formally beneficial by EDGETX)
- Working voltage: 6V – 8.4V
- Battery Required: 21700*2 (not included)
- Dimension: 185*175*79mm
- Weight:
471g503g (with out battery)- 593g with 18650
- 637g with 21700
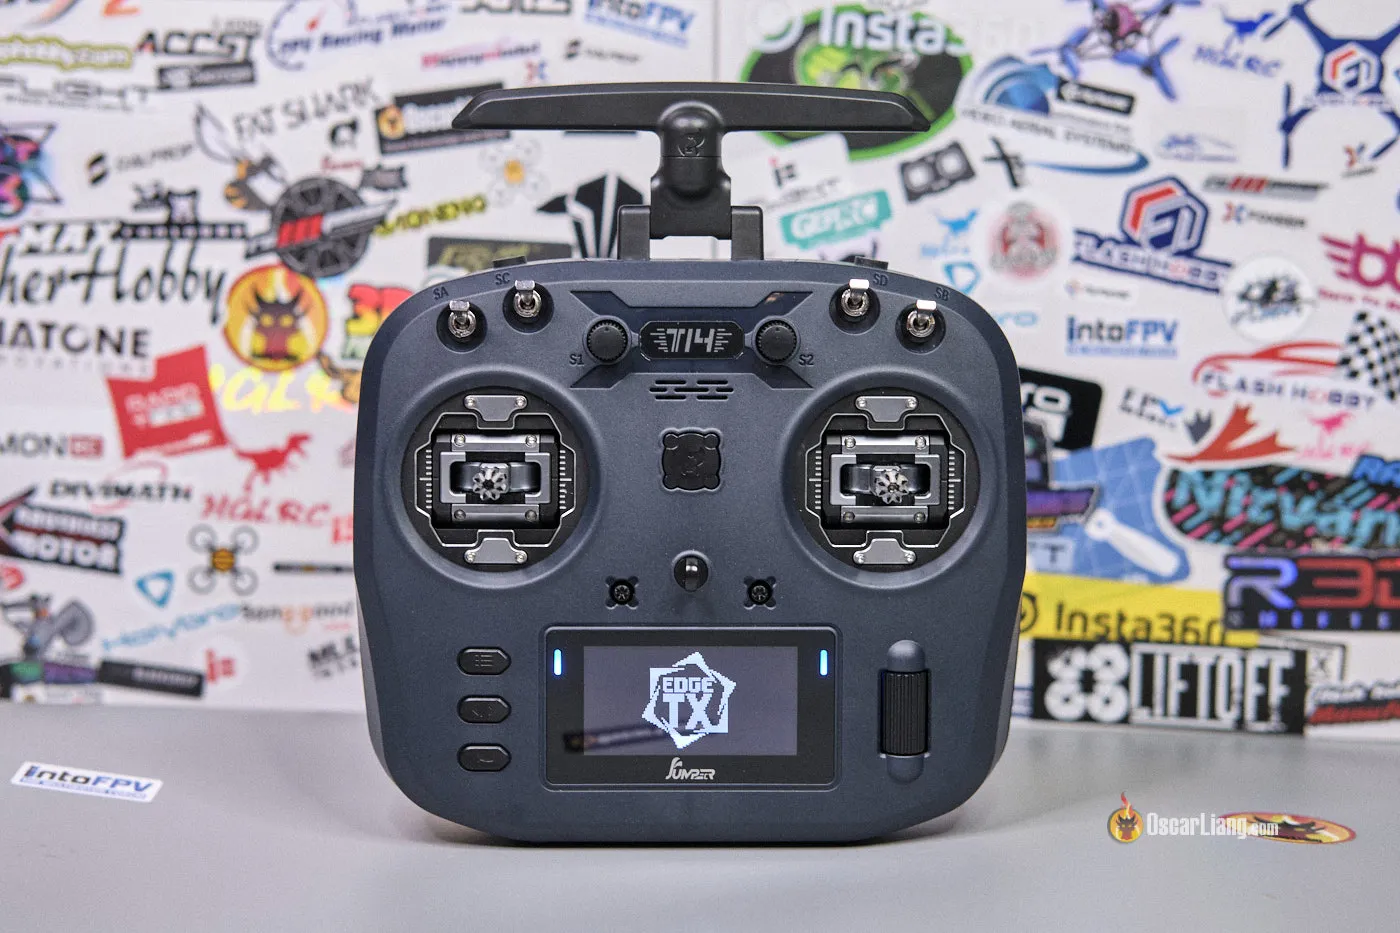
Construct and Design
At first look, the T14 seems similar to the Boxer – the housing can be made from plastic with a black matte end, that includes a well-recognized association of switches and a comparable structure. The plastic shell of the T14 feels barely cheaper and extra flimsy, however contemplating the worth, that is sensible.


It’s not precisely a direct copy although, there are some substantial variations as I’ll clarify on this overview.

Dimension and Weight
Although being related in peak and thickness, the T14 is considerably wider than the Boxer. Nevertheless, it’s the lighter of the 2 by about 30 grams. Each fashions boast flat bases, permitting them to face upright on a flat floor, which is all the time a plus in my ebook.

Stacked in opposition to the Jumper T20S, the T14’s bigger measurement is clear regardless of having fewer controls. The structure due to this fact is seems much less cramped. Regardless of being considerably greater, the T14 solely weighs 50g extra.

Gimbals
My T14 overview unit got here geared up with RDC90 gimbals. Evaluating these to the Corridor sensor gimbals of the Boxer and TX16S, I discovered no vital distinction in management smoothness. The RDC90s do permit for stick journey changes; nonetheless, I discovered the default configuration too slim for me as a pincher and I needed to improve all of it the way in which to the max to really feel exact in my flying. Thumbers may discover smaller stick journey extra to their liking, it’s actually a private desire.
A notable draw back is the gimbal pressure adjustment. Not like the Boxer, the place changes are a breeze from the entrance, the T14 requires a bit extra effort, as you want to open up the radio to make modifications.

The stick ends, too, left one thing to be desired. They felt too skinny and lacked adequate grip for my style. A fast swap for third-party stick ends, just like the Radiomaster Sticky360, made a world of distinction. Bear in mind, these gimbals have M3 threads, so be sure you get stick ends which can be suitable.
Switches and Controls
On the entrance, there are 4 switches, one 2-position and one 3-position switches on either side. Two rotatory dials within the center.

Beneath the dials, you may have the ability button between the 2 gimbals. Not like the Boxer, the place the standing LED is constructed into the ability button, Jumper moved the standing LED to the perimeters of the display.
The shoulder of the radio options two low-profile, button fashion switches. The left is a latching swap and the correct a momentary one, identical to the Boxer. For those who’re not a fan of those button fashion switches, Jumper has thoughtfully supplied stick-style replacements. Nevertheless, each are latching, with no momentary possibility.

Be aware that there are not any “flight mode” buttons on the T14, which could possibly be a disappointment for some. On the intense facet, it makes a cleaner structure by eradicating these buttons. Personally I hardly ever use them so I’m certain it’s not an issue for many individuals.
Display, Buttons and Menu
Navigating the T14’s menu is easy, due to a normal button structure and scroll wheel in Jumper’s radios. The plastic scroll wheel could really feel low cost in comparison with the Boxer’s steel one. And the scroll wheel is a bit slippery and straightforward to pick out the flawed possibility.

The place the T14 actually shines is its monochrome OLED display. It’s a step above the Boxer’s LCD display, providing clear visibility in varied lighting situations, even direct daylight—no backlight wanted.

Antenna
Whereas not detachable, the onboard, foldable antenna is a one other space that the T14 excels, making it travel-friendly and straightforward to pack. It may be rotated as much as 180 levels for optimum angle. It’s price noting that for optimum efficiency, it’s essential to align your TX antenna along with your RX antenna – making certain a constant, robust sign. You’ll be able to discuss with my tutorial on antenna placement for extra insights: https://oscarliang.com/antenna-positioning/
The draw back nonetheless, is which you can’t swap out the antenna for a unique one, e.g. a better achieve antenna. However I doubt many would do this anyway so it’s probably not a deal breaker.

Internally, the antenna is linked to the RF module by way of a UFL connector. Apparently, the antenna’s plastic housing appears outsized for two.4Ghz. I assume they’re utilizing the identical mould for each 2.4GHz and 900MHz to save lots of prices, however they may have clearly made it smaller for two.4GHz.

Connectors and Speaker
On high, you may have the USB-C port for FPV simulator, information switch and firmware updates. Additionally there’s the coach port (3.5mm audio jack).

The speaker, positioned above the ability button, doesn’t fairly match the Boxer’s audio high quality or quantity, but it surely’s a minor setback that doesn’t have an effect on utilization.
Again Deal with and Neck Strap
The T14 incorporates a foldable plastic again deal with, whereas the Boxer opts for a cloth one. Which one is best depends upon your requirement, every has its professionals and cons.

The neck strap hook location is spot on with the battery put in, the radio completely stability on a neck strap.
Ergonomics
Dealing with the T14 feels acquainted should you’ve used the Boxer, due to their related form and weight.
Nevertheless, the anti-slip rubber inserts on the again of the T14 really feel barely cheaper than those within the Boxer, and are much less grippy. They’re adequate, although, particularly when contemplating the T14’s aggressive value.
Whether or not you’re a thumber, or a hybrid pincher, the T14 has you lined. Holding it feels pure, the gimbals are clean and gentle out of the field with out the necessity for any adjustment, apart from throttle which I needed to loosen a tiny bit extra.
My fundamental criticism can be the entrance switches, that are positioned barely additional away from the perimeters in comparison with the Boxer. It makes it more durable to succeed in the interior switches – you form of need to take your hand off the stick to succeed in it. On the Boxer, these switches are extra accessible.
Exterior Module Assist
The T14 has a JR module bay on the again that helps exterior modules, suitable with full measurement modules like Crossfire, different ExpressLRS modules, Ghost, Tracer and so on.

Battery Choices
The Jumper T14 comes with a battery holder that may match two 18650 or 21700 Li-ion cells. To make use of 18650 on this holder, be sure that to tug the contacts outwards so that they maintain the smaller 18650 cells securely.

Batteries should not included, and must be bought individually. Get them right here:
21700 Li-ion cells:
18650 Li-ion cells:
Energy Consumption and Battery Life
Present draw varies relying on the RF energy setting, right here’s the measurements from my testing:
- 0.11A with RF module turned off
- 0.45A at 25mW
- 0.67A at 250mW
- 0.80A at 500mW
- 0.90A at 1W
By default he fan is configured to activate at 10mW, which suggests it’s just about all the time operating. This results in increased present draw than different ExpressLRS radios I’ve examined at decrease energy ranges. I’m unsure if that is intentional by Jumper, as most ELRS radios I’ve encountered usually activate cooling fan at 250mW or increased. Anyway I left this settings at default for the remainder of the take a look at.
Utilizing 21700 4500mAh cells, you possibly can anticipate round 8 to 9 hours of run time at 25mW, or roughly 4 hours at 1W. With the 18650 3000mAh cells, this drops to roughly 6 hours at 25mW or about 3 hours at 1W. Be aware: that is solely a tough estimation.
To optimize battery life, you possibly can make the most of the Dynamic Energy possibility out there within the ExpressLRS LUA script. With Dynamic Energy, the mW output adapts to the mannequin’s vary, sign power and hyperlink high quality, minimizing energy consumption. This function permits for as little as 10-25mW utilization throughout unobstructed line-of-sight flights.
Battery Charging
You’ll be able to cost the battery by way of the USB-C port.
Jumper appears to have fastened the gradual charging difficulty I raised when reviewing the T20S. The T14’s charging charges now attain as much as 10W, over twice as quick as earlier than. Be aware that you’ll want an influence adapter that help at the least 5V 2A or increased, utilizing a pc’s USB port could lead to slower cost occasions.
Estimated charging occasions are as follows:
- 21700 4500mah batteries: Roughly 4-5 hours
- 18650 3000mah batteries: Just below 3 hours
Nevertheless, there’s a quirk: the radio powers on mechanically when plugged in for charging, which looks like a bug. Hopefully this could get addressed in future firmware updates. For now I simply swap to the “Simulator” profile throughout charging, which ensures each inner and exterior RF modules are turned off.
FPV Simulator Assist
The Jumper T14 is plug and play with standard FPV simulators similar to Tryp and Liftoff. When linked, it’s mechanically acknowledged within the simulator. The setup stays the identical as all different mainstream remotes.
Inside RF Module
The T14 options an built-in ExpressLRS module that comes with ELRS 3.3.1 firmware. I’m unable to replace this module but to the newest 3.3.2 because the system goal “T-14 2G4 TX” has not but been added. Hopefully it can in future releases. It additionally helps ELRS Backpack function.
Sadly, Gemini mode isn’t supported by the T14. Hopefully Jumper will launch a Gemini succesful T14 sooner or later. For now you should utilize the BetaFPV SuperG TX module which I’ve examined with first rate outcomes: https://oscarliang.com/betafpv-superg-nano-transmitter-module/
If you’re new to ExpressLRS, take a look at my detailed setup information: https://oscarliang.com/setup-expresslrs-2-4ghz/
Radio Firmware
The Jumper T14 comes preinstalled with EdgeTX firmware, which is presently probably the most extensively used radio firmware within the FPV group. Firmware model is 2.10.0-selfbuild. Firmware goal is T14.
A notable function concerning the T14 is its elimination of the SD card slot. And no, it’s not an oversight. The truth is, the T14 doesn’t even require an SD card. As a substitute, it comes with an onboard 512MB flash reminiscence. This serves as a storage for what’s usually known as “SD Content material” the place mannequin photos, audio information and radio backups are saved. Meaning you received’t have to buy an SD card individually.
You’ll be able to entry the storage by way of the USB-C port: join the cable whereas the radio is lively, when prompted, choose the USB Storage (SD) possibility.
When you seemingly received’t have to mess with firmware when the radio arrives, it’s actually attainable to flash EdgeTX firmware utilizing one of many two strategies described in my tutorial: https://oscarliang.com/flash-edgetx/
Output Energy Testing
Listed below are the ability measurements of the Jumper T-14’s inner module at totally different output energy ranges.
This take a look at was accomplished beneath ELRS firmware model 3.3.1. I couldn’t replace to the newest 3.3.2, as T-14 2G4 TX goal has not made it to the system listing but. Hopefully it is going to be out there within the subsequent launch.
| Energy Ranges | 25mW | 50mW | 100mW | 250mW | 500mW | 1W |
| T14 Inside Module | 55mW | 103mW | 216mW | 448mW | 610mW | 840mW |
These measurements have been taken utilizing the ImmersionRC Energy meter V2 and exhibit the accuracy of the manufacturing unit calibration and whether or not the utmost output energy meets expectations. It’s necessary to notice that these measurements don’t mirror the {hardware} high quality, however reasonably the consistency and efficiency of the interior module
After operating the T-14 at its most 1W output energy for 20 minutes, it settled round 815mW. Regardless of the extreme output energy in decrease settings, the efficiency of most setting is on par with that of the Radiomaster Boxer.

Tear Down
Taking aside the T14 was surprisingly simpler than the T20S, requiring the removing of solely 4 screws with out touching the rubber inserts.

The back and front housing are linked by way of 2 cables, which seem like for the interior and exterior RF module. The improved construct high quality was evident, with all switches’ solder joints protected by glue. The eye to element is nice to see.
The general design is considerably much less advanced in comparison with the earlier T20S, making restore and future modifications a lot simpler.

Listed below are some shut up photographs of the highest and backside PCB.


Conclusion
The Jumper T14 presents versatility and worth for FPV pilots, regardless of its few quirks.
T14 vs Boxer
In relation to selecting between the T14 and the Boxer, it boils right down to what you worth most in a transmitter.
Ergonomics smart, each radios really feel related in hand, however the Boxer presents higher grip. Additionally I really feel just like the switches on the Boxer are simpler to succeed in than the T14 with out stretching your fingers an excessive amount of.
The T14’s superior OLED display and cleaner structure make menu navigation a pleasure. But, by way of construct high quality, the Boxer has a slight edge, feeling extra strong regardless of the T14’s extra engaging value level.
See my overview of the Radiomaster Boxer: https://oscarliang.com/radiomaster-boxer/
Examine costs of the Boxer:
T14 vs T20S
For those who’re deciding between the T14 and the T20S, contemplate the T14’s benefit of a bigger display and exterior modules help without having an adapter. The T14 additionally stands out for its simplicity for restore and mods. The interior construct high quality has improved noticeably in comparison with the T20S.
For individuals who prioritize compact kind issue, you may discover the T20S a extra compelling possibility. Nonetheless, it presents extra options and performance whereas being a smaller radio. Positive, the T20S additionally helps exterior module, but it surely requires a module adapter. If you wish to go together with the T20S you actually ought to keep away from utilizing exterior module because it ruins the compact kind issue.