Do you’re keen on previous typewriters and the distinct typewriter texture and magnificence they apply to the letters? These duplicated letters, and the illegible and generally even blurred and nearly lacking symbols? A premium typewriter font can add a variety of persona to your artistic tasks.


On this tutorial, I’ll present you a fast and simple option to create a classic typewriter font impact utilizing a displacement map, textures, and good filters. Observe this straightforward tutorial to create a typewriter font in Photoshop that you should use every time you want it.
Let’s begin to create our personal classic typewriter font impact. If you wish to be taught this typewriter textual content impact by way of video, try our lesson on the Envato Tuts+ YouTube channel:
What You will Study
As you are on the point of begin this Photoshop typewriter font tutorial, it’s best to verify the examine program to arrange for what you may be taught. On this case, we’ll go over:
- How you can put together the doc
- How you can create a typewriter font textual content impact
In a number of easy steps, you may be able to create your personal typewriter textual content impact.
What You will Must Study How you can Make a Typewriter Font in Photoshop
The next property had been used within the manufacturing of this Adobe typewriter font tutorial:
1. How you can Put together the Doc
Step 1
Let’s get began with this typewriter texture tutorial. Arrange a New Doc by urgent Management-N. Set the doc dimension to 1500 by 1000 px.


Step 2
Drag and Drop the textures from the tutorial property to the doc, after which make these layers Invisible.


Step 3
We’re midway via the primary course of to create a typewriter font in Photoshop. Now, hit T and create two textual content layers with any phrases you wish to use.


Step 4
After that, add a Masks to every layer.


Step 5
Choose the textual content layers whereas holding Shift, and hit Management-G to create a gaggle of the layers. Then add a masks to this group as we did earlier than.


Step 6
Now we have to create 4 duplicates of the group utilizing Proper Click on > Duplicate Layer.


2. How you can Create a Typewriter Font Textual content Impact
It is time to start the second course of to create a Photoshop typewriter font.
Step 1
Choose the masks of the primary textual content layer after which Management-click on the icon of the textual content layer.


Step 2
Go to Choose > Modify > Contract and set Contract By to 4 px.


Step 3
Press Shift-Management-I to invert the choice, after which hit Shift-F5 to fill the choice with black.


Step 4
Add the identical masks impact to the second textual content layer and hit Management-D to deselect.


Step 5
Choose the masks of the primary layer after which go to Filter Gallery > Brush Strokes > Splatter and use the next settings: Set Radius: 10; Smoothness: 15. After that, add the identical filter to the masks of the second layer utilizing Alt-Management-F.


Step 6
Put the ink texture inside the primary group of layers.


Step 7
Double-Click on on the ink texture within the Layers panel, after which go to Shade Overlay and use white.


Step 8
Now we have to add the choice to the masks of the second group of layers, as we did earlier than. However this time we’ll use the next settings: Contract By: 2 px.


Step 9
After that, choose the masks of the textual content layer and go to Filter > Filter Gallery > Brush Strokes > Sprayed Strokes and set the Stroke Size to 20, Spray Radius to 0, and the Route to Horizontal. Then add the identical impact to the second layer masks utilizing Alt-Management-F.


Step 10
Now let’s go to the following group of layers and add the masking impact to each textual content layers as we did earlier than, however this time we need not use the contract perform.


Step 11
Choose the Masks of the layer after which go to Filter > Distort > Displace and use the next settings:
- Horizontal Scale: 4
- Vertical Scale: 4
- Displacement map: Tile
- Undefined Areas: Repeat Edge Pixels
Hit the OK button, and now it’s worthwhile to choose the PSD file from the tutorial property as a displacement map. Add the identical impact to the second layer utilizing Alt-Management-F.


Step 12
Add the masking impact to the textual content layers within the fourth group with the Contract by 4 px setting.
Step 13
Do not despair! We’re midway via this second a part of the tutorial about Adobe typewriter fonts.
To proceed, choose the masks of the textual content layer and go to Filter > Distortion > Ripple, utilizing the next settings: Quantity: 69%; Dimension: Medium. After that, choose the masks of the second textual content layer and hit Alt-Management-F so as to add the identical filter.


Step 14
Choose the masks of the primary layer after which go to Filter Gallery > Sketch > Torn Edges and use the next settings:
- Picture Stability: 40
- Smoothness: 15
- Distinction: 15
After that, add the identical filter to the masks of the second layer utilizing Alt-Management-F.


Step 15
Now let’s go to the final group of layers and create a masks impact as we did earlier than utilizing Contract by 4 px.
Step 16
Go to Filter Gallery > Brush Strokes > Splatter and use the next settings: Spray Radius: 10; Smoothness: 15. After that, add the identical filter to the masks of the second layer utilizing Alt-Management-F.


Step 17
And at last, let’s add the final filter to the masks. Go to Filter Gallery once more, after which choose Texture > Craquelure and set the Crack Spacing to 35, Depth to 10, and Brightness to 0. Use the identical impact for the masks of the second layer.


Step 18
Now we have to make among the components invisible. Choose the masks of the primary group of layers, after which hit M and choose some phrases you want to make seen. Maintain Shift to make a number of picks.


Step 19
Hit Shift-Management-I to invert the choice after which Management-I to invert the masks.


Step 20
Delete some components of various group masks as we did earlier than.


Step 21
Transfer the primary group of layers about 10 px to the left whereas holding Shift.


Step 22
Change the Opacity of the group to 90%.


Step 23
You are nearly accomplished! Simply a few steps to create your personal Photoshop typewriter font.
Create a reproduction of the overlay texture and transfer each layers above all of the teams. Then change the Mixing Mode of the primary texture to Laborious Gentle and the Opacity to 52%. After that, change the Mixing Mode of the second texture to Multiply.


Step 24
Choose the primary overlay texture and hit Alt-Shift-Management-B. Then hit OK.


Step 25
Go to Picture > Changes > Brightness/Distinction and set the Brightness to -80 and Distinction to 100.


Step 26
And for the final step, we have to put all of the earlier teams in a brand new group after which Proper-Click on on the primary texture and choose Create a Clipping Masks.


Superior Work, You are Now Performed Making a Photoshop Typewriter Font!
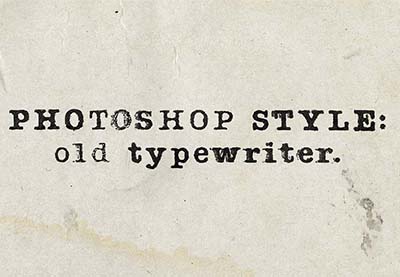
Congratulations! You have got created an previous Adobe typewriter font impact utilizing a displacement map, textures, and good filters. Right here is our last end result. Is not it an superior typewriter texture?


Premium Typewriter Font Examples From Envato Parts (2023)
As you’ll be able to see, studying find out how to make a typewriter font in Adobe Photoshop is pretty straightforward. Nonetheless, if you wish to know what a premium typewriter font seems to be like, try the perfect typewriter font assortment out there on Envato Parts. With them, you’ll get a prime typewriter textual content impact in a number of seconds.
1. Enigma Typewriter Sans Font (TTF)


This traditional typewriter font will show you how to to recreate the fashion of previous paperwork and papers. It was impressed by the “Enigma machine” and has an ideal classic and grungy look. This typewriter font helps multilingual glyphs and is available in one TTF file.
Obtain this unimaginable typewriter texture to present a cool feel and appear to your tasks.
2. Silk Remington Typewriter Texture (TTF)


Impressed by the identify of the previous model, this product is an genuine previous typewriter font, created by Jadugar Design Studio. This classic typewriter font is available in 5 variations, from Skinny to Tough, so it could possibly be actually helpful for several types of tasks.
You will get this typewriter textual content impact with out having to undergo the method of studying find out how to make a typewriter font in Adobe Photoshop.
3. Not My Kind Typewriter Font (OTF)


If you happen to ask what font seems to be like a typewriter, the reply is the one that’s created with an actual typewriter. This typewriter font was made with an Oliver Courier Typewriter from an vintage market. If you happen to want a easy previous typewriter font with a large number of alternates, this one is your best option for you.
4. AMTW Premium Typewriter Texture (TTF)


In case you are searching for an American typewriter font, check out AMTW. This traditional typewriter font could possibly be utilized in some ways as a result of it is available in three kinds: common, tough, and rough-rough.
Use this as a Photoshop typewriter font or in some other design modifying platform.
5. Catalina Typewriter Textual content Impact (TTF)


In case you are searching for a font that appears like a typewriter however was made by hand, Catalina Typewriter is the perfect typewriter font for you. This neatly handwritten font can be excellent for creating typewriter font tattoo sketches, desk playing cards, menus, and far more.
You possibly can obtain it with a few clicks and embody it in your arsenal as an Adobe typewriter font.
Discover Extra Photoshop Tutorials and Assets
Now, you know the way straightforward it’s to discover ways to make a typewriter font in Adobe Photoshop. You’ve got additionally seen prime examples of typewriter textures. Nonetheless, if you need to be taught extra about totally different Photoshop textual content results, try these tutorials:
-


On this tutorial, you may discover ways to create a grunge textual content impact utilizing displacement mapping in Adobe Photoshop.
-
Use a texture, a few filters, and a few drop shadow results to create a brilliant straightforward and fast stylized chalk textual content impact
-
This fast and easy textual content impact will transport you to the colourful streets of Mexico. It is easy to place collectively utilizing Adobe InDesign, and you may adapt the…
-
Study a easy option to create a foil texture textual content impact, utilizing a few filters, changes, and layer kinds.
-
Fonts talk feelings and emotions to your clients. On this article, we provide you with tips about how to decide on the perfect fonts for branding.
-
Attempting to determine find out how to determine a font? Whether or not you are engaged on find out how to determine a font on an internet site, find out how to determine a font in a emblem, or find out how to…
-
Discover ways to convert a written calligraphy pattern right into a clear vector font and program font conduct to account for any potential letter mixture.
-
Have you ever ever observed that twisty curl on the finish of a personality? That is referred to as a swash. On this fast tip tutorial, we check out what they’re and the way…


