INTRODUCTION
Howdy everybody!
My title is Semyon Kostuchenkov. I’m a 22-year-old aspiring 3D artist from Tver, Russia. I’ve been finding out Blender as a passion in my free time for about 2 years and I’m at the moment a scholar at Finest Blender Course.
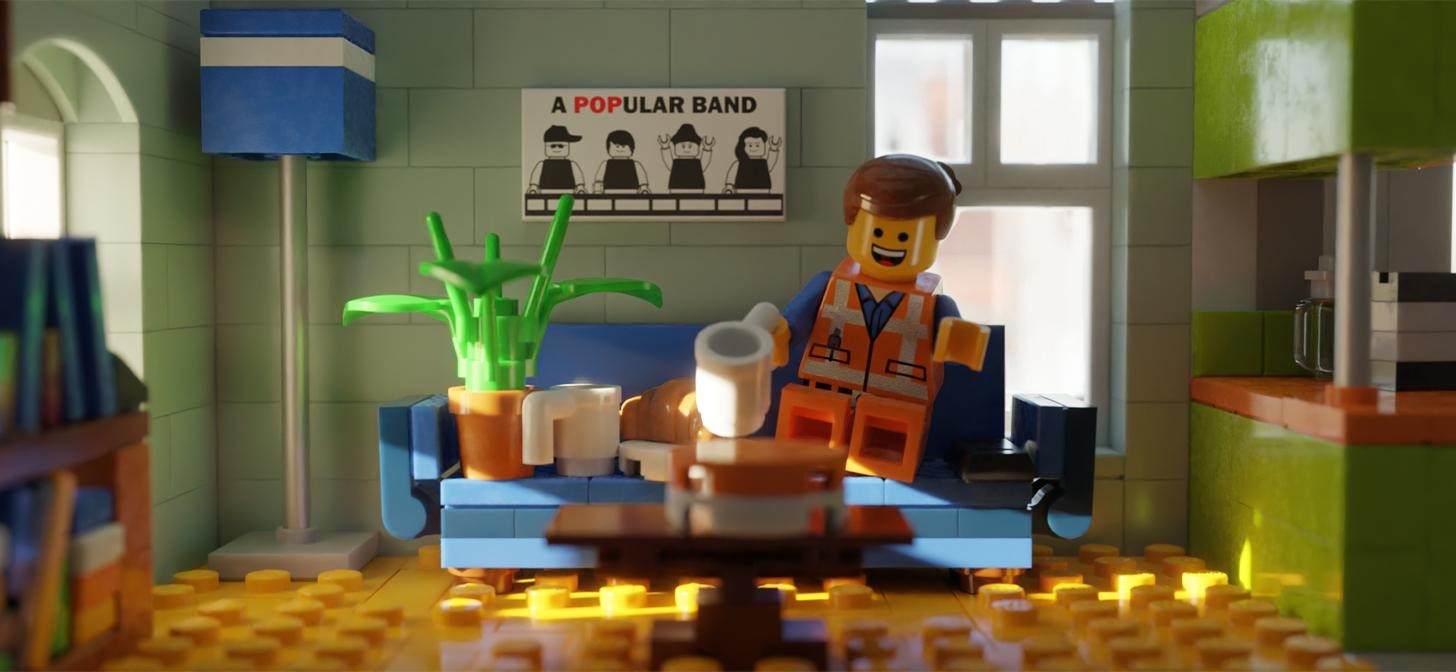
INSPIRATION
MODELING
A greater option to describe this course of can be “constructing.” I used the Mecabricks web site to assemble the scene, and there was not a lot conventional modeling concerned. This was my first time utilizing it, however it’s fairly intuitive for anybody who dabbled in any 3D software program. I constructed a tough model of the scene utilizing solely the shot from the film as a reference.
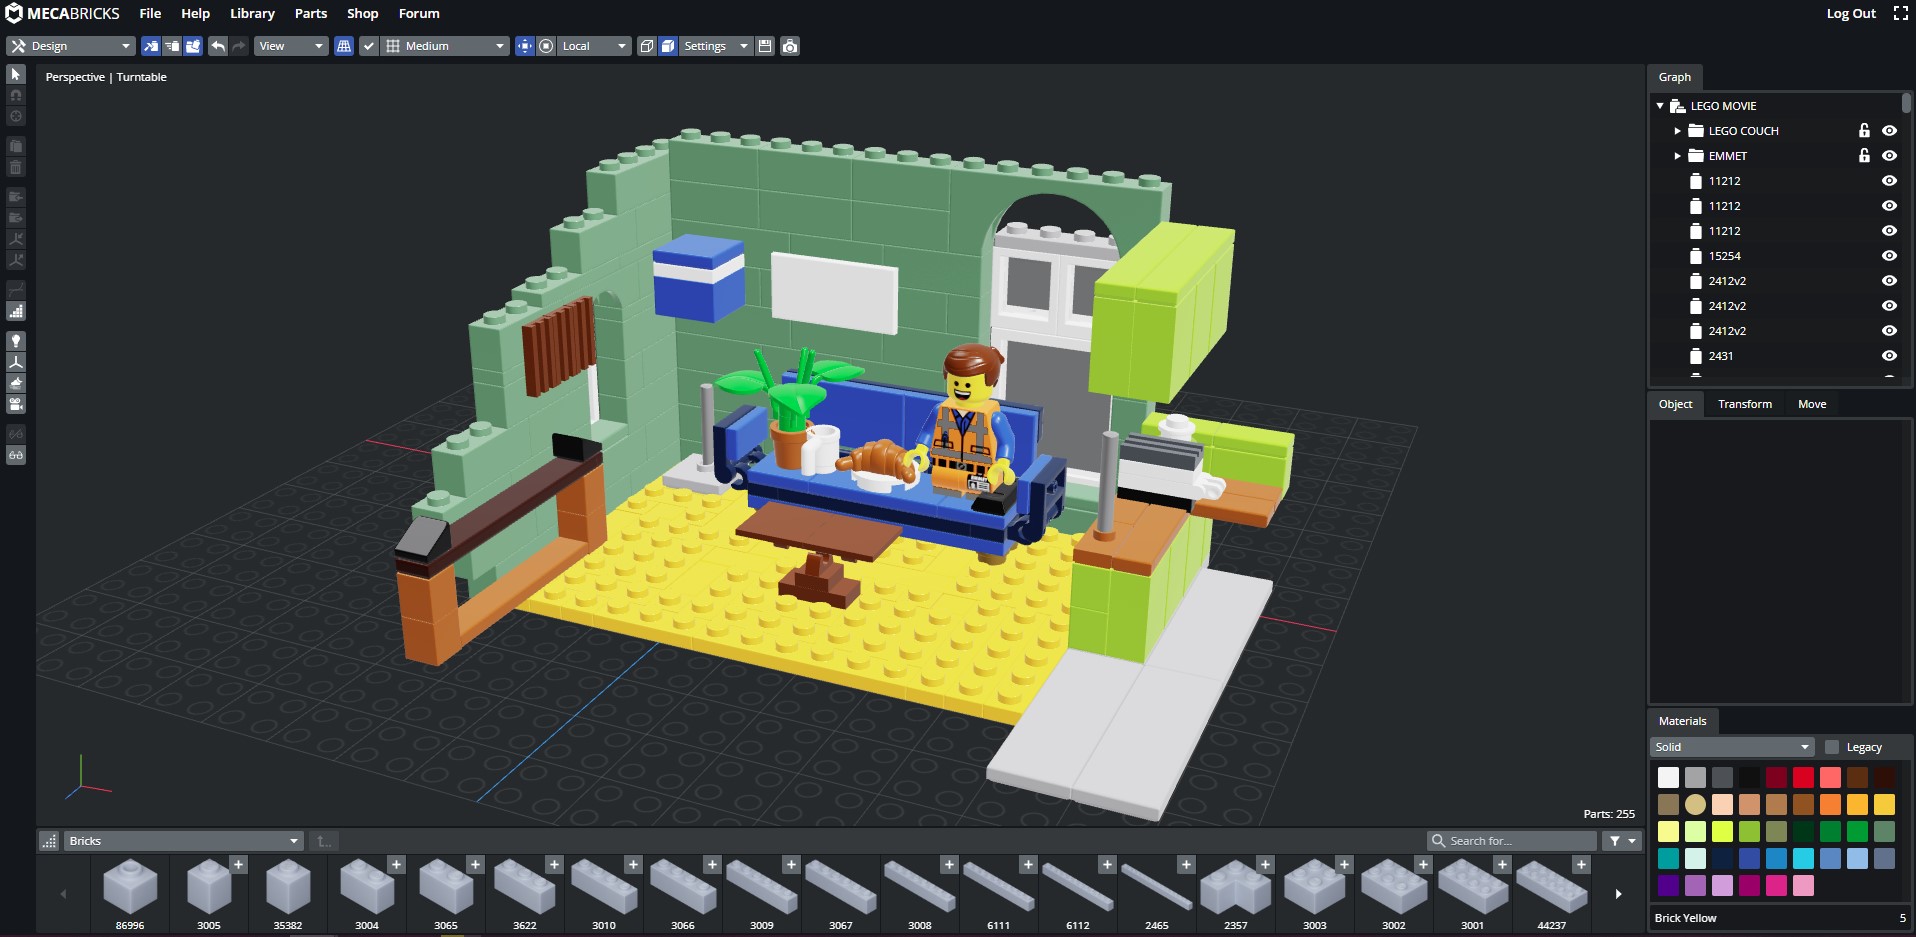
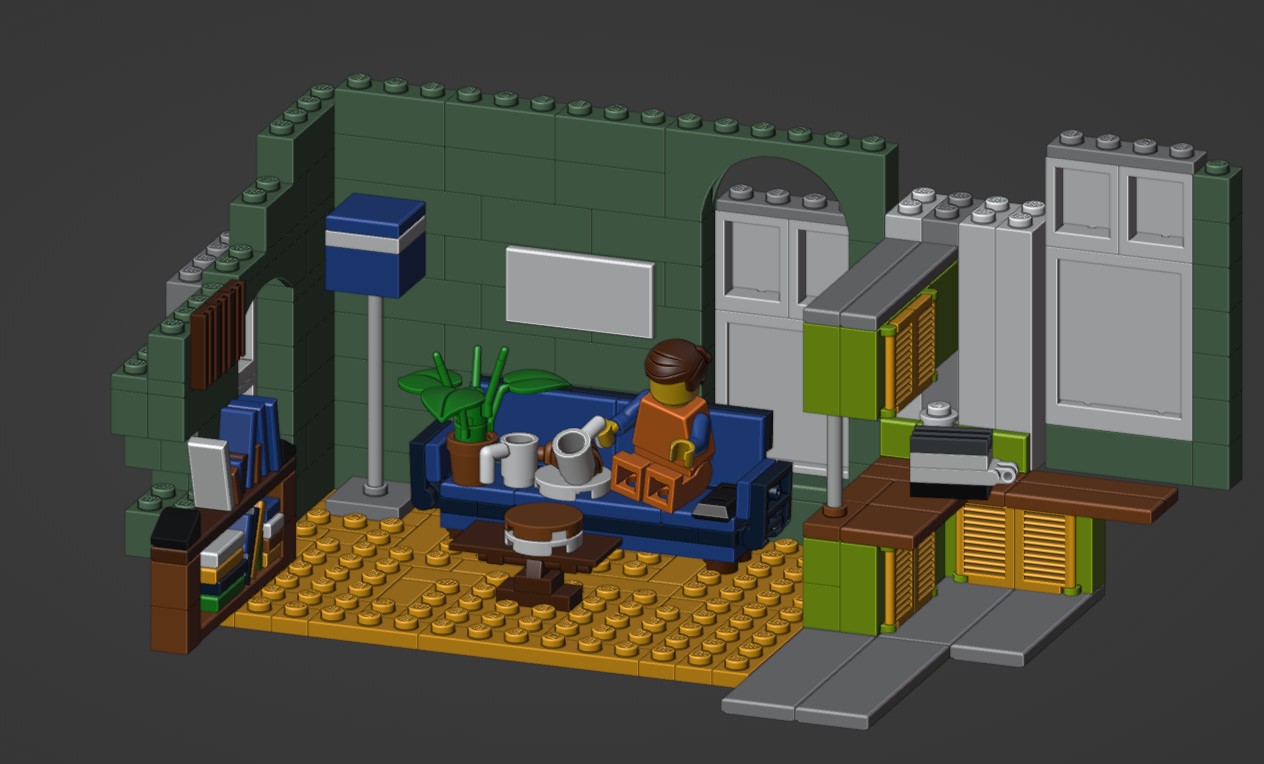
I then imported the file into Blender utilizing the free Mecabricks Lite addon and added extra element to make it resemble the unique extra intently.
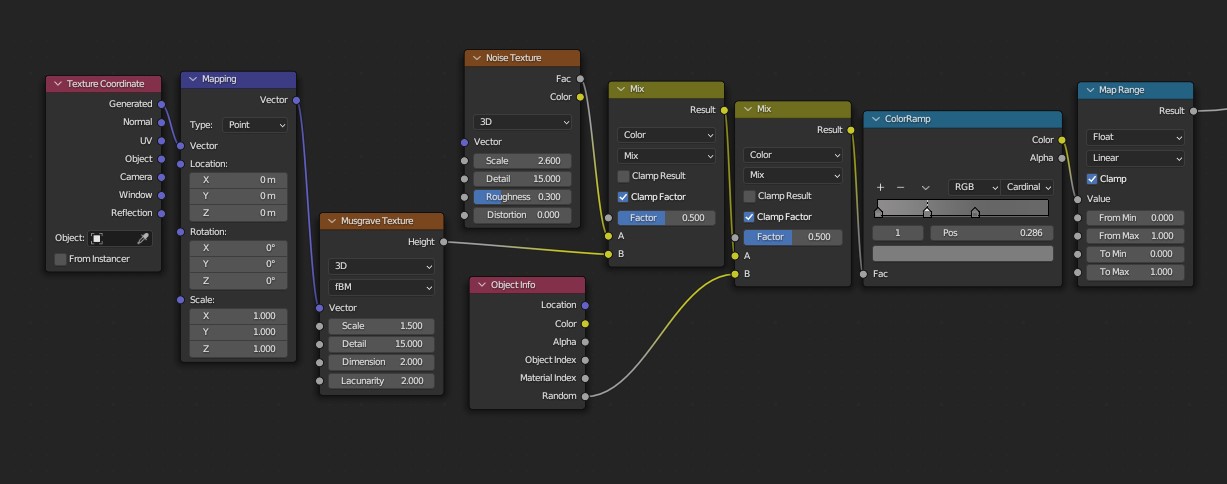
TEXTURING
Mecabricks additionally exports the supplies, so the one factor I wanted to do was change the roughness utilizing the reference. I used Blender’s shader nodes to make the roughness barely uneven on each brick, regardless that the execution will not be good, it was ok for me.
The lamp and the kitchen cabinets had essentially the most noticeable fingerprints, so I needed to copy them utilizing geonodes.

CAMERA
Replicating the lighting of the scene was the primary purpose of this undertaking and the toughest one. However, to begin with, to actually promote the look and make my picture indistinguishable from the actual one, I wanted to cope with the digicam. I attempted to analysis which digital lenses they used in the course of the manufacturing of the film, however all of their focal size values weren’t working for me, so I simply tried every thing utilizing the unique shot within the Background Photographs setting of the Object Information Properties tab of the digicam till I settled on the worth of 44 mm.
Moreover, I turned on Depth of Subject in the identical tab and used the minifigure torso because the Focus Object.
LIGHTING
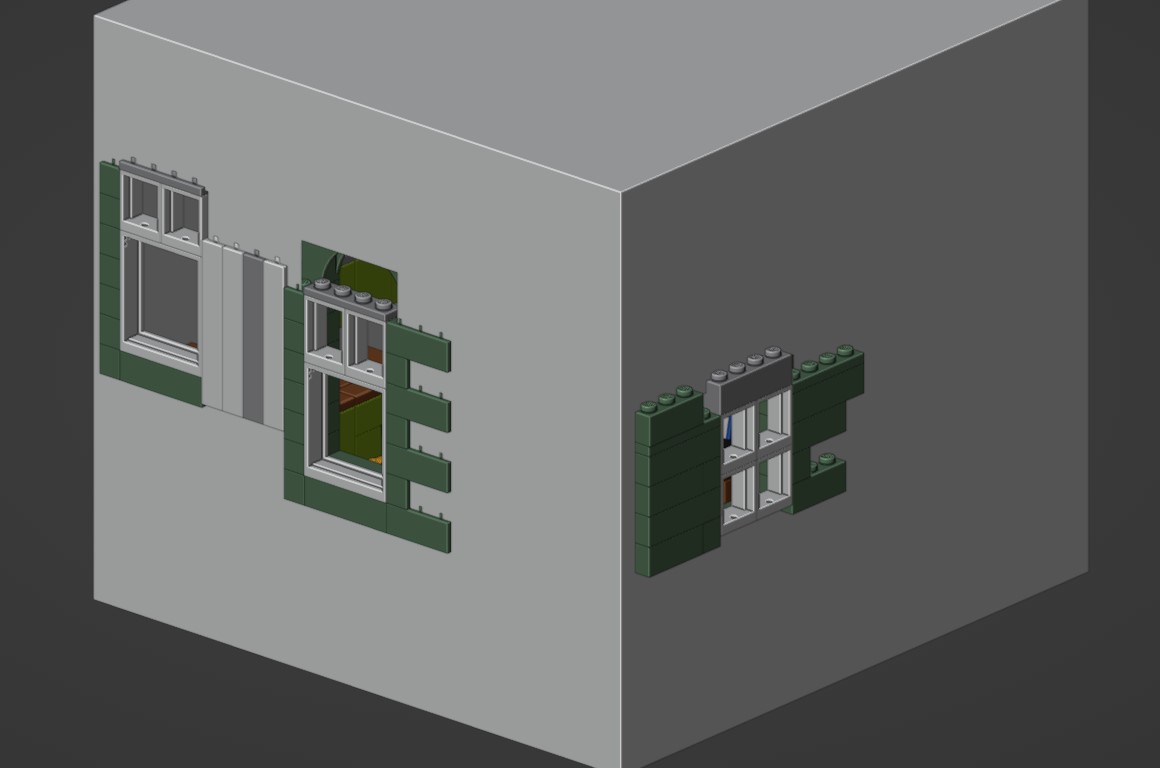
Subsequent, I positioned a dice across the scene with holes for the home windows to direct the sunshine the place I needed it
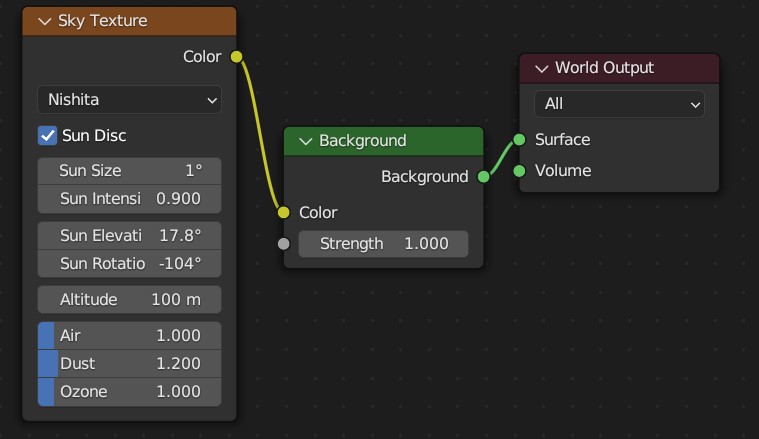
After attempting a Solar kind mild, I settled on the Sky Texture node and spent a few hours of experimenting till I discovered the most effective values.
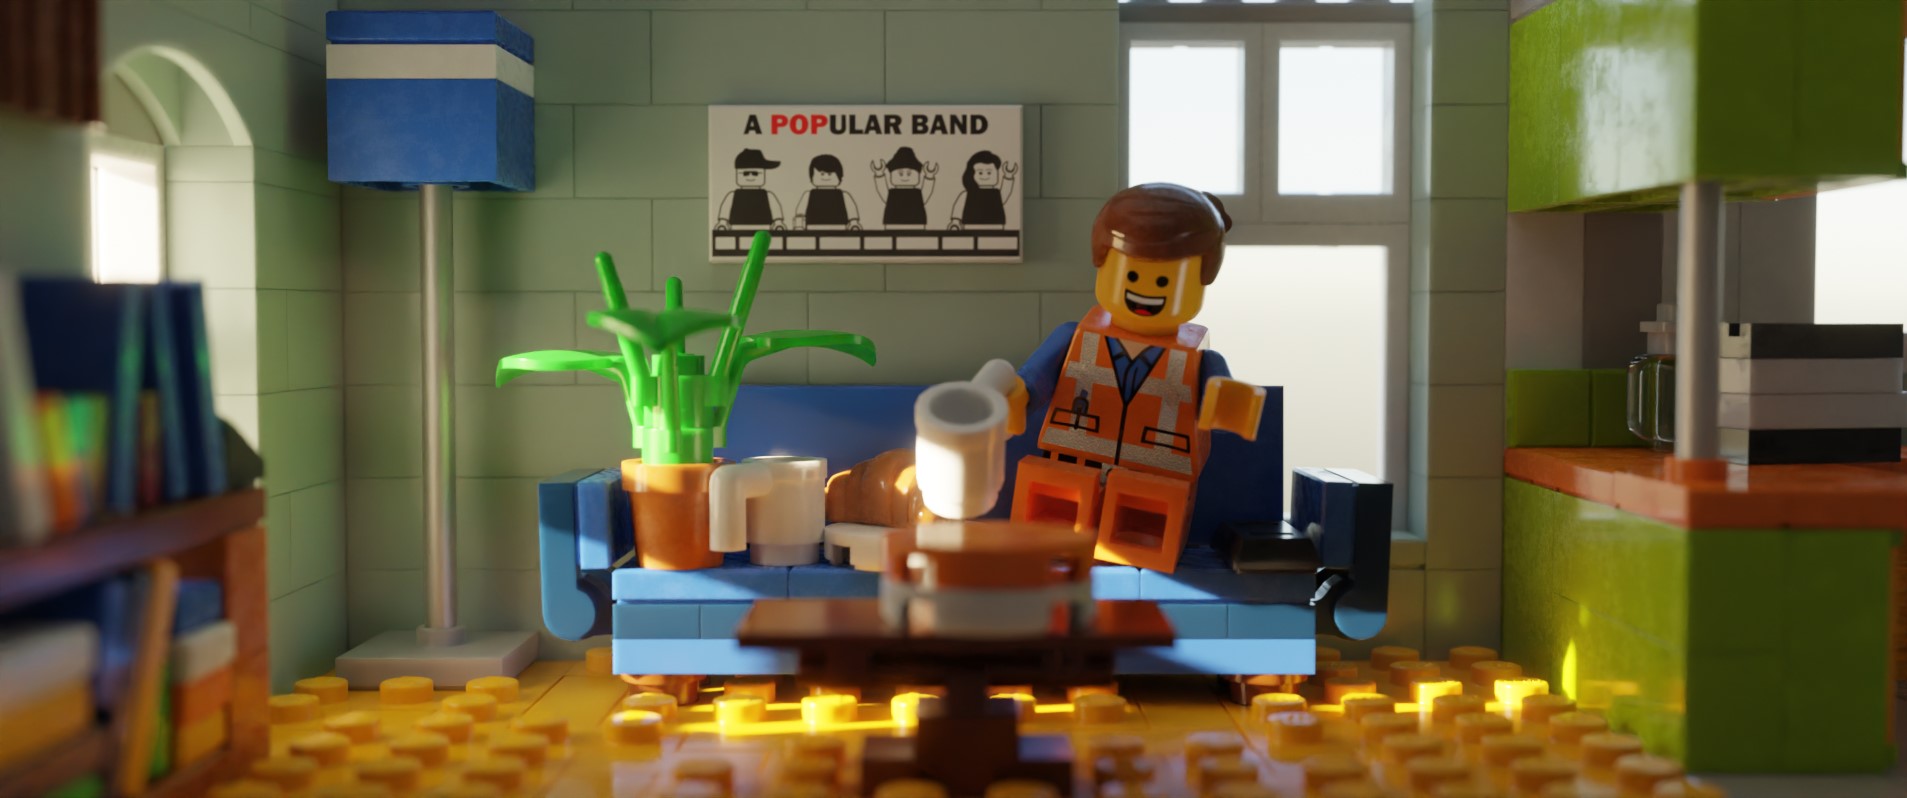
As well as, I crammed the scene with a dice to which I assigned a primary Quantity Scatter materials with nearly the bottom attainable worth of 0.0002, to create a little bit little bit of volumetric lighting. And this was the consequence.
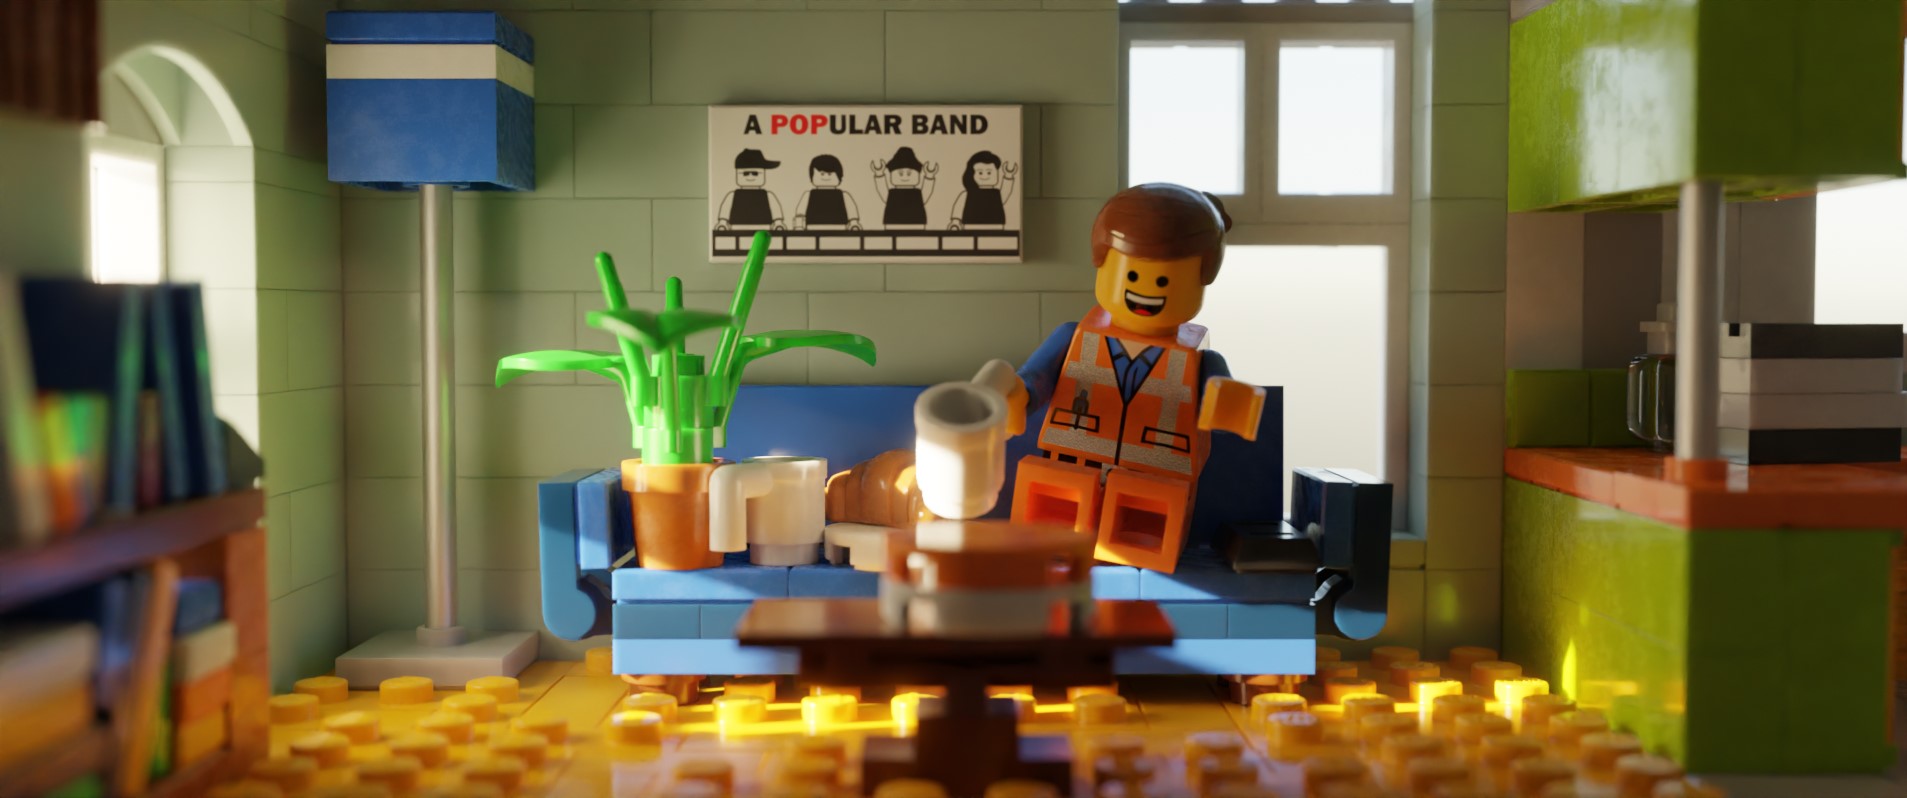
Which I discovered to be darker than wanted, so I added a easy Space mild on the ceiling.
And, whereas this was nonetheless darker than the reference picture, I made a decision that in the intervening time I lack the information to make it even nearer to the unique shot, so I finished there.
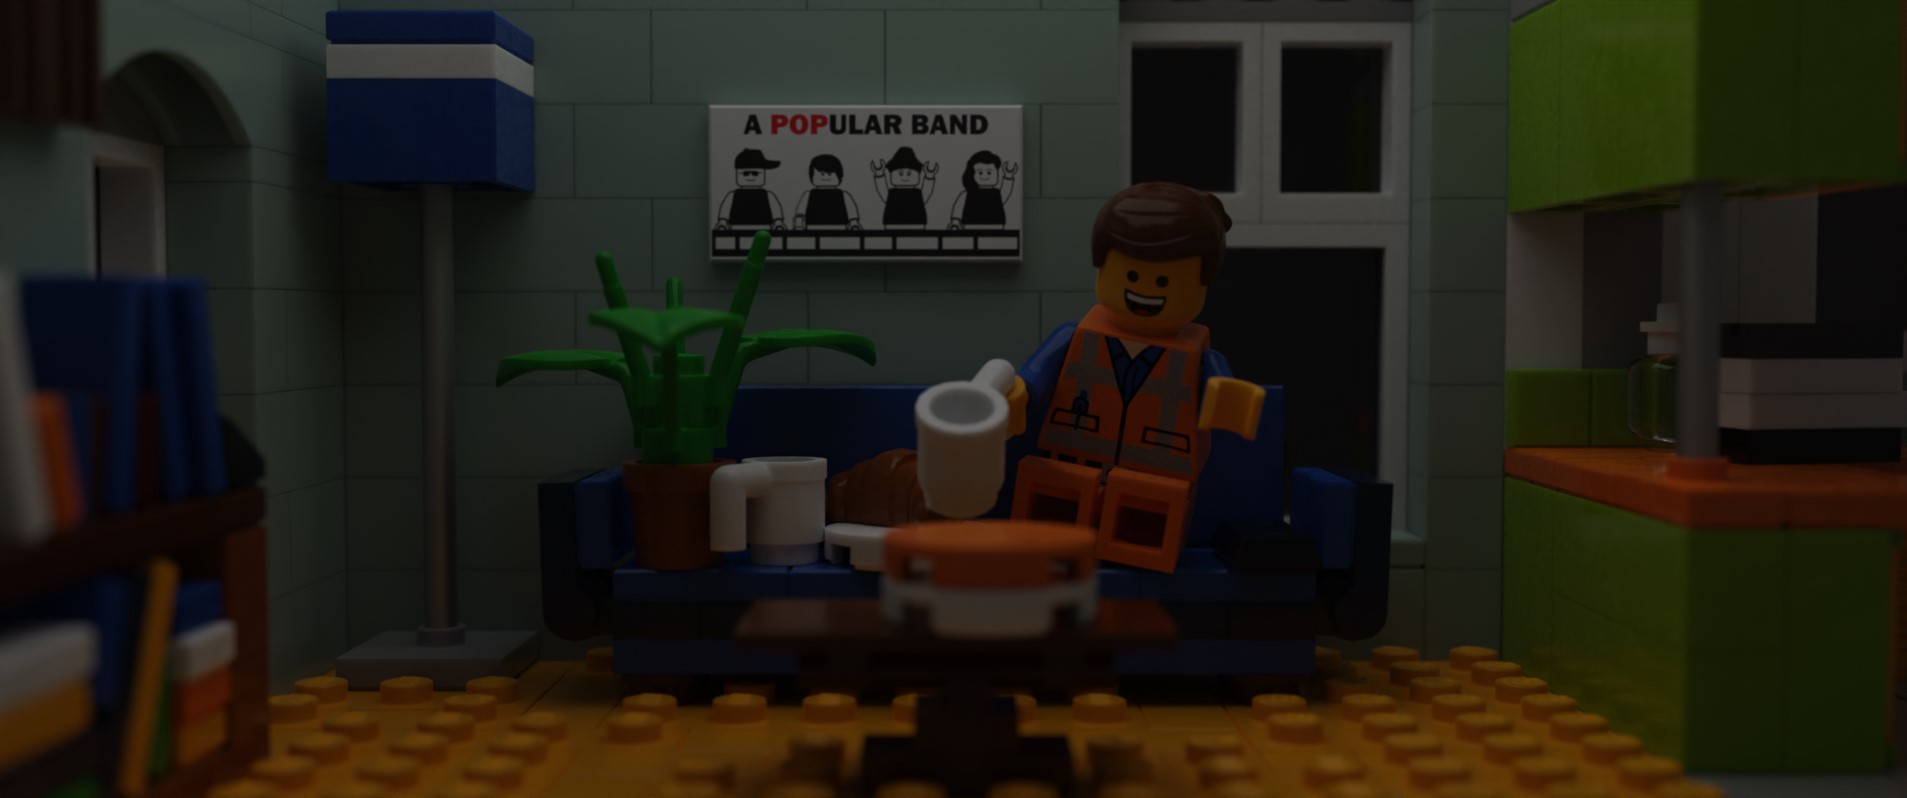
THE LEGO MOVIE
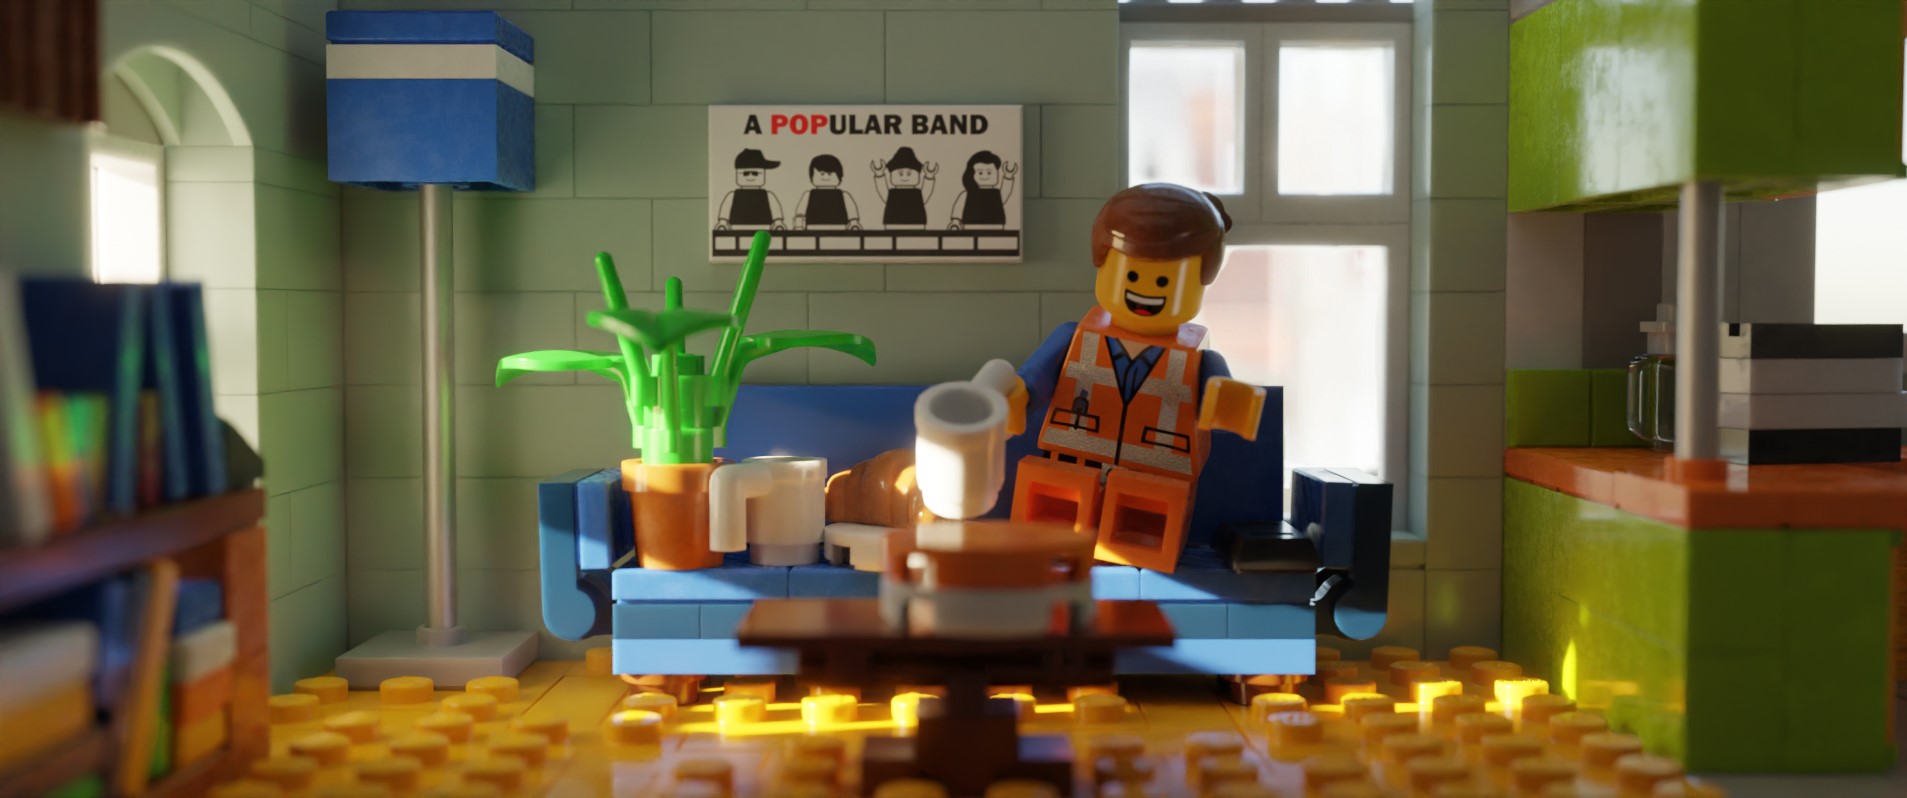
I then used my primary Photoshop expertise to paint right the render and reduce and paste the window background from the unique picture. That is the ultimate consequence.
And right here’s a clay render only for the enjoyable of it.

And that is it!
Thanks for studying my article. I hope you’ve an important day!
Concerning the Artist

Semyon Kostuchenkov, a hobbyist 3D artist. Presently a scholar at Finest Blender Course.