Export separate gentle render cross in Maya with V-ray renderer, in that method we’ve rather more management over the lighting on our scene in Maya, through the post-production course of to make all the additional changes we want, for fine-tuning our closing output.
Lighting is an important a part of any 3D scene. To place it in different phrases, lighting is what makes or breaks the general look of a scene-project. So we want underneath our belt any further instrument that Maya and V-ray can convey to the desk.
Having that flexibility of utilizing a separate gentle render cross in Photoshop for our closing shot, offers us quite a lot of freedom, like controlling the depth of a particular gentle, the colour of the sunshine, and another extra inventive outcomes which might be achieved from taking part in with the mixing mode of that particular gentle render cross layerin Photoshop.
And the way in which to try this is by including a Gentle Choose render cross from the V-ray Render Components panel.
We will have entry to including Gentle Choose render cross from Render Settings – Render Components(tab) – Left column, just like the picture under:

Word: We will have multiple gentle render cross in Maya – Vray. For instance, we are able to have one gentle render cross for KeyLight, one for FillLight, and one for backlight, or much more, if we want them.
In my humble opinion, that is undoubtedly the skilled and productive strategy to go, when coping with V-ray in Maya for lighting functions. It’s completely obligatory to make the most of it, for higher management of the lighting.
What Gentle Choose render cross does:
However earlier than we dive into the Gentle Choose render cross, I suppose we should always in all probability set up, what a render cross or render parts are.
Render Components are a strategy to escape renders into their part elements reminiscent of diffuse colour, reflections, shadows, mattes, and so on. This provides tremendous management over the ultimate picture when utilizing compositing or picture enhancing functions to re-assemble the part parts. Render parts are additionally generally often known as render passes.
chaos
If you’re extra curious concerning the render passes, be happy to study extra about them from right here.
Associated to render cross and baked, be happy to check out a earlier article about The way to bake Ambient Occlusion texture map in Maya – Vray.
Gentle Choose render cross:
As you already guessed, it’s principally a render cross for the aim of lighting. It principally represents the lighting contribution of a particular gentle within the scene. In that render cross you possibly can assign a lightweight out of your scene and thru some paraments, crucial, the kind of gentle, and you might be just about performed, establishing your Gentle Choose render cross.
Be happy to dive deeper into Gentle Choose render cross in V-ray from right here.
Utilizing gentle render cross in Maya:
Right here is the scene we are going to work on:

As you possibly can clearly see, there are two lights on the scene, a dome gentle (fill gentle) and a sphere gentle (key gentle). We’re going to add for each of them a Gentle Choose render cross, as a way to have extra management over the post-production course of afterward in Photoshop.
Steps:
- Open up the Render Settings for the Vray renderer
- Go to the Render Components tab
- Left double-click on the Gentle Choose render cross from the left collum, for the primary gentle
- Add one other one (Gentle Choose) render cross for the second gentle. Do it as many occasions because the variety of lights you have got
- Go within the outliner and drag your first gentle with the center mouse and drag and drop it into the vrayRE_Light_select node.
- Repeat the identical course of to your second gentle within the second vrayRE_Light_select node
- Choose the primary vrayRe_Light_select from the Outliner and open up the Attribute Editor. Beneath the “Additional Vray Attributes” set the Sort mode to full, in case, it’s in one other mode. Repeat the identical course of to your second vrayRe_Light_select.
- Lastly, within the “Additional Vray Attributes” in the identical tab as earlier than, change the Filename suffix and make it extra recognizable, for each Gentle Choose render cross. For instance, into one thing like, KeyLight, FillLight, BackLight, and so on.
Word: Be happy to rename the vrayRE_Light_select, as a way to be extra recognizable.
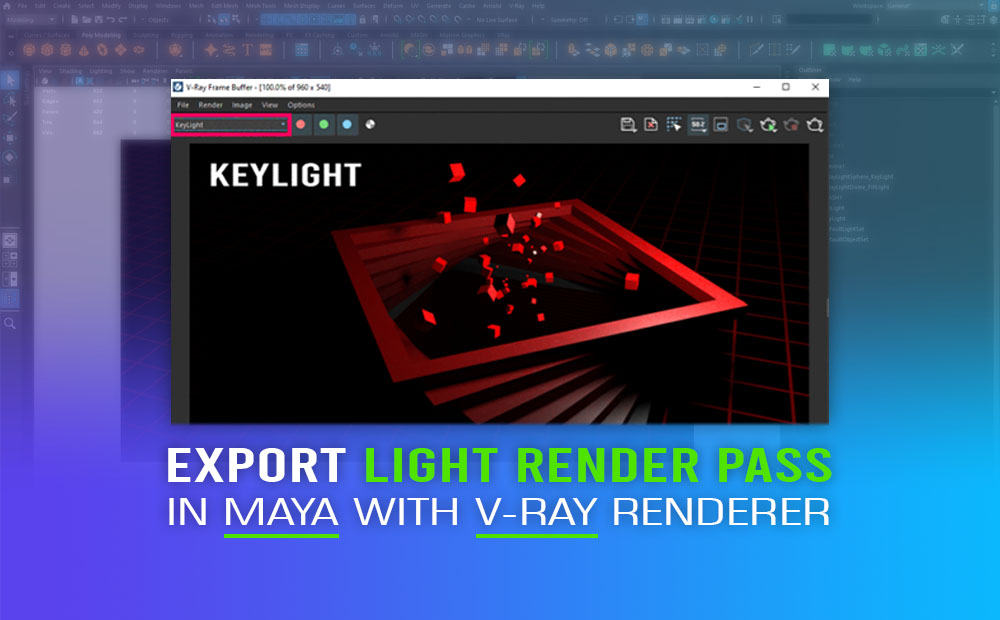
Now, in the event you render your scene by way of the V-ray Body Buffer, and swap between the render passes you possibly can see the 2 Gentle Choose render passes to be rendering as properly, so you should use them in post-production later in Photoshop.

Export all render passes from Maya:
So we need to export all render passes for Maya as picture recordsdata. As a way to do this, after the rendering of our scene has been accomplished, go into the V-ray body buffer – File – Save all picture channels to separate recordsdata. After that, choose a vacation spot folder to avoid wasting all these render passes, and you might be good to go.

Lastly, you possibly can convey all these render passes in Photoshop and make the fine-tuned.
When you have an animation to export from Maya with V-ray renderer, as a substitute of a nonetheless picture the tactic of export is completely different. We are going to cowl this methodology in a later article.
As you possibly can see, gentle render cross in Maya, is a straightforward method you possibly can obtain and make the most of the management of lighting within the post-production course of, that it brings.