Movement Path is likely one of the animation results that ActivePresenter 9 affords you. It makes a stationary object transfer alongside a path so to create partaking eLearning content material. So, deep dive into this publish to discover ways to add and edit object movement paths.
This tutorial covers:
Firstly, obtain the newest model of ActivePresenter then get began!

Add Movement Paths
So as to add a movement path to things, do the next:
Step 1: Choose one or a number of objects.
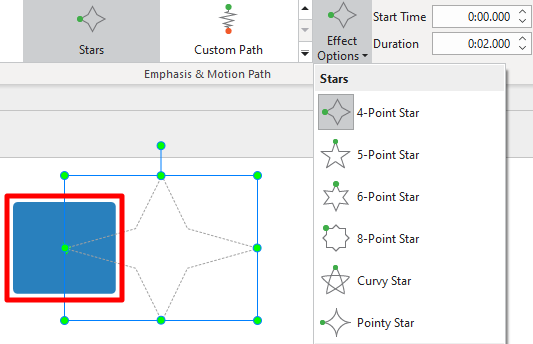
Step 2: Open the Animations tab > open the Emphasis & Movement Path gallery by clicking the drop down arrow.
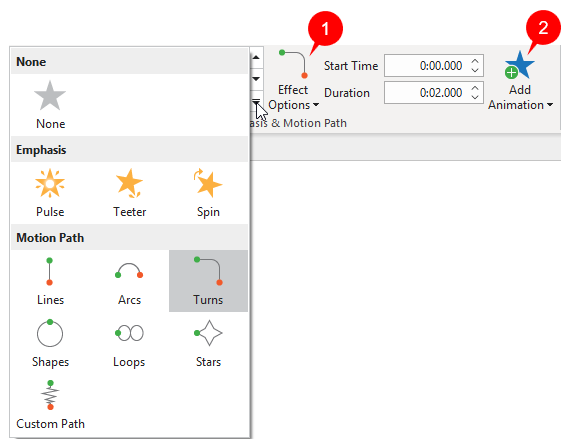
Step 3: Select one movement path impact you want.
- In case you select a predefined path (Strains, Arcs, Turns, Shapes, Loops, or Stars), the trail will seem on the Canvas instantly.
- In case you select Customized Path, the mouse pointer will flip right into a crosshair to allow you to draw a customized line which is analogous to drawing a freeform form.
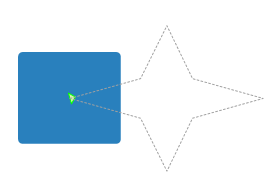
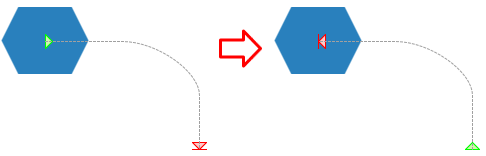
The added movement path seems as a dotted line with a inexperienced and a purple arrow on the Canvas. The inexperienced arrow signifies the trail’s begin whereas the purple one signifies its finish.
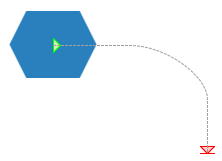
For closed paths like Shapes, Loops, and Stars, you will notice solely the inexperienced arrow.
Step 4 (Non-obligatory): Customise the path or change to a different variant of the movement path. To try this, choose the trail > Impact Choices (1). Then, choose one possibility from the listing.
Word: You may add multiple movement path impact to things. To have it completed, choose objects, then click on the Add Animation button (2) and select the specified one. In case you add a brand new movement path by deciding on from the Emphasis & Movement Path gallery, the newly inserted movement path will change the present one.
Edit Movement Paths
After including a movement path impact to things, you may edit it if you would like corresponding to resizing, repositioning it, or altering its form.
Change Movement Path Dimension and Place
Choose the movement path of the article, then:
- Drag the trail resizing handles to vary its dimension.
- Drag the complete path to the place you need.
Change Movement Path Form
Apart from, you may edit the form of the movement path. It’s the identical as enhancing freeform shapes that you simply’ve realized within the earlier tutorial.
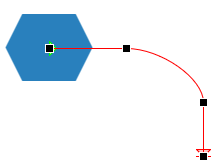
Step 1: Proper-click the trail > Edit Factors, or choose the trail > Impact Choices > Edit Factors.
Step 2: Drag the black deal with to maneuver the portion of the trail.
Step 3 (Non-obligatory): Shut, open the trail or reverse its path.
Movement paths might be categorised as closed or open paths. With an open path, you may shut it. Alternatively, you may open a closed path.
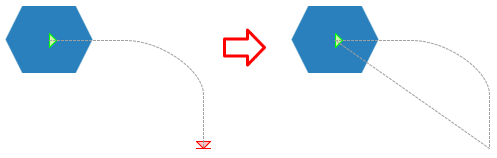
- For open paths like Strains, Arcs, and Turns, right-click the trail and click on Shut Path to make the article return to its begin level. A linear path is added from the earlier finish level to the beginning level.
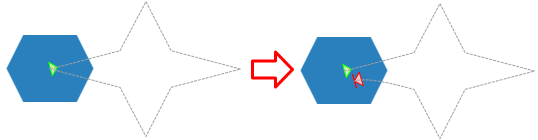
- For closed paths like Shapes, Loops, and Stars, right-click the trail and click on Open Path to separate the beginning and finish level.
- In an effort to reverse the trail path, right-click the trail or click on Impact Choices > Reverse Path Course.
Lock and Unlock Paths
While you transfer the article, the movement path will transfer together with it. So, ActivePresenter 9 permits you to lock the trail for straightforward enhancing. Because of that, the trail nonetheless stays in its place once you transfer the article. To lock the trail, choose it > Impact Choices > Locked. In any other case, if you wish to unlock it once more, choose it > Impact Choices > Unlocked.
Edit Timing
The movement path results are introduced as yellow bars within the Timeline pane.
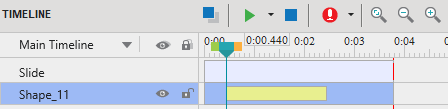
You may alter the beginning time and length of the movement path results in the identical manner with different sorts of animation results. For higher understanding, please discuss with Edit Animation Results.
Delete Movement Paths
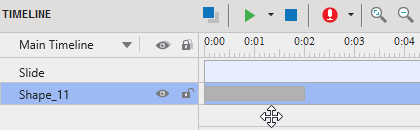
To delete a movement path impact, choose it on the Canvas after which press the DELETE key in your keyboard. Alternatively, drag the movement path impact time bar (yellow bar) within the Timeline pane downward till it turns grey after which launch the mouse button.
So, you’ve realized add and edit object movement paths. In case you want any help, be at liberty to contact us. Apart from, observe our Tutorials web page and YouTube channel for extra helpful articles and movies.
See extra: