INTRODUCTION
Whats up everybody,
I’m Hoya Choe, a 3d artist, at present dwelling in Korea. I labored as a 2D graphic designer for a recreation firm for 7 years. I taught myself Blender 3D and achieved my childhood dream of creating animations by means of it.
Now, I’m the founding father of “HOYA CHOE Artwork Studio,” a one-person firm. I create quick commercial animations for different corporations. My aim is to proceed making animations steadily, and Blender 3D can be my companion on this journey.
INSPIRATION
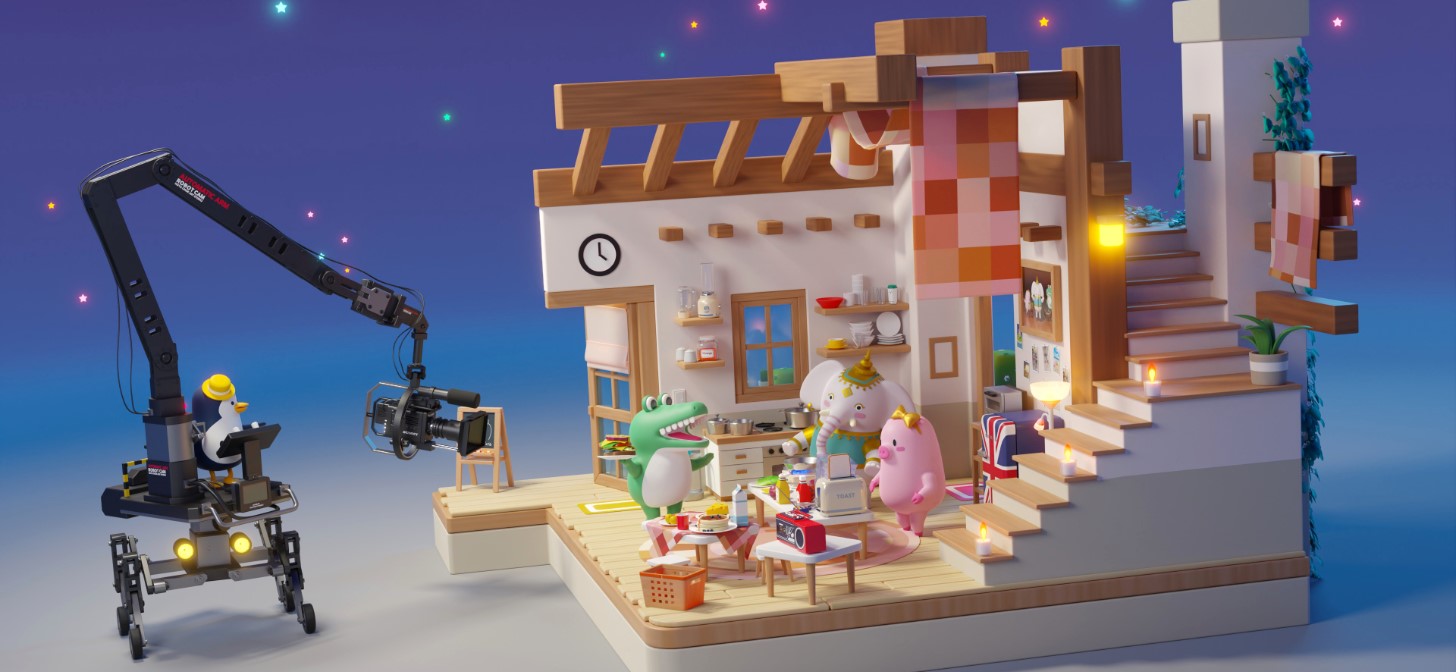
My animal character buddies have comparable considerations to ours. How can I create a enjoyable content material video? This is similar concern. Consuming exhibits and cooking movies are in style in Korea, so we determined to prepare dinner as a result of it could be burdensome for one individual to eat a variety of meals.

I keep in mind watching cooking movies by Jamie Oliver and Gordon Ramsay as a toddler. I designed a studio to depict a cooking video shoot, drawing the artwork route inspiration from miniature home toys and fashions.
PROCESS
This animation was created utilizing just one device, Blender 3D. It has all the required instruments to create animations. Even video enhancing was attainable utilizing the composite node.
MODULE MODELING
After I’m modeling a cooking studio, my aim just isn’t the ultimate completion. When engaged on a big undertaking with many parts, I favor to create small completed merchandise, modularize them, after which assemble them.
I needed a stage that may very well be acknowledged as a completed product even within the early manufacturing stage.

By creating small objects and environments like this, I can acquire varied forms of completed modules. If I do not do that and goal for the ultimate product from the start, I’ll solely see an unfinished display screen throughout the lengthy manufacturing time.
What makes this attainable is Blender 3D’s highly effective useful resource administration device, the “Asset Library Browser.” We will save a number of objects and environments modularly at any time and recall and reassemble them as wanted.
MODIFIERS
The time period “modify” has been used extensively in object modeling. When creating animations, the timeline velocity of Blender 3D ought to be at the least 30 frames per second. If Blender 3D’s efficiency drops under 30fps, it means the animation can’t transfer on the appropriate velocity.
All characters and objects are modeled utilizing modifiers to optimize them within the animation stage. When creating animation keyframes, I make modifiers with excessive load collectively invisible.
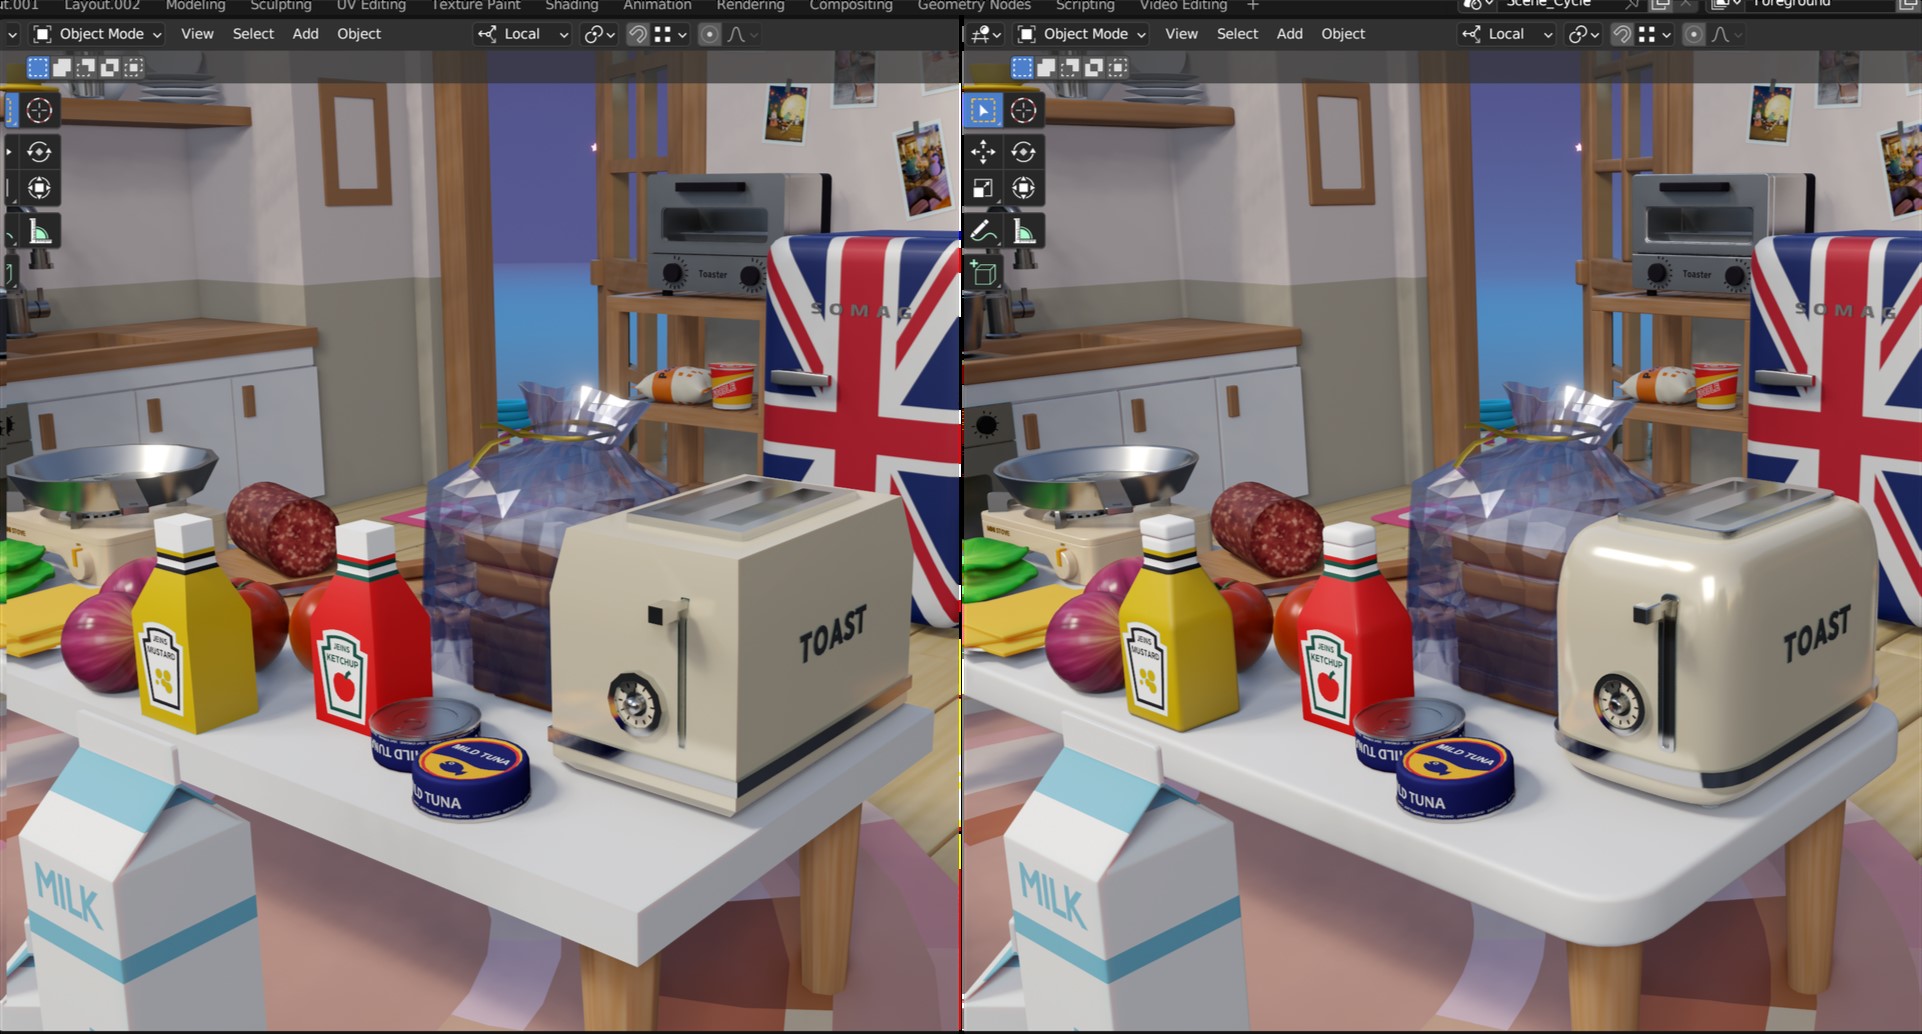
On the left, all modifiers with excessive masses are invisible, and on the precise is the ultimate rendering high quality.
RIGGING
As for the character’s rigging, I made the Armature bone myself. Rigging utilizing a script-based add-on was heavy to function and never light-weight.

Additionally, my animal characters have components of their our bodies that do not look an identical to people. Due to this fact, it’s higher for me to create the skeleton myself to attain the specified habits.

Stretch bones had been additionally used to specific exaggerated actions of the characters.

The implementation of the character’s expressions includes creating a number of patterns of eye shapes and connecting them to the Blender driver. This enables the chosen mesh within the driver to be activated whereas the remaining are deactivated.
CAMERA ROBOT
An necessary a part of this undertaking is the robotic digicam. Typically, movie units use ‘Jimmy Jib’ cameras. Nonetheless, controlling the digicam within the ‘Jimmy Jib’ is tough as a result of my animal characters have quick legs and arms.

Moreover, the ‘Jimmy Jib’ digicam was not enjoyable as a result of there have been few dynamic components that may very well be animated. I made a robotic digicam, and it felt extra enjoyable to think about that my character pal would management the robotic digicam. The form of the robotic digicam was impressed by development machines like tower cranes and excavators.
Making the robotic cam was a variety of enjoyable for me. It was my first time making a robotic with a restricted turning radius.

ROBOT ANIMATION
It’s a bit difficult to maintain the digicam mounted on a selected object, so a mixture of two IKs (Inverse Kinematics) was used. It was tough for the robotic cam’s legs and arms to maneuver freely whereas the digicam remained stationary.
Specifically, I spent a variety of time finding out the hierarchical construction and bone constraints to remove the flipping phenomenon when rotating 360 levels. Limits are utilized to the rotation axis of the bone within the decrease layer of IK, excluding the axis that may truly transfer.
Furthermore, by making use of the constraint of limiting rotation, the utmost rotation radius was specified.

VEGETABLES
Greens lower with a knife are modeled in a pre-cut state and connected with rigging.

4 texture photos had been used for this animation undertaking. The primary picture on the left is chargeable for the crocodile character’s eye expression.
SHADERS
All different objects and characters are made up of supplies created as nodes within the shader editor. I am fairly happy with the performance of Blender’s shader nodes. One nice benefit of utilizing shader nodes is that they are often animated, not like picture textures.

The attention expression picture talked about above is used to alter the expression of the eyes by altering the UV coordinates within the shader node. Aside from the feel photos aforementioned, all different objects use supplies created from shader nodes.
CASSETTE PLAYER
Youthful individuals nowadays is probably not aware of cassette gamers. I personally just like the traditional cassette design.
When listening to music on a strong machine like a present cellular phone, no mechanical motion is felt. It is very handy, but it surely would not really feel as pleasurable when animated.
Cassette gamers from the 80s have a spread of movement that may transfer round like a mechanical machine. The cassette tapes containing music knowledge have a structurally fascinating design.
I used ‘Bake Sound to F-Curves’ for the cassette participant to maneuver with the music. The cassette jumps to match the bass beat. The speaker subsequent to it modifications its scale to match the sound waveform.

After baking the sound curves into keyframes, we are able to additional refine the curves and take away pointless actions. The cassette participant leaping to the bass beat needed to be erased, simply because it deleted frequencies apart from the bass beat.
FRIED EGGS
I put in a variety of effort to animate the fried eggs. The supplies for the eggs had been created utilizing shader nodes. The oil within the frying pan was additionally generated utilizing a shader node. Moreover, the oil splash impact was achieved utilizing the particle perform.
The explanation I did not use a picture texture for the fried eggs was as a result of the egg whites needed to step by step transition from clear to white and have a crispy exterior when cooked in a frying pan.

I used form keys to alter the form of the egg. The form of the egg modifications by switching the form key.
MUSTARD
The animation of the mustard sauce was not attainable with liquid simulation. As a substitute, I processed the metaball as a particle and made it transfer alongside a curve.

CAMERA
For the animation of the taking pictures digicam, I used rigging with two bones. Totally different roles had been assigned to the bones to forestall gimbal lock.

COMPUTER HARDWARE
System: AMD Ryzen 9 7950X, RTX 4090, 64GB RAM.
This paintings was made utilizing Blender 3.4 Model and rendered in 4K decision (3840×2160) with 1100 samples at 30 FPS over a interval of 10 days. The two-minute animation I created 2 years in the past had an estimated render time of 30 days, so I did not try to render it utilizing Cycle and used EEVEE as an alternative.
Nonetheless, Blender has turn into far more highly effective now. I rendered it for 10 days utilizing Optix at 1100 samples. If I had just a little extra money and one other laptop for parallel rendering, I imagine it may very well be shortened to five days. It is a important enchancment for me. I’ve observed that Blender’s rendering time is step by step lowering whereas the device’s capabilities are constantly rising.
RENDER – Cooking Class For Animals


“Dongmul Chingudeul-i Yoli Han Saendeuwiji” (The Sandwich Cooked by Animal Associates),
Thanks for studying my article, I hope you discovered it helpful and informative. You possibly can observe me on my social media accounts under to see extra of my paintings.
Have a pleasant day!
In regards to the Artist
Hoya Choe, a self-taught 3D artist, at present dwelling in Korea. They’re additionally the founding father of HOYA CHOE Artwork Studio, creating quick commercial animations for corporations.
