
INTRODUCTION
Hi there everybody! My identify is Andrew, and it is not the primary time I’ve had the prospect to share my work course of on Blender Nation. So, thanks once more for this chance!
INSPIRATION
It is exhausting to say what impressed this work, however I believed it could be enjoyable to mannequin Santa sitting on a reindeer like a tricky biker. I had a transparent imaginative and prescient in my head, and I simply wanted to convey it to life utilizing the out there graphic instruments.
POSE
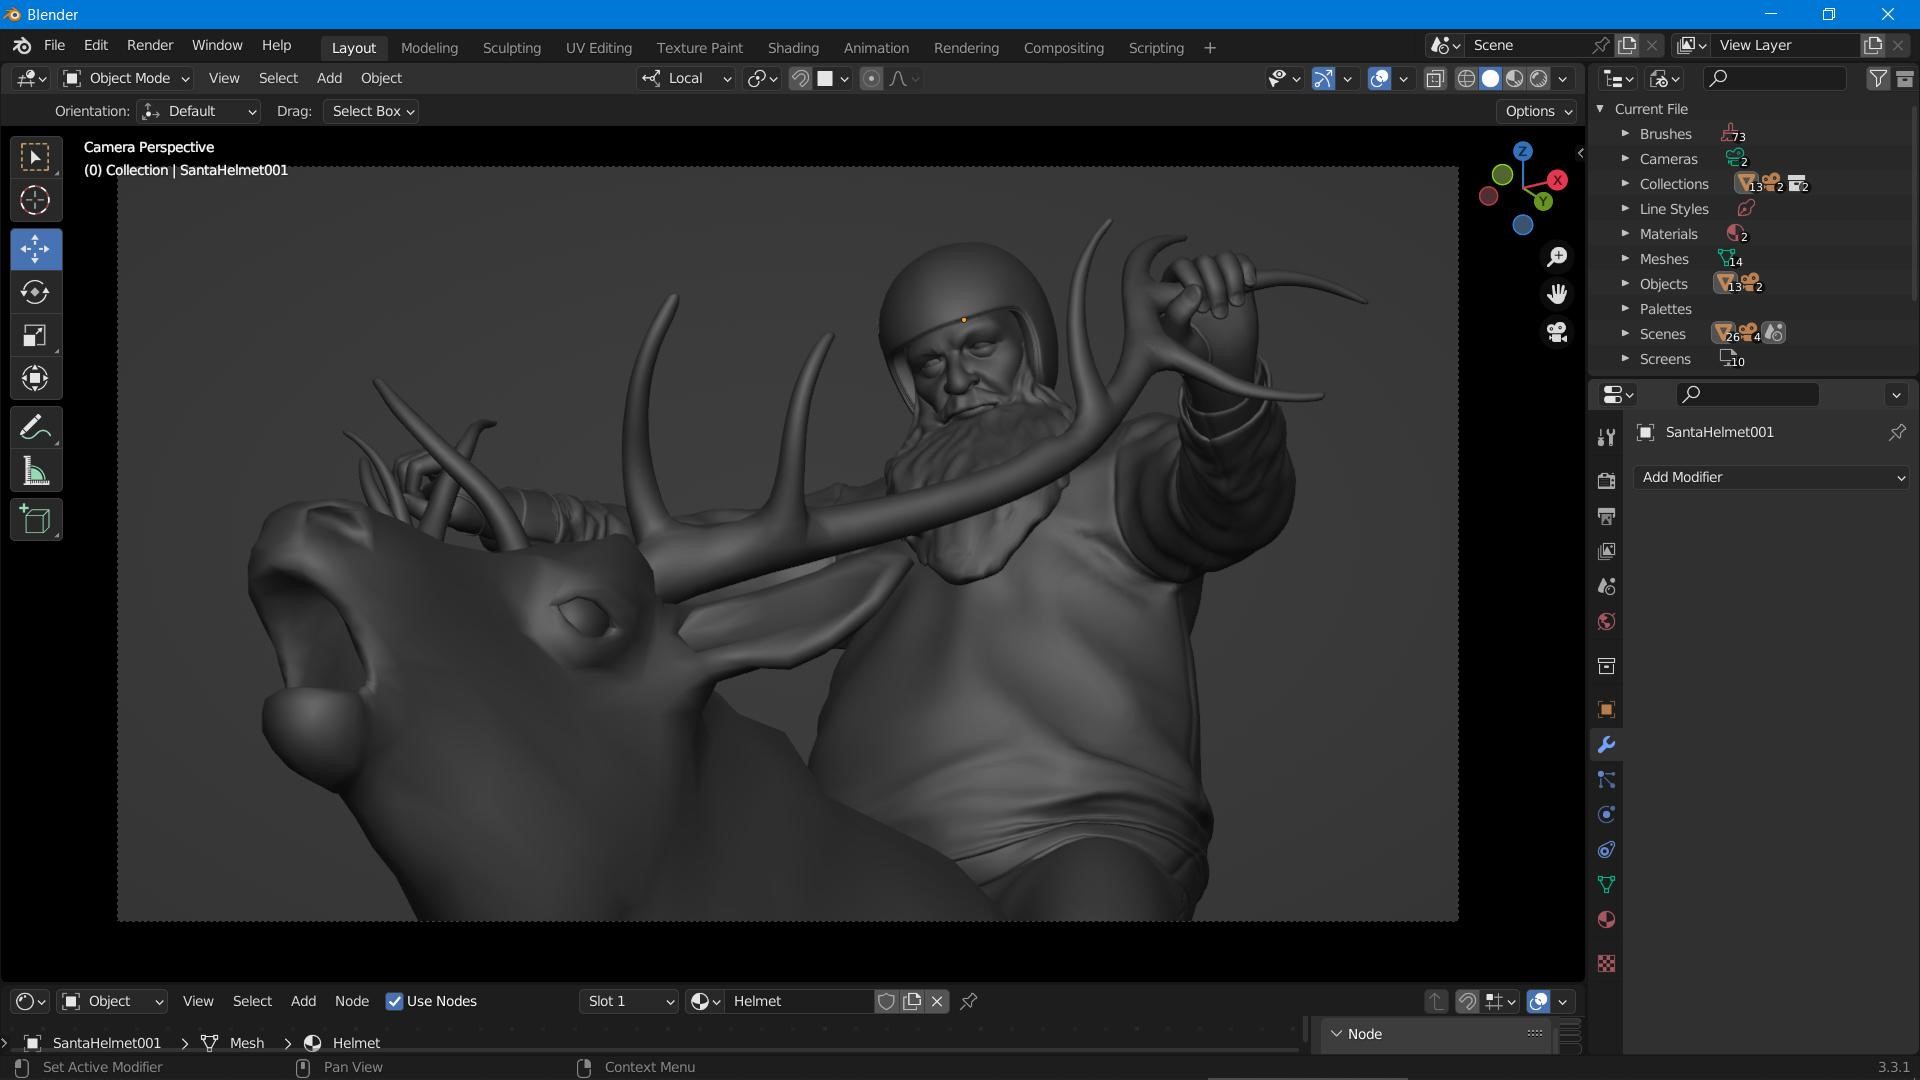
I wanted a place to begin, so I used one among my outdated fashions of a person in a helmet with a easy rig

This allowed me to approximate the pose of the rider. Then, I added a beard mesh, a low-poly deer, and my mannequin seemed like this.
Subsequent, I began including particulars to the mannequin. Listed here are the primary steps of the work.
HELMET
All the pieces may be very easy right here. I used the poly modeling instruments and subdivision modifier to create a retro-style helmet with goggles. Right here is the mesh and viewport render with easy supplies.
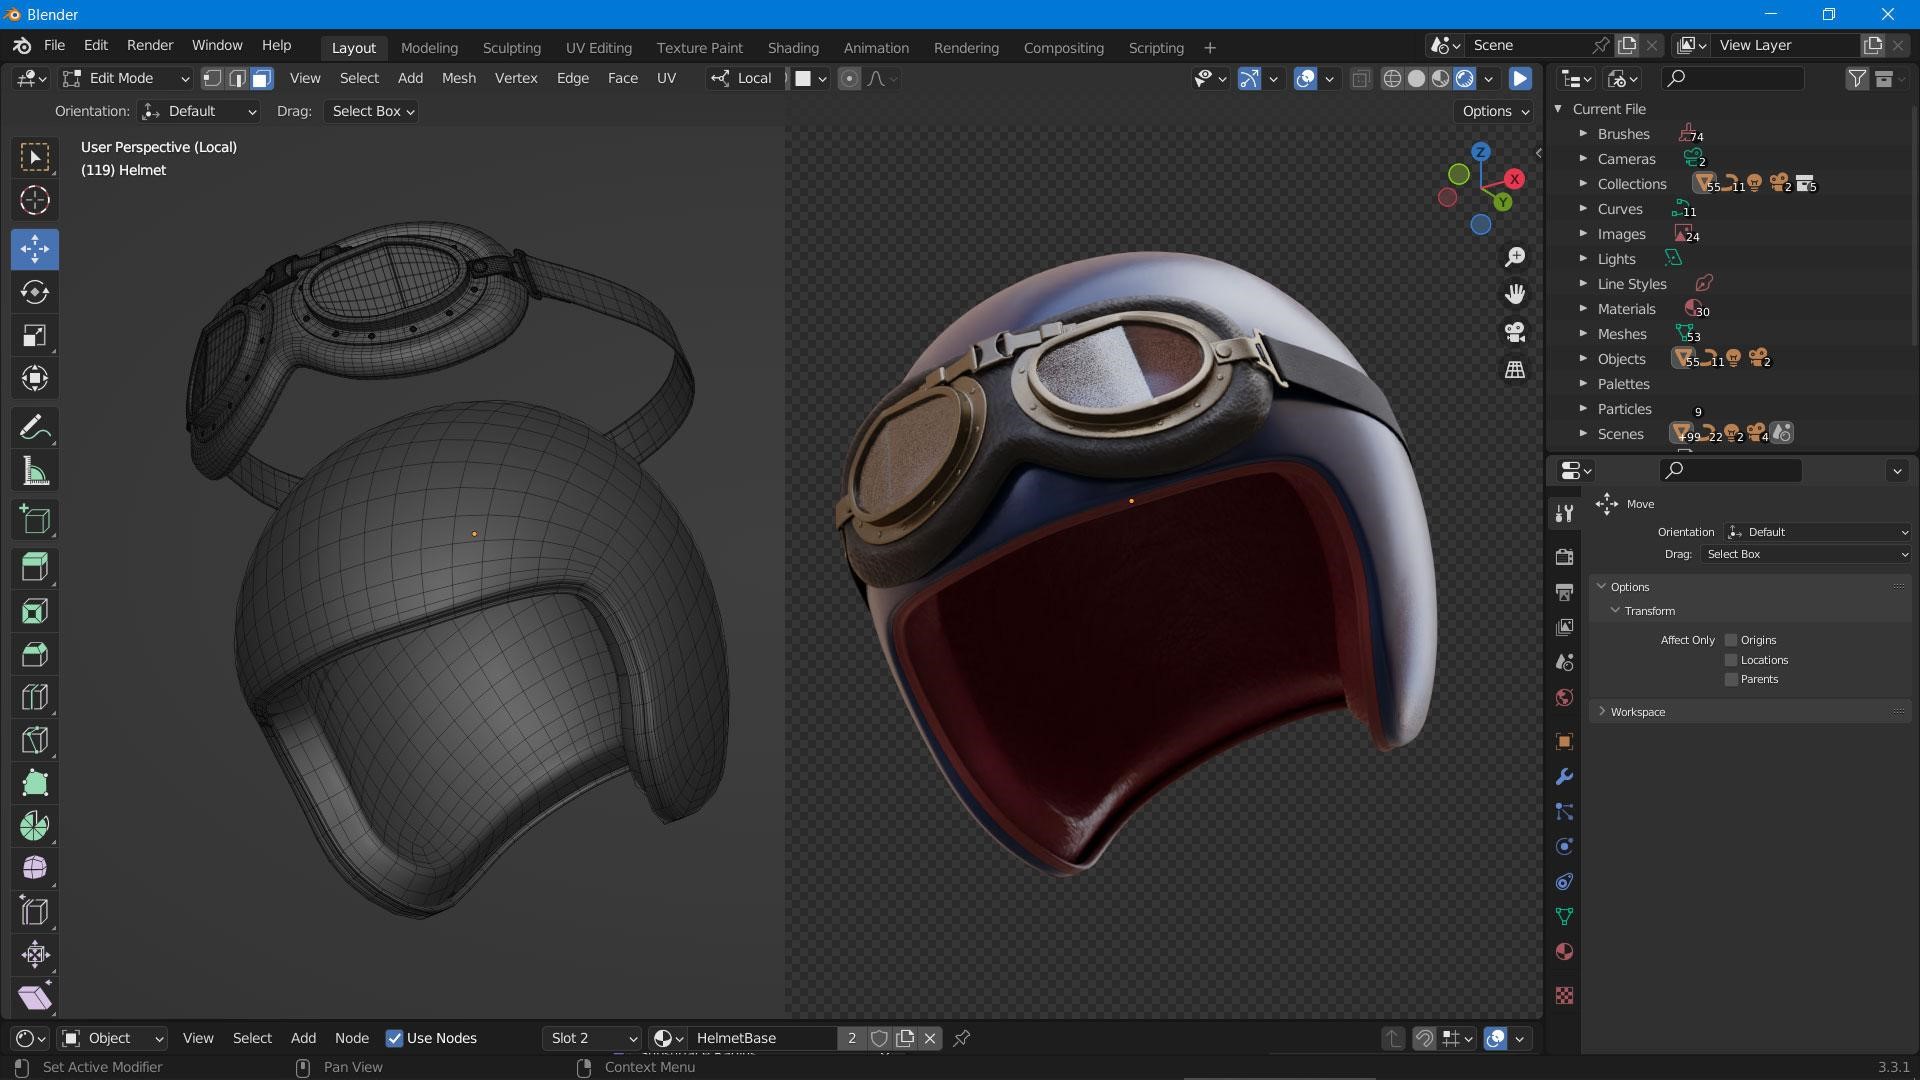
As you’ll be able to see, I did not embrace a chin strap on the helmet because the beard would cowl it. This is applicable to any small particulars on this mission that are not seen to the digicam straight. I used to be making an illustration, not a full 3D mannequin.
JACKET
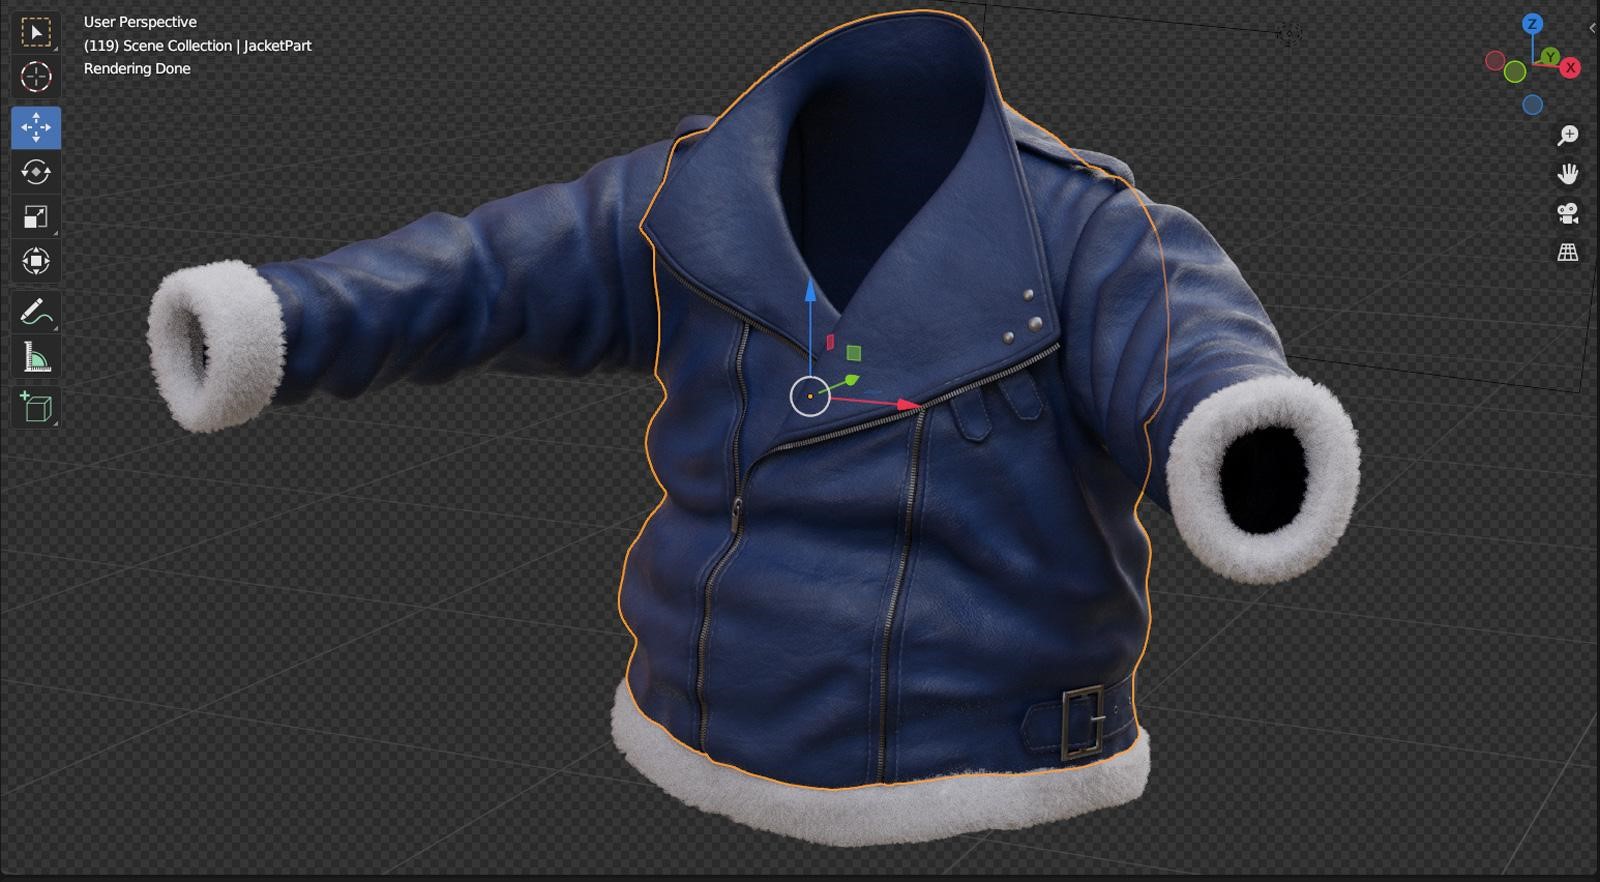
The jacket took most of my time. I made it with sculpting brushes from a easy primary mesh with none fabric simulation. Within the image under, you’ll be able to see the primary elements of the jacket. As an illustration, the sleeves are separate from the primary half, and I did not merge them into one mesh till the tip of the work.

The zipper elements have been made with Array and Curve modifiers. I separated the sting loop from the jacket mesh and used it as a curve path.

On this screenshot, you’ll be able to see the particle system settings that I used to create the white fur cuffs.

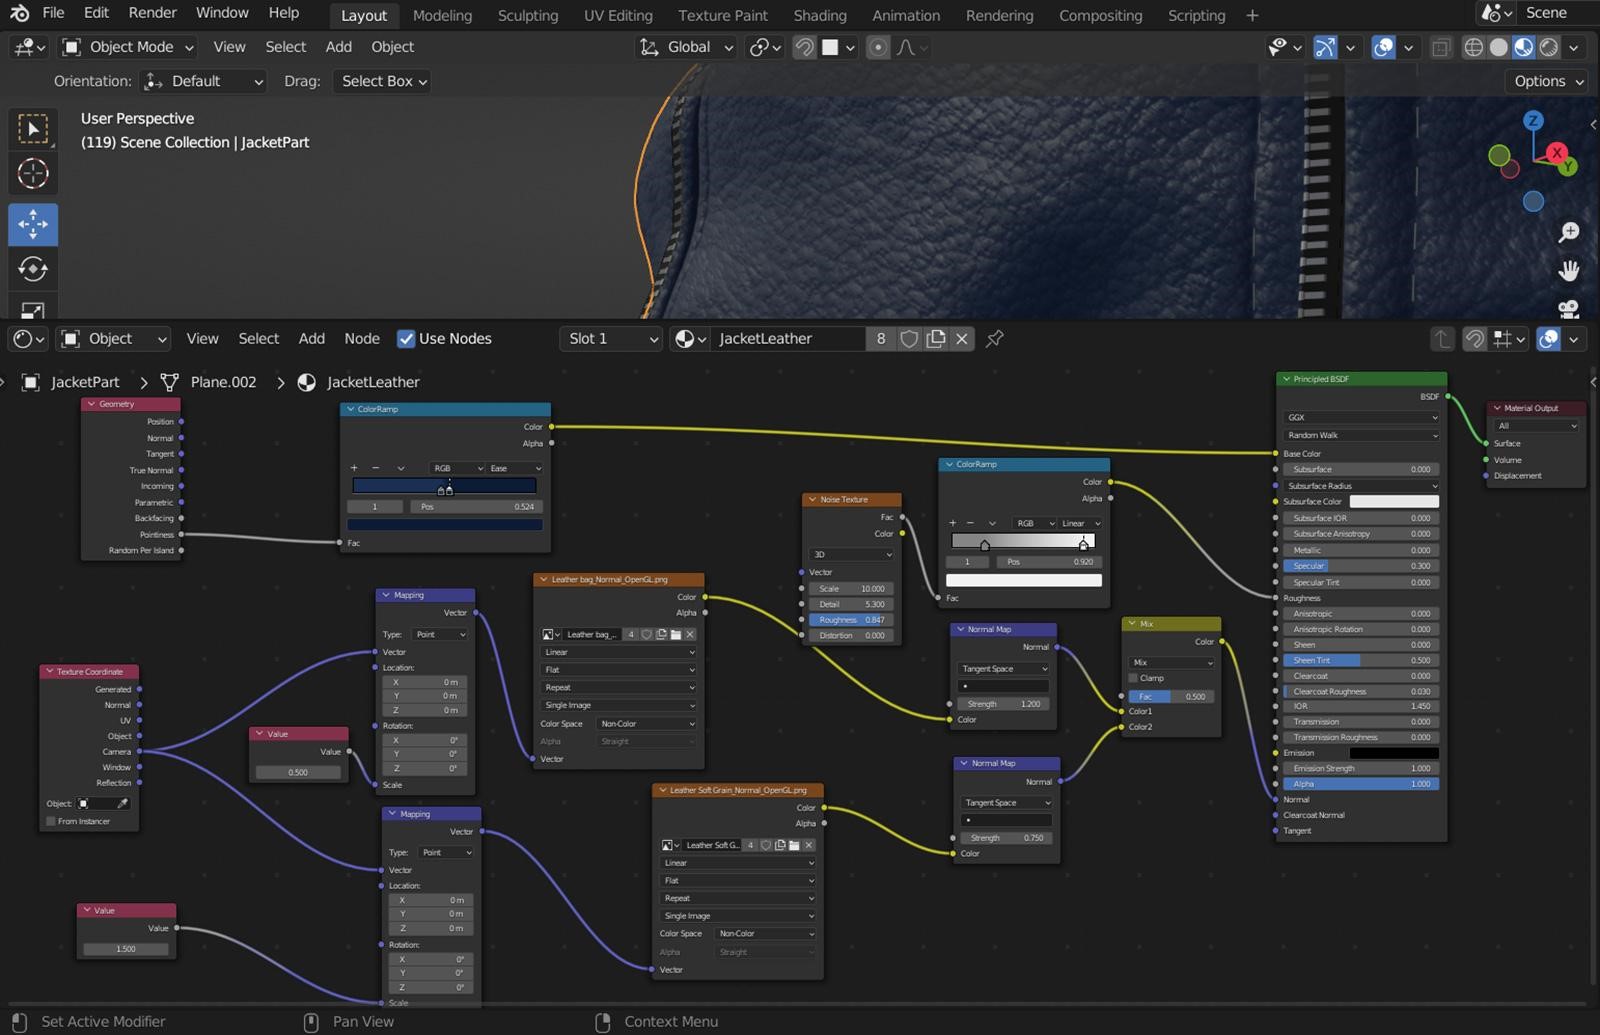
Right here, you’ll be able to examine the leather-based shader settings. Observe that I’m utilizing the Digicam texture coordinates on this case. This sort of mapping provides a adequate outcome and permits me to not fear about UVs. I’ve tried Generated and Object sorts too, however stopped on the Digicam possibility.
At this level, the jacket was prepared, and I moved on to the subsequent object.
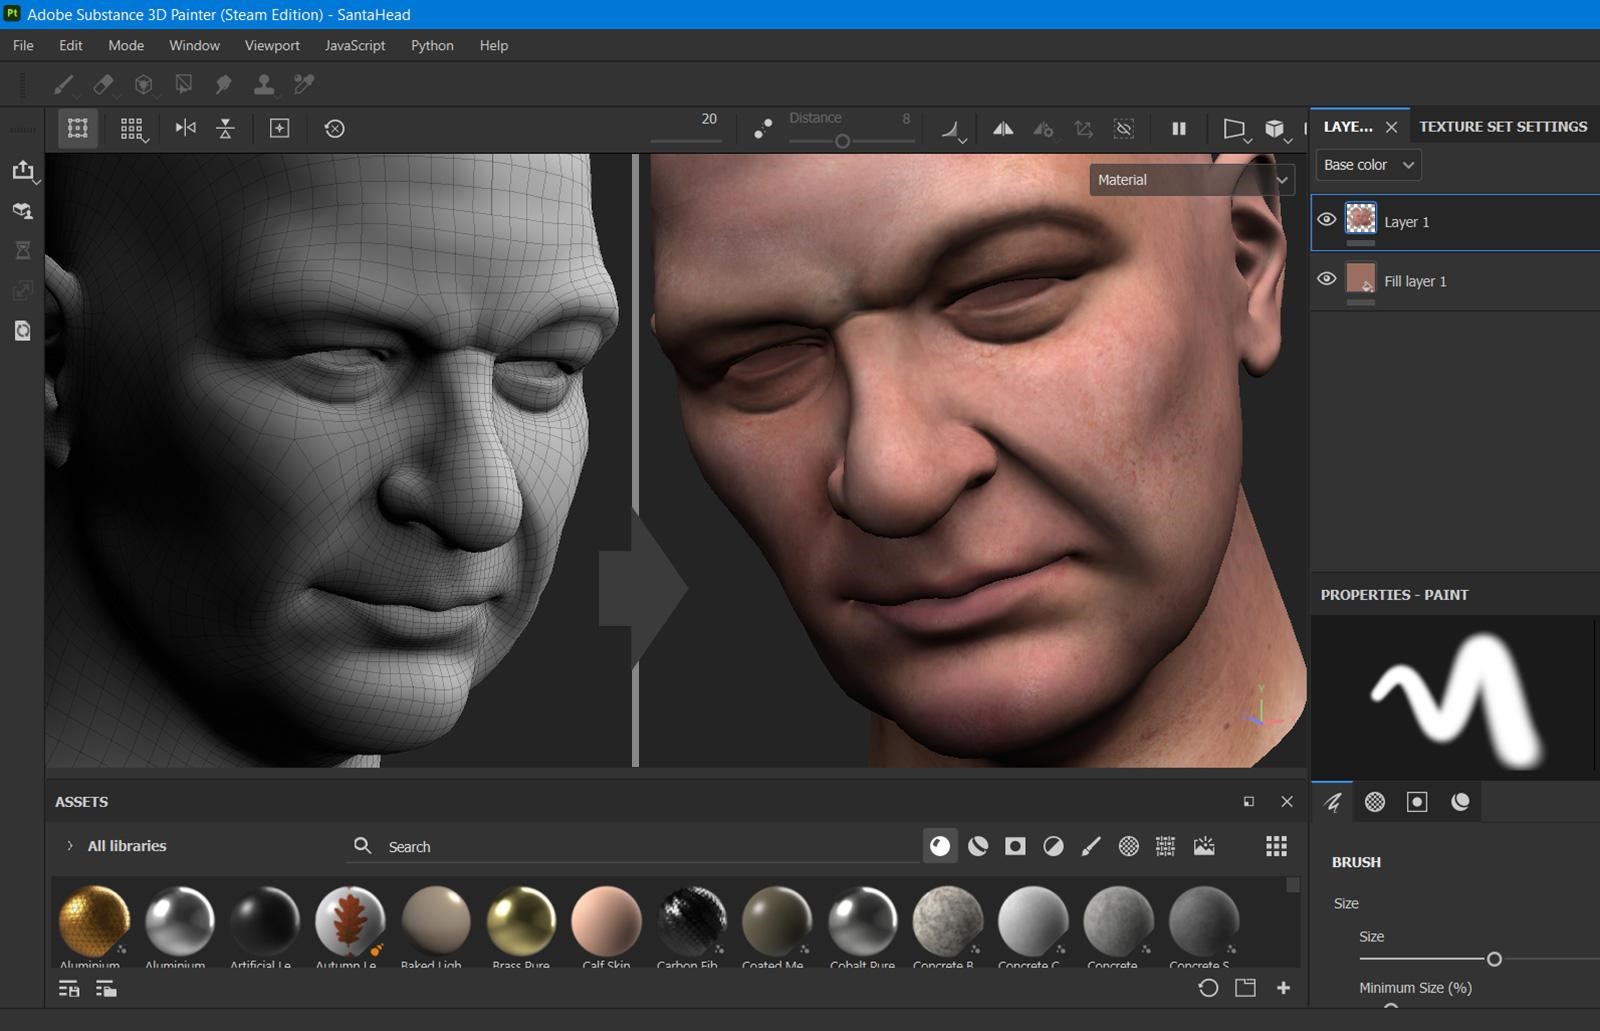
HEAD
After I made the top look extra “aged” with sculpting instruments, I drew a easy texture in Substance Painter. For the ultimate render, I used solely this coloration map and the face mesh geometry.
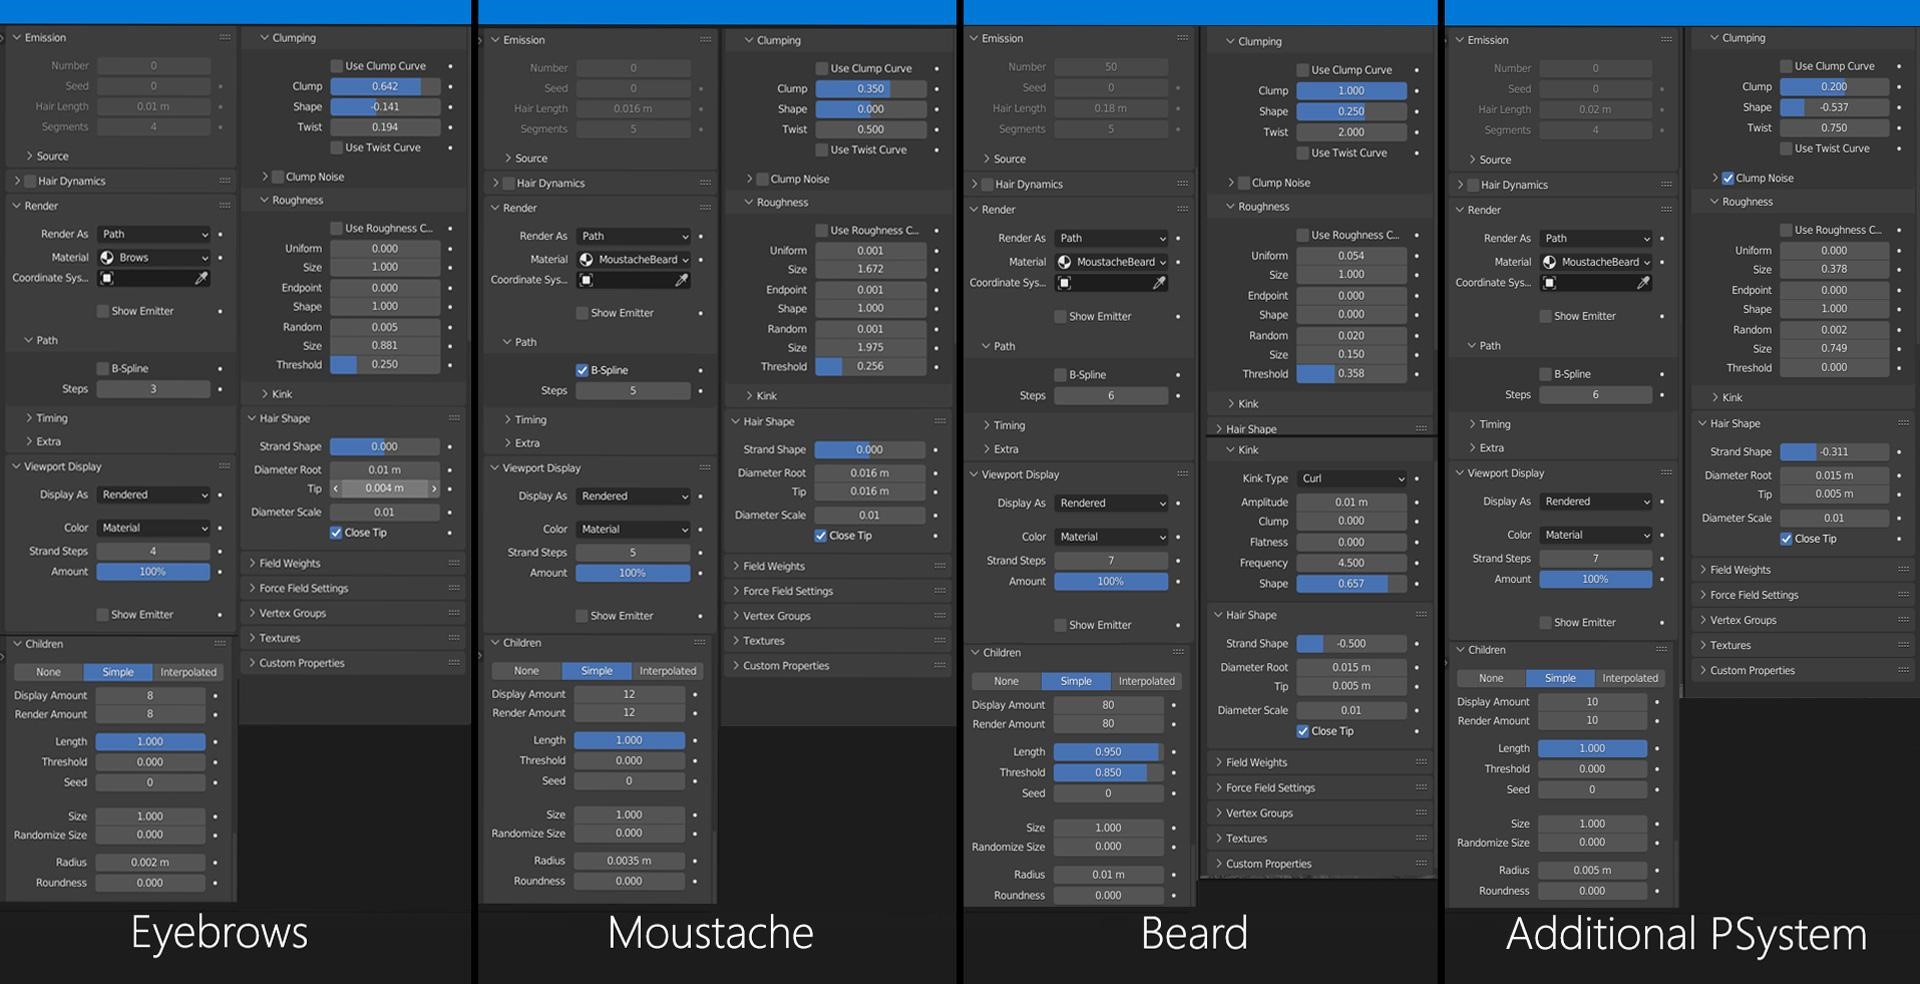
Facial hair is made up of 4 particle methods: eyebrows, mustache, beard, and extra beard hair.
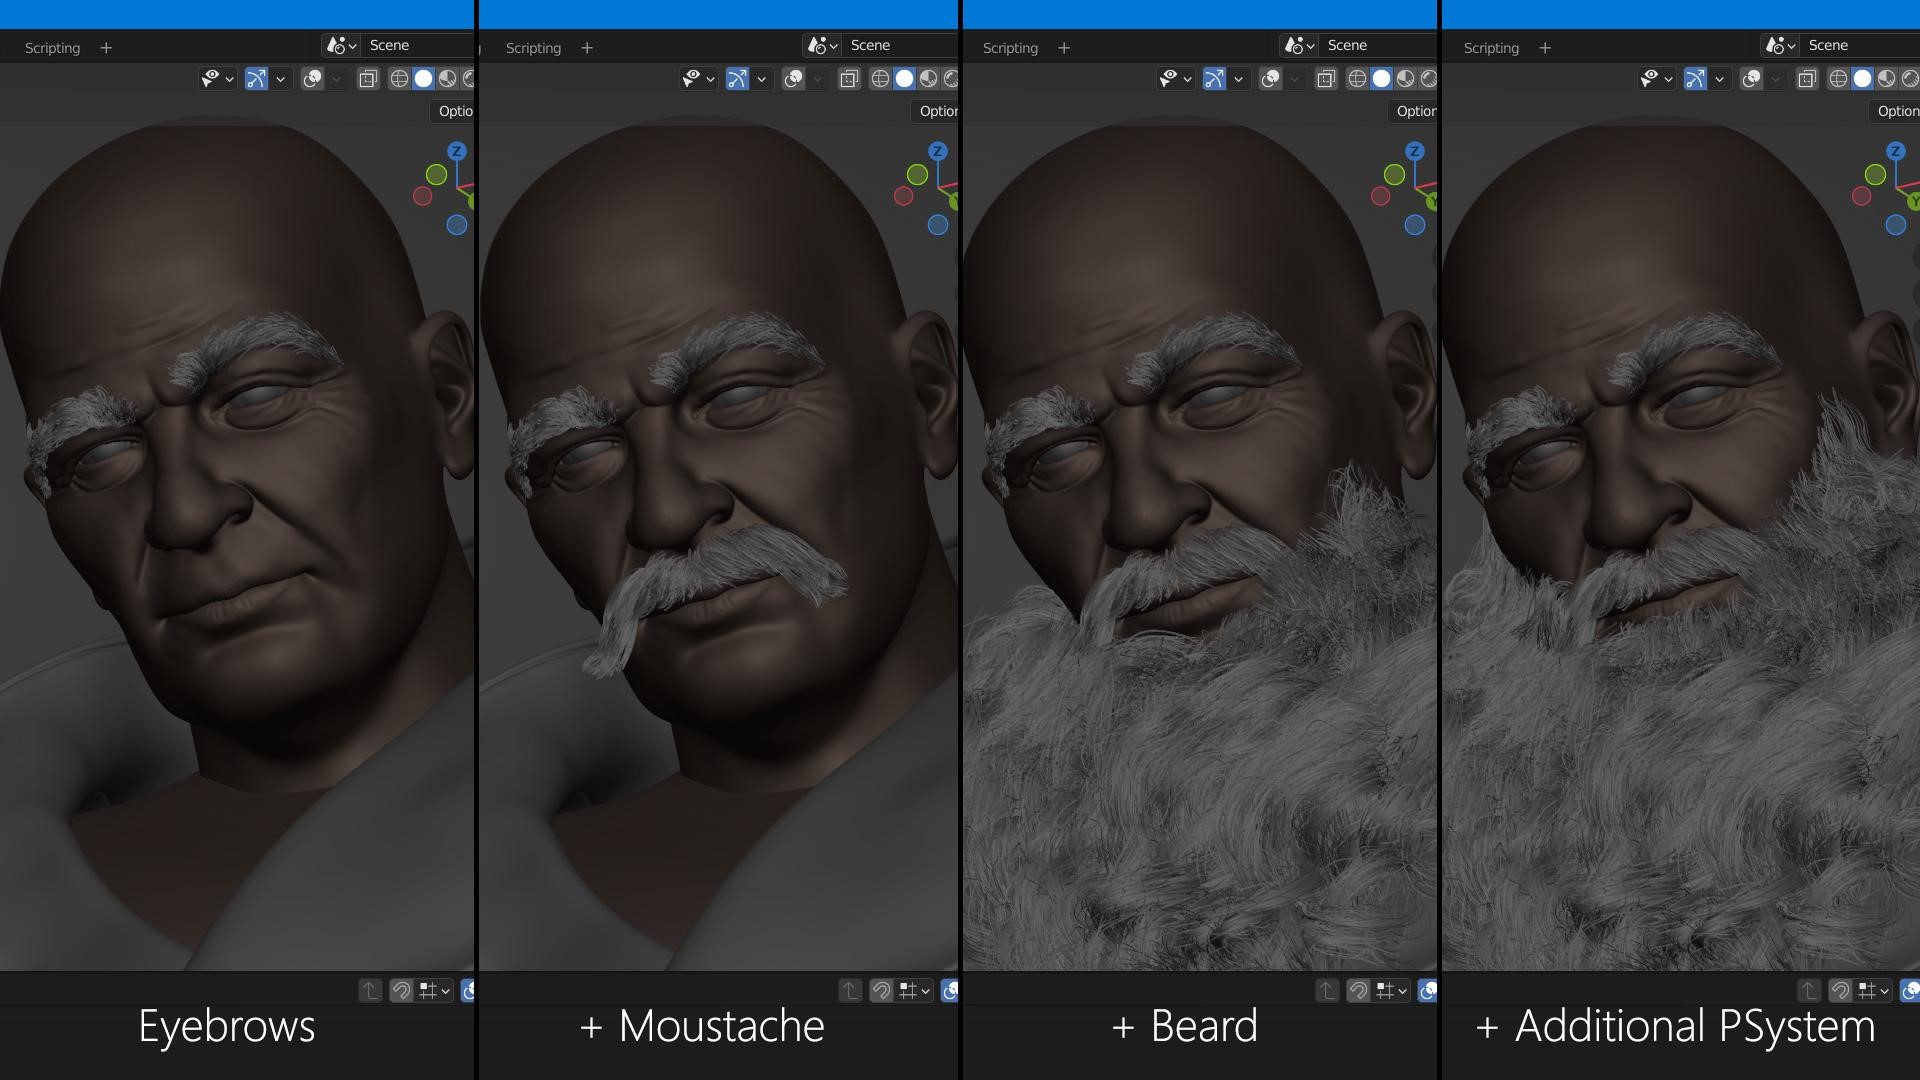
I used the legacy Blender particle system for all of the hair on this mission.
DEER
I created the antlers’ base mesh utilizing a Curve object and a Pores and skin modifier. Then, with mesh enhancing and sculpting instruments, I achieved their last form. I made the antlers’ materials in Substance Painter by combining a number of wooden supplies, grunge and scratches textures.

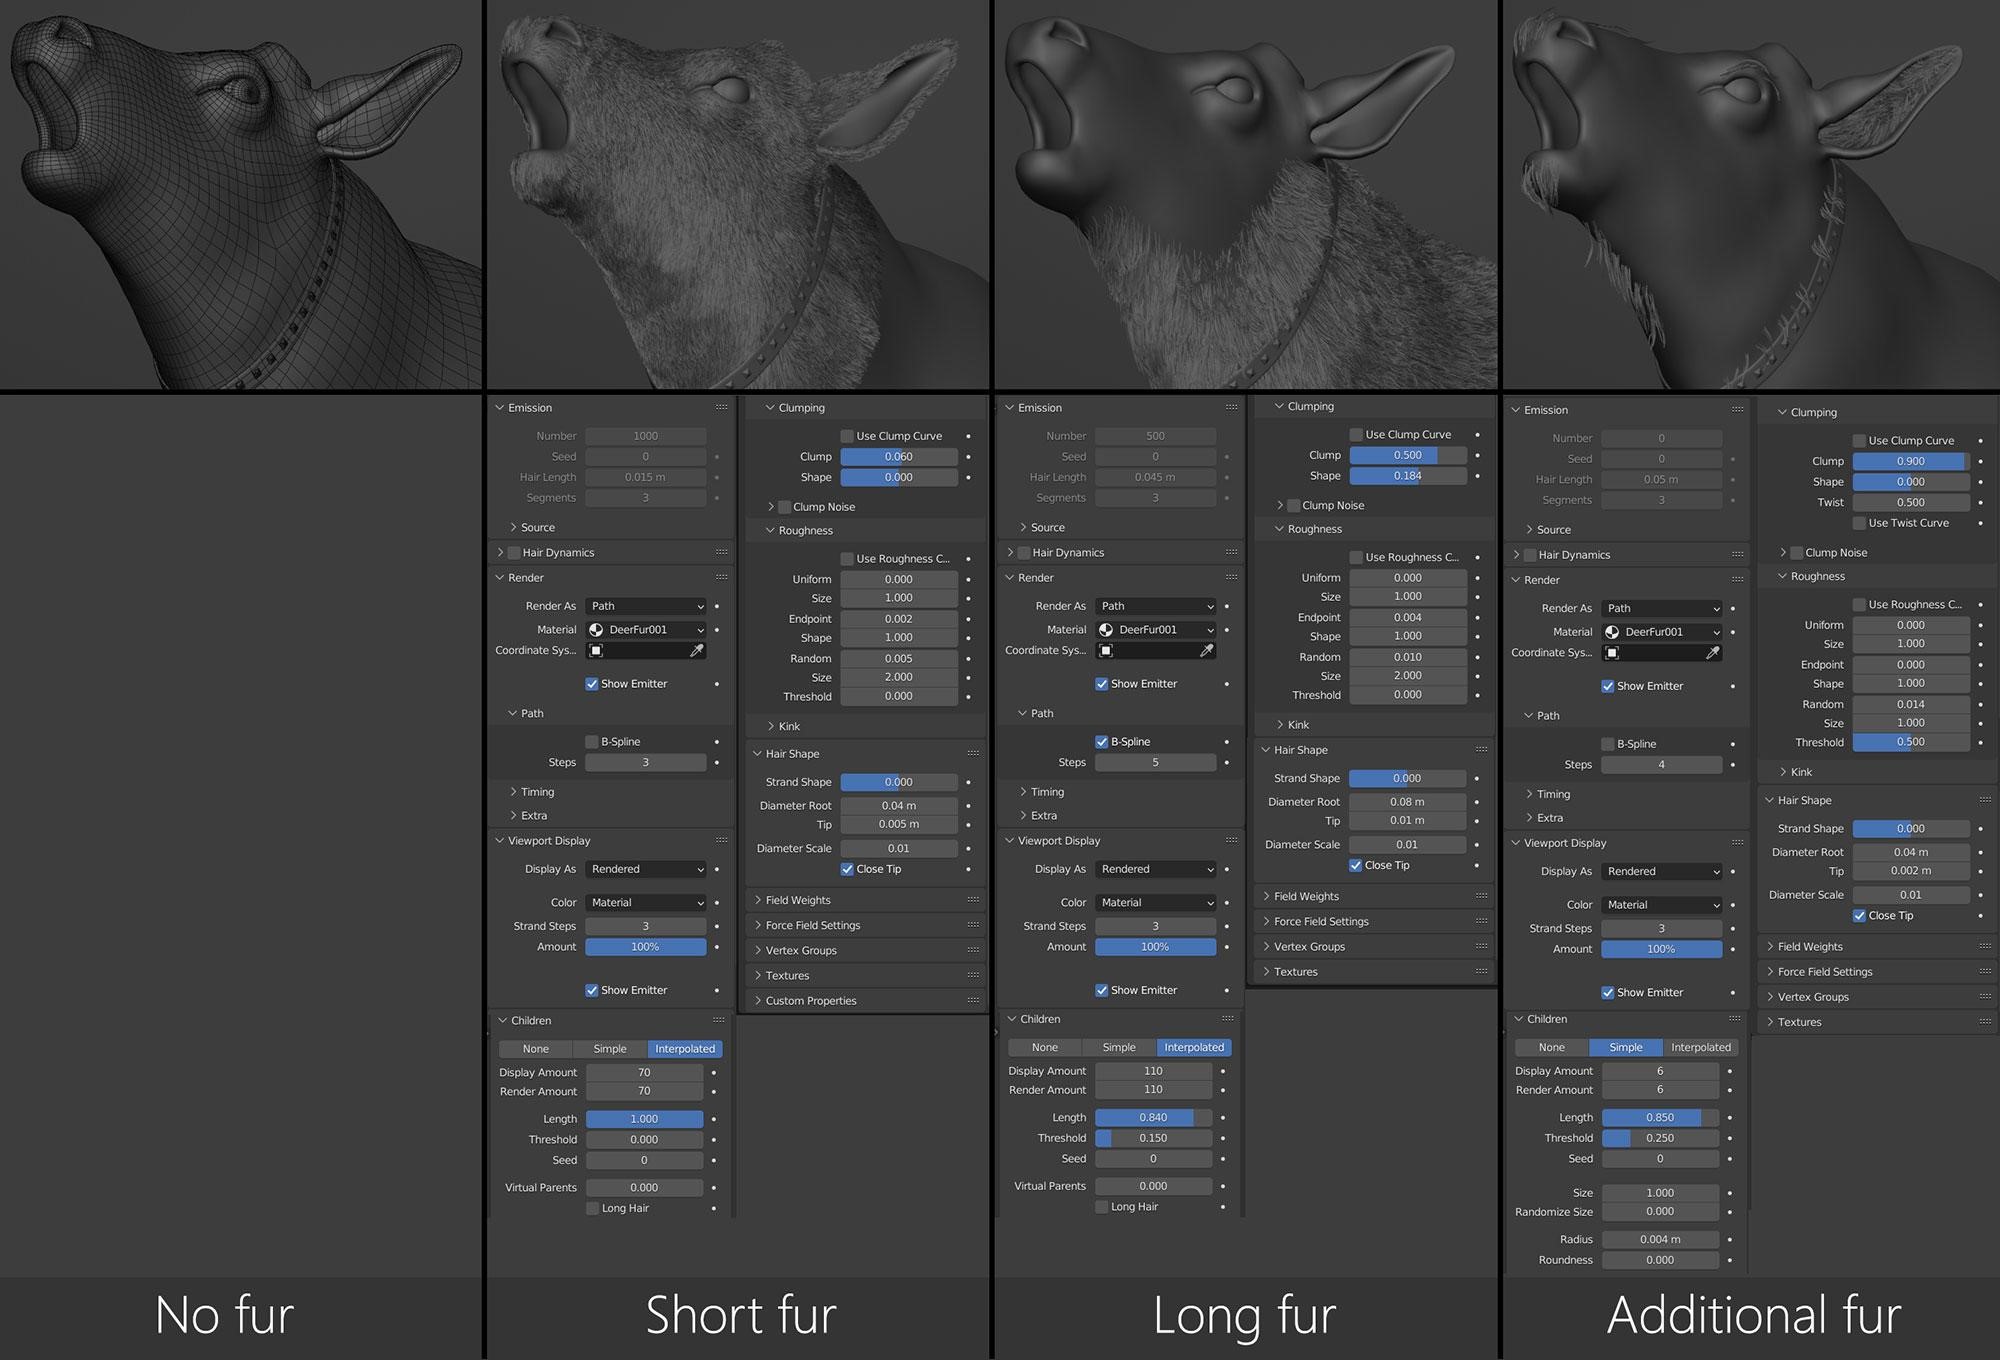
Deer fur was probably the most difficult half for me as a result of I had by no means achieved something like this earlier than. First, I created a number of maps in Substance Painter: coloration and density maps for fur, and masks for SSS and roughness of the pores and skin materials.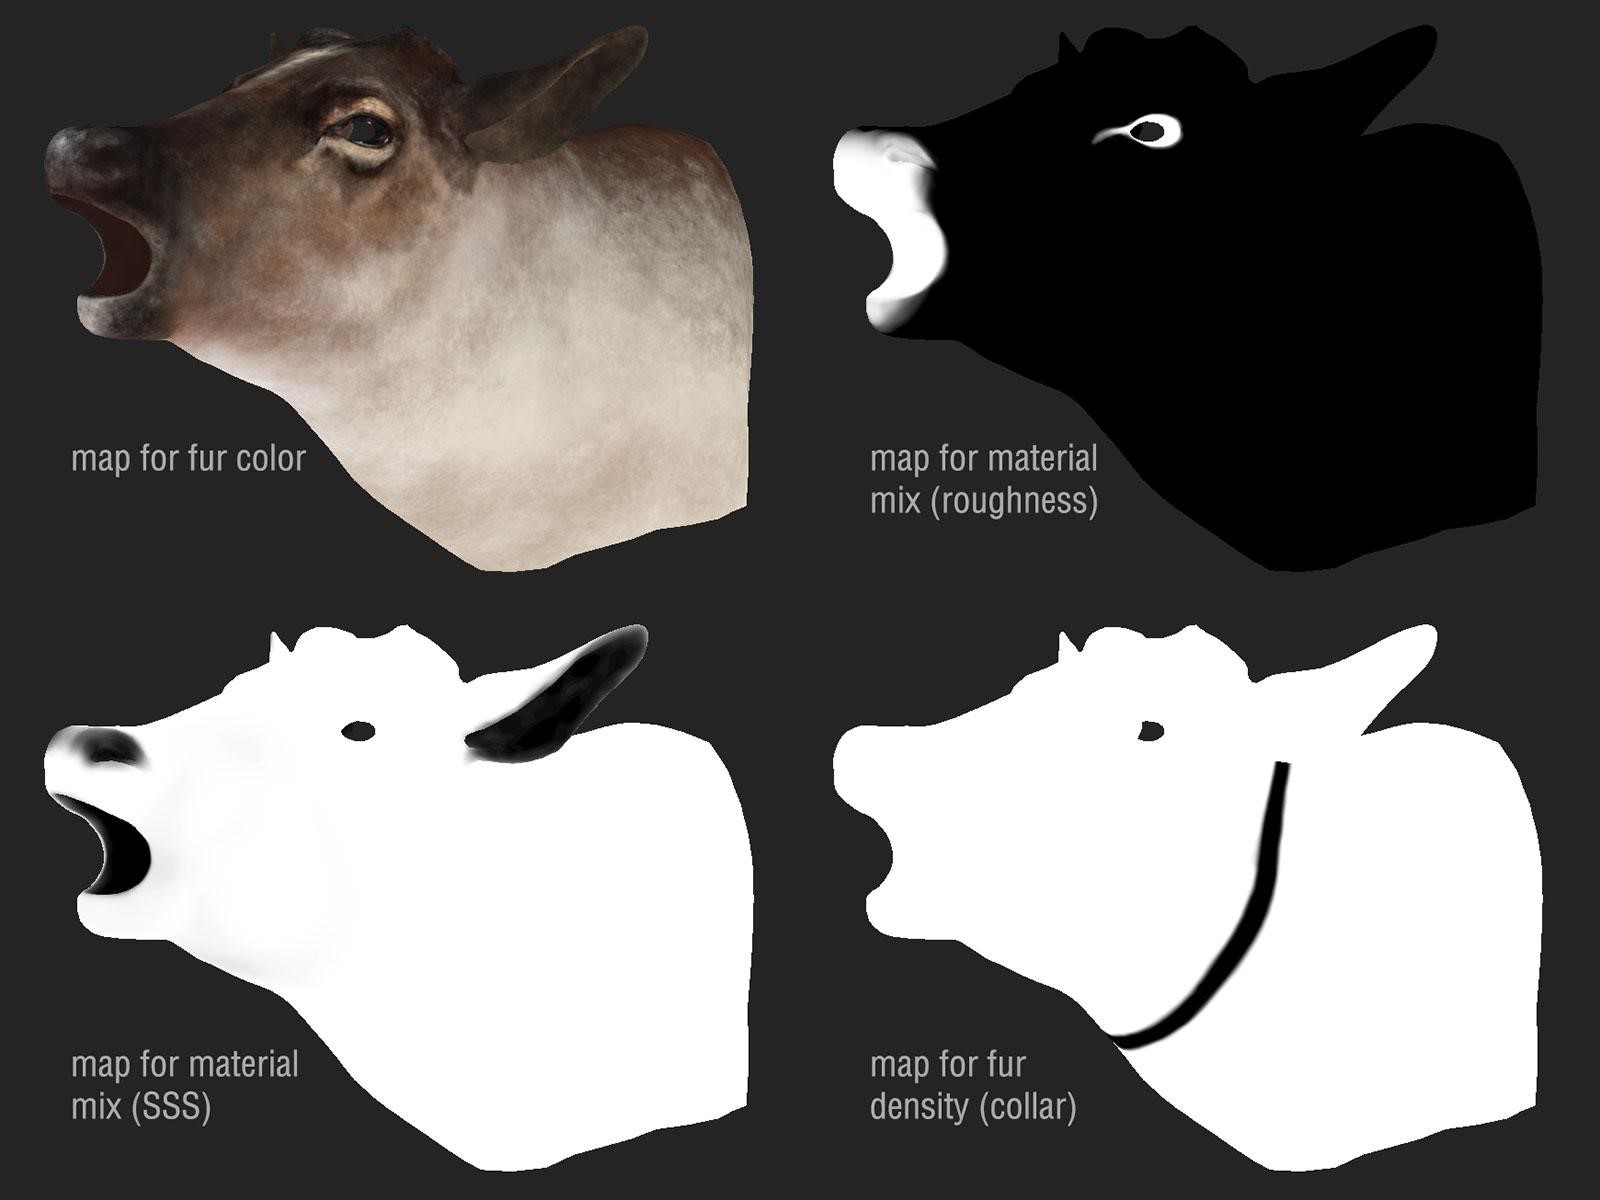
Subsequent, I divided all of the fur into a number of elements (as I did with the rider’s head): brief fur, lengthy fur, and extra fur. You’ll be able to see the settings of all these particle methods within the image under.
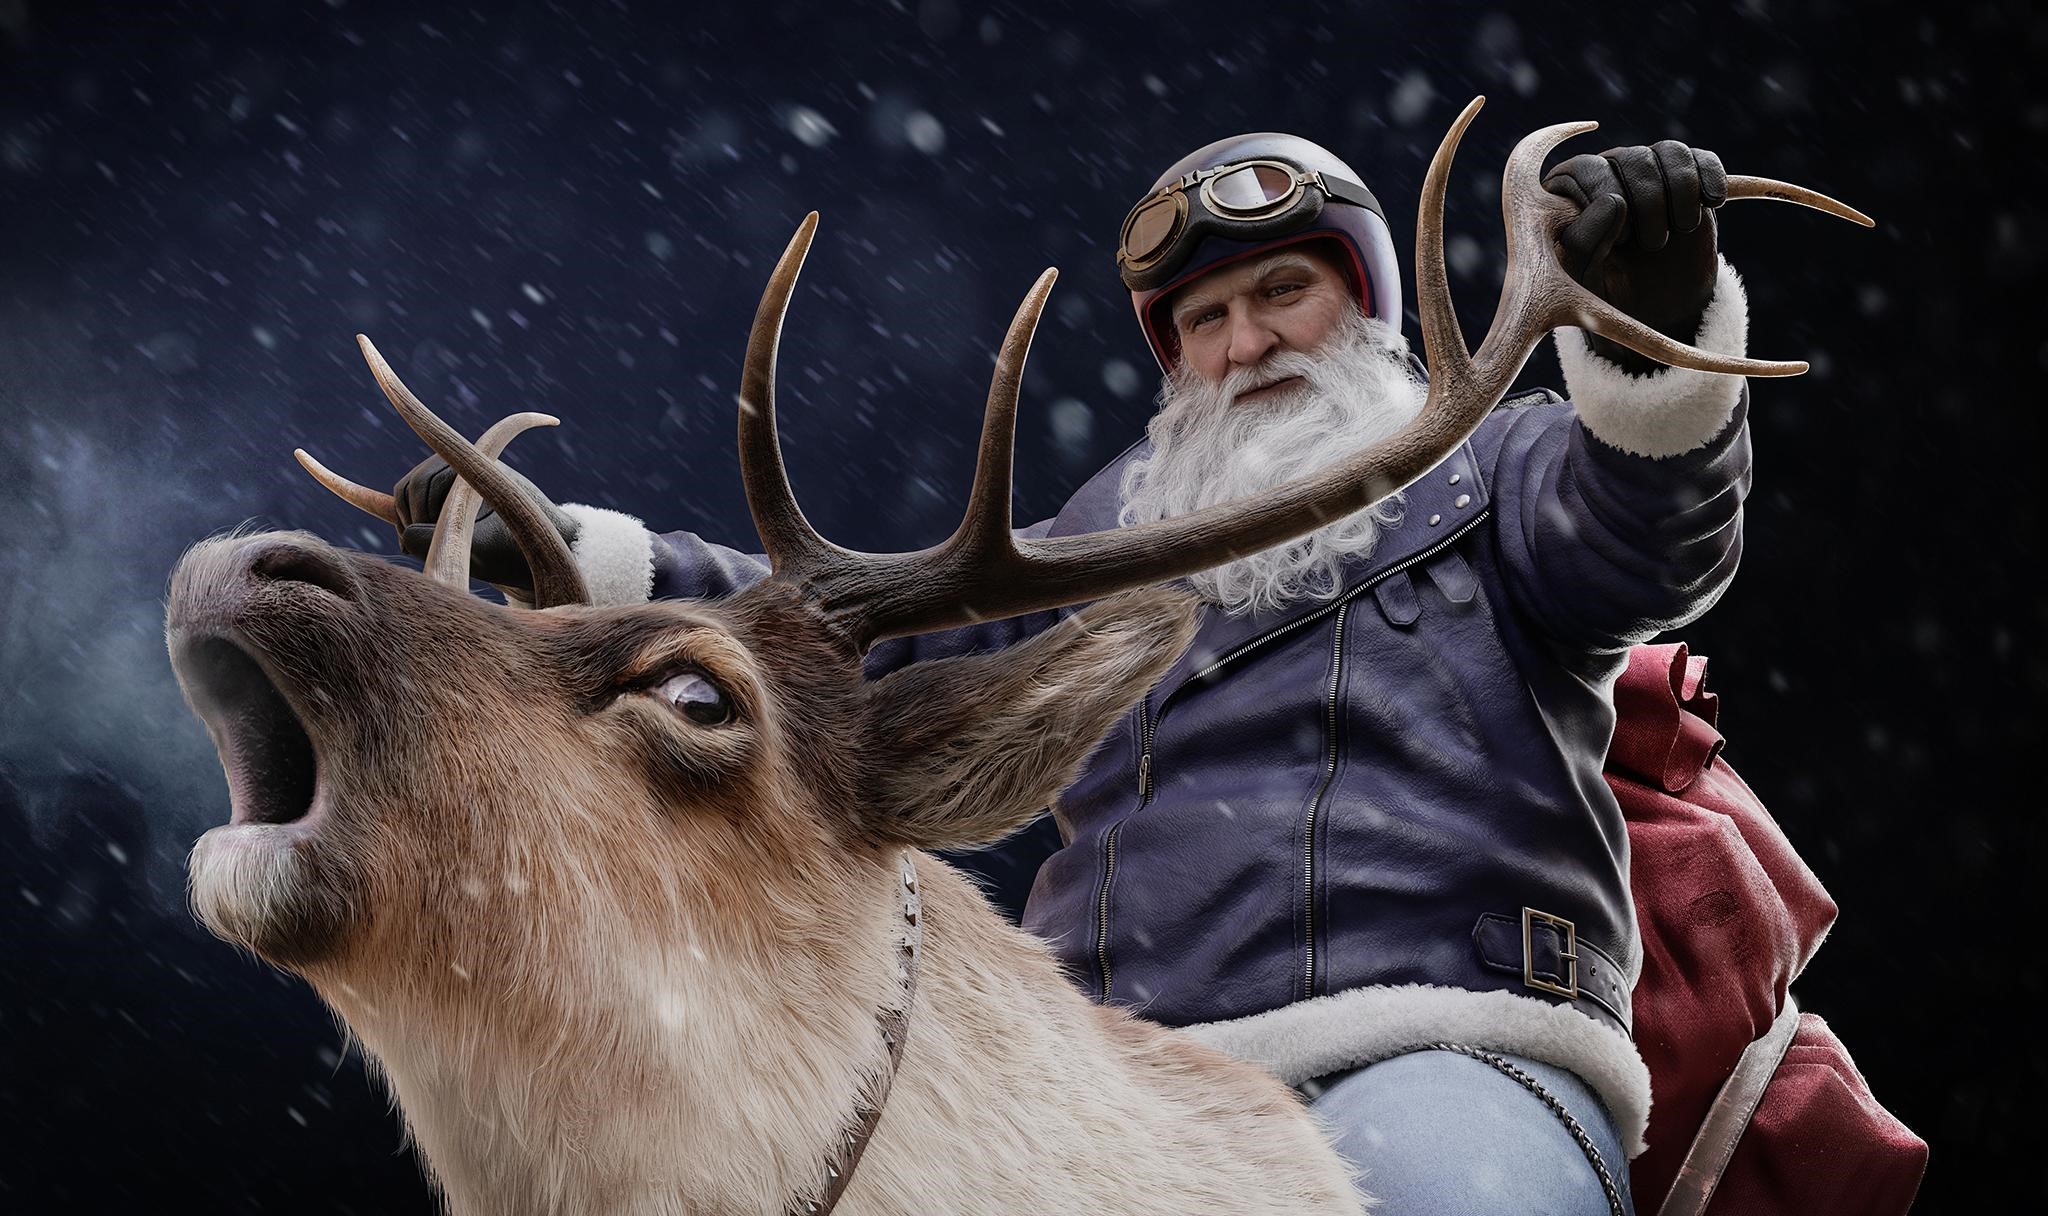
FINAL
I completed just a few extra issues (bag, gloves, chain, and so on.) and made the ultimate render. For lighting I used an HDRI map and one rectangular mild supply proper behind the rider. Within the photos under you’ll be able to see the distinction between the uncooked render and the ultimate picture edited in Photoshop. I added extra hair and fur (simply drew the hairs with a small diameter brush), utilized textures in numerous mixing modes, used a Digicam Uncooked filter, added snow layers with movement blur, and so on.
DEER RIDER


That is all! I hope this text was helpful or at the very least attention-grabbing for you.
Have a pleasant day!
Concerning the Artist

Andrew Dudka, a 2nd and 3d artist from Saint Petersburg, Russia.