INTRODUCTION
My title is Murad, and I am a 3D generalist from Armenia. Regardless of finding out Utilized Arithmetic and Pc Science at college, I did not pursue a profession in artwork till I returned from the military in 2015.
I started studying 3D software program by way of free sources, beginning with 3ds Max and later switching to Maya. I landed my first full-time job as a 3D animator at a small studio in Yerevan, however I did not have the chance to pursue private tasks that really me.
In mid-2020, I began listening to concerning the rising recognition of Blender and determined to discover it extra intently. After utilizing Maya for 4 to 5 years, I made the swap to Blender and located it to be extra productive and environment friendly.
INSPIRATION
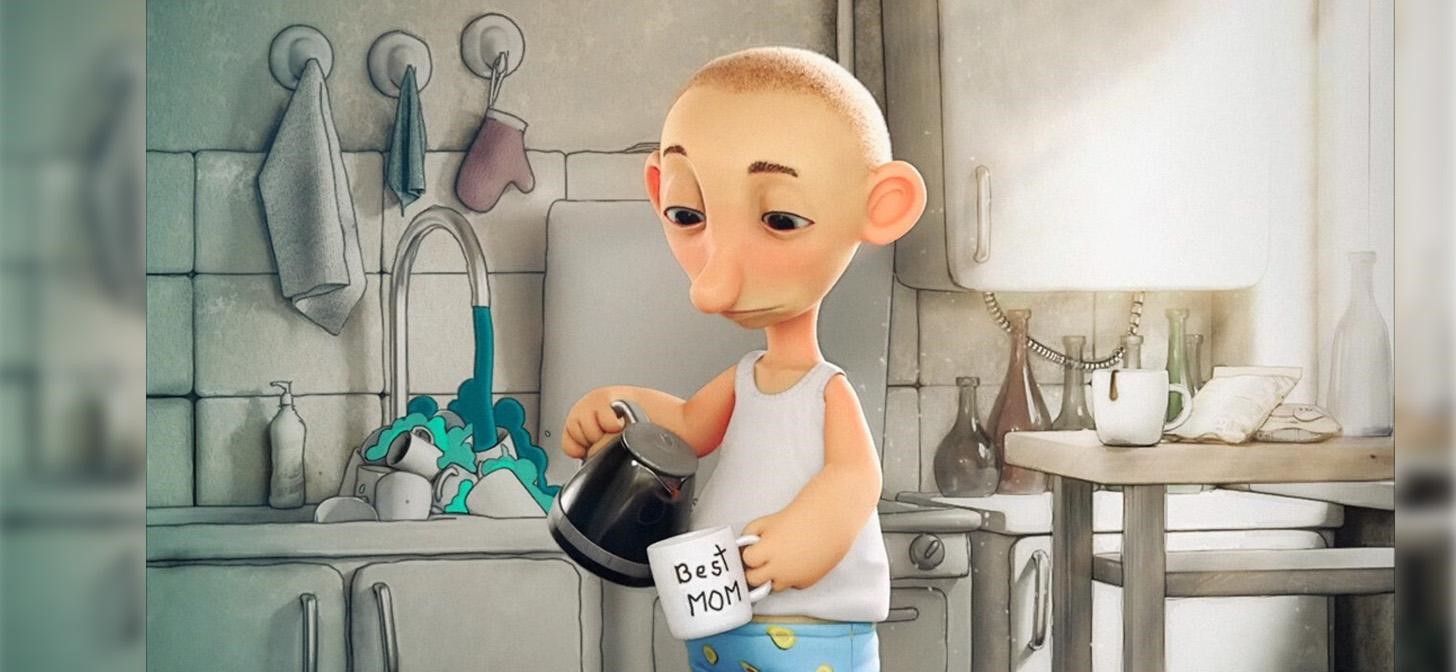
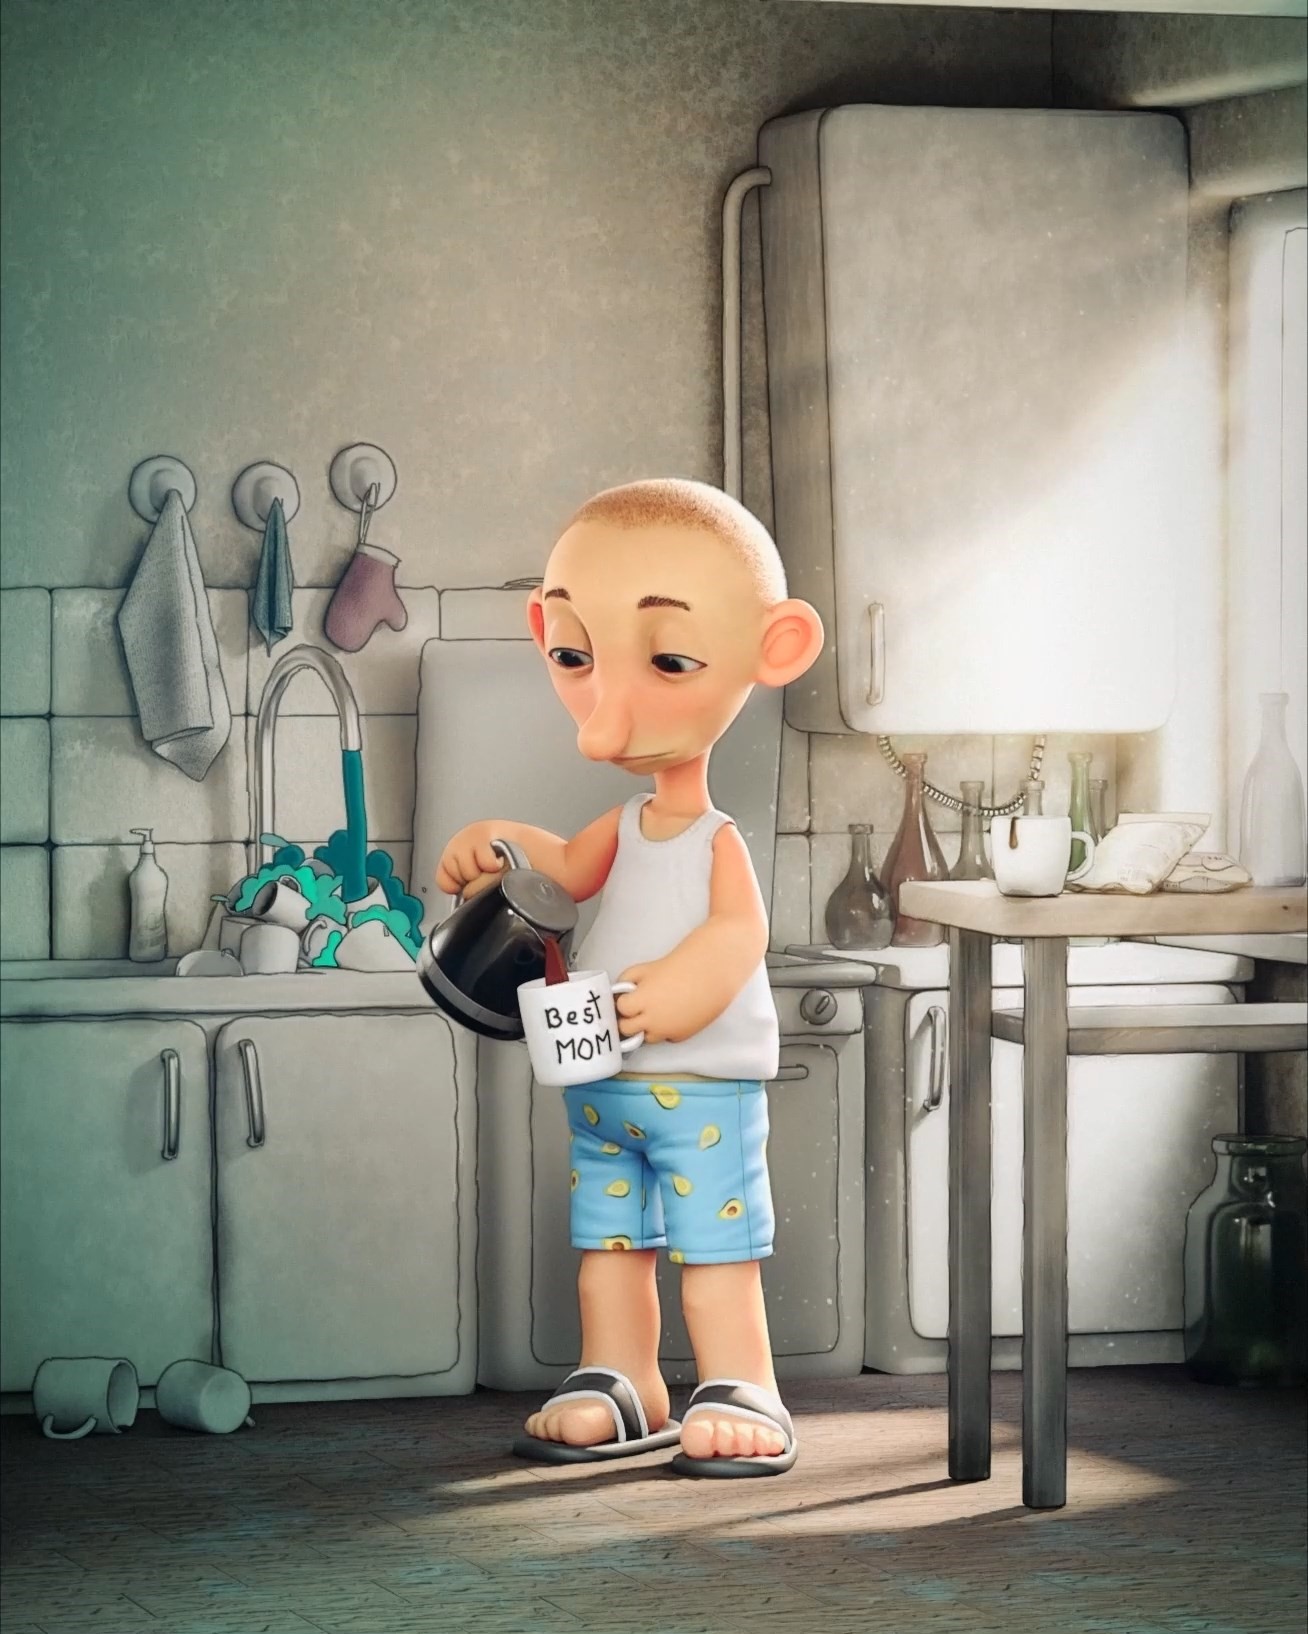
Right this moment, I am proud to work at my dream studio Triada in Yerevan and have the liberty to discover my private inventive passions utilizing Blender. I am excited to share the story behind certainly one of my most up-to-date works, which was impressed by a brand new kitchen the place I used to start out my mornings final 12 months. The art work is titled “Good Morning, Espresso.”
This concept visited me one summer time morning in 2022. I awoke and located myself closely depending on the darkish elixir. I consider most of you acknowledge that feeling 🙂 Typically, it looks as if you want tons of caffeine to cease feeling like half a human.
As a self-proclaimed espresso and sleep fanatic, I knew I needed to seize this expertise in my artwork.
CHARACTER CREATION
The character is absolutely made in Blender. Blender’s sculpting instruments are extremely helpful, so I did not want any further software program or add-ons to design the character. Though Blender has a bunch of nice instruments for sculpting, my essential workflow for sculpting characters consists of solely these 9 brushes (no less than for this character, I didn’t use every other ones).

")
For retopology, I used a terrific add-on known as Retopoflow on Blendermarket.
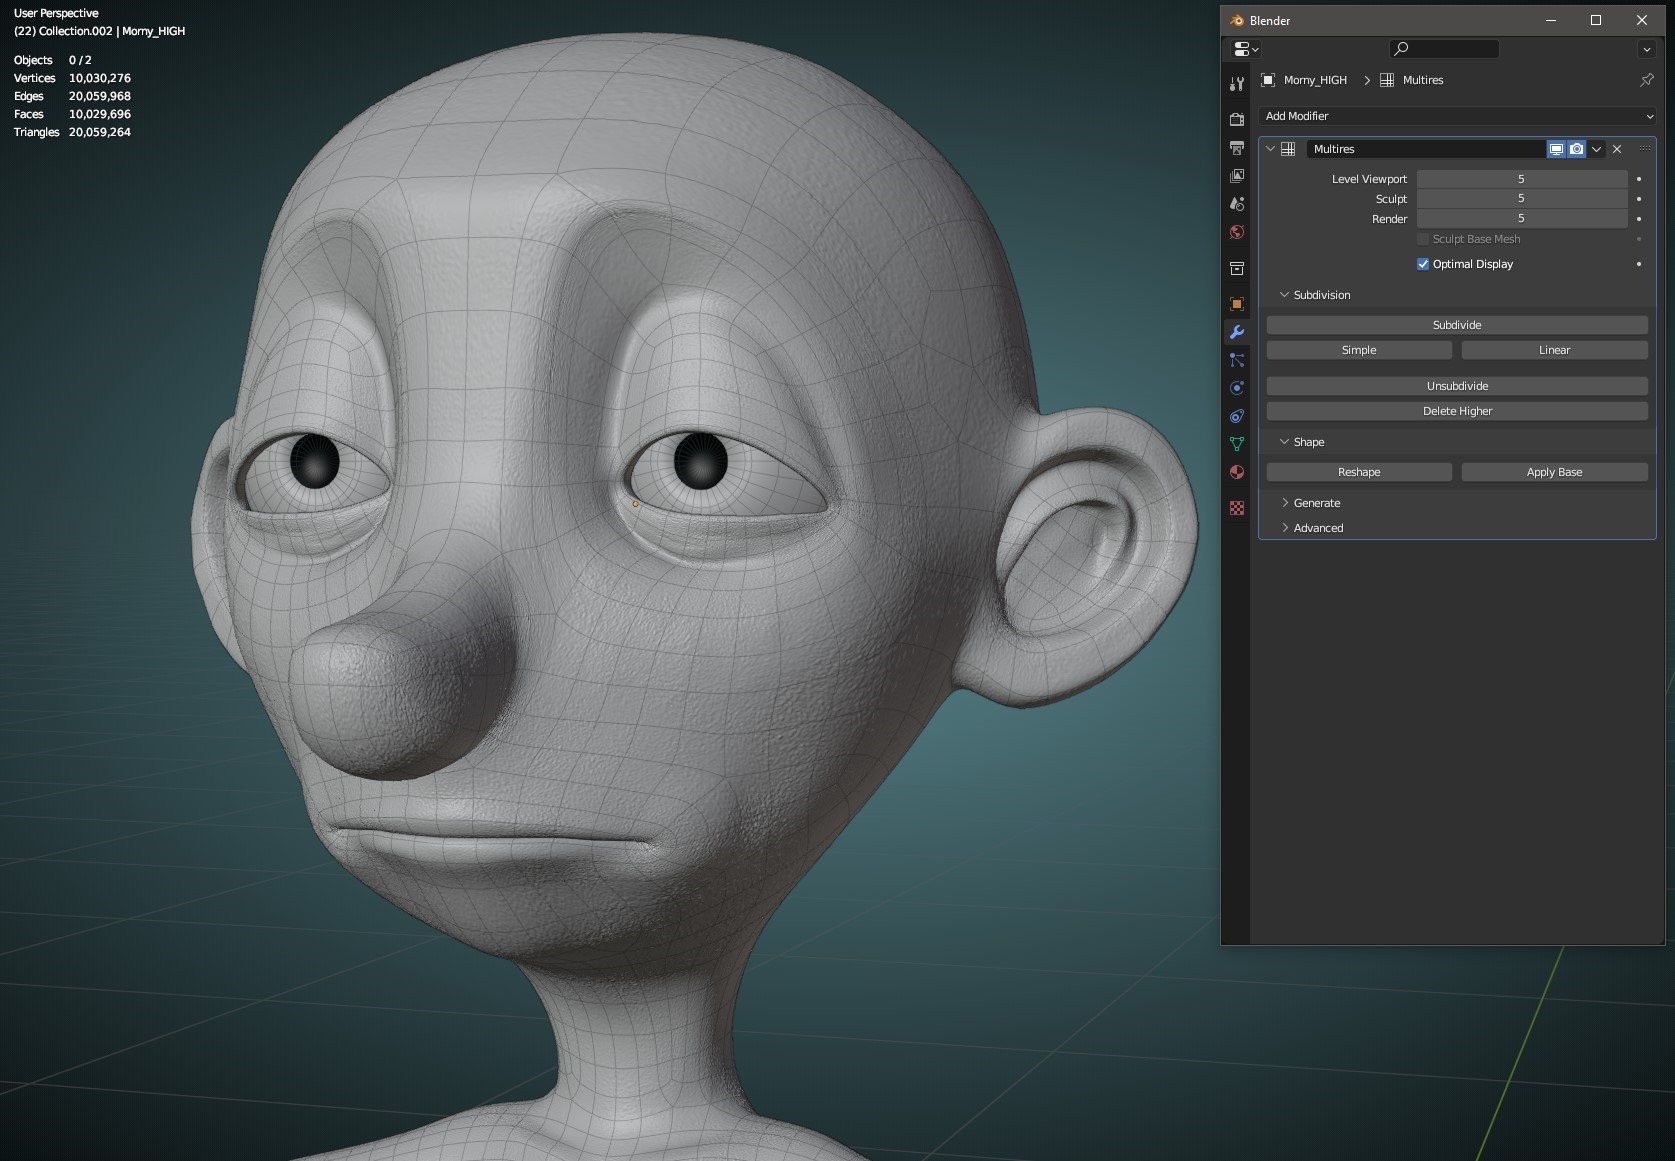
As soon as the mannequin was retopologized, I sculpted particulars with the multiresolution modifier of the face and pores and skin utilizing alphas supplied by the Sculpting Toolbox.
Right here is the end result …
After that, the texturing half adopted. My character isn’t so detailed and reasonable, so Blender’s widespread texturing was sufficient for this half. Utilizing the bake from multiresolution possibility for regular maps and normal portray for colour and roughness maps, I acquired this end result.
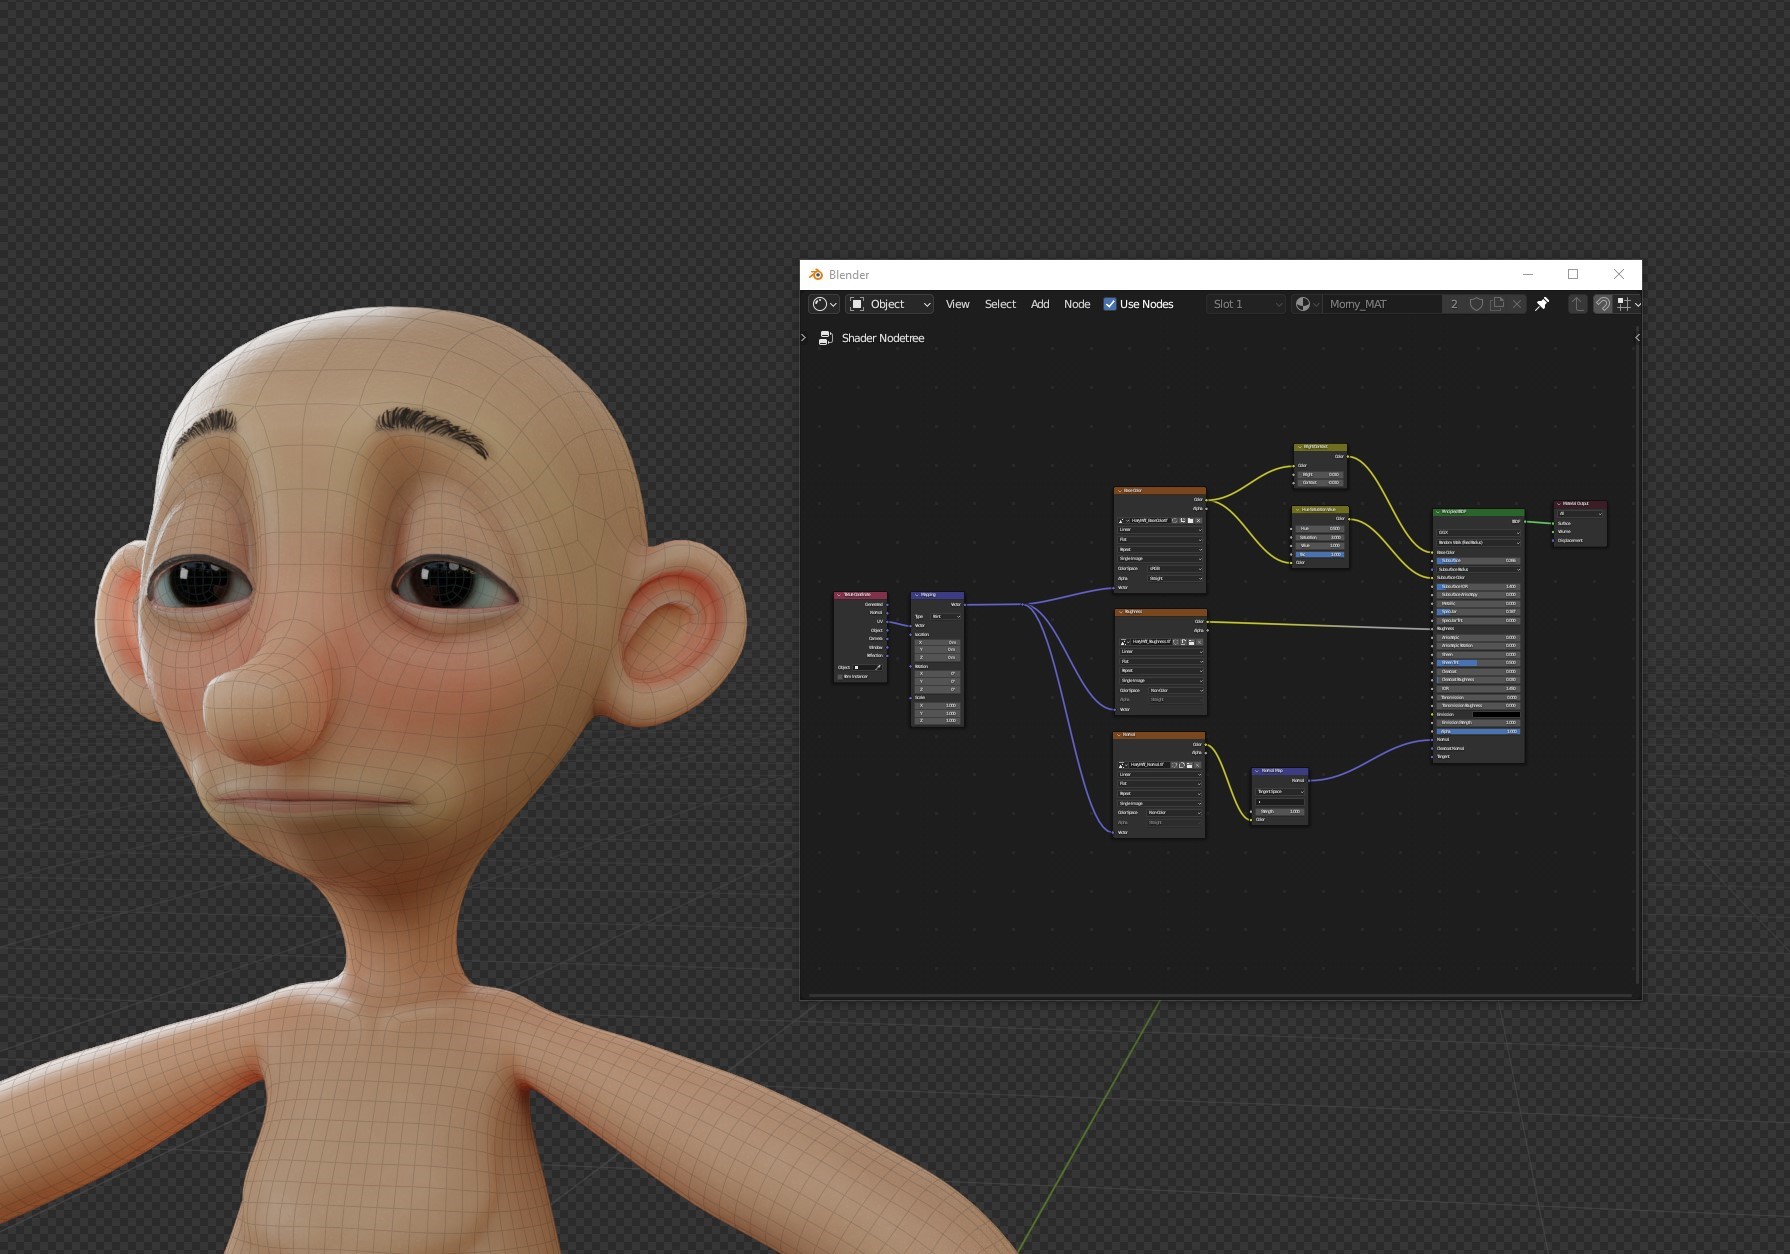
The shading mannequin is fairly easy. I solely used colour, roughness, and regular textures. For SSS, I used the identical colour texture with twice the saturation.
There isn’t a particular approach for creating garments, simply the identical as the principle physique modeling, so I am going to skip this half. The rigging was executed by Rigify, with some guide rigging for the face, particularly the jaw, nostril, brows, and eyes.
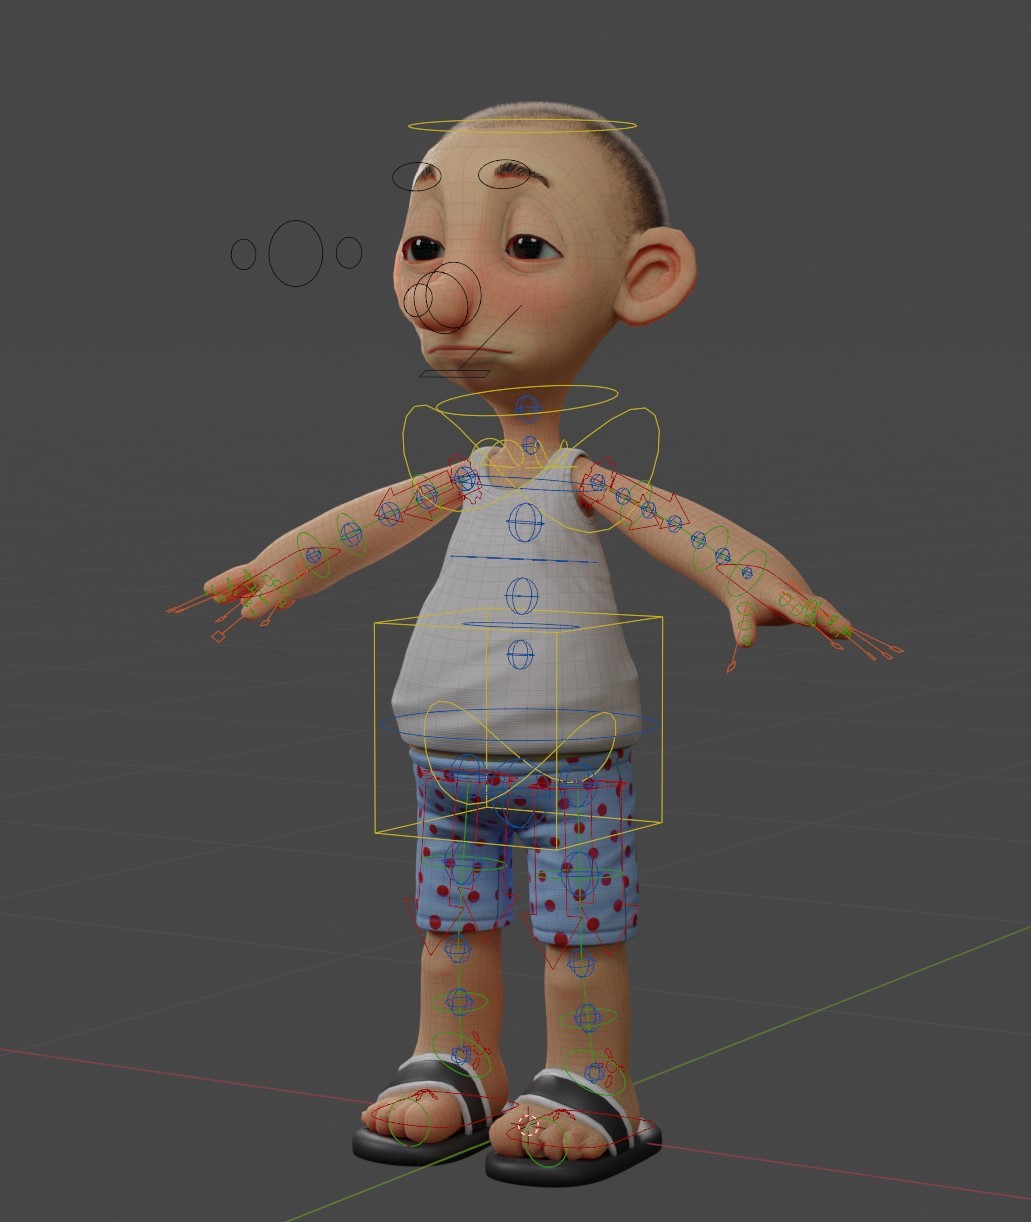
The one recommendation I may give right here is to make use of the CorrectiveSmooth modifier. I feel many individuals might not find out about it, however it’s an enormous time saver, particularly when Weight Portray is a headache for you. You may see the impact of it under within the jaw space.
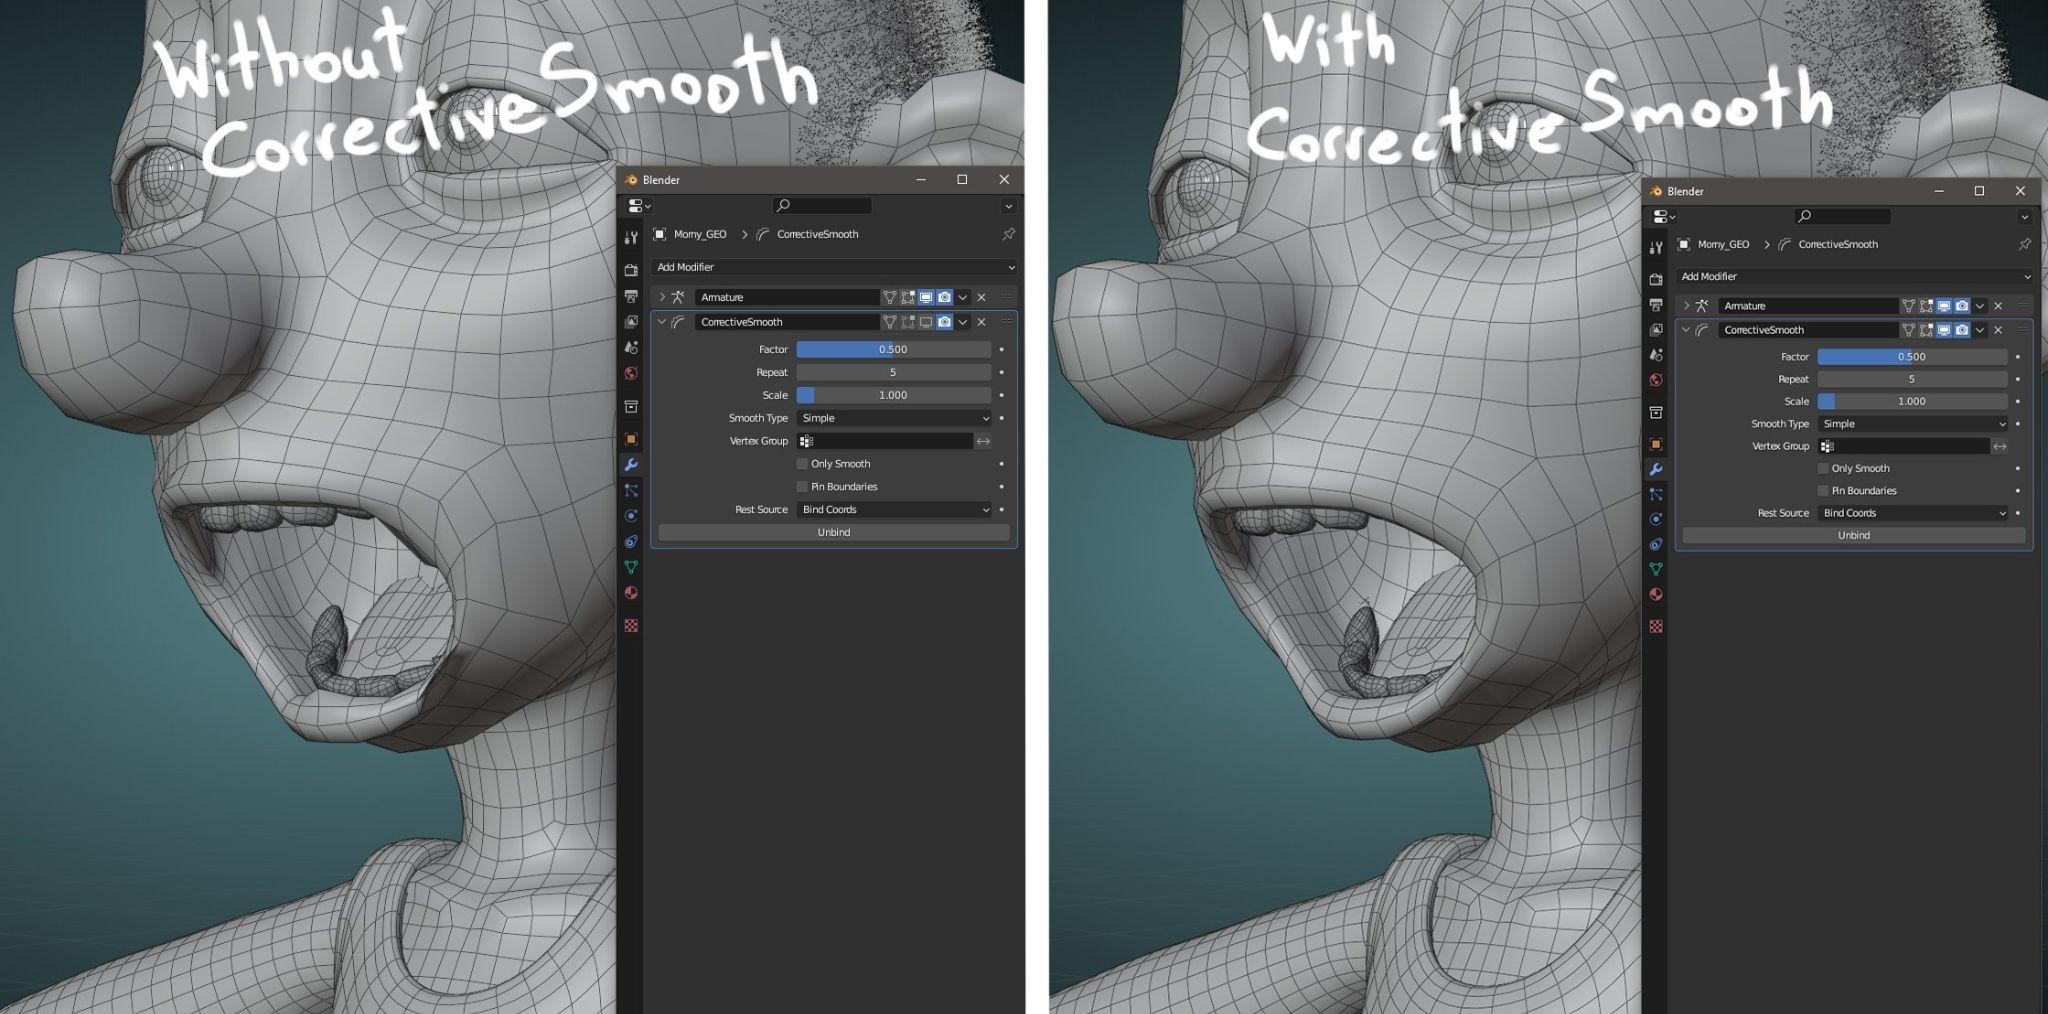
After all, it received’t work in sport engines, however inside Blender, it does job. I added some additional mix shapes to my rig within the animation stage, which I am going to speak about later. It is time to create some environments…
ENVIRONMENT
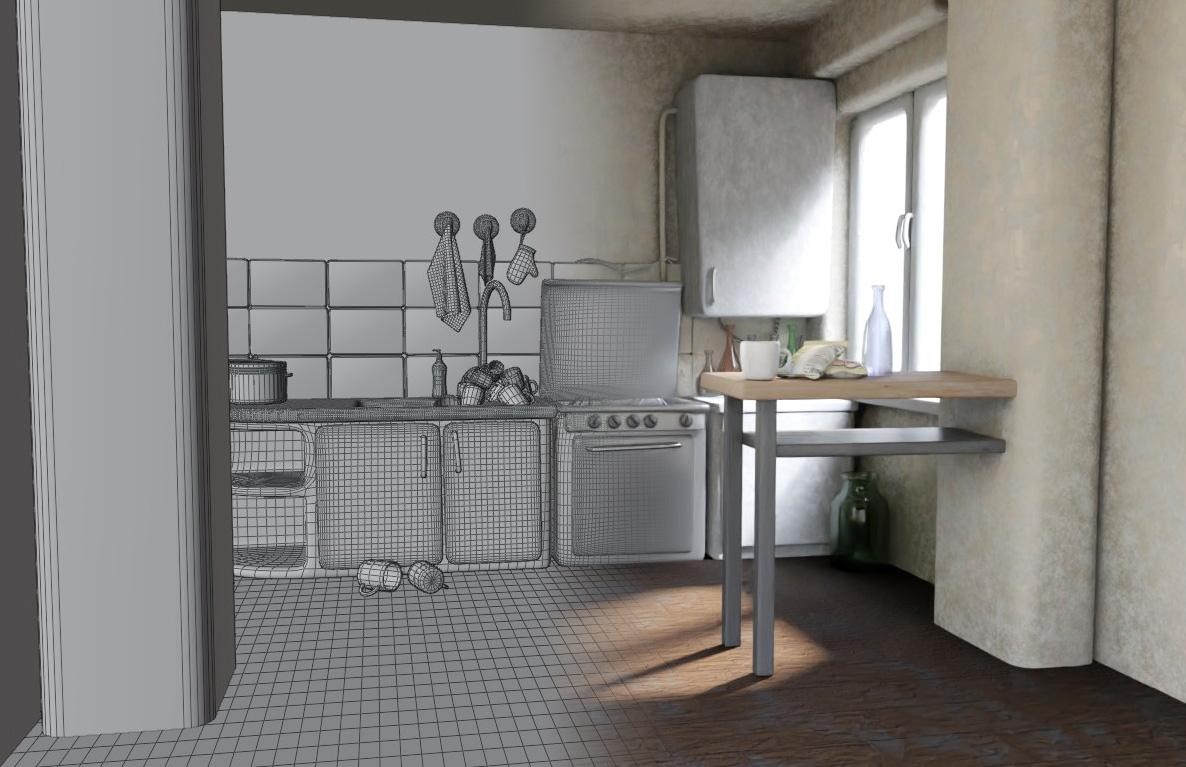
Since this art work represents me and my private emotions, I wished to recreate a particular place that is essential to me – an area that I share with somebody who could be very expensive to my coronary heart: a nook of my kitchen the place I’ve my morning espresso.

You may see that many of the fashions are simply beveled containers, so general, modeling the kitchen was normal field modeling.
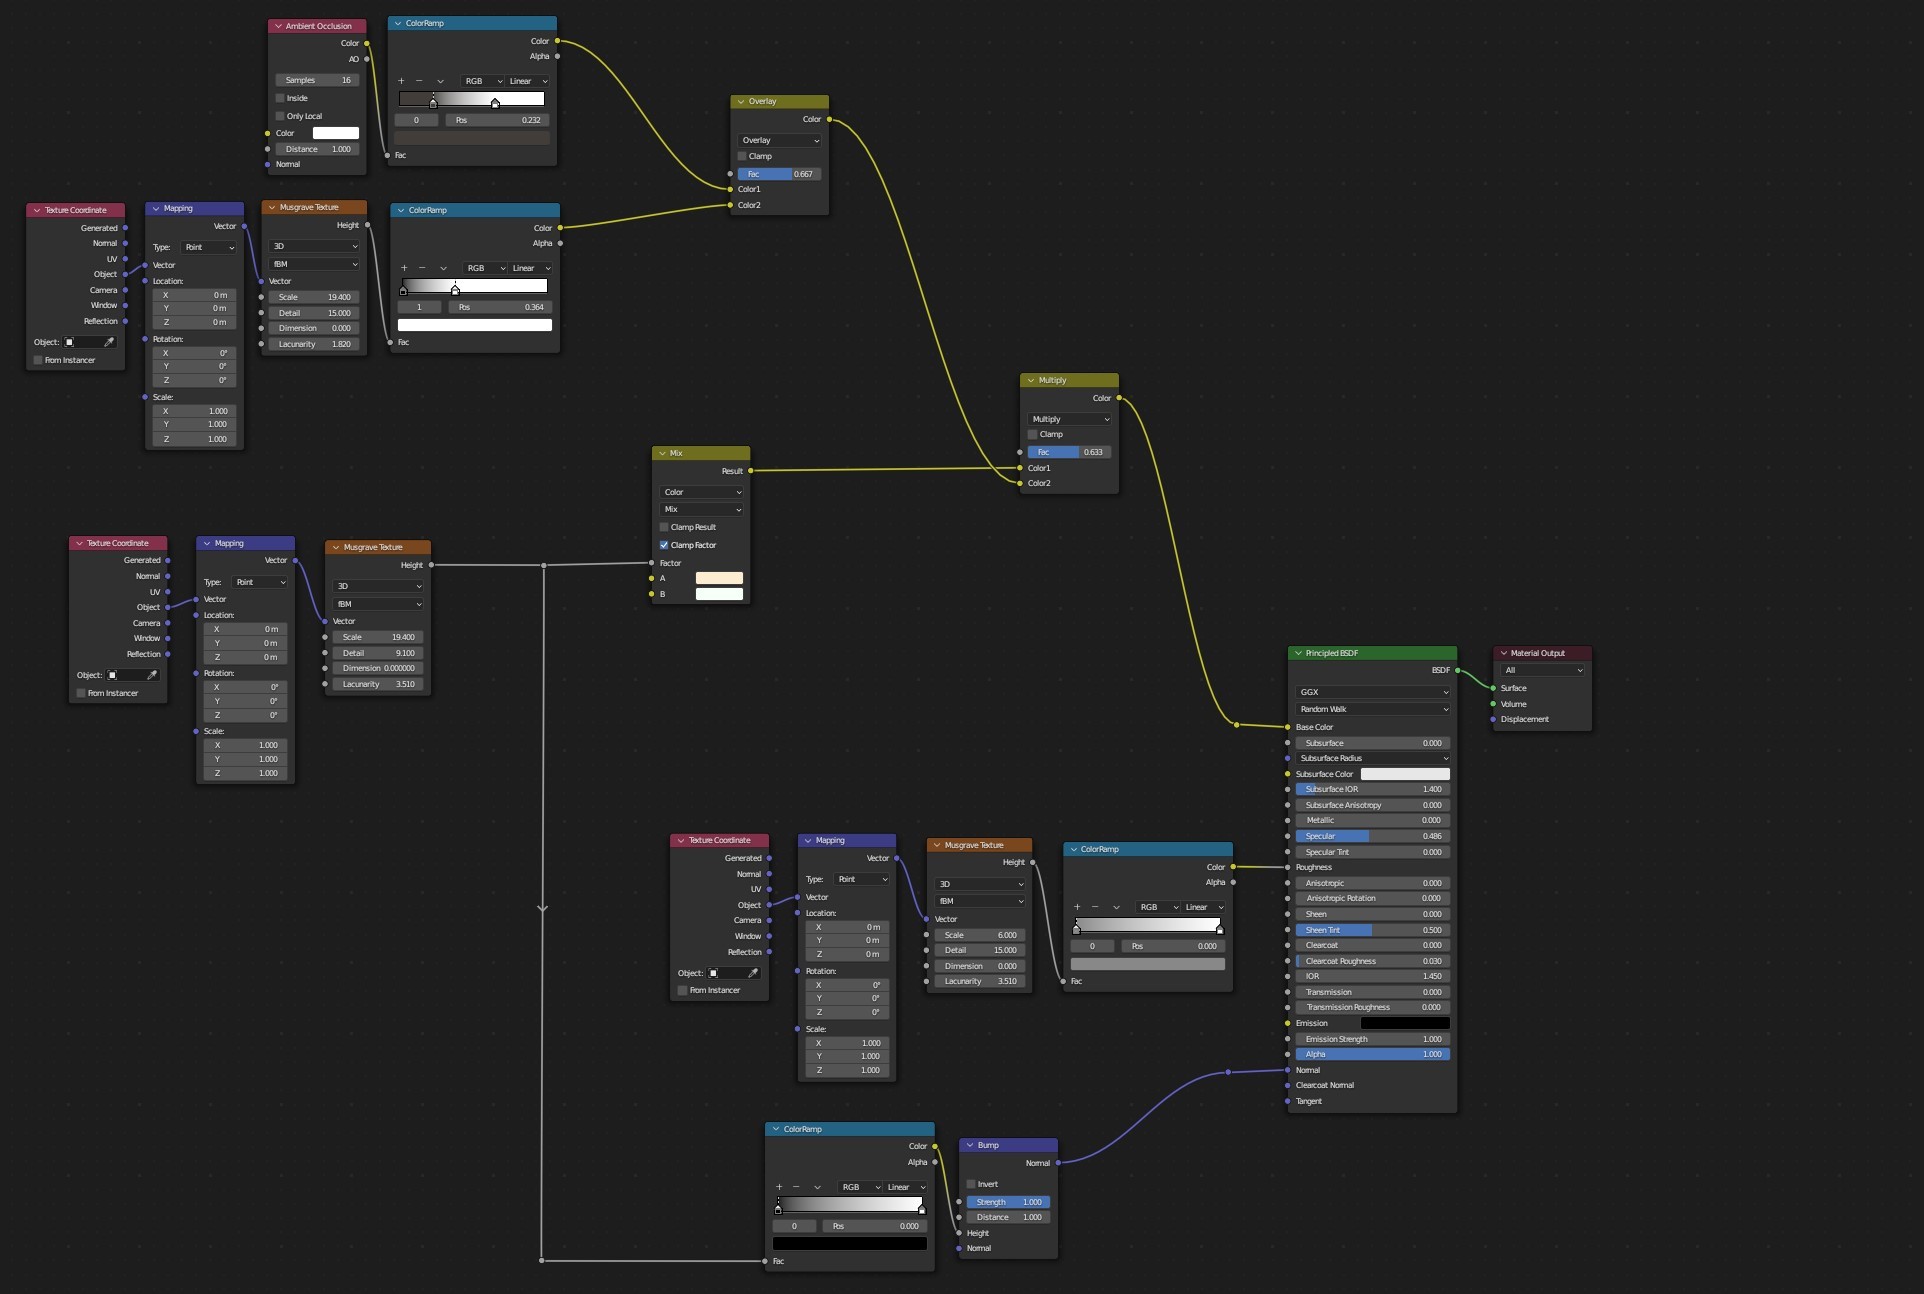
For the shading, I largely used procedural textures, mixing a variety of ambient and musgrave textures. For instance, right here is the node graph of the wall materials.
LIGHTING
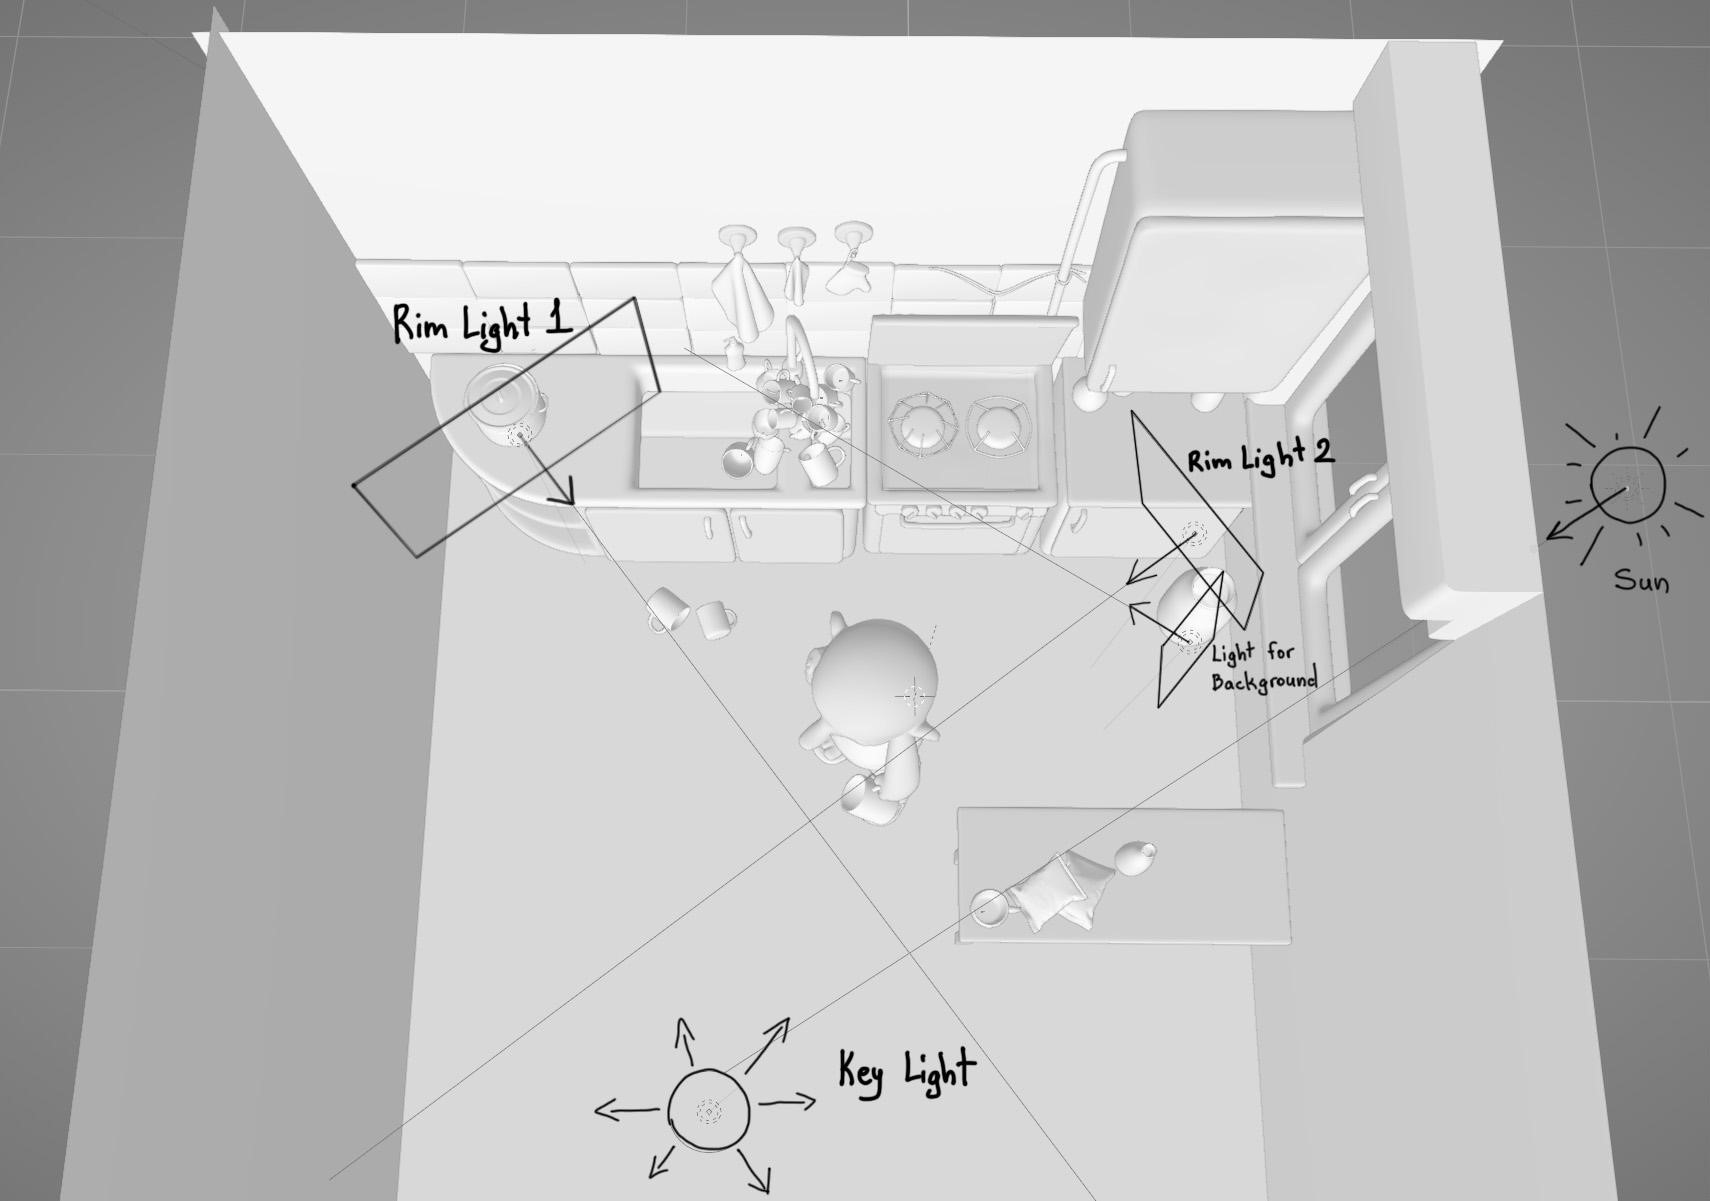
For the lighting scene, I used 5 gentle sources and an HDRI. The principle purpose was to create an phantasm of a sunny morning that illuminated the entire scene solely with the solar, whereas nonetheless having an correct sufficient composition. So, I achieved the impact with this sort of lighting construction.
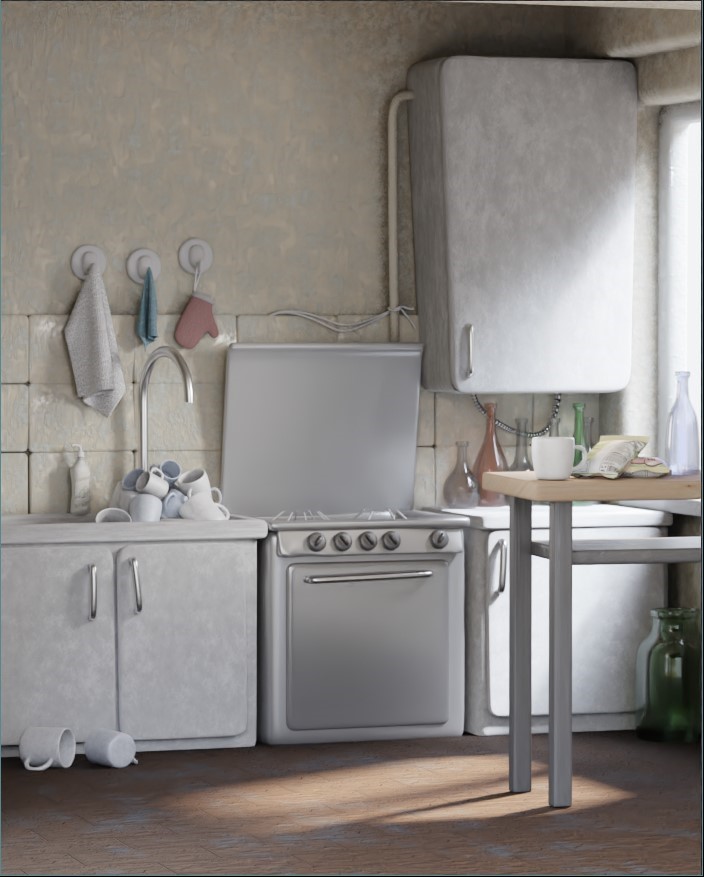
The ultimate pure render with out post-production seems like this…
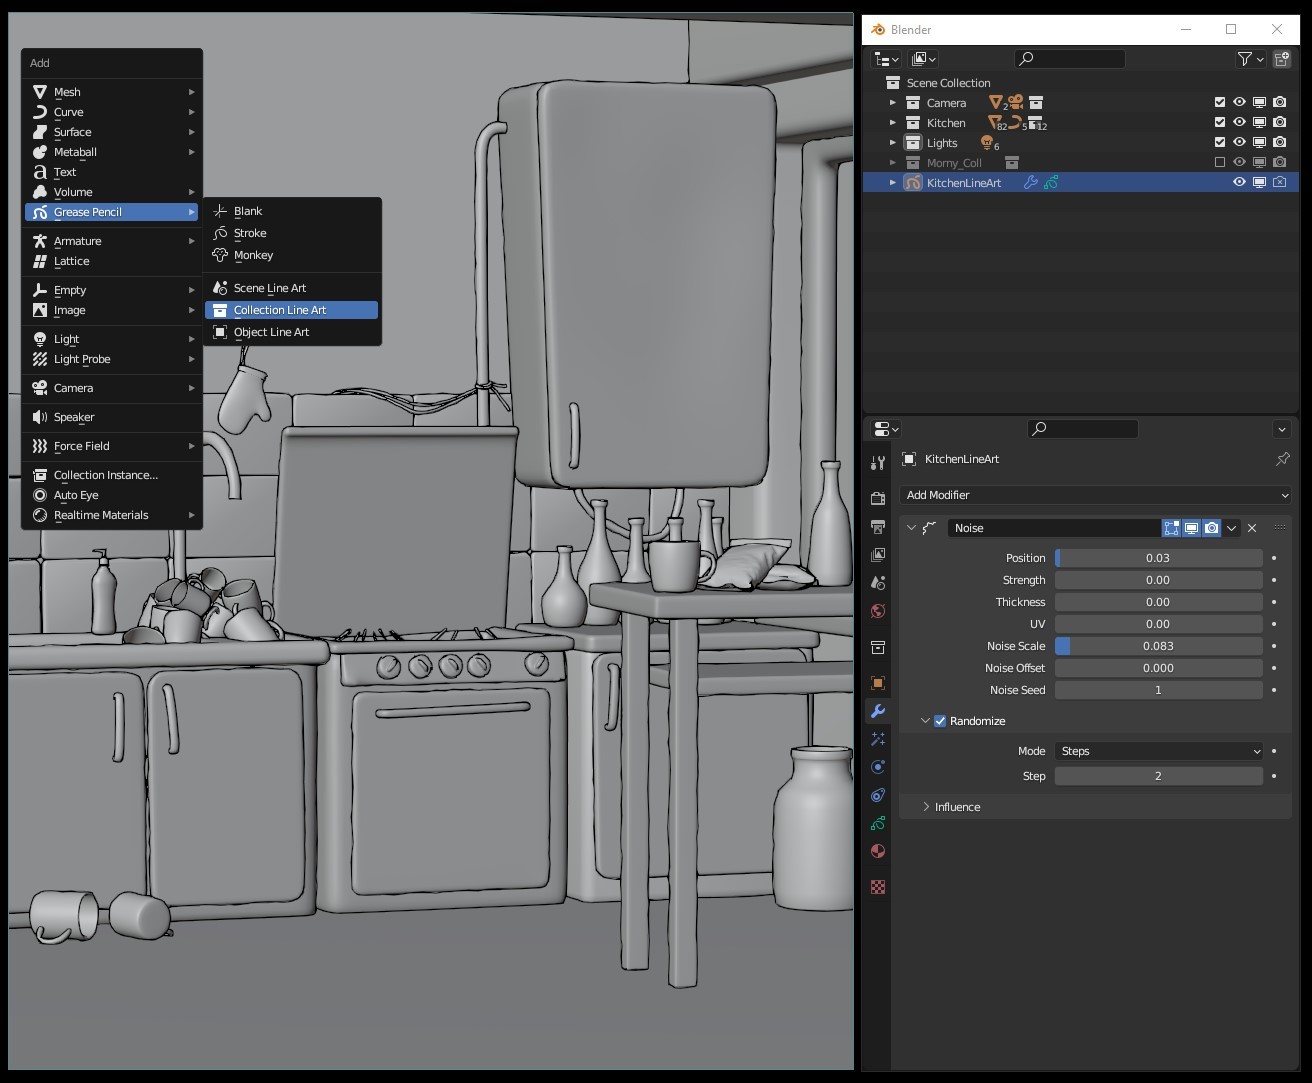
After that, I added a LineArt grease pencil object with the kitchen’s assortment chosen. As a result of I haven’t got animated objects within the kitchen, I utilized the Lineart modifier for sooner efficiency and added a noise modifier with the Randomize parameter checked on, so it could add a low FPS hand-drawn impact to the kitchen. I’ll render the lineart in a separate sequence so I can play with it in post-production.
ANIMATION
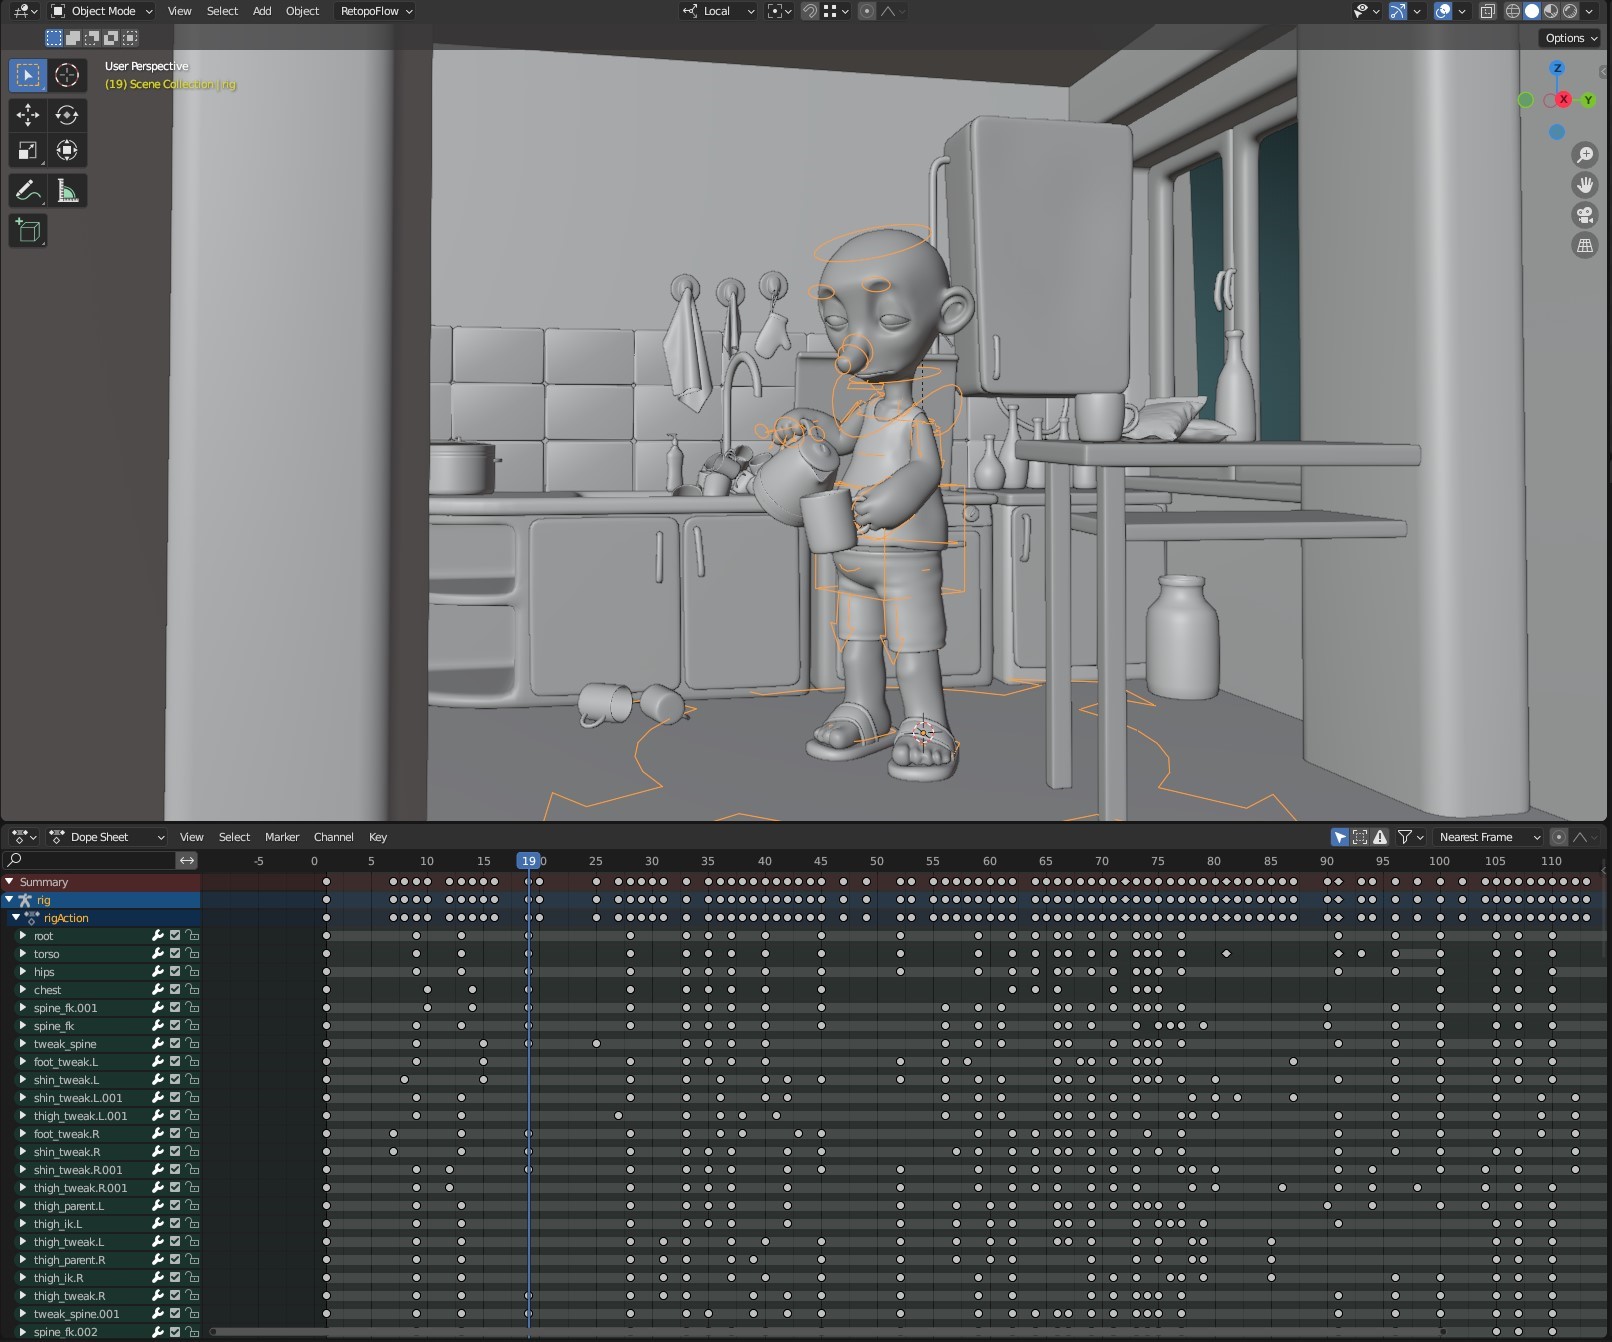
I animated the character within the conventional approach of 3D animation, that’s, blocking-polishing.
After bone-based animation, I began to play with blendshapes. Total, I added solely 4 blendshapes. The primary one was for eye blink. The second was for stylized movement blur (I didn’t use movement blur in render choices; as an alternative, I did it in mesh animation stage).

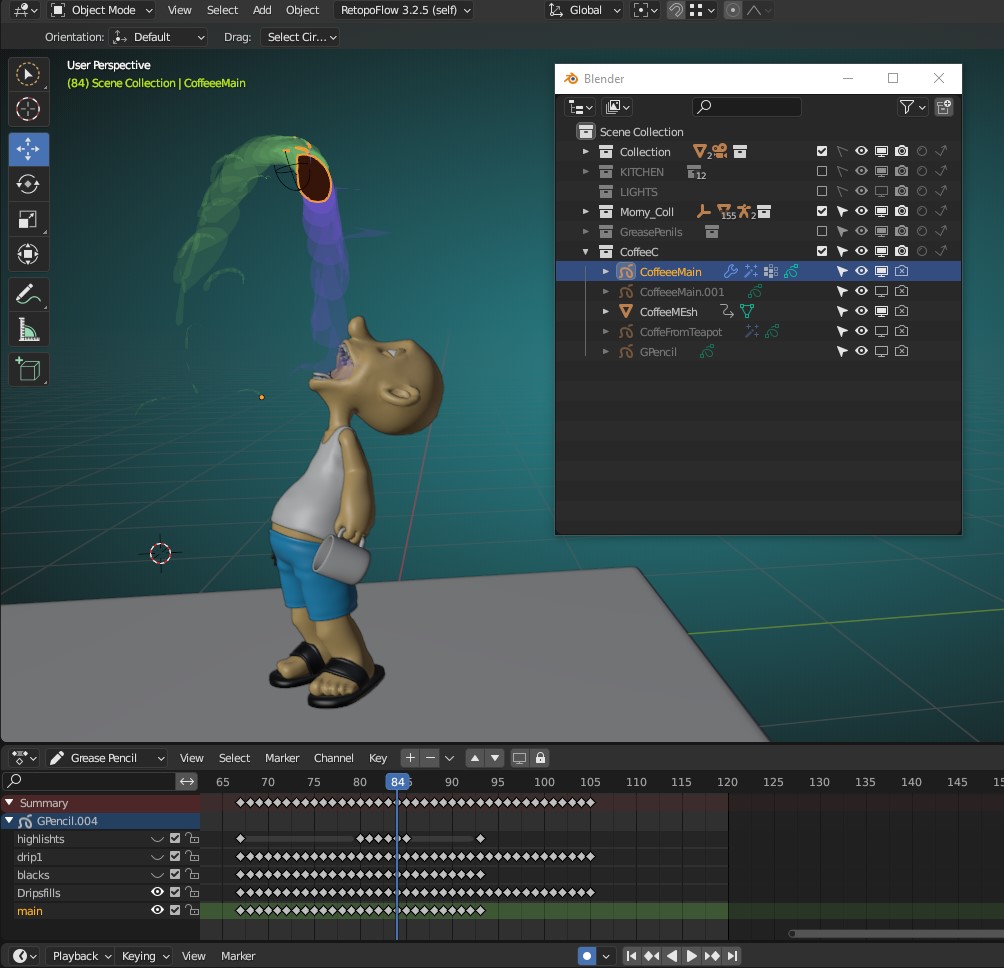
The final two blendshapes have been for mouth animation, particularly for this body… The character is animated, so it is time for Grease Pencil. This was probably the most enjoyable half for me because it was the primary time I did conventional animation body by body.
For the water faucet within the background, I separated the animation into three essential objects: the precise movement, the froth, and the water drops. I animated just one drop, then duplicated it many instances and offset the animation.

The principle espresso animation was a bit difficult, so I used a helper object, a easy sphere mesh that I animated like a bouncing ball and drew body by body over it.
The very last item earlier than rendering was the throat animation. Right here is how I solved it. I did it with a displace modifier, with a radial gradient in it. I added a weight group so it solely affected the throat space and set the feel house to an empty. In any case, I needed to alter the feel coordinates to suit it properly. So, the empty goes up and down, and the throat follows it.

RENDERING
I needed to anticipate about two days to complete the rendering course of. The animation was 120 frames lengthy with 24 fps, and every body took roughly quarter-hour to render.
For animations, I all the time use rendering on the command line. I like to recommend this technique to artists who do not have a robust PC. It’s extra secure and makes use of fewer sources since you are rendering with out opening Blender. For those who’re not acquainted with it, you may learn Blender’s documentation.
POST-PRODUCTION
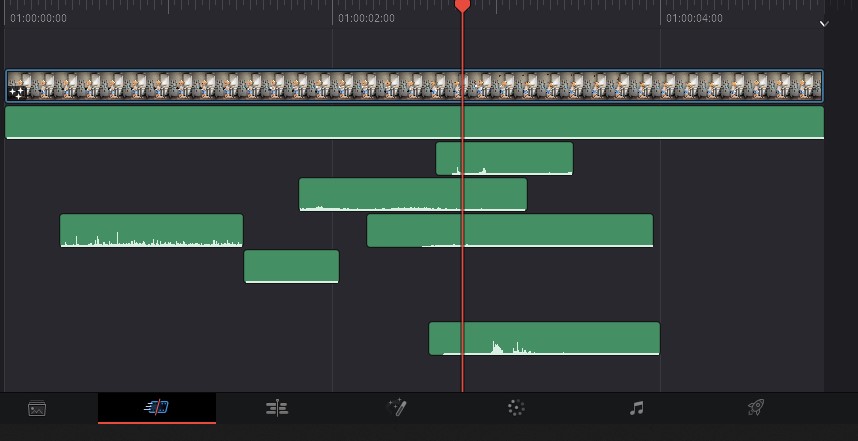
I did a variety of compositing in DaVinci Resolve to realize the fashion that I like. I rendered the background, character, all line arts, and all 2D animations individually in sequences, and mixed them in DaVinci. I additionally used some results and presets from BorisFX Continuum.

I recorded among the sound myself with my cellphone, and sound modifying was additionally executed in DaVinci Resolve.
GOOD MORNING COFFEE
And that is it. I hope my article was informative, and also you loved studying it.
Wishing you all extra creativity!
In regards to the Artist
Murad Rama (Tshntshghukyan), a 3D generalist from Armenia.