INTRODUCTION
Hello there! I am Nabihah. I am an 18-year-old self-taught 3D artist primarily based within the Netherlands. I began studying Blender in early 2021, when my highschool went absolutely on-line for the second time attributable to COVID-19, and I needed to study a brand new passion to go the time. For the primary 12 months or so, I performed with Blender on and off, however I wasn’t fairly severe about it till a number of months in the past.
I had no prior expertise as an artist, however I grew to like working with Blender and discovered fairly a bit about it via YouTube tutorials in addition to the great Blender group on Reddit.
INSPIRATION
Though I attempted a whole lot of completely different artwork types over the previous months, designing photorealistic interiors has been probably the most attention-grabbing and enjoyable expertise for me but. My motivation and inspiration for interiors principally got here from reference images on Pinterest and even, at occasions, inside design subreddits.
The inspiration for “Wet Morning” got here in an identical approach. I gathered concepts from completely different references and tied them collectively in a single cohesive scene. Typically I added in stuff I remembered seeing in {a photograph} weeks in the past, even when I may not discover the picture!
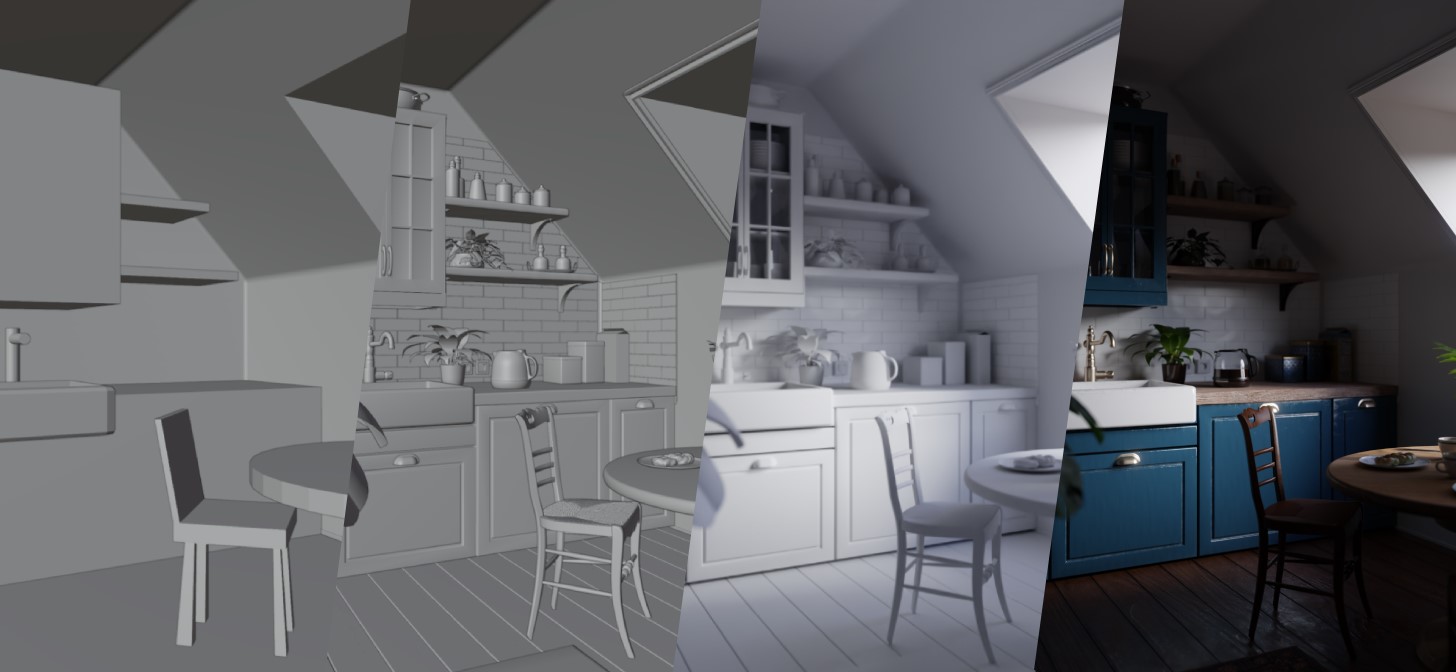
PROCESS
Creating a perfect workflow that labored greatest for me was a vital step in the direction of enhancing my work. Listed here are a few of the steps I often took.
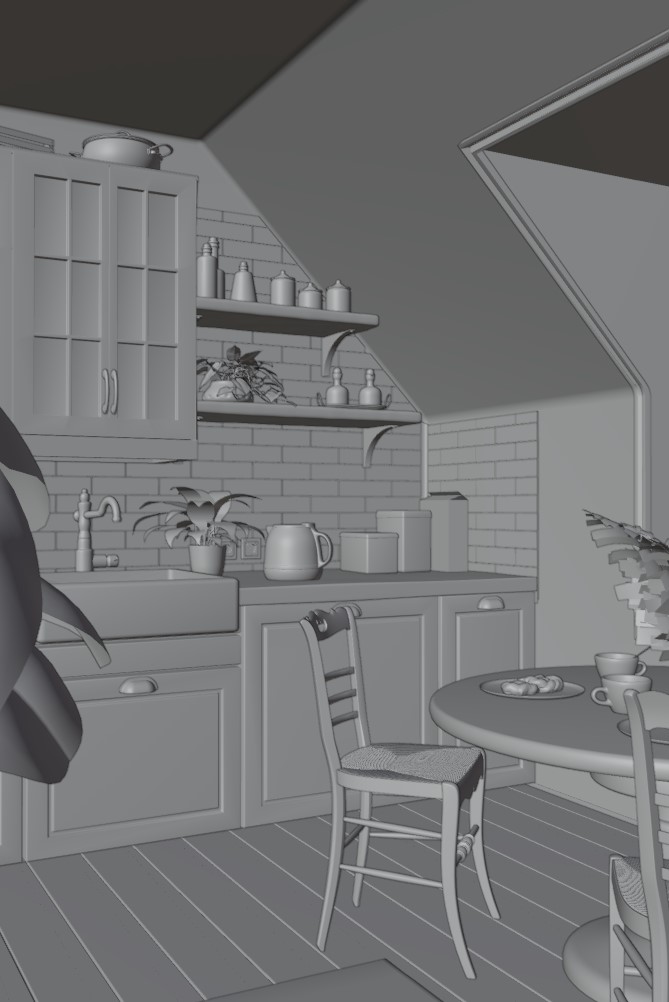
BLOCK-OUT
Though it was easy sufficient to mannequin a whole kitchen and resolve on completely different digital camera settings afterwards, I personally appreciated to arrange the digital camera dimension and angle and block out the fundamental scene with generic shapes equivalent to cubes and cylinders.
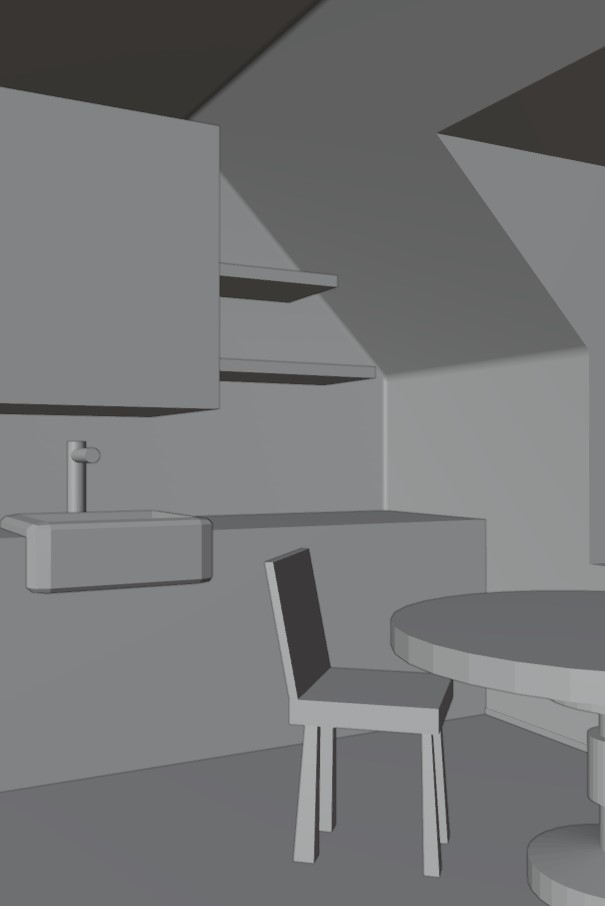
This did not must be something correct, as you possibly can see under, I even used the only of cubes to nearly “sketch out” how I needed a specific chair to look or the place I needed it to be.
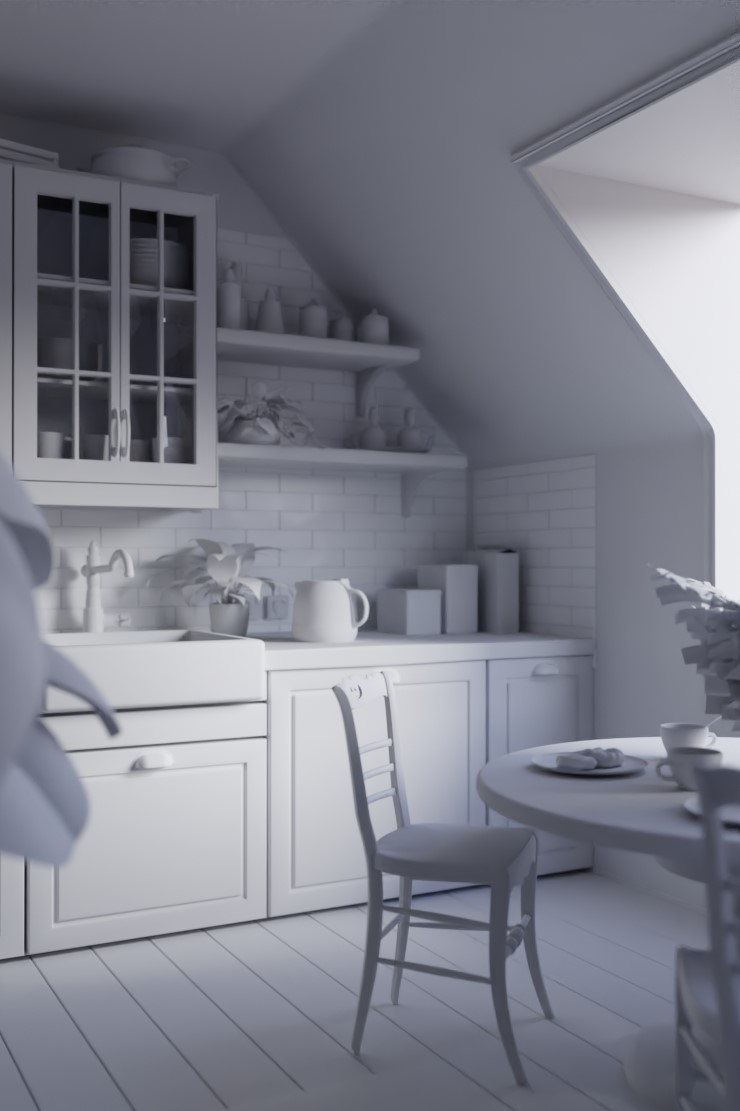
LIGHTING
I like to determine the lighting in my renders early on. Just like blocking out the scene, that is usually simply to offer a tough thought of what the ultimate render will appear to be. Whereas I often wish to go for good sunny lighting to showcase the interiors, I needed this scene to appear to be a cloudy morning the place the solar was out however lined by clouds.
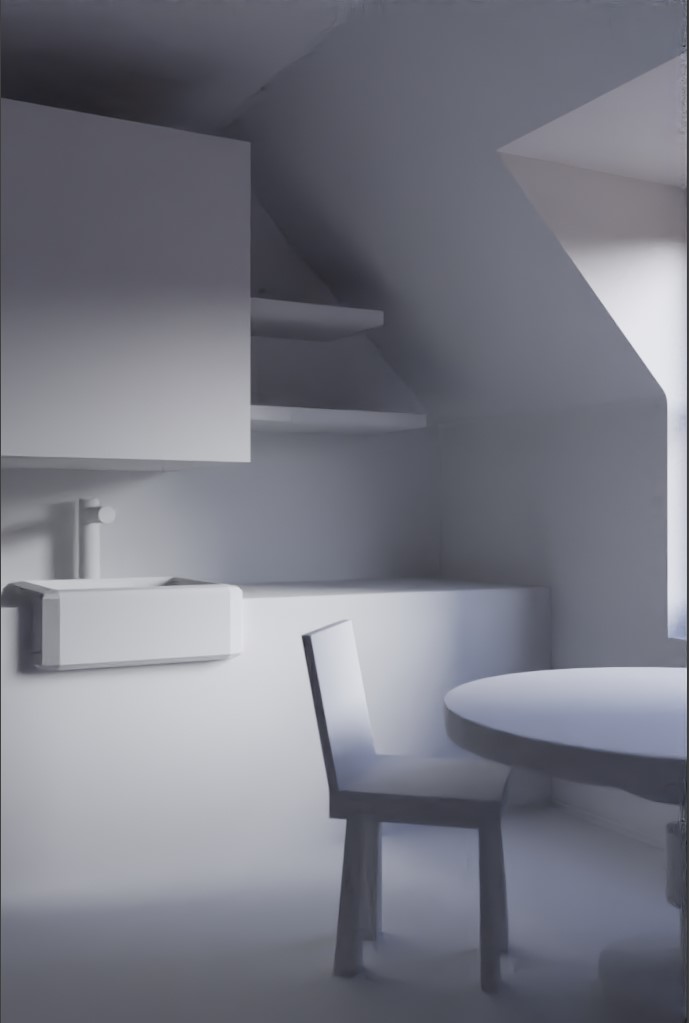
To attain this, I first used my favourite HDRI from PolyHaven and paired it with an ordinary solar lamp with a really mild blue shade and energy of about 4, enjoying round with the rotation till I obtained lighting I used to be proud of.
MODELING
The modeling of the principle furnishings is a enjoyable strategy to simply be artistic and add as many or as little particulars as wanted in your scene. For this scene, I had a basic aesthetic and theme in thoughts, but I usually simply began modeling and arising with concepts about what to make on the fly.
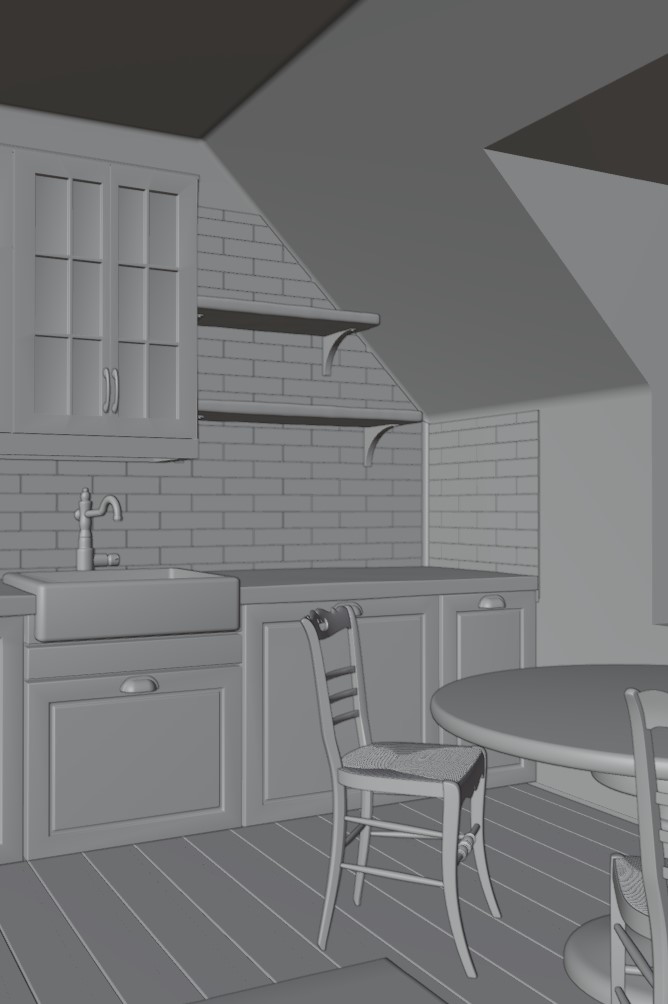
Many of the furnishings on this scene required easy exhausting floor modeling instruments equivalent to including loop cuts and extruding. For wood components such because the countertop and cabinets I favor to have a extra natural really feel, and this was achieved by subdividing the mesh and including a displace modifier with a large-scale and low-strength cloud texture.
TEXTURING
Texturing is an extremely essential step to reaching the photorealistic look. For this scene I primarily used PBR textures from my very own archive I’ve gathered, most of them being from ambientCG (previously often known as CC0 Textures) or Poliigon.

To get a extra worn out look, I added floor imperfections utilizing picture or noise textures, managed utilizing a shade ramp and added onto the roughness and bump values of the unique textures. I took my time with this to ensure I had the correct amount of imperfections (ensuring to not overdo it), particularly on the kitchen counter, ceramic sink, and wood ground.
DECORATING
One of many ultimate steps in creating this scene is including equipment and decorations to make it seem lived-in, as a way to inform a narrative and supply the viewer with varied particulars to look at. Just like modeling, I used to be artistic with this step and experimented with completely different design choices till I discovered ones I appreciated.
Many objects, such because the tin bins, espresso pot, and cups, have been modeled and textured by me. The crops and pastries have been imported from completely different add-ons equivalent to Blender Equipment (free) and Botaniq (paid), which I each extremely advocate.
OPTIMIZING
The final step of my workflow includes optimizing the scene for rendering. This consists of taking a number of steps, equivalent to decreasing the variety of mild paths and lowering the decision of any PBR textures that aren’t extremely seen within the picture. That is particularly essential for the HDRI decision, because the sky shouldn’t be seen at this explicit angle.
RAINY MORNING

A LITLLE EXTRA STEP!
A enjoyable additional step I wish to take after finishing my scenes is creating an isometric view of the room. Since a lot of the scene is already made, it is comparatively easy to perform. I start by repositioning the digital camera to have an orthographic view and including any extra furnishings or equipment to make the isometric view extra interesting.
For lighting within the new view, I merely cut back the energy of the HDRI to a small worth of about 0.005 to keep up the darkish and gloomy ambiance. As an alternative of making a glass window, I alter its materials to a light-blue emission aircraft. Lastly, I add an empty object within the heart of the scene and use it to set the depth of area for the digital camera, adjusting the f-stop to offer the room a extra miniature really feel.

And Viola! An isometric view to showcase all of the attention-grabbing particulars of the scene!
Thanks for studying, and be happy to ask me something. Have an ideal day!
Concerning the Artist

Nabihah Zaheer, a 18-year-old self-taught 3D artist from the Netherlands. Presently learning Aerospace Engineering on the Technical College of Delft