
This tutorial will educate you learn how to copy and paste an impact from one clip onto one other in Avid Media Composer.
It’s tremendous unintuitive. I’ll present you what to do, learn how to save an impact in a bin to be used later, and supply a pair key factors to recollect when working with keyframes.
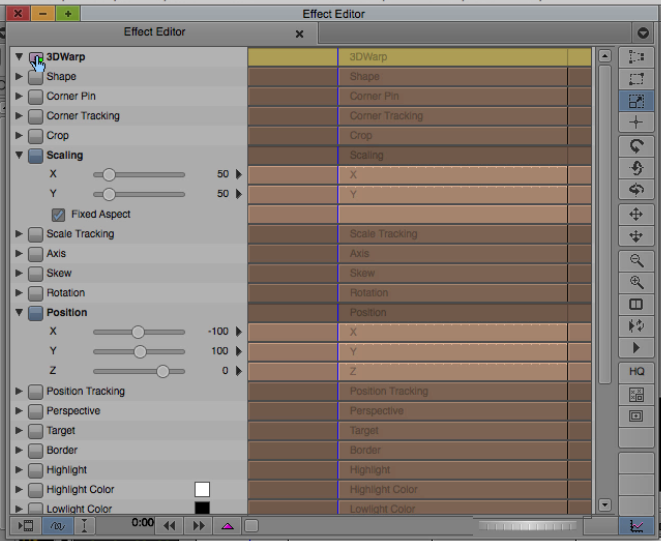
Utilizing the Impact Icon to Copy Impact in Avid Media Composer
To repeat an impact in Avid Media Composer, open the Impact Editor and choose the clip with the impact that you simply need to copy. On the prime of the Impact Editor is the identify of the impact with a small icon subsequent to it. Click on on the icon and drag it into the clip you need to copy the impact to in your timeline. That’s it! You’ve copied the impact onto the clip. You possibly can then go and choose the clip and modify the impact within the Impact Editor if wanted.
New to Avid Media Composer? Try my Mastering Avid Media Composer’s Keyboard Shortcuts Collection
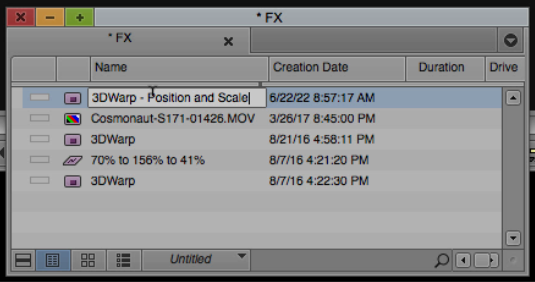
Saving an Impact to a Bin
Let’s say the clip you need to copy the impact to is all the way in which on the opposite facet of your Avid Media Composer timeline. Otherwise you simply need to retailer it as a result of you’re going to need to use it later. Effectively, it can save you an impact to a bin in Avid.
Open the bin you need to save the impact to. I usually name this bin “FX” or “Results” FWIW. Again within the Impact Editor, click on on the clip’s icon once more on the prime then drag it into the bin. You possibly can rename the impact identify within the bin to one thing extra particular when you’d like.
Copying Results with Keyframes in Avid Media Composer
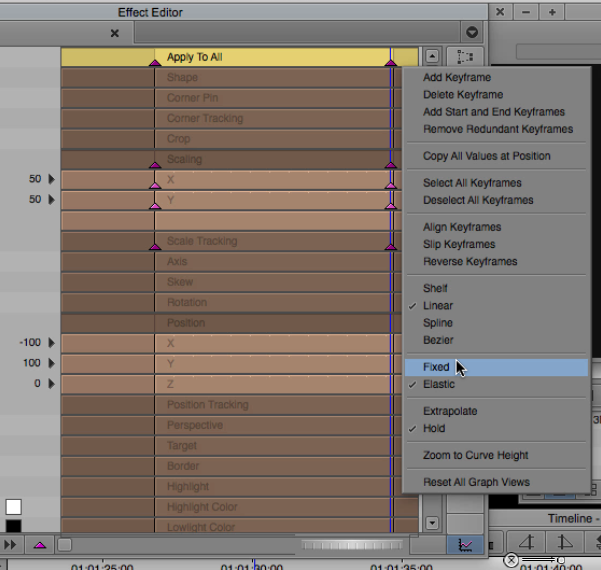
One thing to bear in mind if you find yourself copying results is that if they’ve keyframes on them. By default, keyframes in Avid Media Composer are elastic. That means that if they’re on the primary, center, and final frames of a clip whenever you paste them onto one other clip of a special size they’ll even be on the primary, center, and final frames of the brand new clip.
You possibly can change them to mounted keyframes when you’d like. This fashion they stick it a selected body equivalent to 00:00:00:00, 00:00:01:00, and so on. of the clip. You possibly can watch this tutorial for extra data on mounted and elastic keyframes.
To alter the keyframes from elastic to mounted, choose the keyframes within the Impact Editor then proper click on considered one of them. Within the menu that seems select mounted (or elastic).
In the event you’ve learn this text and you continue to need assistance to repeat an impact in Avid Media Composer, please depart a remark and I’ll do what I can to assist troubleshoot. I hope you stick round and take a look at a number of the different Avid Media Composer articles on my web site or take into account signing as much as get notified about new weblog posts and happenings round EVF.
– Josh
Associated