Closed caption or CC is the textual content model of the spoken a part of movies, or films. It makes movies/films extra accessible for people who find themselves laborious of listening to. So, on this publish, you’ll learn to add CC to initiatives in ActivePresenter 9.
Desk of content material:
Add CC to Initiatives
So as to add closed captions to your venture, comply with the steps under:
- Play the Playhead on the timestamp that you really want the closed caption to seem.
- Click on both the CC button on the Timeline pane or within the Insert tab.

Then, an CC node will seem on the Timeline pane on the place of the Playhead. On the Canvas, an CC editor additionally seems so that you can sort the caption.
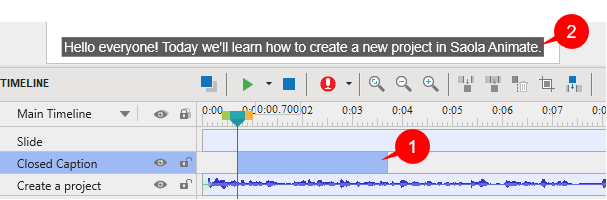
- Sort the caption within the editor (2). Repeat these steps so as to add extra closed caption nodes. These nodes are put in the identical line on the Timeline and regarded as one closed caption object.
- Drag the CC node or its begin/finish level to alter its timing and period. It’s best to show every CC for ample time in order that your viewers can learn it comfortably.
Apart from, be aware of the next:
- For those who don’t specify the timestamp, ActivePresenter 9 will append the brand new CC node to the top of the beforehand present CC node.
- The CC nodes are organized in time order. There isn’t a overlapping in time between CC nodes, which means that just one CC node could be displayed at a time.
- You can not swap the order of the CC nodes.
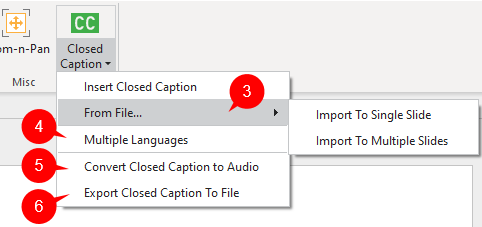
Notice: If in case you have a subtitle file (*.srt) prematurely, you possibly can import it to the venture. Within the Insert tab, click on the arrow on the Closed Caption button > From File… (3) > Import To Single Slide or Import To A number of Slides > choose the subtitle file that you just need to import.
Add Extra Languages to Closed Captions
ActivePresenter 9 means that you can add multiple language to your closed captions in order that overseas learners/viewers can entry your movies/eLearning programs simply.
To do this, carry out steps under:
- Choose one CC node within the Timeline pane.
- Click on the drop-down arrow on the Closed Caption button within the Insert tab > A number of Languages (4). Or, click on the
 Edit Language button within the Properties pane > Measurement & Properties > Basic.
 - Click on the plus button and choose the language you need to add.
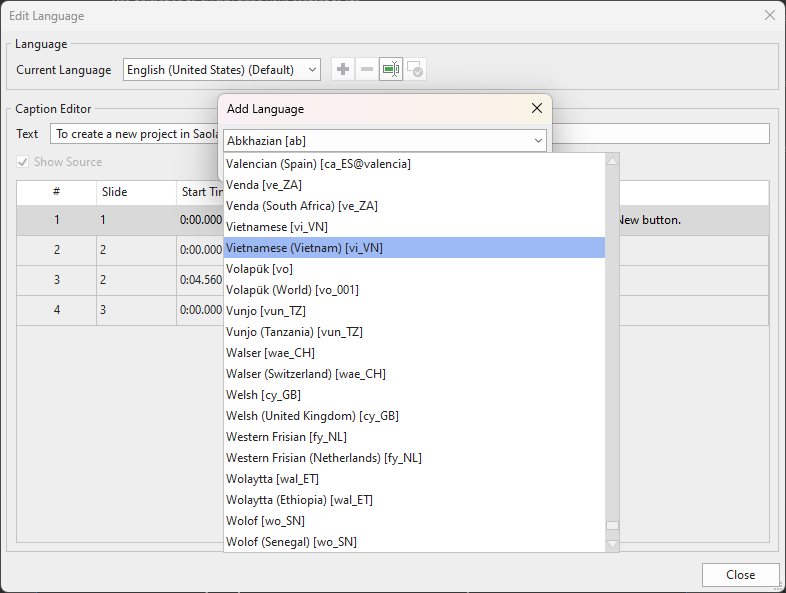
- Choose every sentence of the supply textual content, then sort the model of the brand new language into the Textual content field.
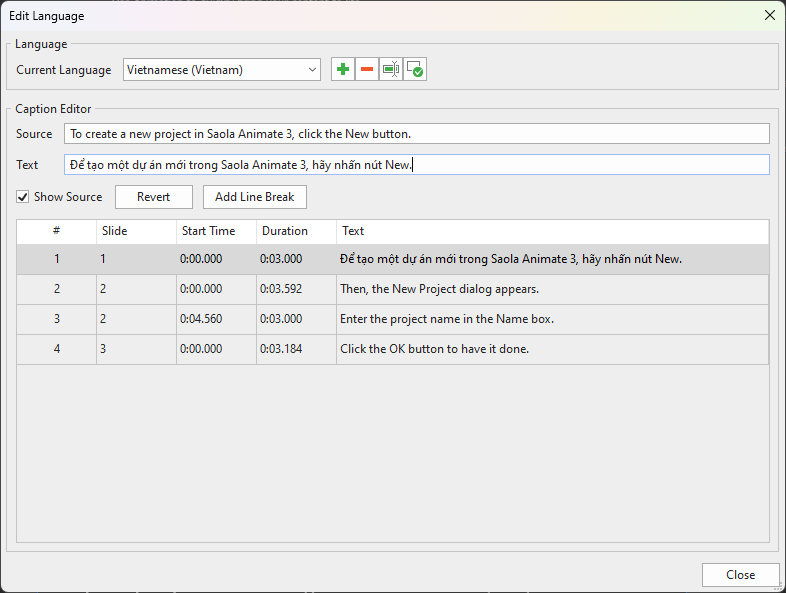
- Click on Shut to avoid wasting and end.
Format Closed Captions
To vary the closed caption’s fashion, choose a CC node, then use instructions and choices obtainable within the House tab, Format tab, or the Properties pane. The modifications will likely be utilized to all CC nodes in your venture. For those who add new CC nodes, additionally they inherit the brand new modifications.
Do not forget that, in case you export the venture to video, bear in mind to export closed captions as laborious subtitles to encode it to the video.
Notice: The fashion of the closed caption would be the similar no matter displaying in any language.
If you wish to preview closed captions in different languages, choose a CC node > Properties pane > Measurement & Properties > Basic > Caption Language > select any language from the drop-down checklist.
Convert Closed Captions to Speech
You possibly can convert closed captions to audio in ActivePresenter 9 due to the Textual content-to-Speech function. To do this, right-click a CC node > Convert Closed Caption to Audio, or entry the Insert tab > Closed Caption > Convert Closed Caption to Audio (5).
Then, all CC nodes within the present slide produce a mixed single audio object.
For particulars about this, see Convert Textual content to Speech.
Toggle the Closed Caption
There are two methods to toggle closed captions: utilizing the CC button within the participant or utilizing actions.
Use the CC Button within the Participant
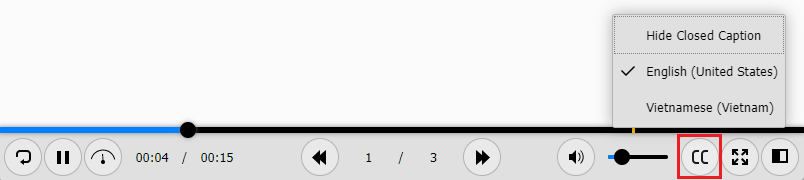
To allow this button, open Export tab > Participant Settings. Then, navigate to the Basic tab of the Participant Settings window > Basic Parameters > Toolbar > choose the CC Button test field > OK to avoid wasting modifications. By doing so, the CC button will seem on the backside proper nook. Learners can click on this button to toggle the closed caption or change language of closed caption.
Notice: ActivePresenter means that you can customise the participant for every operation mode individually or all of them collectively. Click on the Operation Mode combo field and choose the mode you need. See Customise HTML5 Participant Settings for extra data.
Use Actions
One other solution to management closed captions is utilizing actions. ActivePresenter 9 offers the apCCVisible variable that helps present or cover the closed caption. Set the variable to true to show the CC on, and false to show it off.
For instance, you possibly can create your individual CC button that enables customers to point out or cover the closed caption:

Export Closed Captions to File
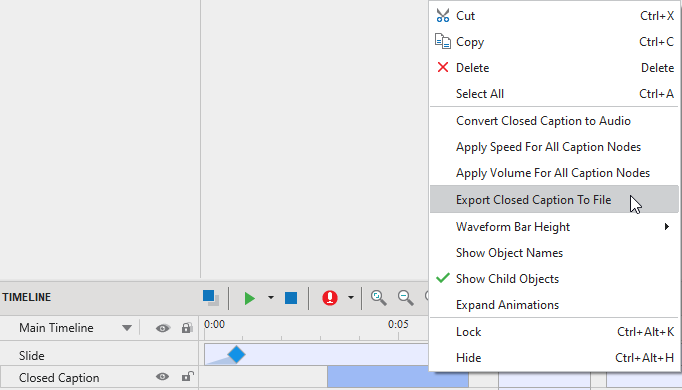
ActivePresenter 9 means that you can export closed captions to *.srt file with out exporting venture to video. To have it finished, right-click a closed caption node on the Timeline pane > Export Closed Caption to File. Alternatively, open the Insert tab > Closed Caption > Export Closed Caption to File (6).
Delete CC
To delete a number of CC nodes, choose them within the Timeline and press DELETE.
To delete all CC nodes, click on the Closed Caption title to pick out all of the nodes and press DELETE.
That’s all in regards to the steps so as to add and work with closed captions in ActivePresenter 9. Obtain and do that function now.

Don’t overlook to go to our Tutorials web page and YouTube channel to get extra ActivePresenter 9 written and video tutorials up-to-date.
Associated matters: