
In a earlier article, we had a have a look at texel density and the way taking it into consideration may also help us obtain a sense of consistency and immersion in our 3D scenes. We discovered that usually, a render can really feel unusual as a result of the objects have textures with decision disproportionate to their dimension and visible significance, and that by sustaining that proportionality throughout the textures, we get optimised initiatives and higher trying renders.
There are, nonetheless, exceptions that may and in lots of instances ought to be made. We see these exceptions primarily in belongings which can be prone to be considered up shut and sometimes all through a sequence, or some extent of focus in a nonetheless picture. Property like these are sometimes granted way more texture decision/texel density to permit their finer particulars to shine by a shot, and to stay crisp no matter their distance from the digital camera.
In fact, this may imply that our “Hero” belongings might want to have their UV shells or islands take extra space within the UV grid, and bigger Texture Map sizes, which could be a drawback if the asset is comparatively massive and consists of a single mesh.
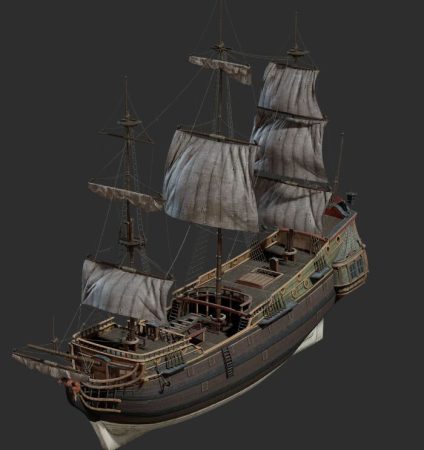
Supply: “Ship Pinnace” by James Ray Cock, Nicolo Zubbini and Rico Cilliers, out there at Poly Haven
A mannequin like this, for instance, may encompass many separate meshes. Relying on every mesh’s dimension within the scene, a single or group of meshes can occupy their very own 0-1 UV grid (however this might imply extra textures than we’re snug coping with for one object).
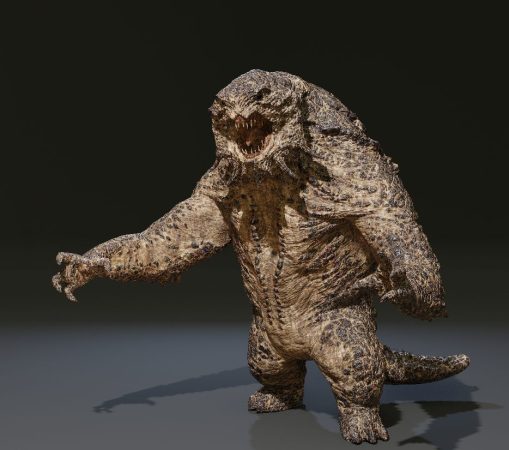
Credit:* Monster, designed and created by Daniel Bystedt. CC BY-SA 3.0 license
For a mannequin like this, that strategy will not be as possible. That is the place UDIMs are available in. On this article, we’ll go over what UDIMs are, and the way we will use them on our personal belongings.
What are UDIMS
UDIM tiling is a texture mapping method utilized in 3D graphics to enhance the effectivity and high quality of texture mapping. UDIM stands for “U Dimension” and permits us to distribute UV islands throughout a number of textures, successfully affording the islands extra space to work with than the 0-1 grid we’re used to. This could additionally enable for various resolutions for various elements of the mesh. The UDIM tile system assigns a singular index quantity to every tile, with the primary being 1001 and subsequent tiles being positioned to the proper of the principle tile or in a brand new row above it.
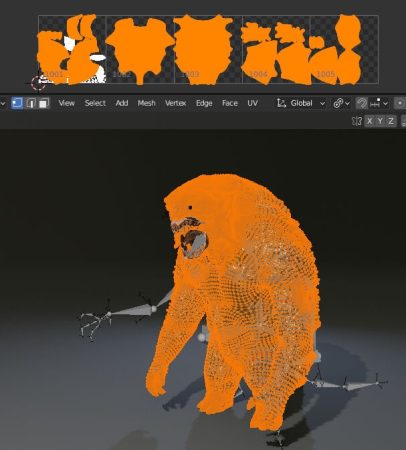
The panel above the creature mannequin exhibits its UV islands distributed throughout 5 UDIMs, which makes every area of the mannequin able to having way more texel density utilizing a single materials. This additionally means it’s nonetheless potential to color throughout the entire mannequin when texturing.
UDIMs provide a number of benefits over conventional UV mapping strategies:
- Larger texture decision: By dividing a texture into smaller tiles, every tile can have its personal decision. This permits for extra detailed and better decision textures, particularly for bigger meshes with geometry of various significance.
- Flexibility and effectivity: UDIMs present better flexibility and effectivity in texture creation and administration. Artists can edit particular person tiles with out having to redo your entire texture, saving effort and time. Moreover, UDIMs simplify asset administration by assigning distinctive identifiers to every tile.
- Business customary: UDIMs have change into an industry-standard for texture mapping in 3D graphics, making it a needed ability for artists working within the movie, gaming, and VFX industries.
- Improved high quality and realism: Using UDIMs permits for better management over the ultimate look of 3D fashions, resulting in extra real looking and better high quality textures.
Now that we’ve a common understanding of UDIMs, let’s see how we would apply them to the scene from the article on texel density:
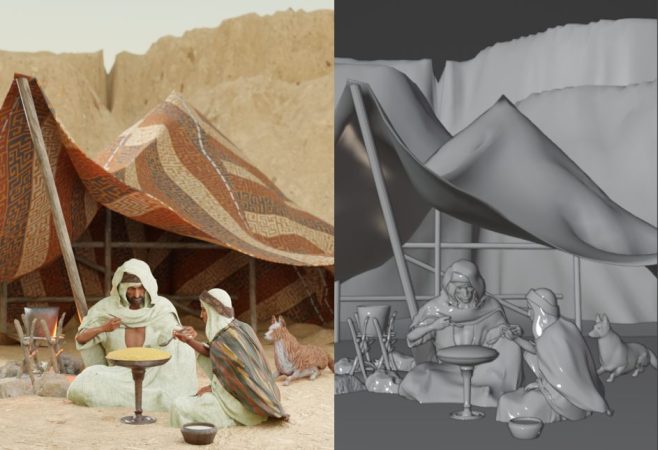
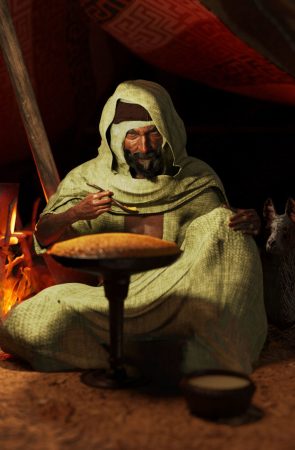
Let’s say we’d like a shot from this undertaking that focuses on the male character with a extra menacing tone, and that we’ll want the character’s physique as an entire mannequin, unbiased of the clothes to anticipate fabric simulation and modifications in costume design. Let’s additionally say we wish the top texture to have a dimension of 4096 x4096, and the remainder of the physique to have sufficient texel density proportional to the top.
To begin, let’s check out the character’s UVs:
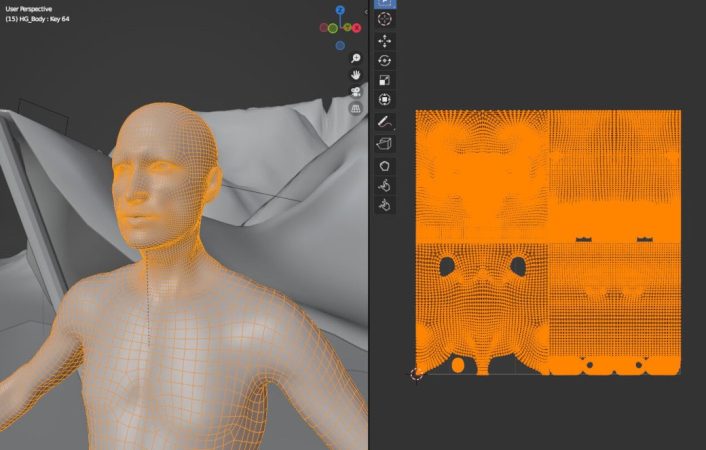
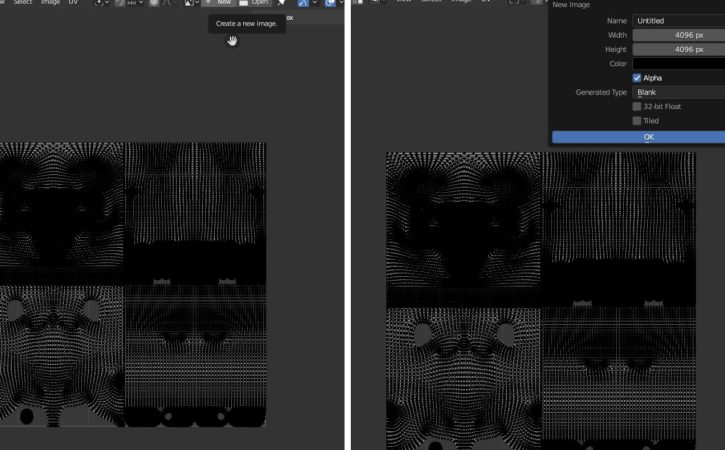
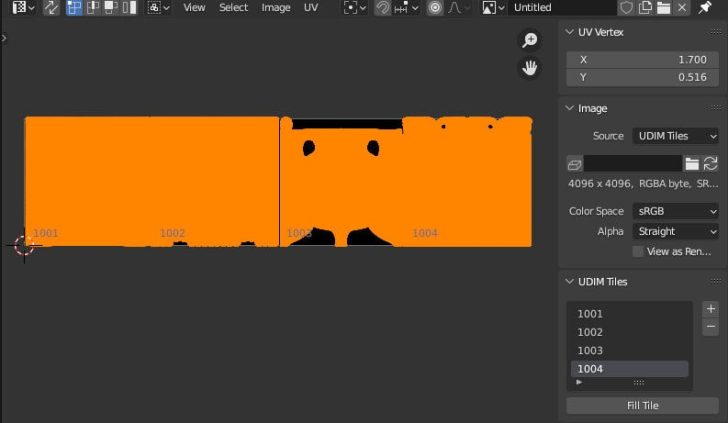
Presently, they’re laid out effectively on the 0-1 grid. The higher left island maps the top, the higher proper maps the arms and fingers, the decrease left maps the torso and pelvis, and the decrease proper maps the legs and ft. We’ll take every island and assign it to its personal UDIM tile. To try this, let’s create a brand new picture within the UV editor and set the scale to 4K.
The “Picture” Panel within the UV Editor has a area referred to as “Supply”. Let’s change this from “Generated” to “UDIM Tiles”:
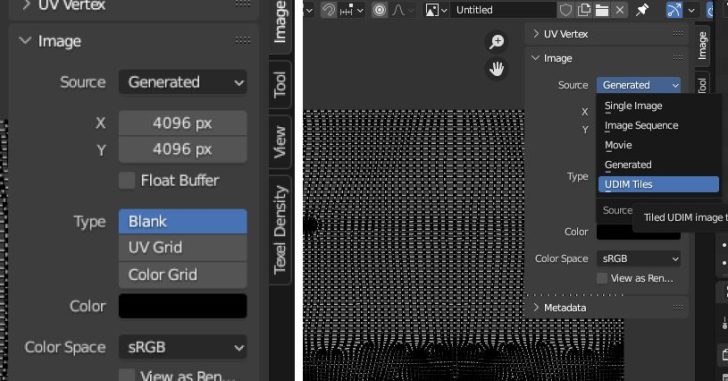
The UV grid we’re presently utilizing is now the primary tile of our UDIM array. So as to add extra tiles, let’s hit the “+” icon to the proper of the listing and add 3 extra tiles.
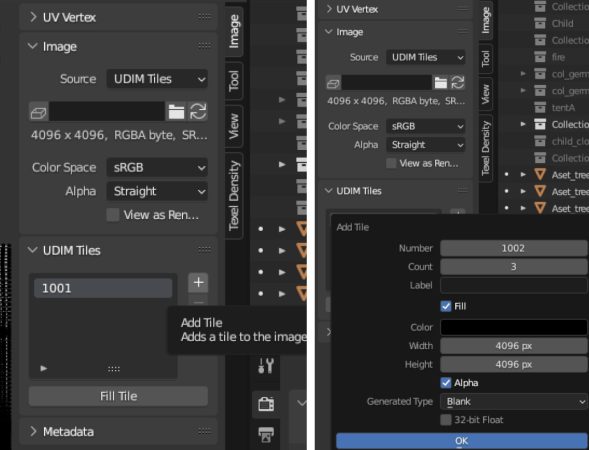
As soon as that’s executed, we will now take every of our islands and pack them into their very own tile:
We now have our character prepared for texturing! Let’s say we’ve run it by a multiresolution modifier, sculpted some further element and exported it out for Substance Painter (once more, software program like MARI or different alternate options will probably have assist for UDIMs).

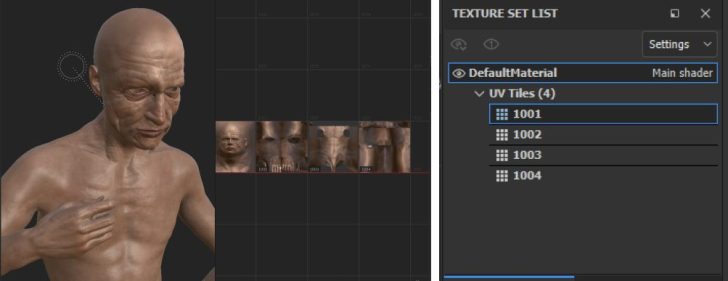
In Painter, all we have to do is tick “Use UV Tile workflow”, and select one of many 2 choices out there. On this case, we’ll select the primary.
Here’s a glimpse of the character with some texture utilized, and the Texture Set Checklist panel, indicating that each one UDIM tiles have been learn and are energetic. As we will see on the tiles to the proper, we will paint in particulars for the top with the total decision of a 4K map AND seamlessly proceed portray the remainder of the physique at a proportionally excessive decision!
Within the scene we’ll be rendering nonetheless, the legs and ft gained’t be seen, so for now, we may change the decision of UDIM Tile 1004 to a smaller map dimension. The torso (1003) will hardly be seen so we may change its map dimension to 2048.
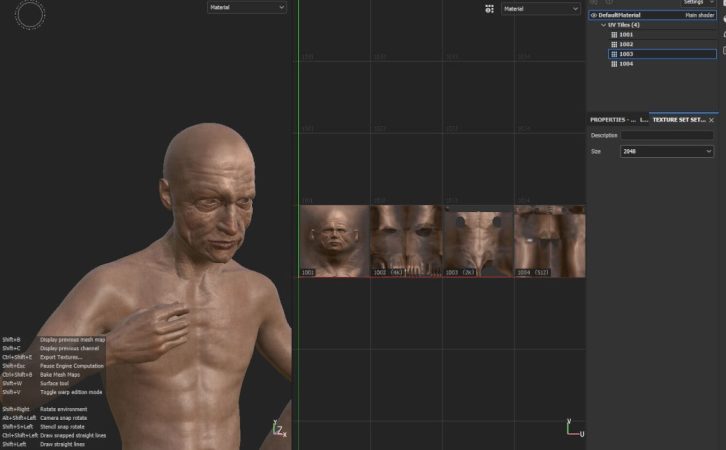
We see that the window on the proper now signifies the map sizes of every UDIM Tile, and from the left we will see the up to date mannequin. This means that with UDIMs, we even have the power to shortly optimise our textures for regardless of the scenario requires. Ought to this character resolve to go streaking within the desert in some unspecified time in the future, we will load our Painter file and alter accordingly.
In Painter, the ID of the tile will likely be added as a suffix to every texture picture that’s exported.
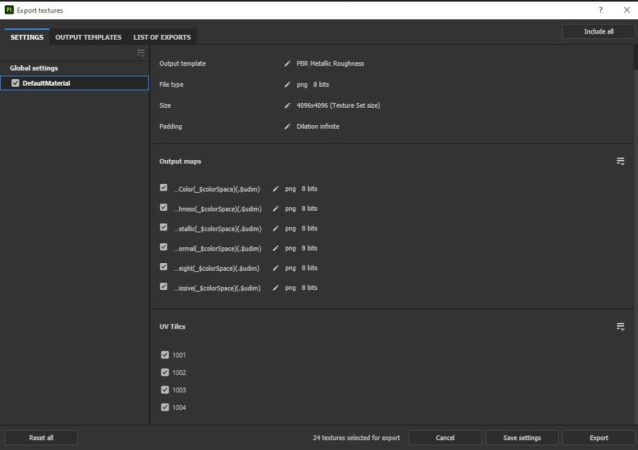
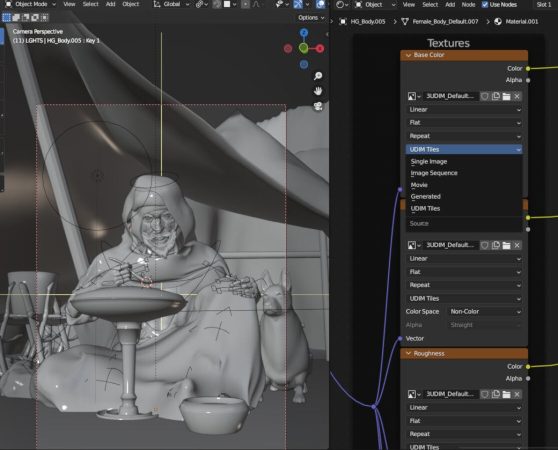
Again in Blender, when importing our new textures into our character, we’ll want to pick the maps that finish with the suffix “1001” and set the supply of every imported picture to “UDIM Tiles” to see our textures correctly distributed throughout our UVs.
And that’s it! We’ve efficiently created our first UDIM setup in Blender!
In abstract, UDIMs, or “U-Dimension” texture mapping, can tremendously profit a 3D artist’s workflow by permitting for the creation of high-resolution textures that may be utilized to a mannequin with out sacrificing element or decision. UDIMs are sometimes utilized in conditions the place a mannequin requires high-resolution textures, similar to in movie and sport manufacturing, the place high-quality and detailed textures are important for attaining real looking and immersive environments.
By dividing a texture into a number of tiles, UDIMs allow artists to work on completely different sections of a texture concurrently, permitting for extra environment friendly texturing workflows. In addition they present better flexibility for texture scaling and allow artists to reuse and repurpose textures for a number of fashions and scenes.
General, UDIMs have change into a vital instrument for 3D artists, offering the power to create extremely detailed and real looking textures for complicated fashions, whereas additionally streamlining the texturing course of and enhancing effectivity. As at all times, we hope this was useful! Have enjoyable experimenting with UDIMs, and Completely satisfied Rendering!
Want some rendering energy on an upcoming undertaking? Take a look at our Blender Render Farm and get $50 price of free credit upon registering! P.S. we assist scenes that use UDIMs 😉
The article was initially revealed at https://garagefarm.internet.