Making a sample in Photoshop is kind of a easy methodology, we will obtain it with just a few easy steps. It’s a fairly helpful ability for every kind of designers and artists. Patterns give complexity to graphics and we must always use them when it’s wanted. We are able to use patterns in quite a lot of methods, from simply backgrounds to including texture to our photos.
On this article, we are going to simply cowl the way to make a easy sample in Photoshop. In a later article, we are going to cowl the way to mix a sample with a background picture.
We are able to observe the identical course of to make a way more advanced sample. The core of the method is precisely the identical.
Since we’re planning to make use of our new sample with an incredible quantity o scales (mixing mode, sample choices), we are going to set the size of our doc to be small. In case we wished to make use of our new sample 1:1, with out scale, will probably be finest practise to design our sample in a bigger doc.
So let’s open up Photoshop and prepare to create a sample.
The way to make a sample in Photoshop:
The steps for making a sample in Photoshop are under:
1 Step (create a brand new doc):
So as to create a sample in Photoshop now we have to do this by making a brand-new doc with small dimensions (16×16, 32×32, 64×64, 128×128, and so forth.)
So, go to File – New (ctrl+N). Within the New Doc window, set the Width and Peak to 64 pixels. Change the format of the measure to Pixels. Additionally, set the decision to 72 pixels, and the colour mode to RGB Shade, 8-bit. Lastly, set the background contents to white and click on Create.

2 Step (create the sample design):
For the creation of our sample, we will use any form of instruments that Photoshop has to supply for that matter. We are able to use the comb device, pen device, any form of form device, customized form device, and so forth. On this case, we’re going to use the ellipse form device, so we will make a easy circle sample.
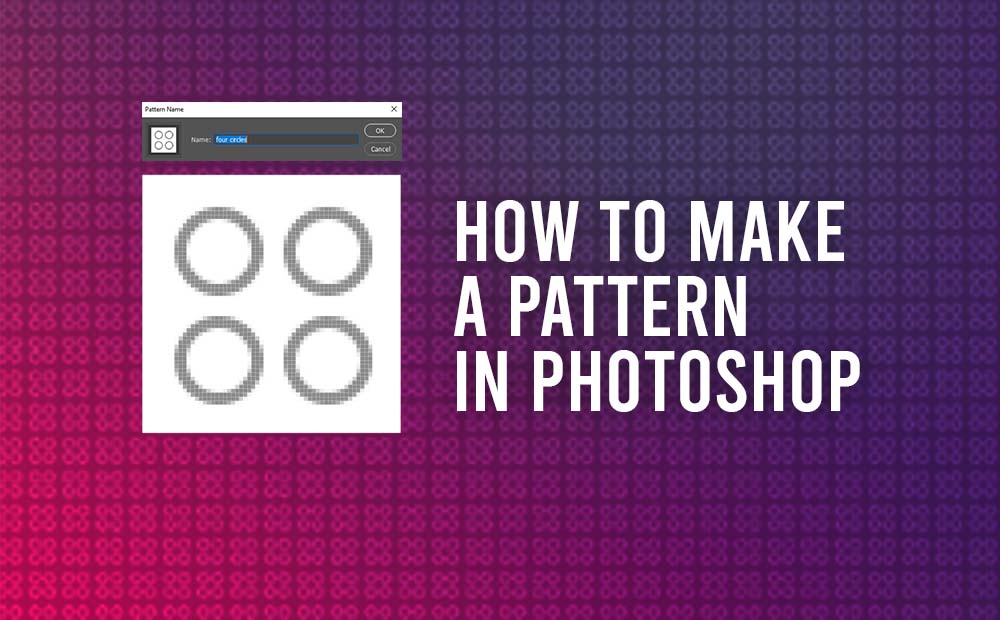
So choose the ellipse form device (U) from the toolbar in Photoshop. Attempt to make 4 circles and place them within the middle of the doc, just like the picture under:

Observe: The rationale that our 4 circles look pixelated is as a result of we created our doc in small dimensions (64×64 pixels) from the beginning. The rationale we did that, is as a result of we are going to repeat the above sample with an incredible quantity (scale). And in that case, the sample shall be fairly small to note that’s pixelated. If we deliberate to repeat our sample with a decrease quantity, in that case, can be wiser to begin our doc in greater dimensions, so it wouldn’t look pixelated.
3 Step (Outline Sample):
After ending the creation of our sample, it’s time to reserve it. And the way in which to do this is by going to Edit – Outline sample..
Within the new sample window, simply give it a reputation for future reference and click on okay.

That’s it. Now now we have our customized sample within the Sample palette in Photoshop. To confirm it, go to Home windows – Patterns and we are going to discover it on the backside of the listing.

Organizing sample in Photoshop:
After we create a brand new sample in Photoshop, that sample provides completely to our sample assortment.
As we already see, by default, once we create a sample, Photoshop put it on the backside of the Sample listing. If we discover ourselves making a number of patterns, is a good suggestion. to create a folder(s) and put them inside accordingly for group functions.
For that goal, we will use the icons on the underside of the sample pallet, to create, delete folders for our patterns.
Making use of the sample in Photoshop:
The steps of making use of our new sample in Photoshop:
Steps:
- Create a brand new a lot greater doc let’s say a FullHD (1920×1080).
- Choose the default layer and unlocked it
- Proper-click on it and choose Mixing Choices
- Go to the sample Overlay part
- Choose our new sample from the listing of patterns
- Set the slider scale round 50%.
- Be sure that the sample Mix mode is ready to regular

The ultimate results of our sample:

Bonus tip, create the sample in Illustrator:
We might additionally create our design sample in Illustrator, after which ship it to Photoshop, with a purpose to put it aside on the Sample palette.
Yow will discover extra about this method in an older article: Switch Vector graphics from Illustrator into Photoshop.