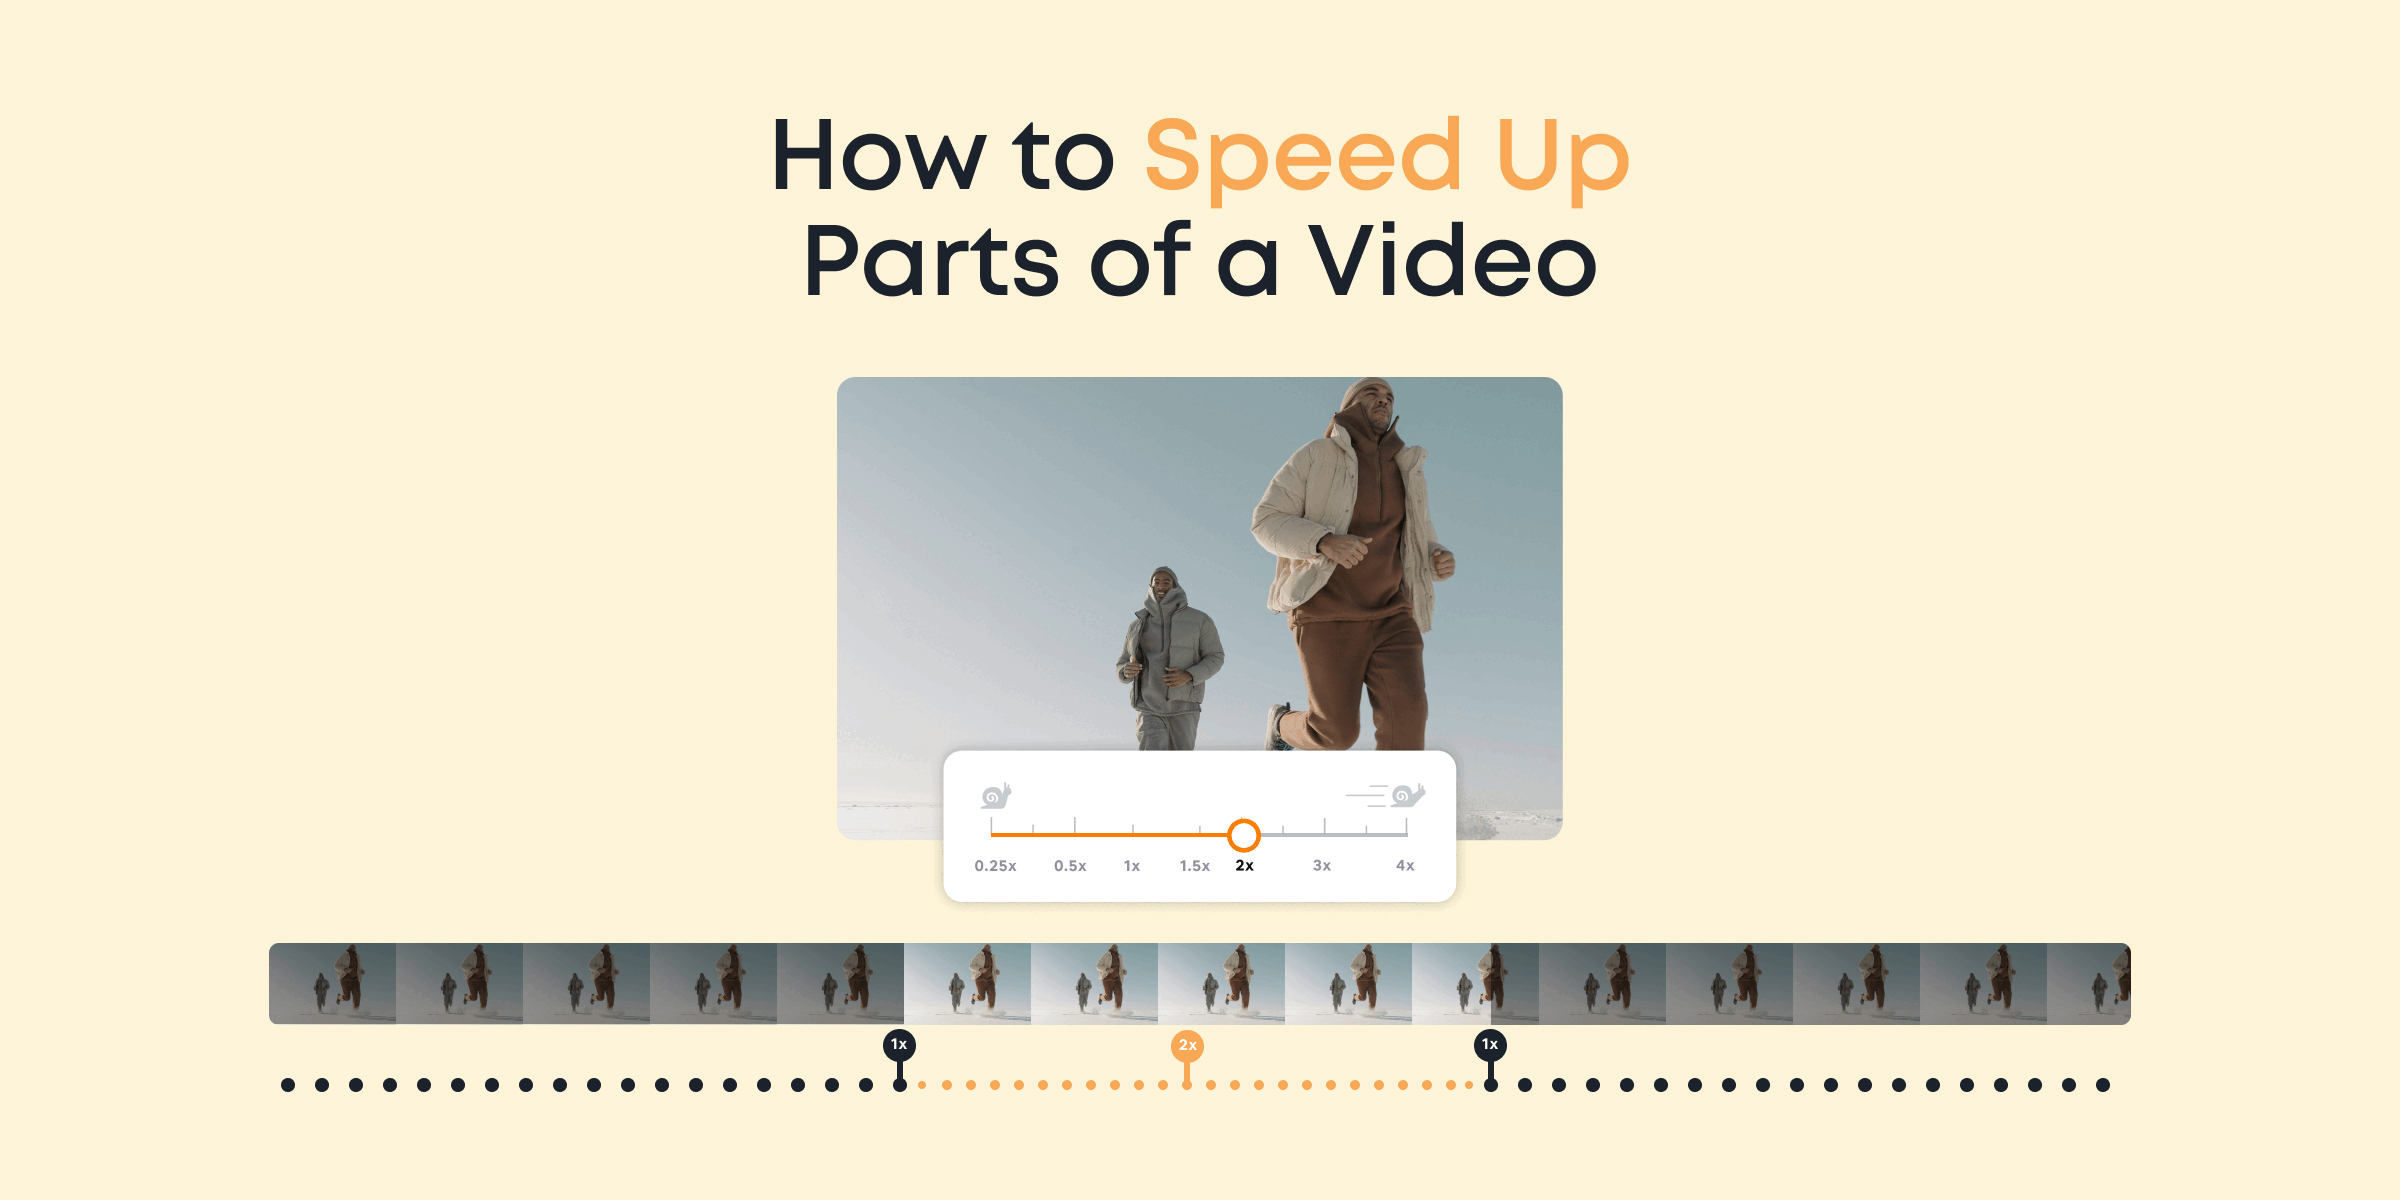
Virtually all people is aware of the best way to quick ahead a video in Home windows 10. However you’d be shocked by the quantity of people that barely know the best way to pace up elements of a video.
So, let’s say you’re making a cooking tutorial, and also you don’t need to bore your viewers with lengthy footage of meals simmering within the oven. You possibly can simply pace up the half the place the meals is cooking so you’ll be able to concentrate on the outcomes!
Furthermore, you too can pace up elements of your video typically only for cool results!
In a nutshell, the steps under mainly exhibits the best way to pace up elements of a video on most video editors:
- Import your video file
- Separate the half you need to pace up
- Pace it up
- Add some ending touches
- And Save!
On this information, we’ll present you an easy course of to dashing up a bit of any video in Home windows 10. With out additional Ado, let’s get to it!
Prime 5 Instruments for Rushing up Components of a Video
There are a number of instruments that may allow you to quick ahead part of your video conveniently. Among the finest ones are mentioned under. Let’s check out them.
Animotica

Animotica is definitely our favourite on the listing due to its versatility, effectivity, and reliability as a video editor.
In the case of dashing up a bit of your video, Animotica makes the method extra simple than ever!
Professionals:
- Newbie-friendly interface
- Big selection of modifying options
Cons
- Solely accessible on Home windows 10 PCs
The next entries on our listing are nice alternate options, however we’ll simply listing their professionals and cons to save lots of time.
EaseUS

Professionals:
- Simple
- Helps quite a lot of video codecs
Cons:
- Dated interface
- Restricted options
Camtasia
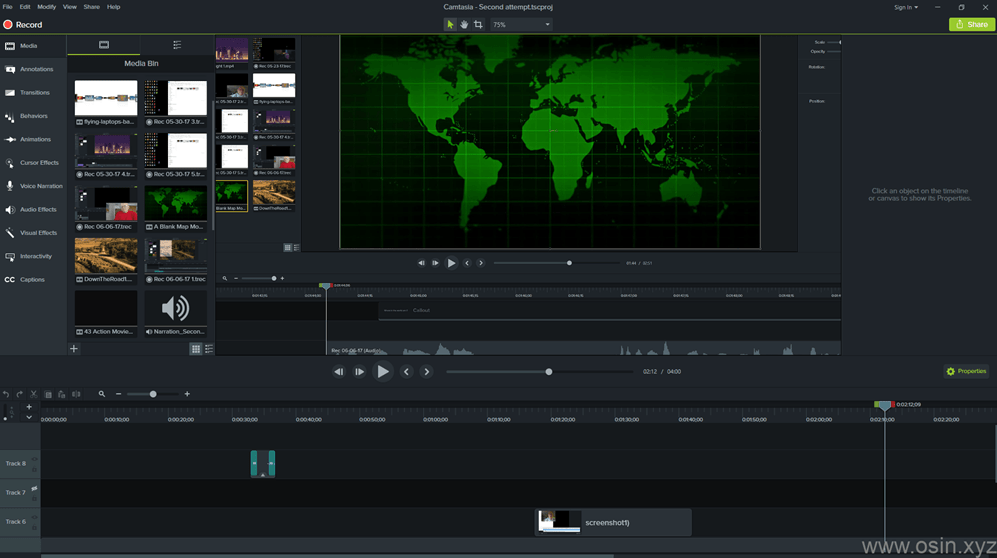
Professionals:
- Helps quite a lot of video codecs
- Comes with a display screen recorder
Cons:
- Costly
- Consumes a considerable amount of RAM
VSDC
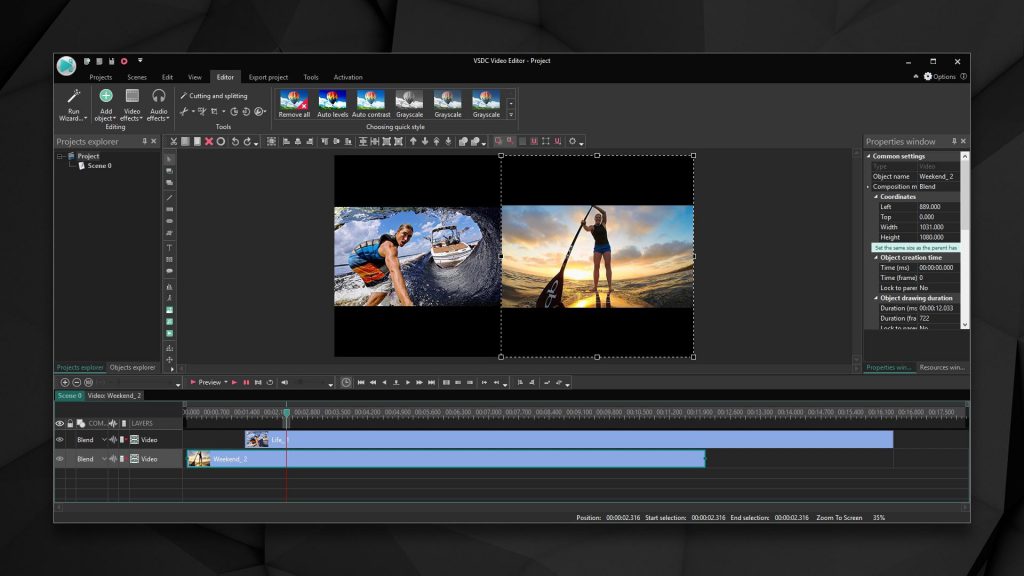
Professionals:
- Free to make use of
- Has loads of further options
Cons
- Not really easy to make use of
- Crowded interface
Flixier
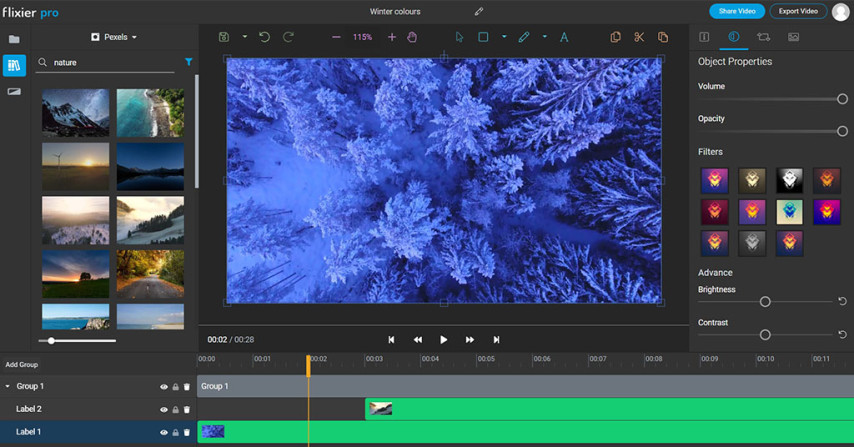
Professionals:
- Fully used on-line
- Simple to make use of
Cons:
- Will depend on the energy of the web connection
- Requires customers to undergo a signup course of
The way to Pace Up Components of a Video
On this part, we’ll go into the precise steps you’ll be able to take to hurry up sure elements of a video.
We shall be demonstrating this utilizing Animotica, our easy-to-use, highly effective video editor!
Hit the button under to obtain it without cost.

Step 1: Launch Animotica and Create a Challenge
Having put in the software program, launch it and hit on New Challenge. It will take you to a clean challenge window the place you’ll be capable of perform any modifying job!
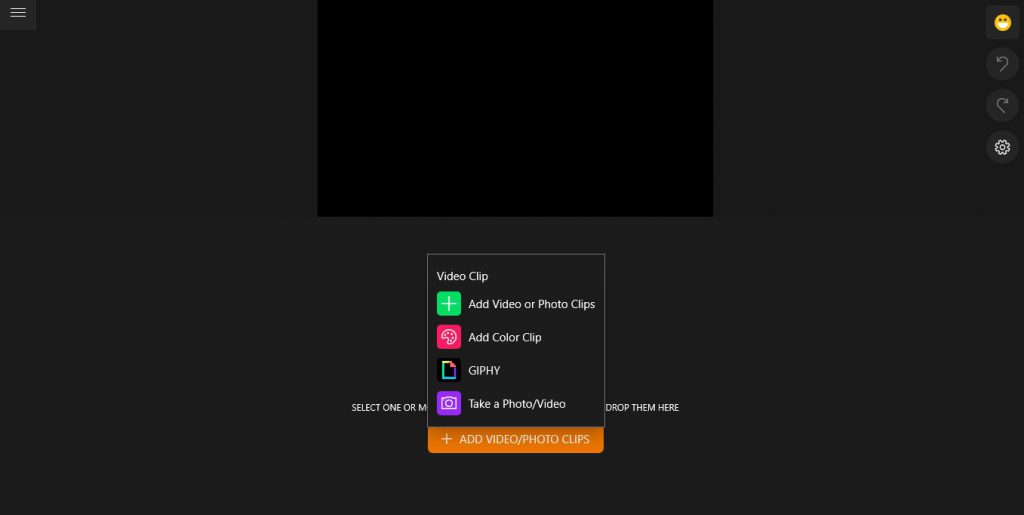
Step 2: Add Your Video Clip
Hit on Add Photograph/Video Clips to start. From the pop-up tray, choose Video or Photograph Clips.
It will take you to your native storage so you’ll be able to navigate to your required video clip, choose and add it. Don’t freak out whenever you see a pop-up producing a proxy file out of your clip. That is normally fast and allows you to edit your movies far more effectively.
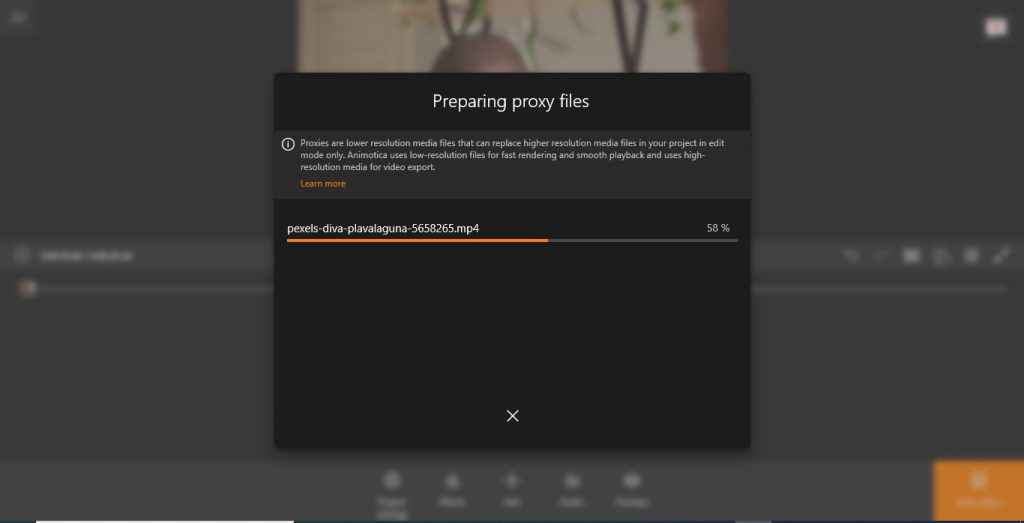
Be taught extra about proxy information right here.
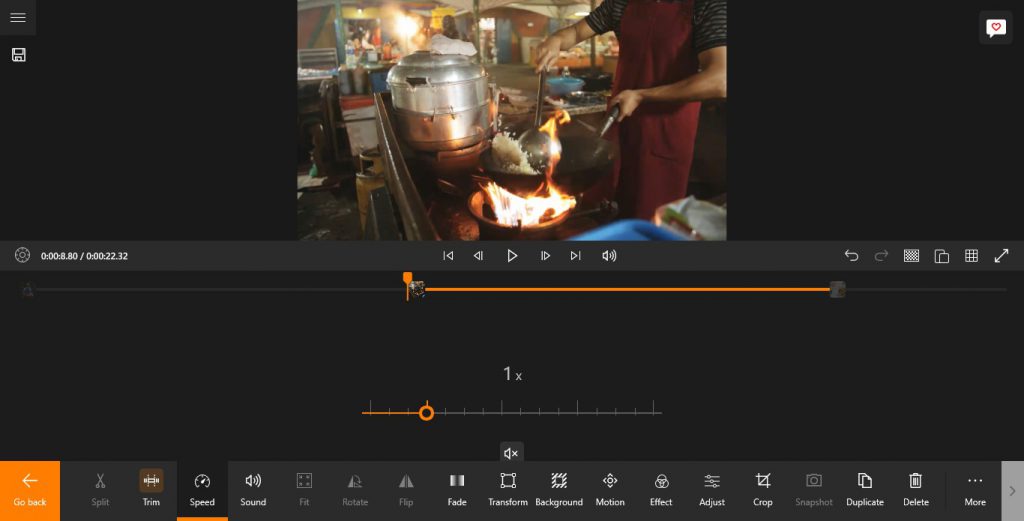
Step 3: Isolate the Half you need to Pace Up.
That is the place the magic begins! Choose the video clip’s thumbnail to disclose the primary modifying choices.
Subsequent, drag the time slider to the place to begin of the half you need to isolate. Now, choose Break up (or hit Ok).
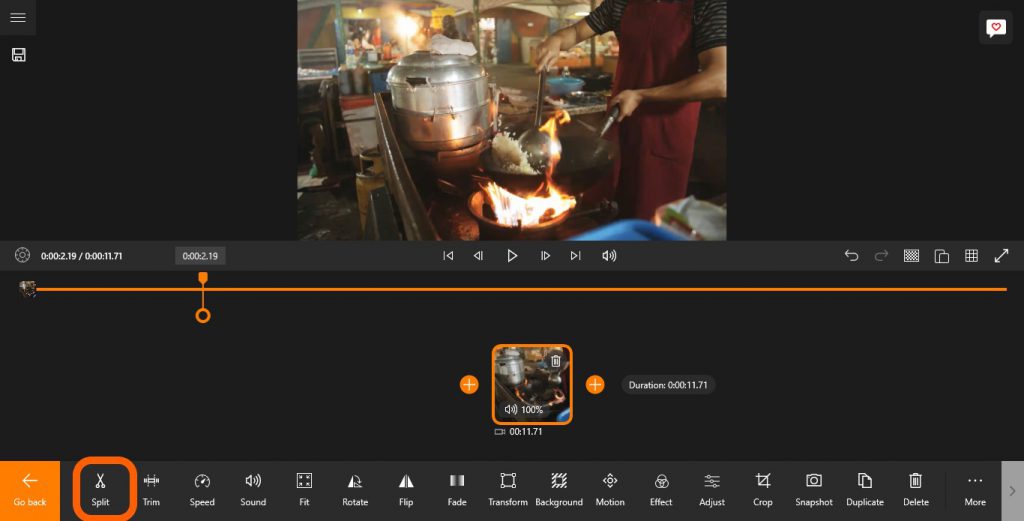
Once more, drag the slider to the ending level of the half you need to isolate and hit Break up once more.
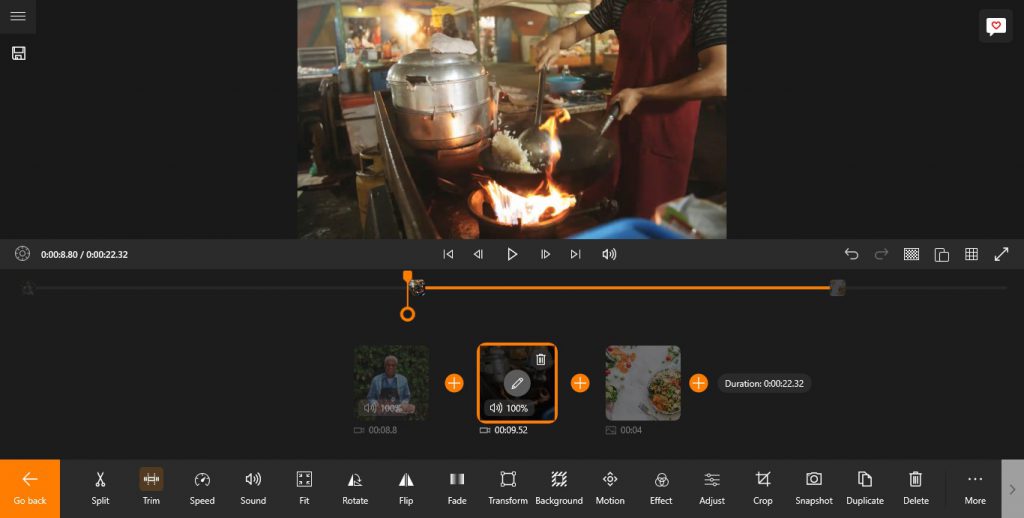
From the above screenshot, you’ll be able to see that there at the moment are three clips. The one within the center is the remoted clip. Be at liberty to play it to ensure it’s the appropriate one!
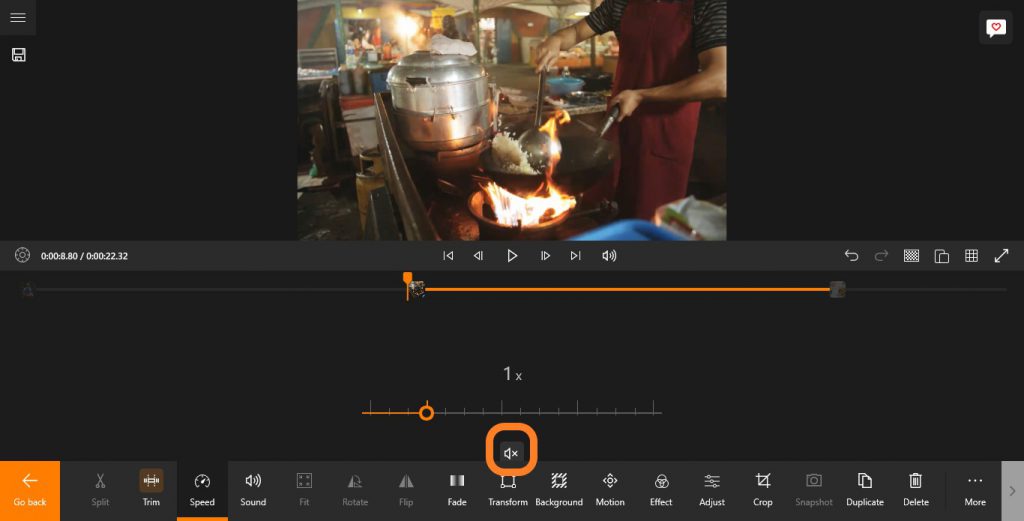
Step 4: Pace up the Clip
At this level, now you can edit any of the remoted clips individually. To hurry up your chosen clip, faucet on the thumbnail to disclose the modifying choices after which choose Pace.
Now you can alter the pace by dragging the slider to the proper.
Word that altering the clip’s pace will alter the sound of the video. So it’s all the time advisable to mute that half and substitute it with background music. You possibly can mute the video instantly by clicking on the mute icon, as proven under.
Step 5: Last Touches
Okay, fantastic, you’ve sped up a bit of your video. Mission accomplished. However then, it could be so much nicer in case you can add some ending touches to make the video ‘pop.’
For instance, you’ll be able to add transitions, background music, particular impact layers, and extra to the remoted clip.
You’ll want to preview your video to make sure the whole lot checks out.
Step 6: Save your Video
To save lots of your video, hit on Export Video or CTRL+E.
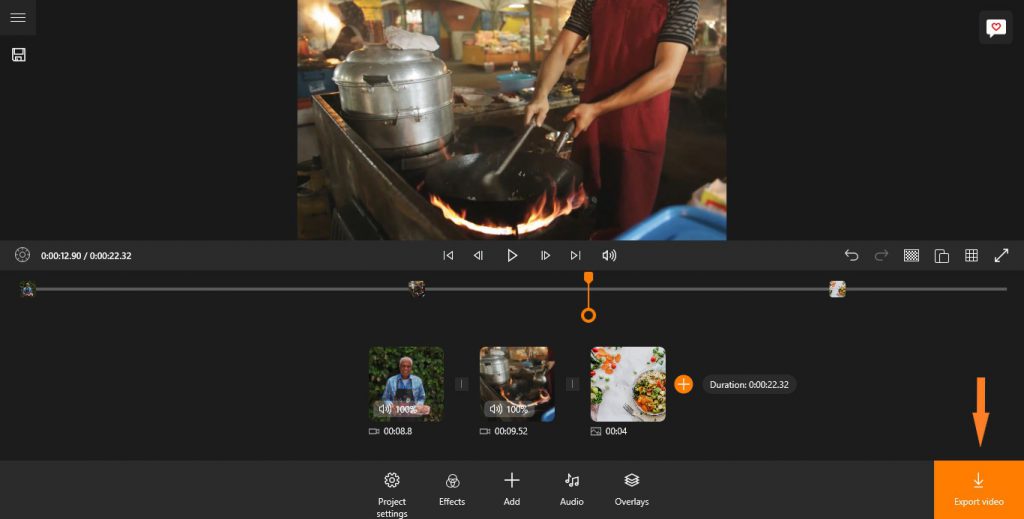
You’ll get to the export window. This window lets you set parameters for video decision, bitrate, and so forth. However since Animotica chooses the very best stability for each high quality and dimension, be happy to depart the parameters the best way they’re.

Subsequent, hit Save As, add your filename, and hit Save once more!
Conclusion
Now that you simply’ve discovered the best way to pace up elements of a video, you’ll be able to relaxation assured figuring out that your video modifying expertise have gotten to a brand new stage.
Identical to it’s with the whole lot else, you get excellent with fixed observe. Simply be sure you have enjoyable whereas at it.
Cheers!