It is simpler to indicate the larger image when your viewers can see precisely what you are speaking about. However immediately’s Zoom-fatigued workforce wants entry to info with out sitting by way of one other assembly.
Now, you possibly can simply document, edit, and customise your display recordings and seamlessly add them to Animoto movies. Right here’s how you can simplify your communications and strengthen your movies with display recording.
In immediately’s hybrid workforce, communications should be extra compelling and concise than ever earlier than with a view to be seen and remembered. Including display recordings to displays, demos, trainings, and walkthroughs could make them extra partaking, informative, and memorable.
Animoto’s on-line display recorder is at the moment accessible to everybody for a restricted time. This function means that you can document, edit, and customise display recordings with out leaving your Animoto workspace. That’s every thing it is advisable to inform your story multi functional place.
Let’s begin recording!
How one can document your display {#how}
Display recordings may also help streamline your communications. As a substitute of forwards and backwards emails or conversations, you possibly can share precisely what’s in your display in full context. If you add them alongside different compelling supplies like images, textual content, and voice-over narration, you have got a strong video! Right here’s how you can document your display with Animoto.
Step 1: Begin a video mission
Display recording all begins in Animoto. First, create your video mission as traditional. You can begin by choosing a customizable template and following the directions in this video. Or, in the event you’d like your display recording to be a standalone video, you can begin off with a clean canvas. To do that, select the START FROM SCRATCH button within the high proper hand nook of the templates web page.
Step 2: Begin recording
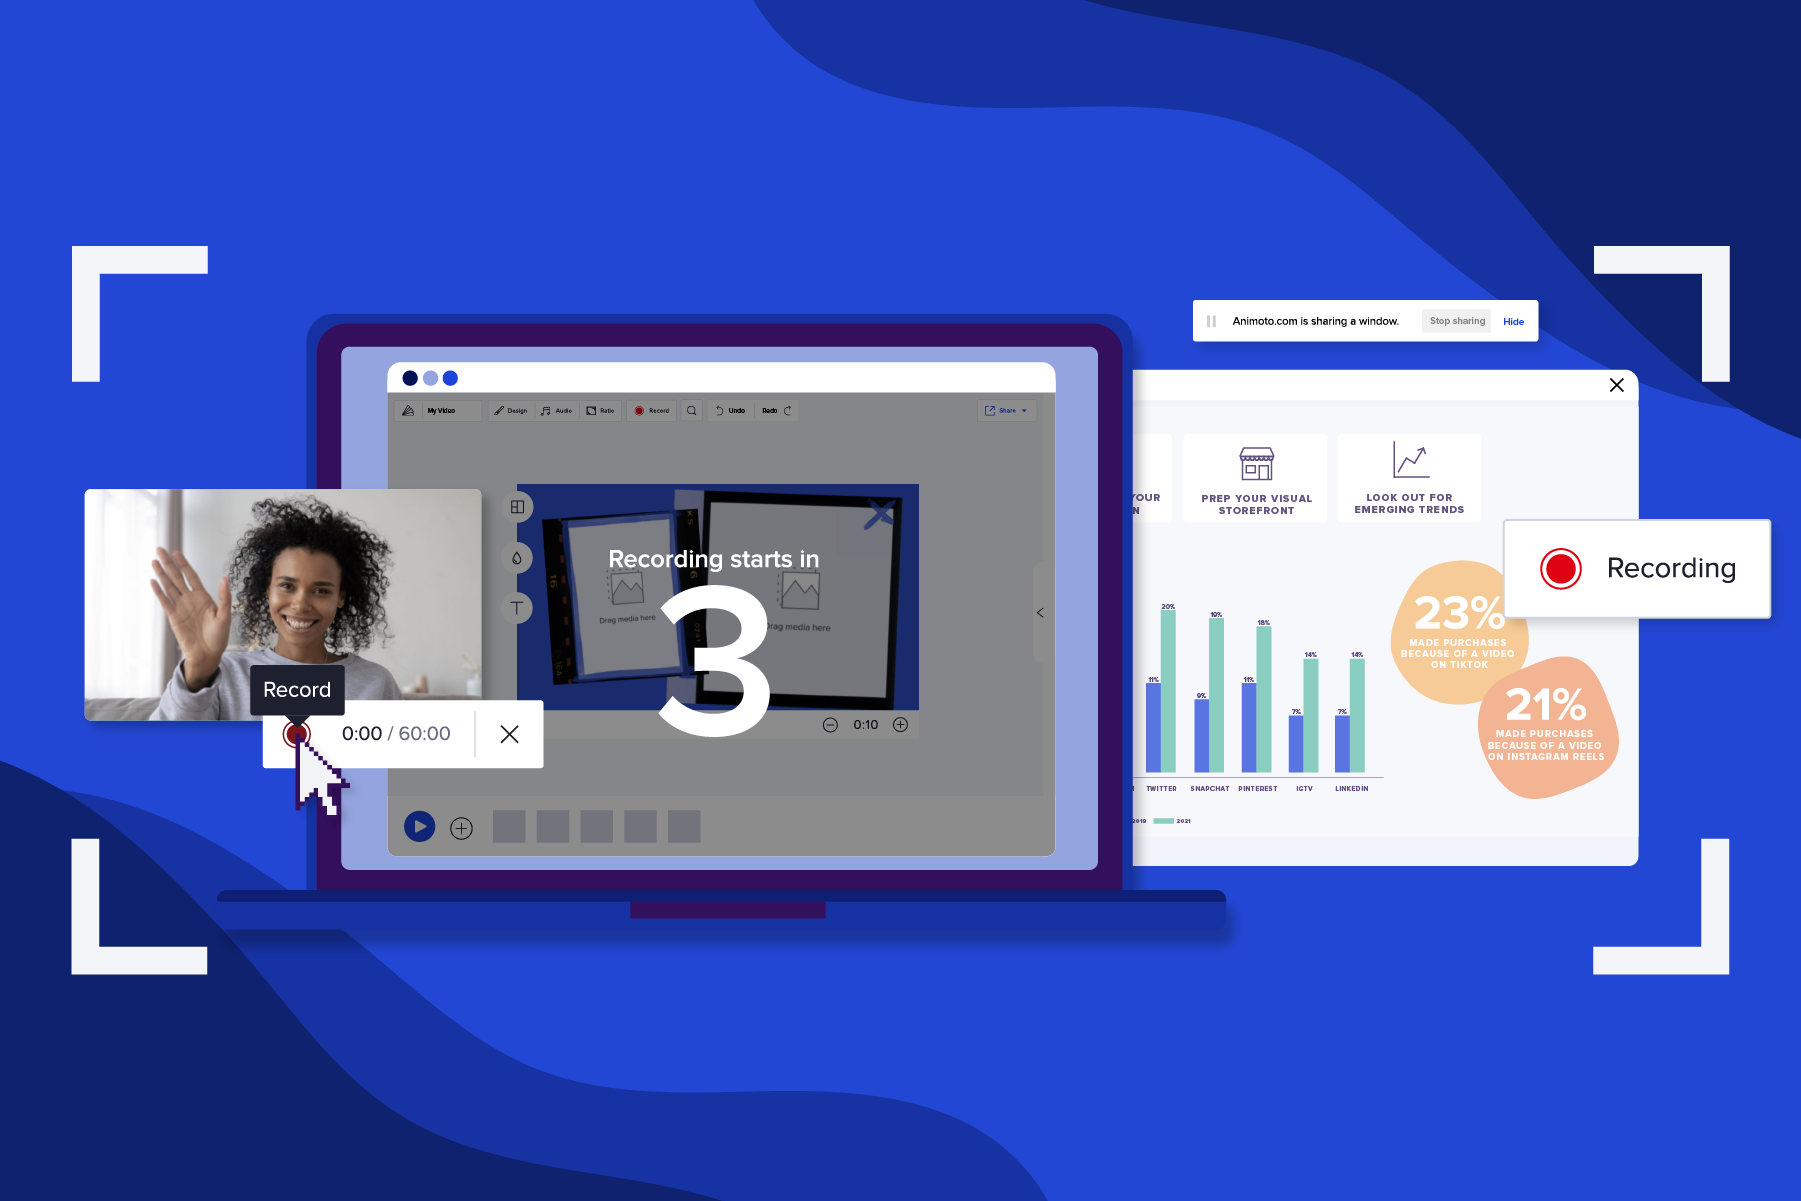
If you’re prepared to start out recording your display, click on the RECORD button with the black document icon on the high of your display.
From right here, you’ll be capable of select whether or not you document your display or digicam. Choose “Display” after which select to document your complete display, window, or particular tab in your browser. In case you select to pick a selected tab in your web browser, you’ll be capable of see a preview earlier than you start recording.
In case you haven’t beforehand given Animoto permission to entry your microphone, it’s possible you’ll obtain a small pop-up in your browser. Click on “Permit” to grant it permission.
For greatest outcomes, please use Google Chrome or Firefox as your browser if you wish to document a window or particular tab fairly than your complete display.
When you’ve chosen the window or display that you simply wish to document, click on the SHARE button within the pop-up window. Lastly, click on the pink File button to start out your recording.
Recording your display will even document your audio so be happy to relate over your recordings. You may all the time mute your clip when you add it to your mission in the event you’d wish to maintain your video silent or add a voice-over later.
If you’re completed along with your recording, you possibly can both click on “Cease sharing” within the field within the backside of the display you’re recording or hit the cease button again in your Animoto workspace.
Your recording will robotically be loaded into the “PROJECT” tab of your Media Library. There isn’t a restrict to what number of display recordings you possibly can add to your movies. To delete undesirable recordings, choose them within the Media Library and click on the trash can icon to delete.
How one can document your digicam {#digicam}
Digicam recordings are nice for “speaking head” movies. By utilizing your webcam to document you, you possibly can communicate on to your viewers and put a face to your model. You may select to speak your method by way of all the video or document a brief intro or outro so as to add alongside the remainder of your content material. Right here’s the way it’s performed!
Step 1: Begin a video mission
To start out recording your self on digicam, first create a video mission and get into your video workspace. You can begin from scratch or use any of our skilled video templates.
Step 2: Choose “Digicam” and begin recording
Now, choose the black RECORD button on the high of your display. From right here, you’ll be capable of select whether or not you document your display or digicam. Choose “Digicam” to document your webcam by itself. You might have to grant your browser permission to make use of your digicam.
A preview of your digicam footage ought to seem on the left of your video workspace. Be sure to are recording in a well-lit surroundings so viewers can clearly see your face.
If you’re able to go, click on the pink document button beneath the preview. A countdown from 3 will begin after which your recording will start!
To finish your recording, click on the “X” that seems slightly below the digicam preview and counter. A window titled “Evaluation Digicam Recording” will seem the place you possibly can rewatch your recording or select to retake it and begin another time!
Lastly, click on Save recording and watch your recording add into your Media Library.
How one can edit display recordings {#edit}
Webcam and display recordings supply the identical modifying choices as any video clip.
Your recordings will robotically seem alongside all different uploaded media in your Media Library. So as to add it to your video and begin modifying, drag and drop it right into a media block.
Click on in your recording to start modifying. Within the left hand nook of your video, click on “Scale” to zoom your video in or out.
Click on the “Trim Clip” icon that appears like scissors to trim your video clip. You may drag the buffers on both finish to take away any undesirable footage.
For extra recommendation on trimming video clips, watch this brief video.
youtube:https://www.youtube.com/watch?v=1SO3yUE5zKU
You may as well use the “Rotate” icon to rotate your video 90 levels or the trash can icon to take away your recording from the video.
To mute your display recording, click on in your video inside the media block then click on the microphone icon to mute it.
As soon as your video is accomplished, you possibly can share it nevertheless it’s best for you and your viewers. Hit the EXPORT button to combine your video into electronic mail, share it on social, or ship through hyperlink, no software program or video downloads required.
How your enterprise can use display recording {#enterprise}
Generally phrases aren’t sufficient to elucidate difficult processes or clearly get your level throughout. Including display recordings is a compelling technique to not solely make telling your story simpler, however to make it extra memorable.
Animoto has every thing it is advisable to inform your story by way of video. Not solely are you able to add your display recordings, however you possibly can assist your content material with different photographs, video clips, voice-overs, textual content, and extra. Beneath are some nice examples of movies made higher with display recordings plus templates to get you began.
Technical Tutorial
Technical duties are greatest demonstrated, not defined. By including display recordings to your tutorials, you’re offering learners with easy-to-follow directions. Whether or not sending your video to a brand new buyer or inner workforce, the Technical Tutorial template makes it straightforward so as to add display recordings and show your expertise.
youtube:https://www.youtube.com/watch?v=vE3hKQmsSHc
USE THIS TEMPLATE
Office How-to
Must get a workforce skilled in a brand new software program, app, or course of? The Office How-to template breaks it down step-by-step, making it simpler for everybody to comply with alongside no matter expertise. This template can also be nice to incorporate in an onboarding package deal for a brand new shopper or new rent.
youtube:https://www.youtube.com/watch?v=NehNhkPv87Y
USE THIS TEMPLATE
Product Demo
Most prospects usually tend to pay extra for a product or re-purchase a product after they perceive how you can use it. Correct utilization also can prolong the lifetime of your product and cut back the quantity of buyer error and refunds.
When you have a digital product or a product with a digital element, attempt making a Product Demo video with display recordings!
youtube:https://www.youtube.com/watch?v=9Z5P0DUkSAQ
USE THIS TEMPLATE
Worker Onboarding
Whether or not your new staff might be becoming a member of your workforce within the workplace or remotely, an easy onboarding video may also help them hit the bottom working. From organising their emails and calendars to coaching them in your CRM (buyer relationship administration) software program, onboarding movies are simpler with webcam and display recordings.
Check out our Worker Onboarding template and customise it with every thing a brand new worker might want to succeed at your organization.
youtube:https://www.youtube.com/watch?v=_Vn3_GWxK6g
USE THIS TEMPLATE
Simplify communications with display recording
At Animoto, our purpose is to make it straightforward for anybody to create skilled movies in minutes. With display recording, you possibly can share precisely what you need to share with out having to obtain a brand new software program or video.
To be taught extra about Animoto’s video options, proceed studying on our weblog. Or comply with us on Linkedin to be taught how one can strengthen your communications with video.
SIGN UP FOR FREE
Troubleshooting {#troubleshooting}
Flick thru any troubleshooting matters beneath in the event you run into any points. In case you get caught, be happy to achieve out to the Buyer Operations workforce at assist@animoto.com for help.
I’m utilizing Google Chrome and the recording gained’t begin after I press File.
In case you’re utilizing Google Chrome and you’ll’t get your recording to start out, you seemingly want to alter your privateness settings.
For Mac customers:
- In your Mac, select System Preferences, click on Safety & Privateness, then click on Privateness.
- Choose Display Recording.
- Then add Display Recording permission in your browser of selection.
- Give up and begin the browser once more.
- Begin recording!
For PC customers:
- In Chrome, click on the Website Data choice (the lock icon within the search bar).
- Click on Website Settings choice.
- Set the Digicam drop-down choice to Permit.
- Set the Microphone drop-down choice to Permit.
- Shut the browser tab and reload the web page.
- Begin recording!
The pink “File” button is not displaying for me
When you have adopted the steps above however the pink “File” button didn’t seem, it’s possible you’ll have to restart your browser and/or laptop.
My video seems to be distorted
In case your closing recording seems stretched or compressed as soon as uploaded, it could possibly be since you modified the dimensions of your tab. To maintain your video as constant as attainable, keep away from altering your window or tab’s dimensions whereas recording.