INTRODUCTION
Good day there! I’m a 29-year-old 3D designer who works professionally with Blender at a industrial design firm and in addition makes use of it typically for aspect tasks in my free time.
I’ve been working with Blender on and off since round 2011, after I began turning into on the earth of 3D design whereas in highschool. I studied 3D animation at Dakota State College, the place I primarily used Maya and 3ds Max. Nonetheless, after commencement, I acquired again into utilizing Blender as my main 3D software program.
INSPIRATION
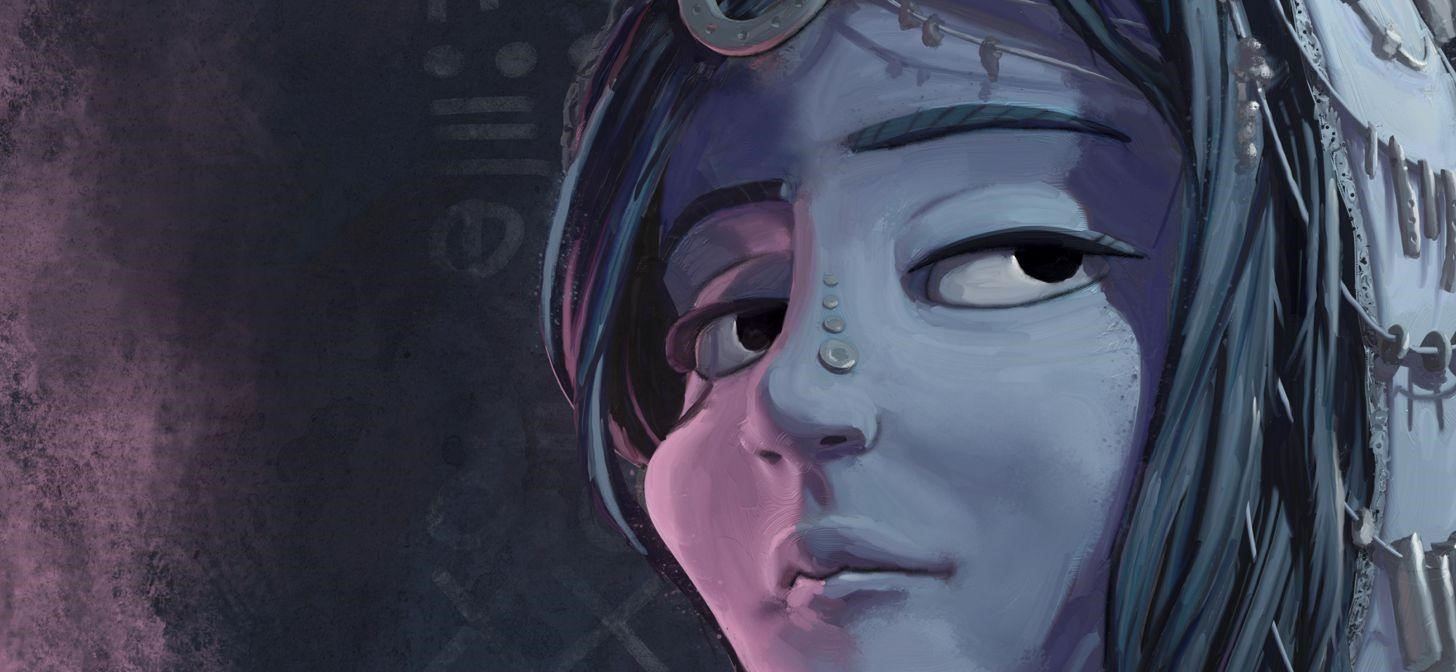
One of many aspect tasks I’ve been engaged on for a few years has required me to create a sequence of characters, all in an identical model, and that is the third picture in that sequence.
Under are the 2 earlier characters


The world they inhabit is a dark-Victorian steampunk kind of world during which numerous factions attempt to work collectively whereas in search of a possibility to take energy for themselves at any second. Every bit represents the chief of that faction; on this case, a faction of merchants known as “The Mongers.”
After I got down to make these, I knew I wished them to be stylized and kind of painterly. The issue is I’m not very expert at free-handing portraits, and even utilizing references, it could take an excessive amount of time. I knew I might use Blender to sculpt and light-weight these figures a lot quicker than drawing from scratch, however I used to be additionally frightened that I’d have problem getting the painterly look if I stayed in Blender for the complete course of. Subsequently, I opted to make use of Blender to mannequin and light-weight the characters after which painted over the picture to realize the specified look.
REFERENCE
I’ve a foul behavior of not saving my references, however a lot of it concerned Googling Victorian costume and headwear and adapting these parts for my functions (taking many liberties, after all).
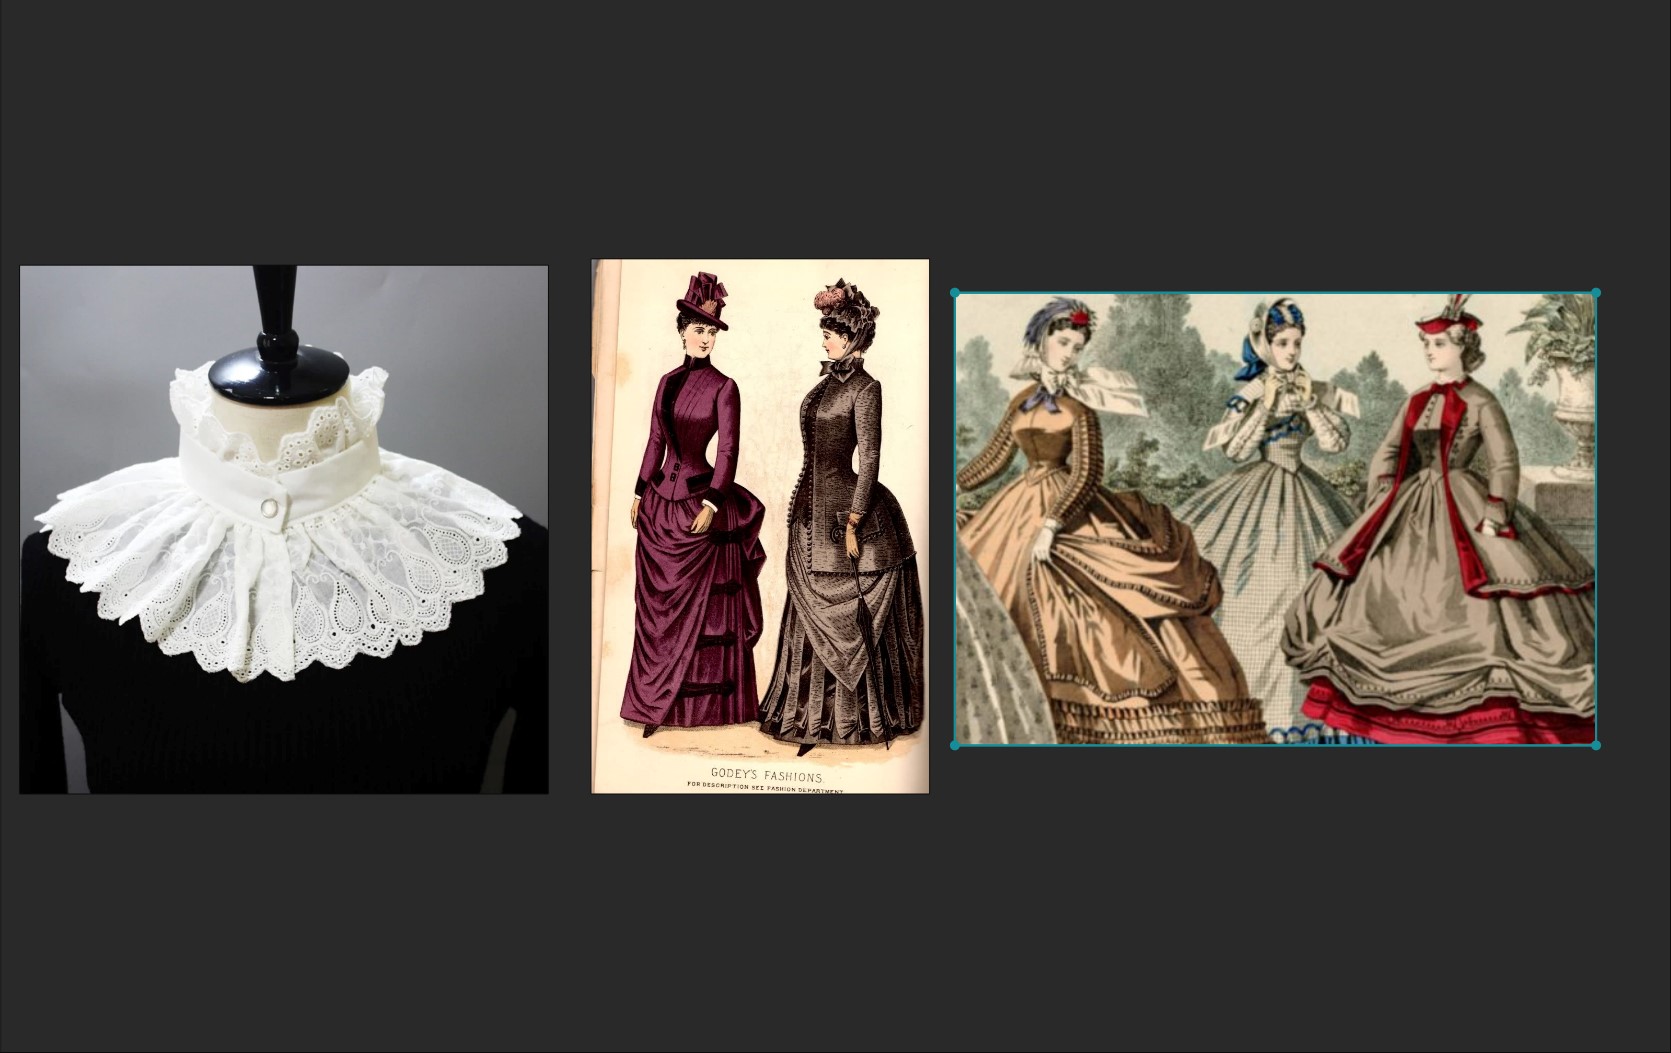
My “reference board” *facepalm*
SCULPTING
I began with a subdivided sphere and started sculpting the shape as typically as potential with the “Symmetry” instrument on. As I went, I added additional chunks such because the ears and the eyelids, merged them with a “Boolean” modifier, after which re-meshed. I additionally started including density incrementally with further subsurface modifiers.
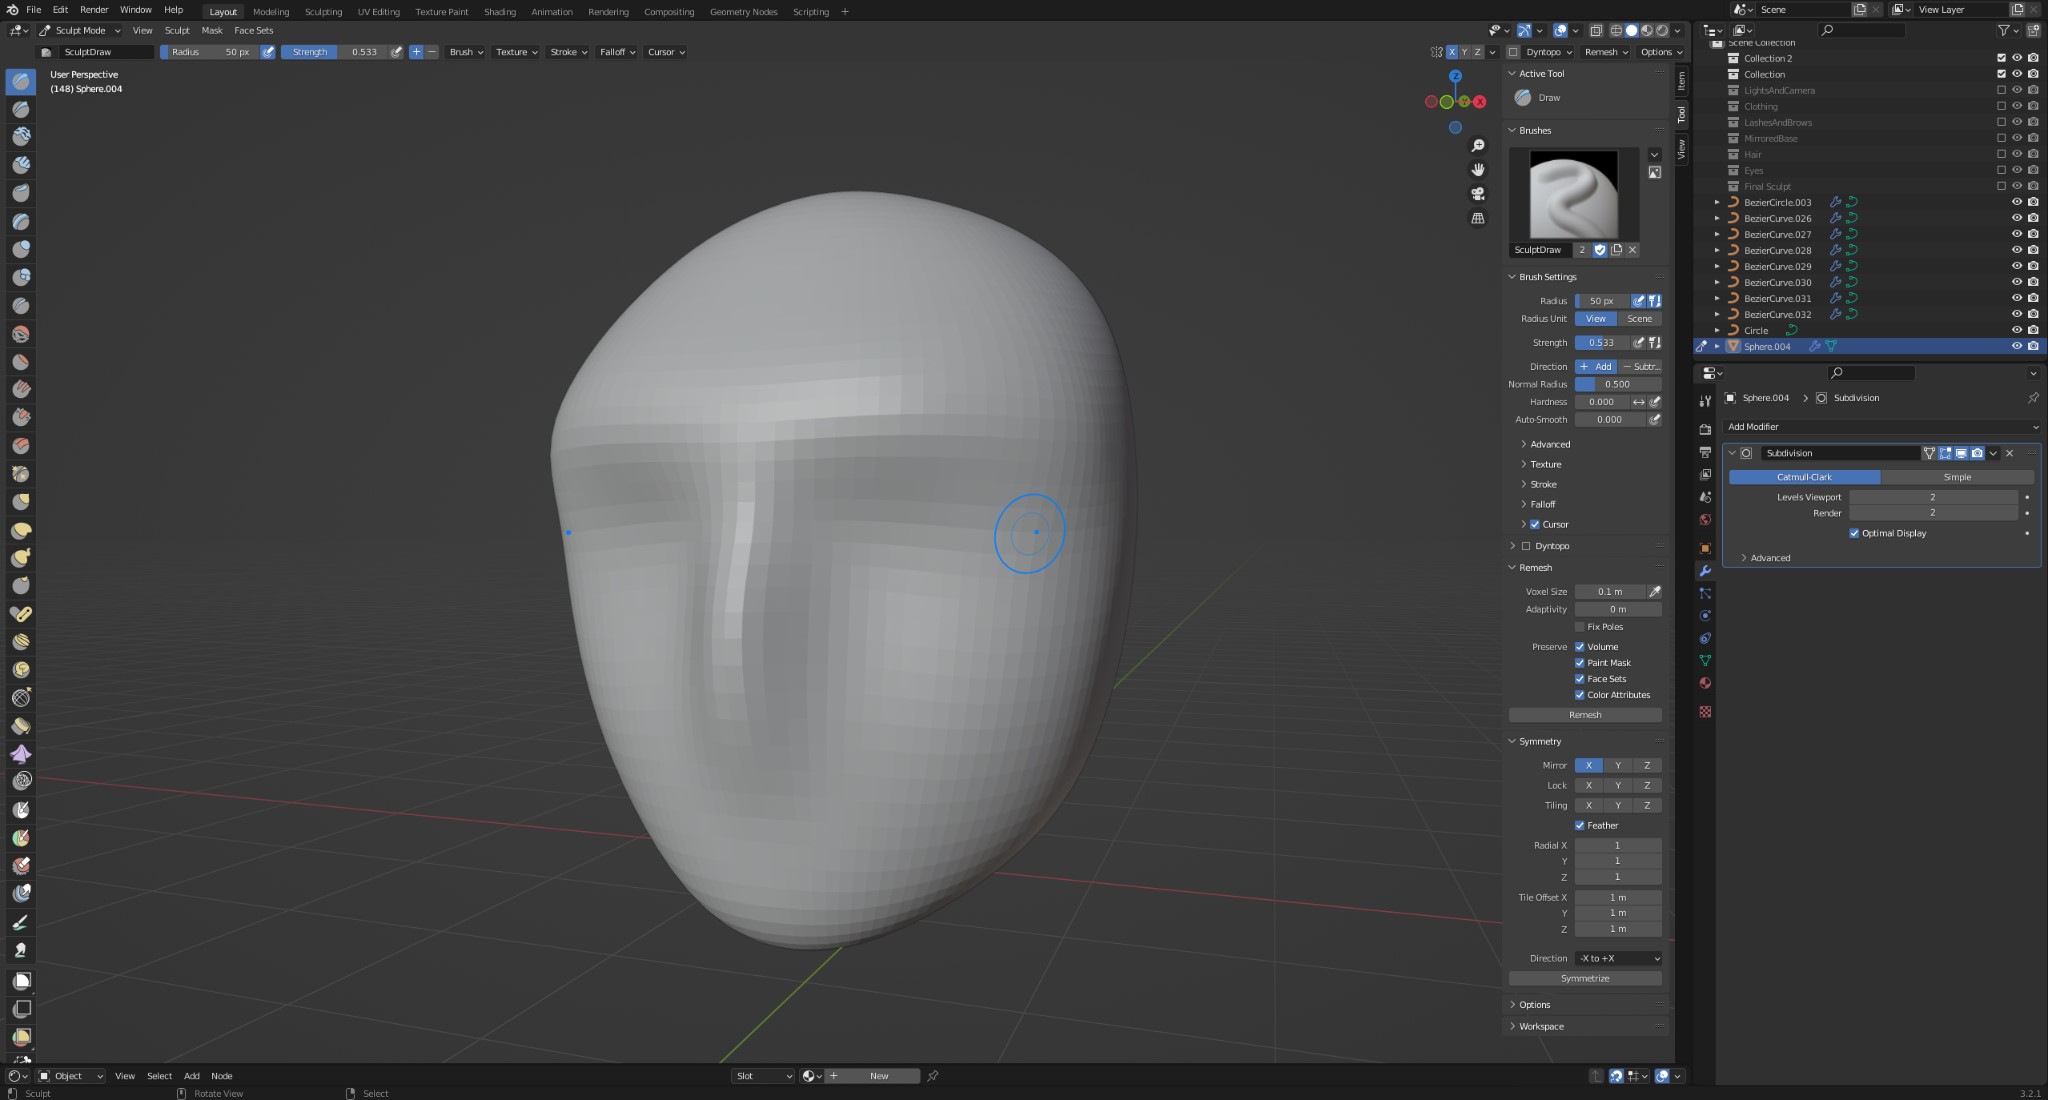
Since this character is stylized, instruments such because the “Multiplane Scrape” and “Pinch” instrument have been very helpful in accentuating sure options, corresponding to her forehead line and eyelids. They allowed me to primarily scrape out planes that might seize the sunshine effectively and provides some good definition to her face.

As soon as I had completed the essential sculpt, I went forward and arrange my digicam and lighting to ensure the whole lot was shaping up. I additionally turned off symmetry within the sculpt instrument in order that I might increase a forehead, give her a smirk, and make different small changes utilizing the seize instrument that give her character, as refined as it might be.
You’ll little doubt discover that the sculpt is fairly ugly by way of density and topology and has tough patches throughout. Nonetheless, since I knew this was going to be a static shot that might be painted over later, that stuff would not have an effect on the ultimate outcome.
LIGHTING
I positioned the digicam low, trying up at her, to provide her an air of energy and authority. The lighting setup is fairly primary: one key gentle with a bluish hue, two rim lights (one coloured and one white), and a purple fill “solar” pointing up from the underside. I additionally used low environmental lighting simply to fill any remaining shadows.
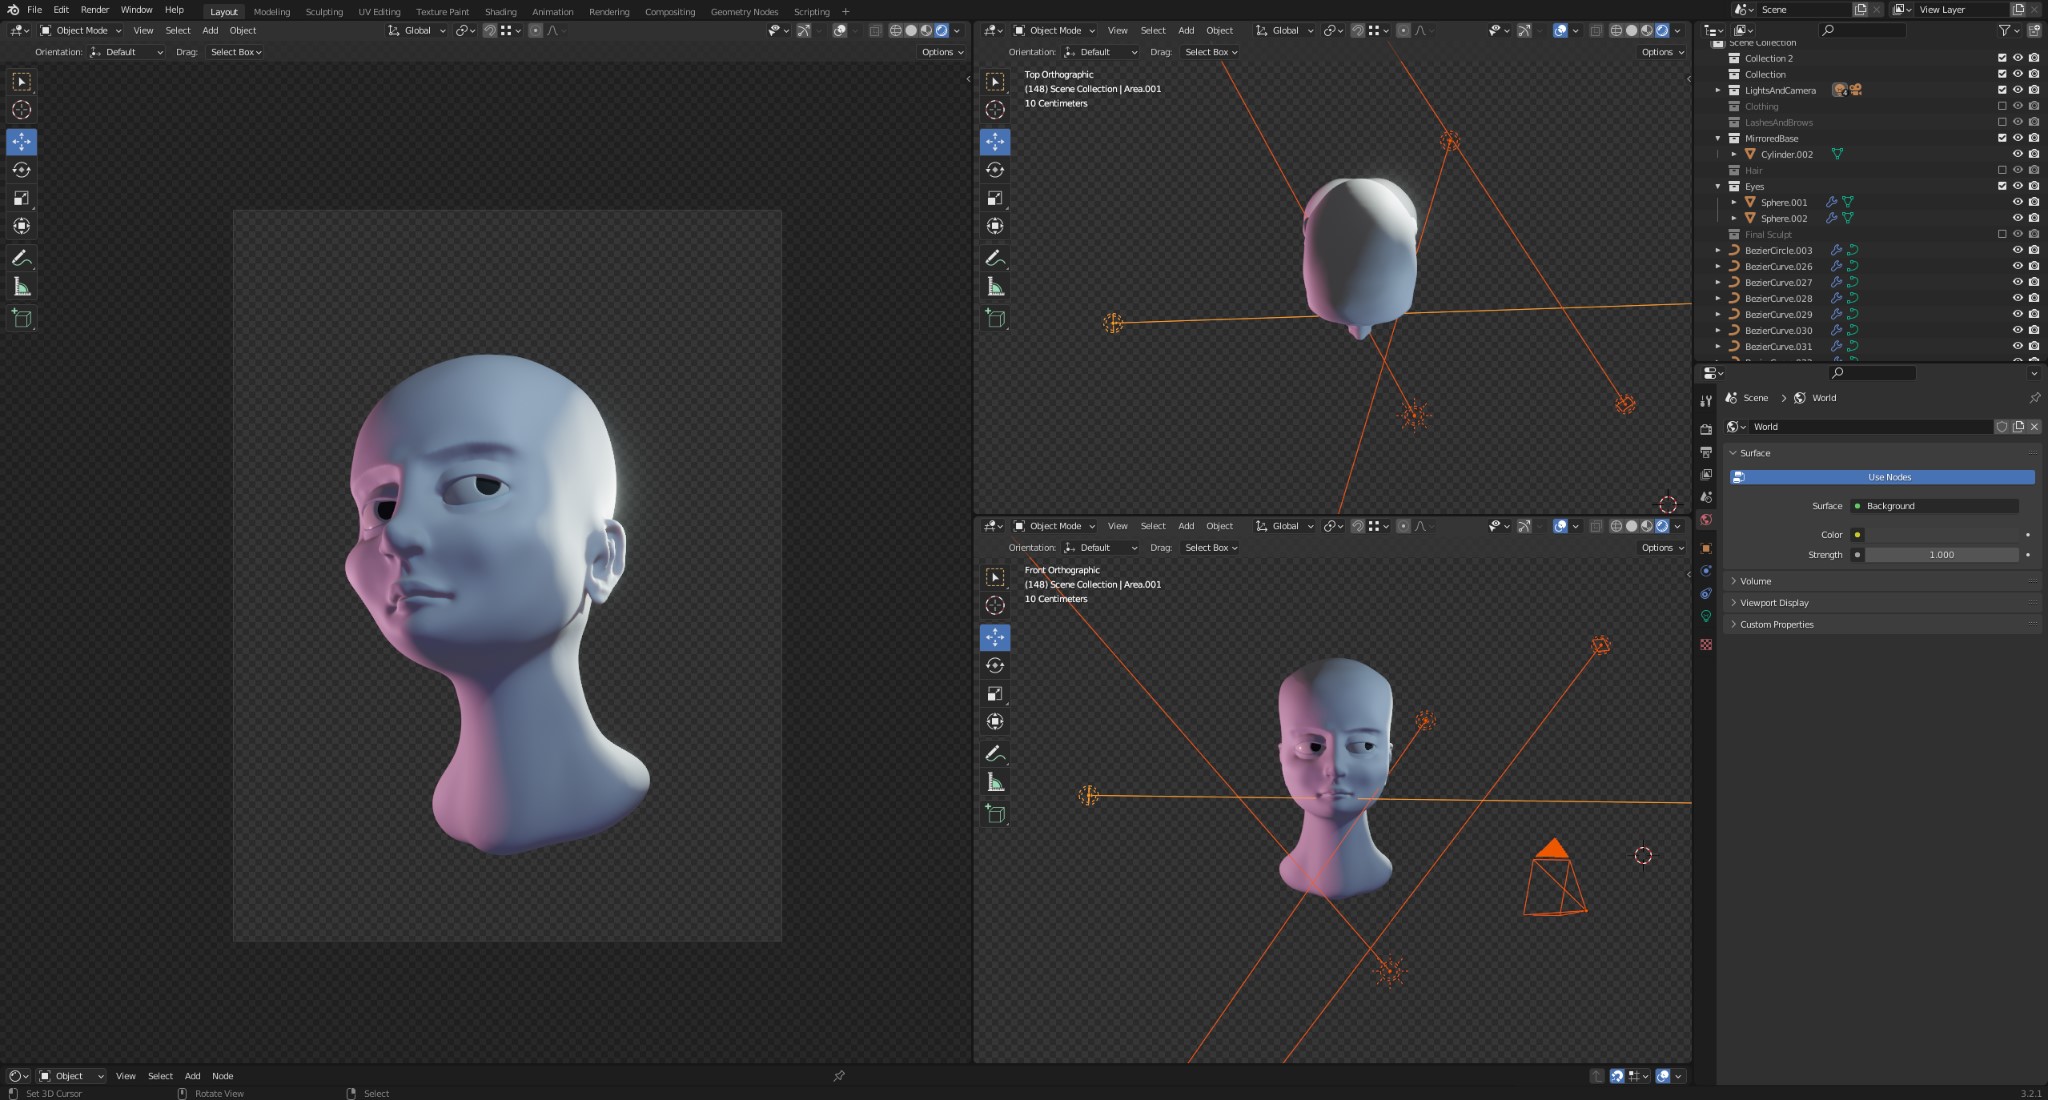
Checking composition and lighting
The lighting total is a little bit darkish to be able to preserve a mysterious vibe, however the harsh rim lights did rather a lot to determine type and silhouette.
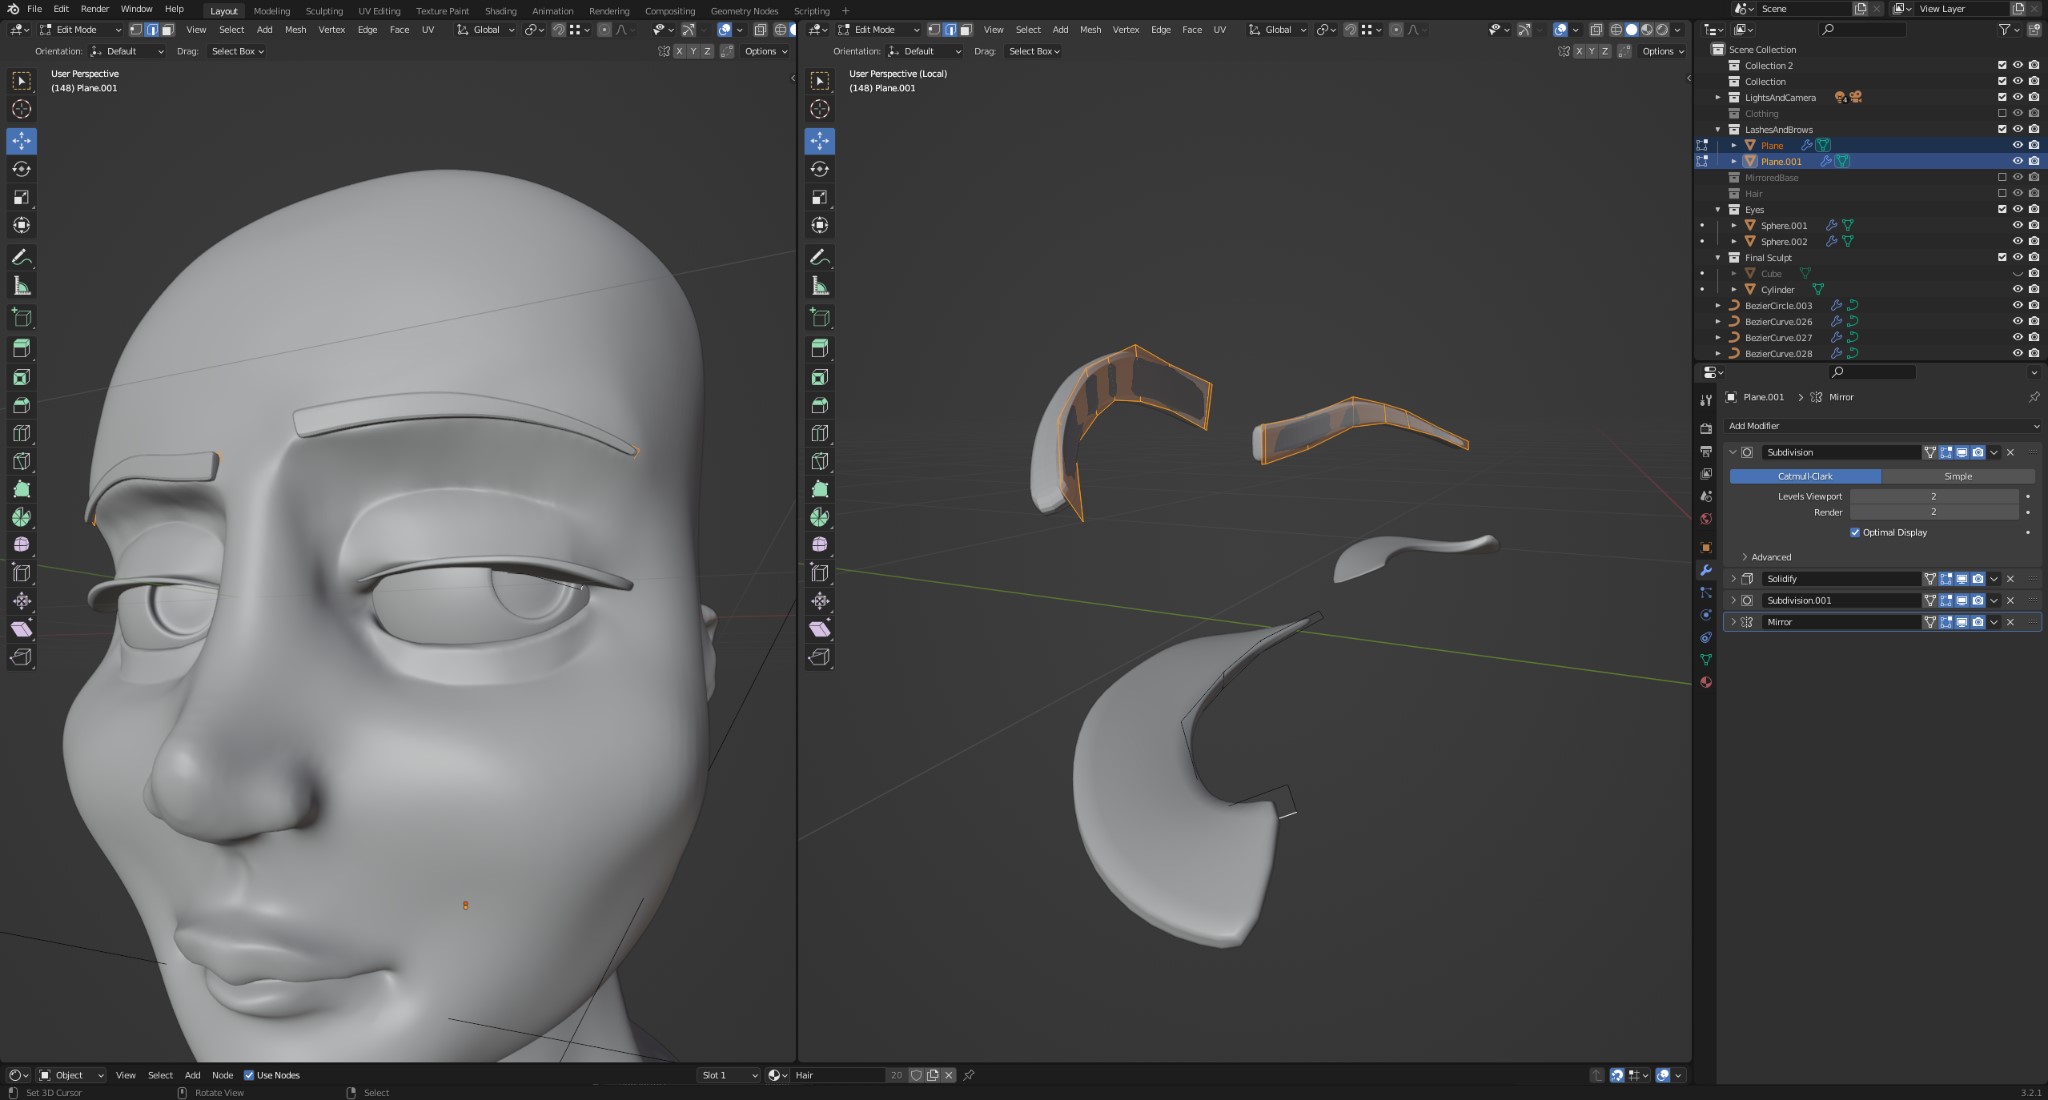
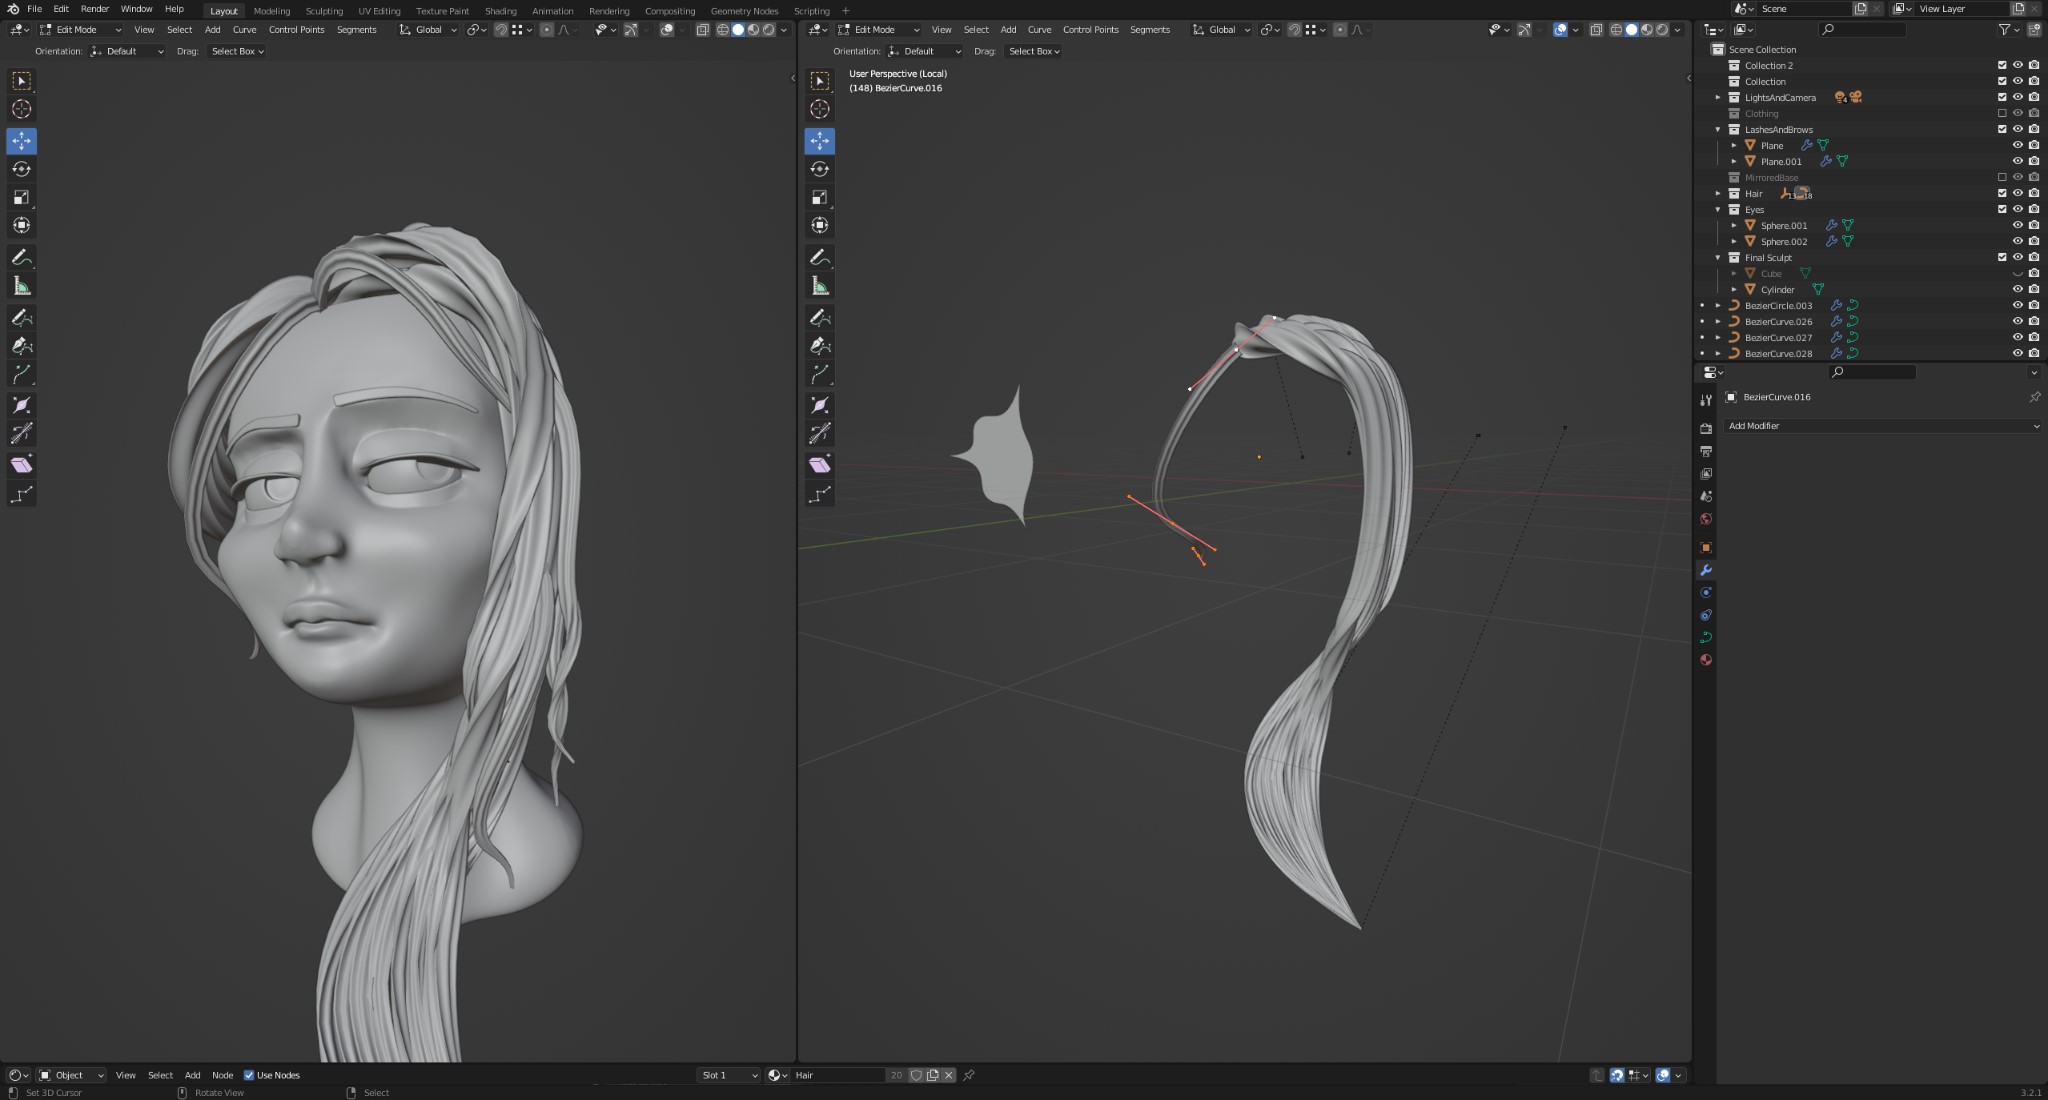
HAIR
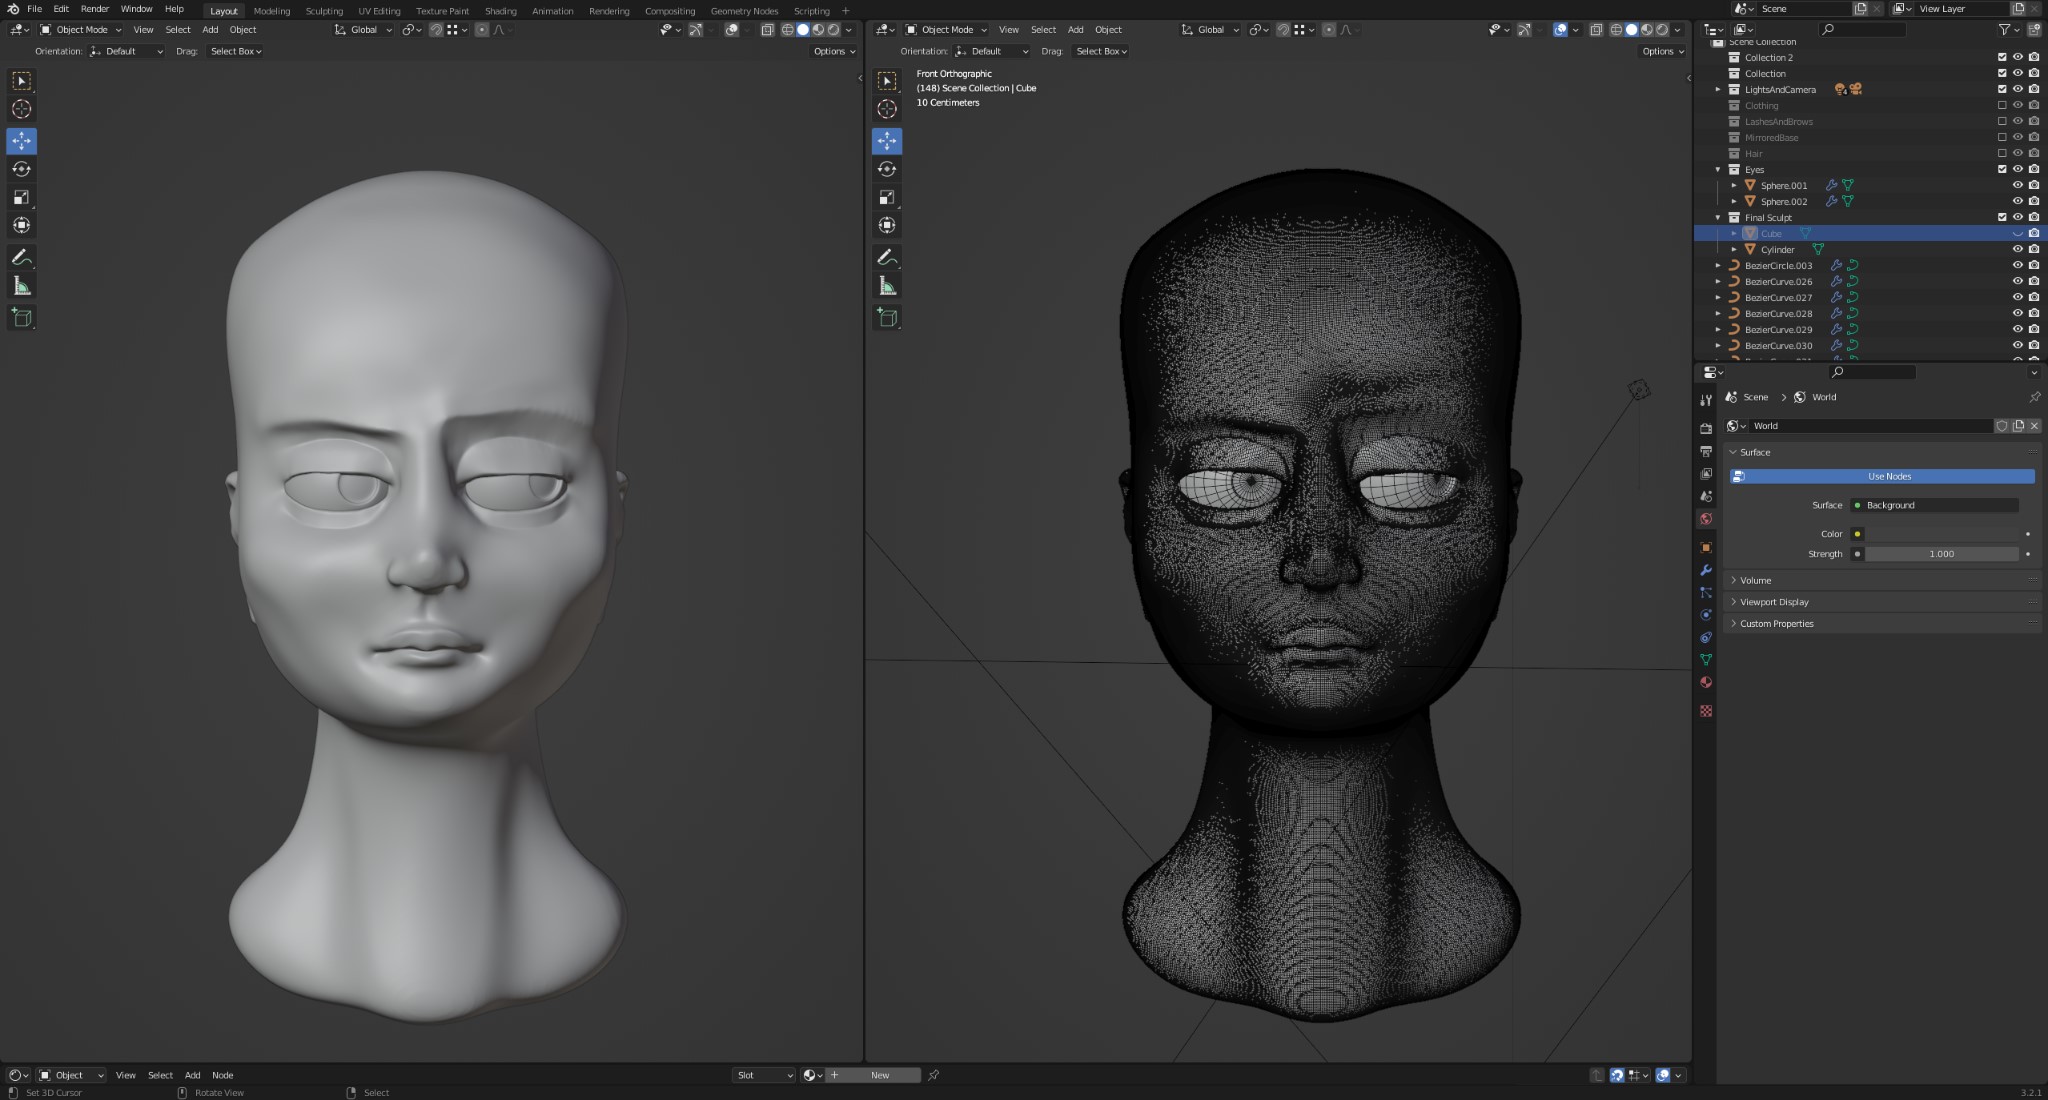
Content material with the essential composition, I moved on to the main points.
Eyebrows and eyelashes have been made with easy planes snapping to the pinnacle geometry after which given a “Solidify” modifier, making eyebrows and lashes so simple as potential.
Her hair was made with a curve form extruded alongside a management curve after which grouped with a number of different strands that I might management with anchors (fairly than positioning every strand individually), offering plenty of element with little effort.
CLOTHING
Her clothes was additionally made with planes that I formed round her head and neck after which gave some thickness utilizing a “Solidify” modifier.
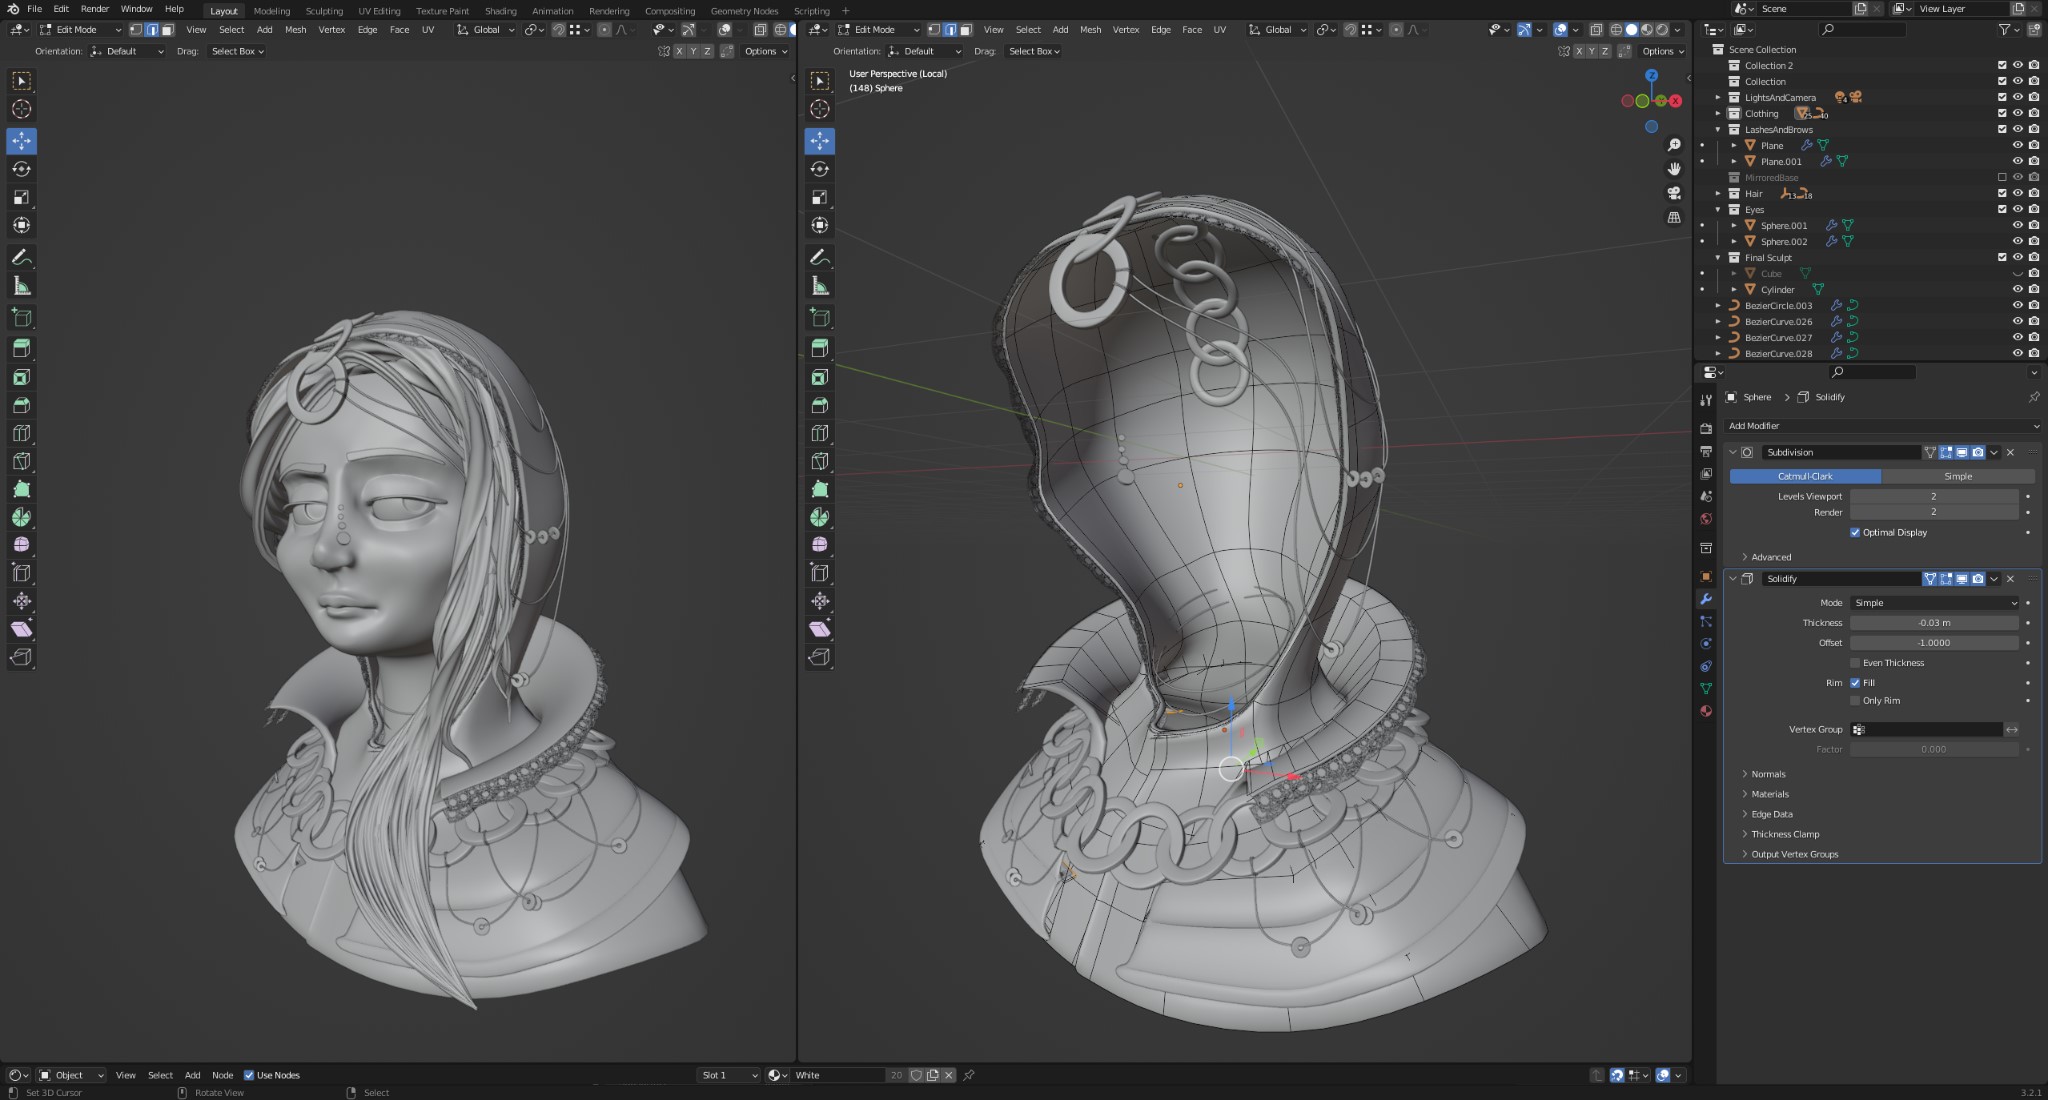
Clothes the character
Some further particulars have been created by creating an array of objects, choosing and duplicating an edge loop on the clothes, changing that edge loop to a curve, after which utilizing a “Curve” modifier to wrap the array of objects across the clothes (like with the lace across the hood, for instance).
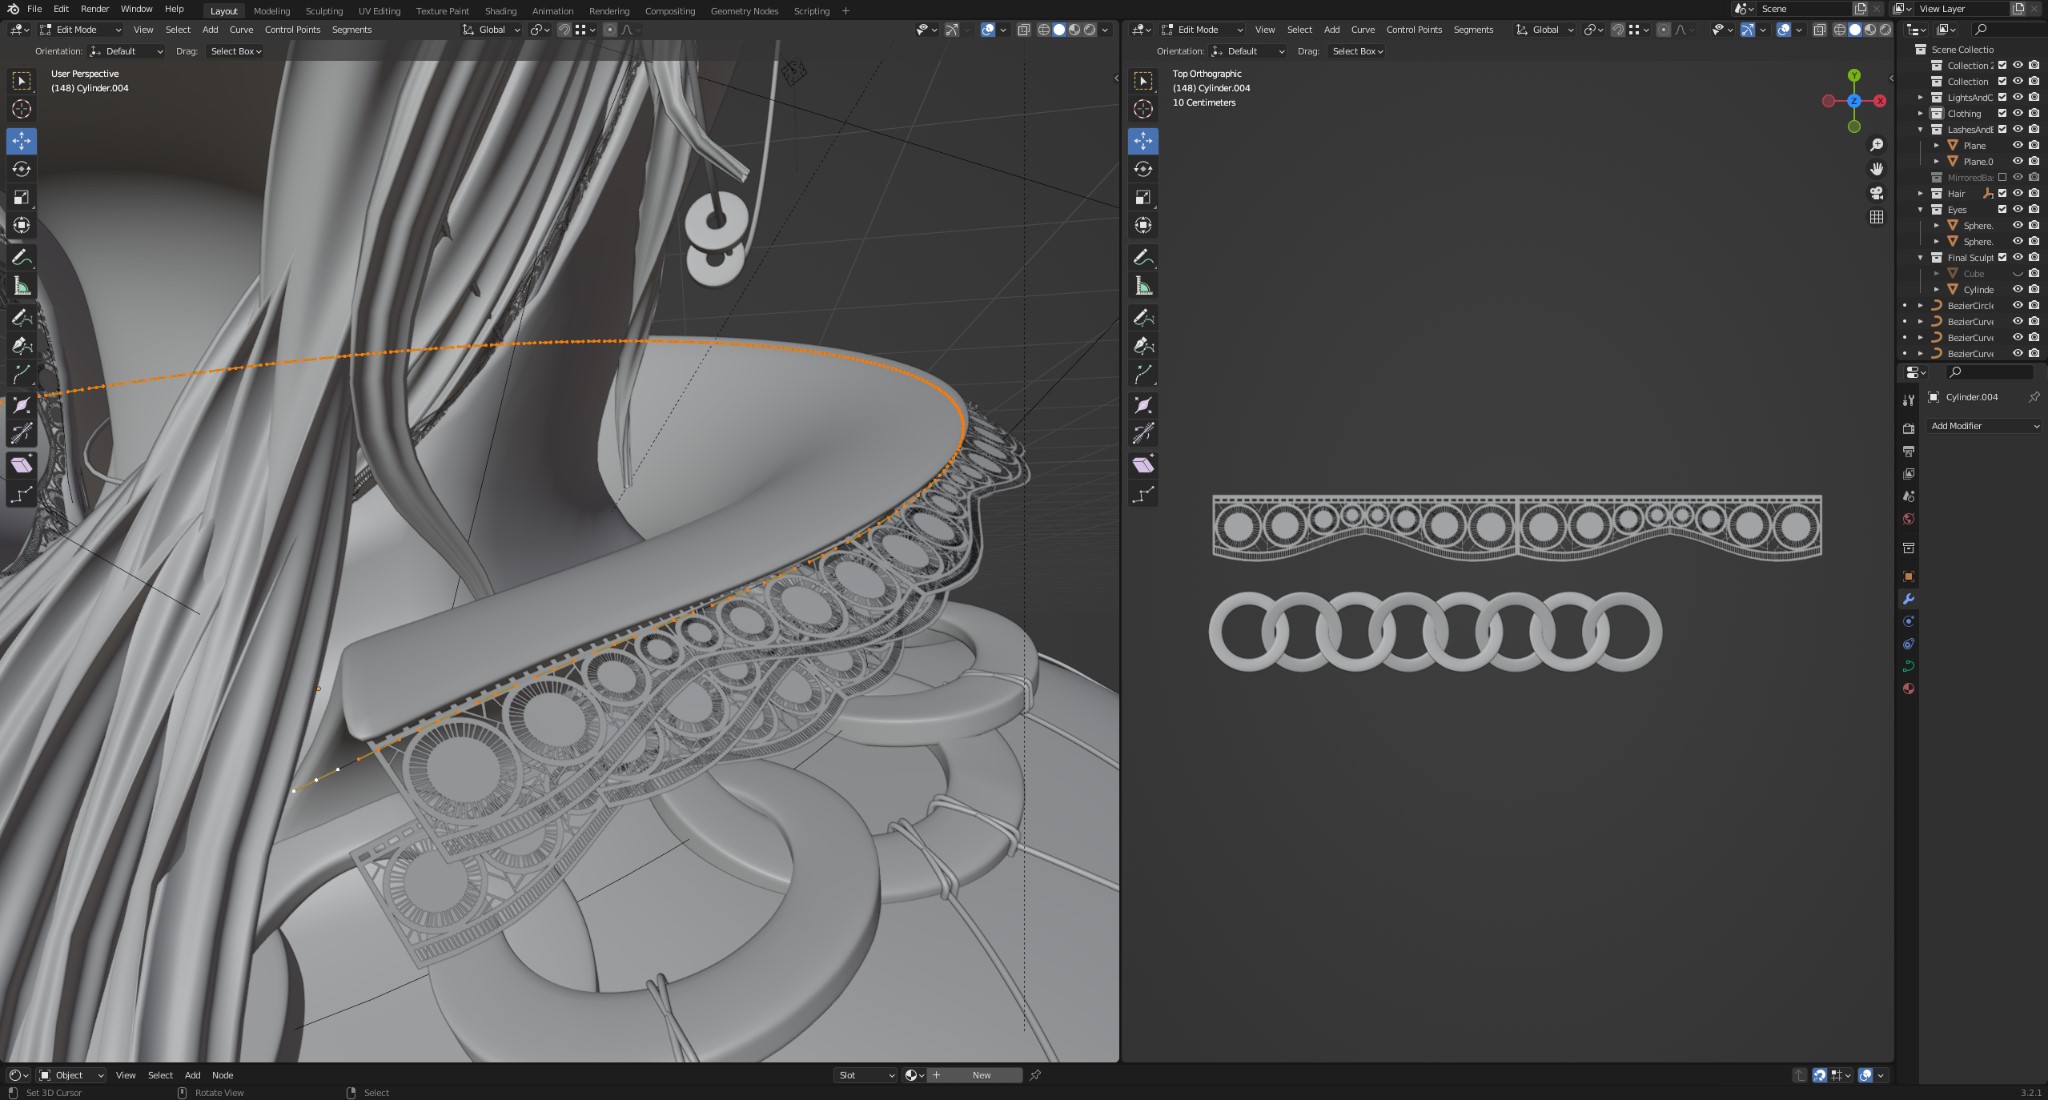
Detailed shot of lace trim
MATERIALS AND RENDERING
There is not a lot to say on this matter since I stored this so simple as potential. There are solely 5 supplies in complete since I wished the lighting to do a lot of the coloring, and they’re all easy principled shaders with various roughness. The pores and skin is the one exception because it has some subsurface included.
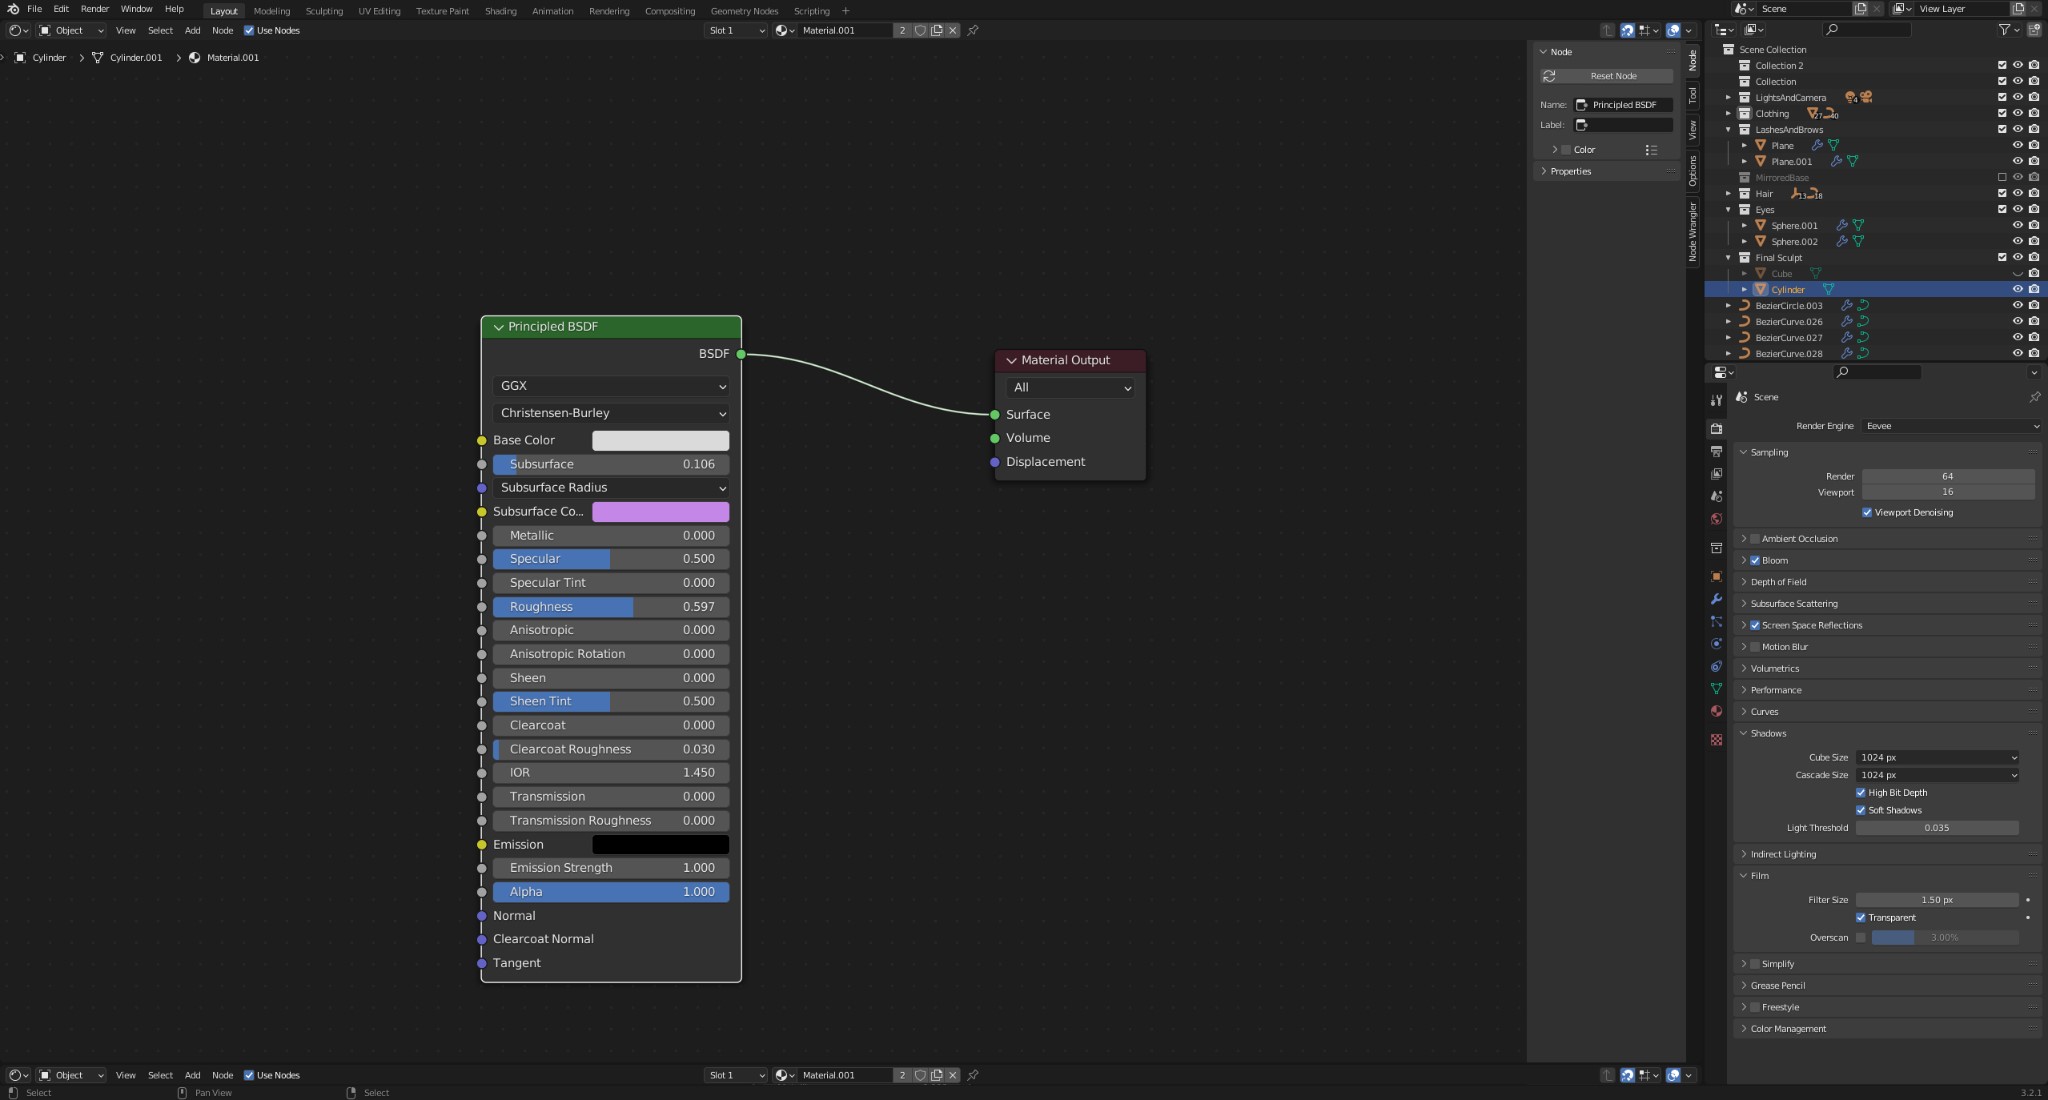
Pores and skin materials setup
As soon as my supplies have been assigned and arrange, I stored a lot of the render settings for Eevee at default. I made certain Bloom was on, in addition to Display House Reflections, and rendered with a clear background.
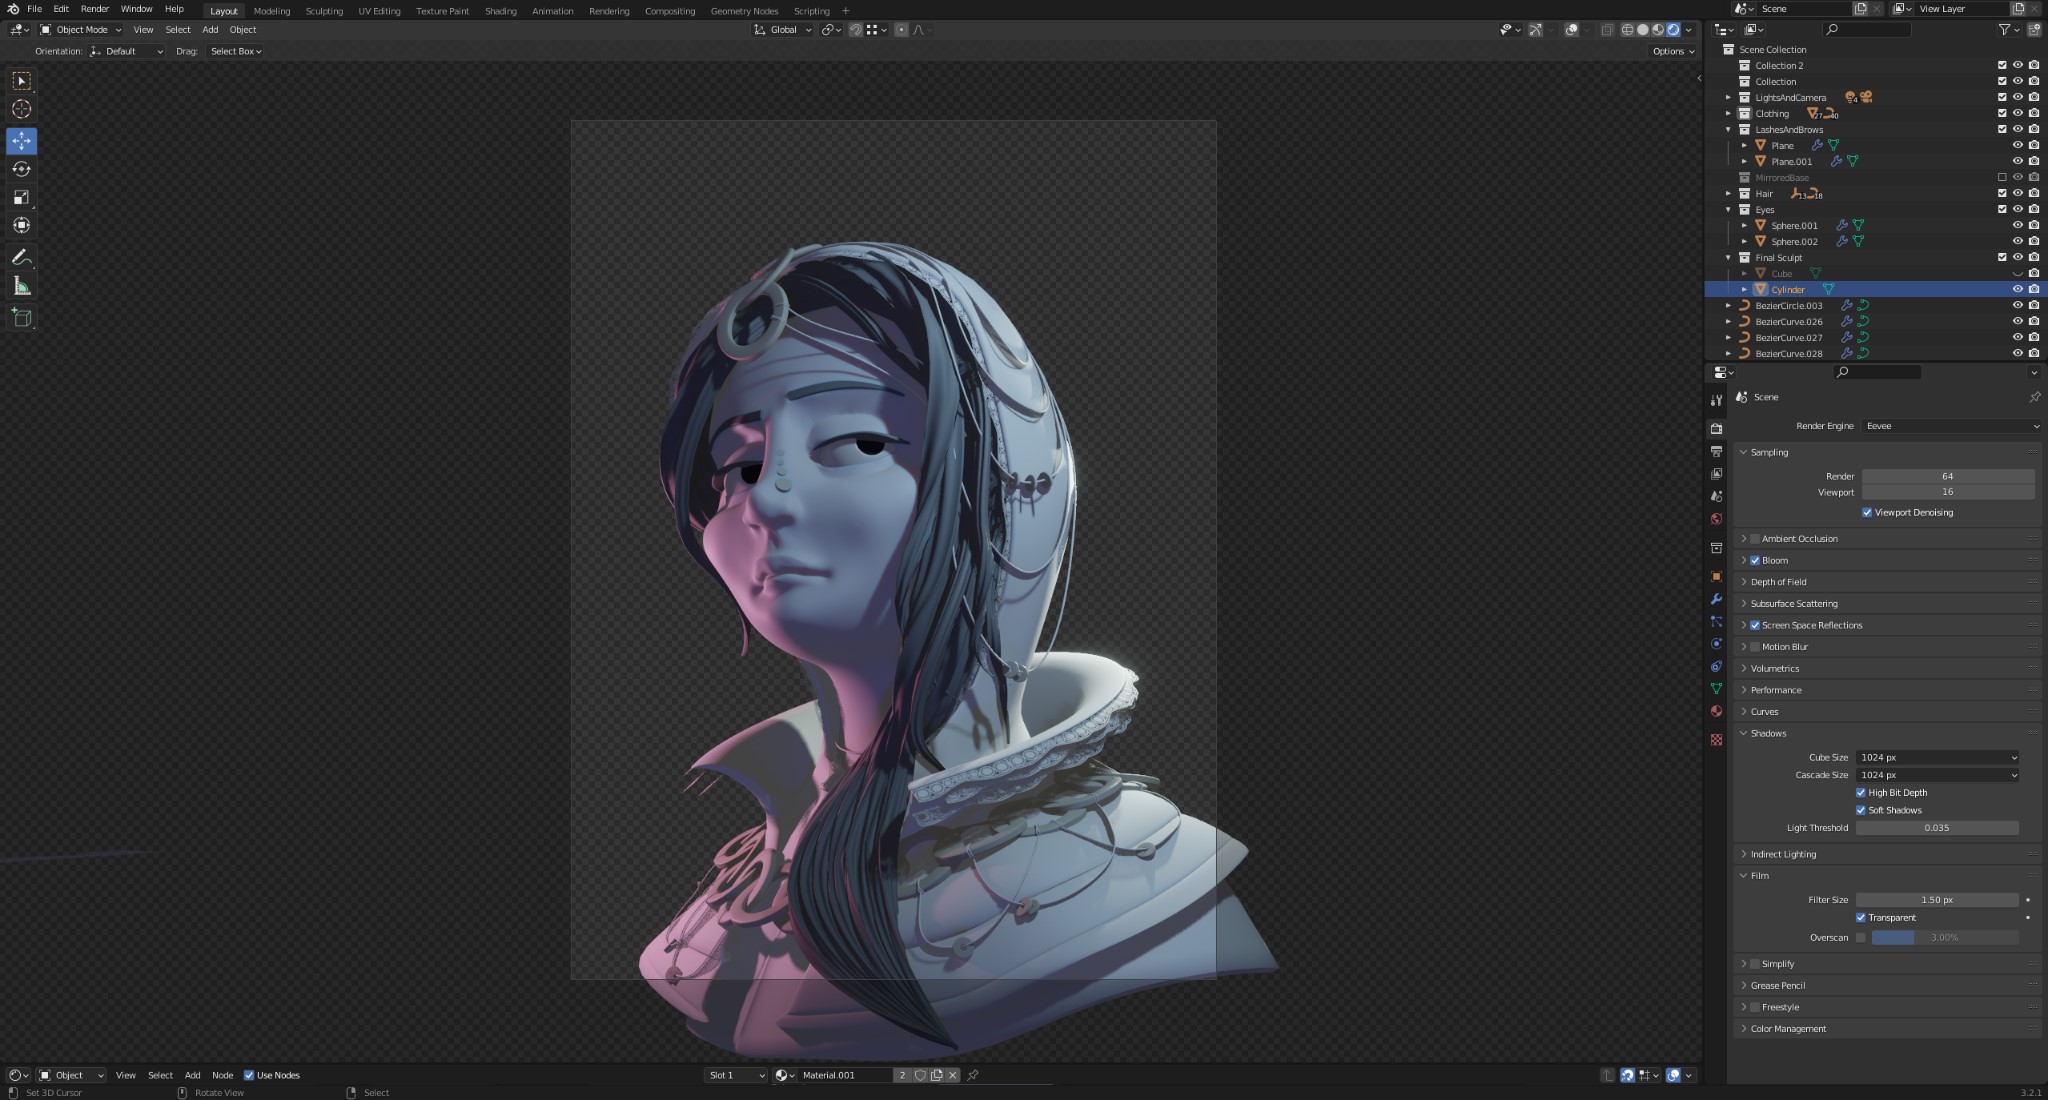
Last digicam composition
OVERPAINTING AND FINAL COMPOSITION
As soon as the render was completed, I imported the picture into ArtRage and started portray over it by sampling colours from the render and utilizing them as a basis for additional element.
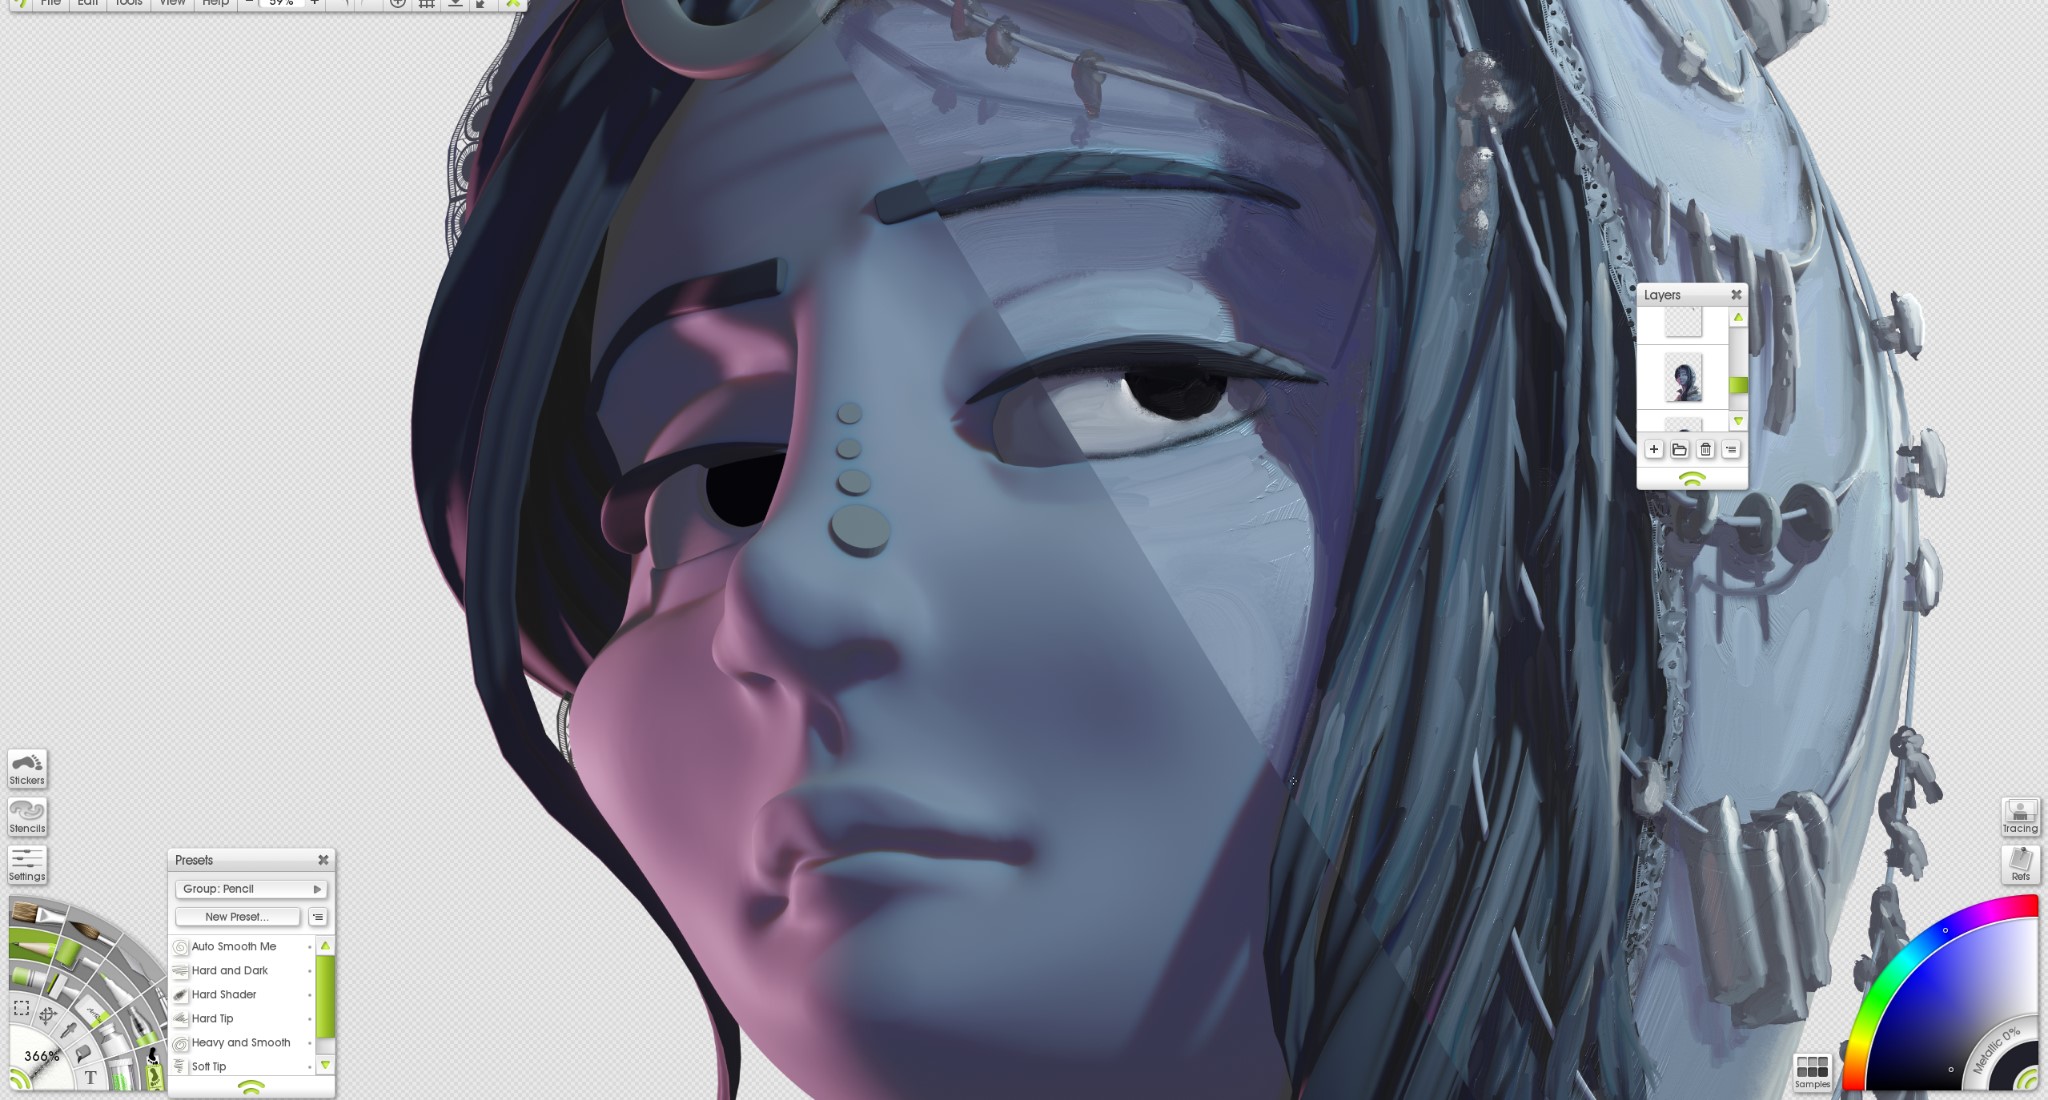
Portray in ArtRage
ArtRage is nice as a result of it provides a scrumptious texture to its strokes and fashions the way in which actual paint mixes collectively. Along with giving it the feel I used to be searching for, I additionally had the chance to repair any clipping points, refine any shapes, and add further particulars with only a few brushstrokes.
Comparability of render vs. painted


With a lot of the work accomplished at this level, I imported the ultimate paintover into Krita to create the background just because they’ve quite a lot of brushes that work effectively for that type of stuff. I added some coloured fog as a supply of the rim gentle, in addition to some cryptic textual content, and with that, the picture was completed!
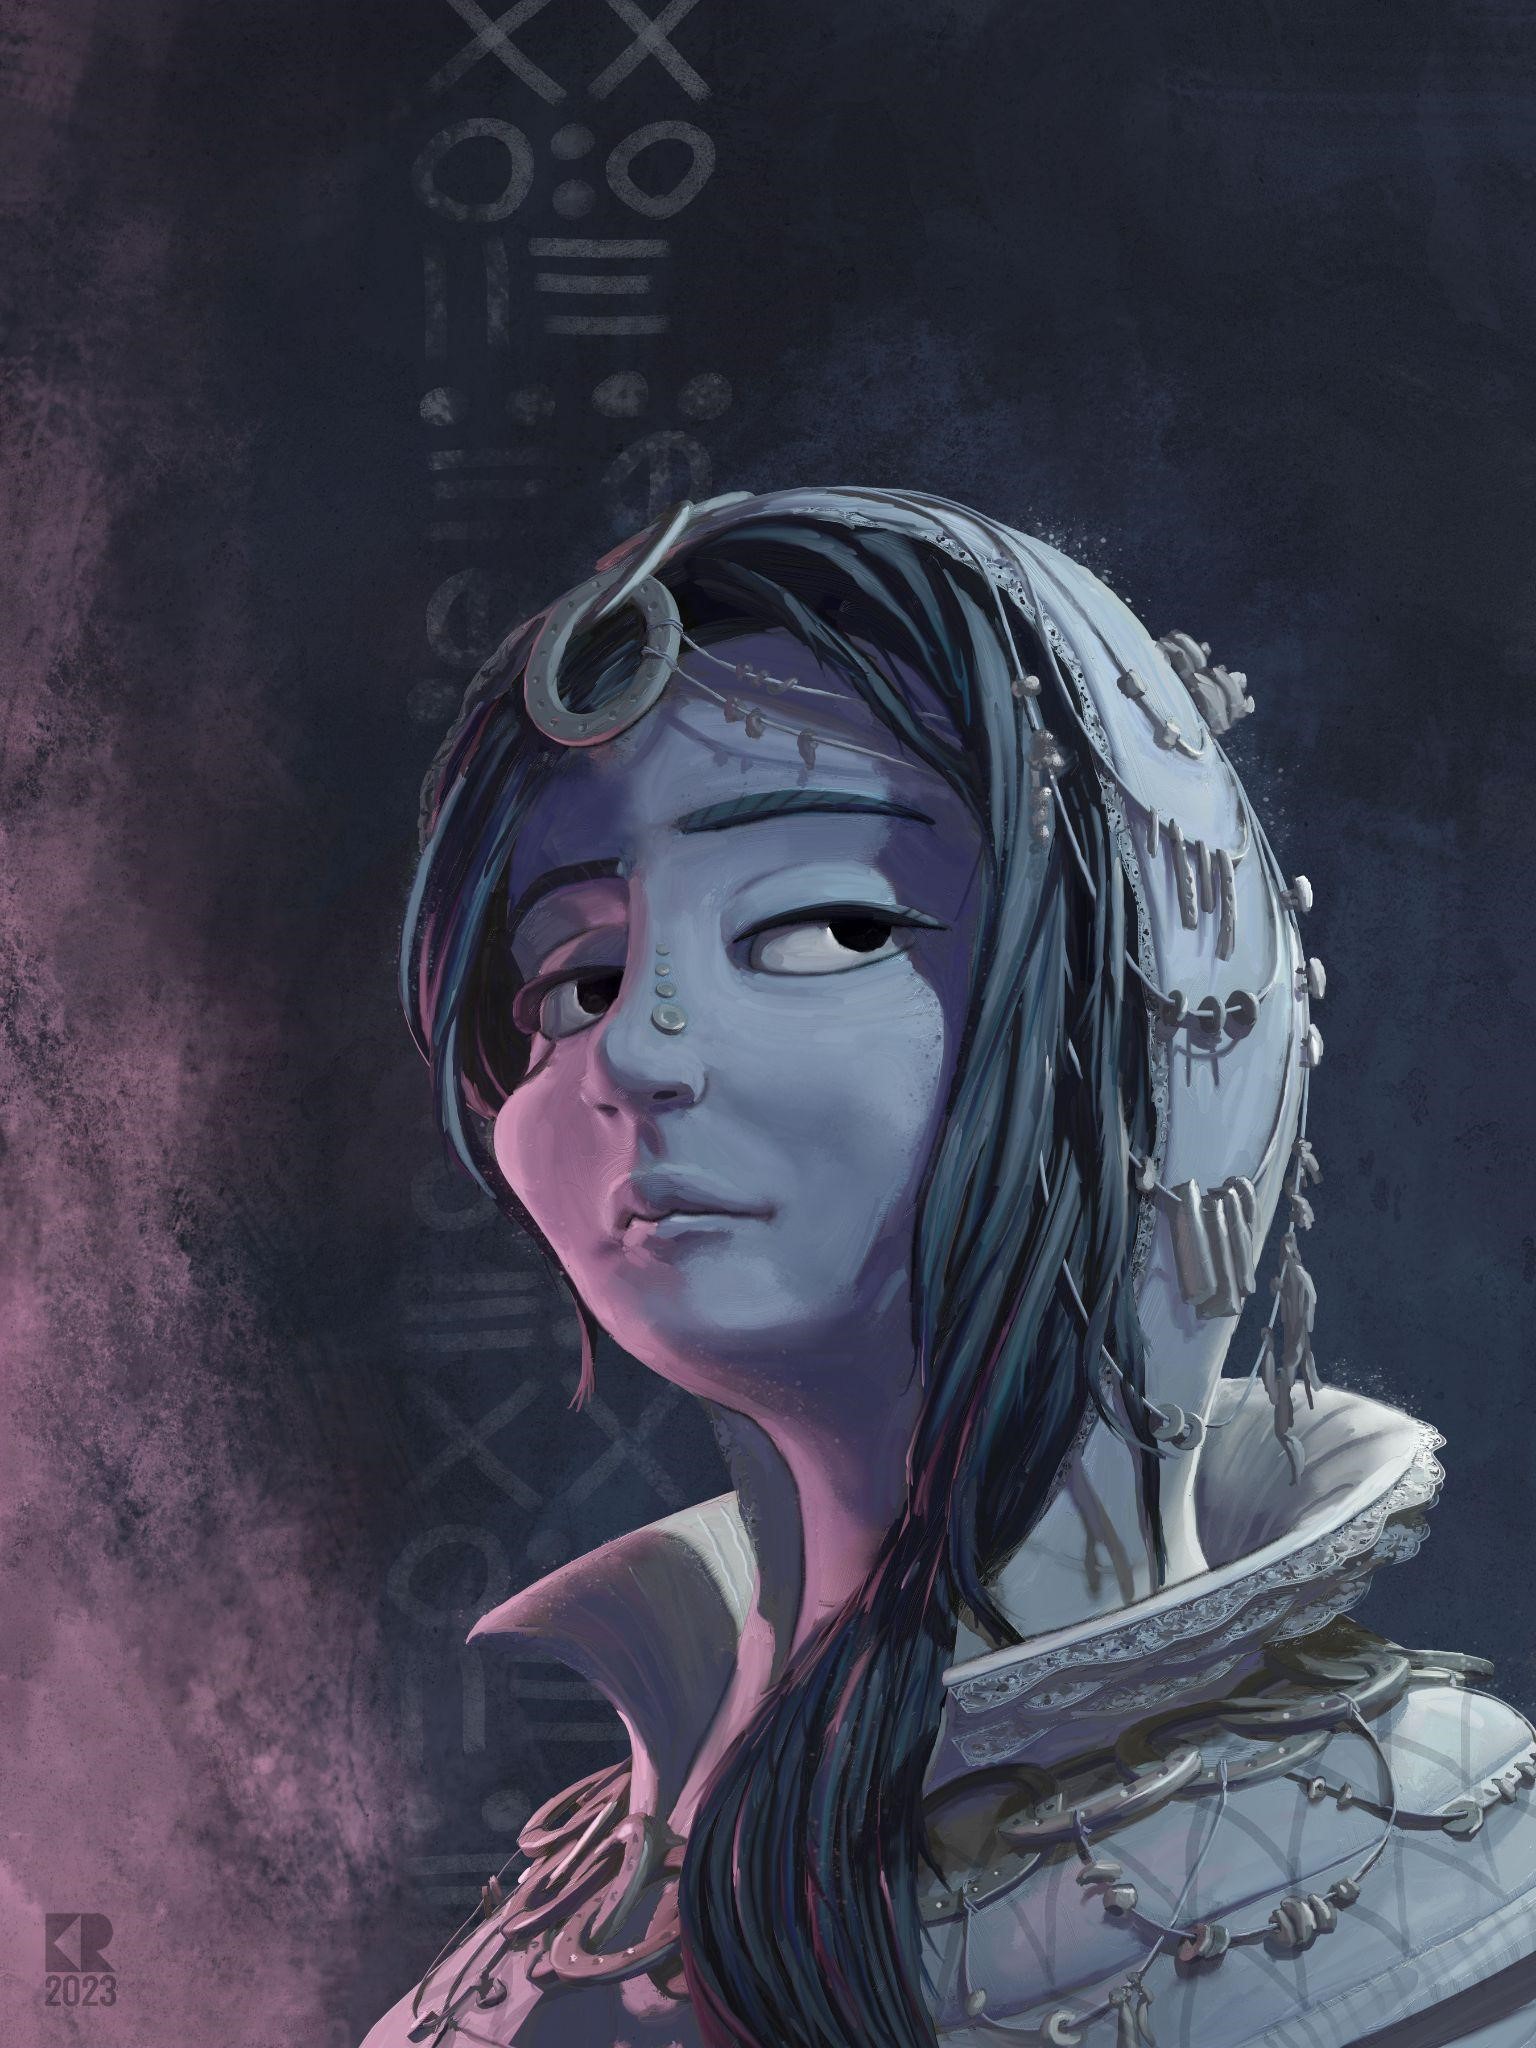
RENDER – THE MONGERS
I hope you discovered this beneficial or attention-grabbing, and when you have any questions, be at liberty to achieve out!
In regards to the Artist
Kevin Ruffenach, a 3D designer from Tulsa, Oklahoma. At present in search of to enhance his storytelling prowess.
