Lastly, Capcut for Desktop! Now that the FREE video modifying app CapCut is obtainable for Mac and PC, I put collectively a beginning-to-end tutorial for video modifying for inexperienced persons utilizing CapCut. That is my course of for modifying YouTube movies that I educate my purchasers and college students!
Some product hyperlinks on this publish are affiliate hyperlinks, and I might be compensated while you buy by clicking our hyperlinks. Learn my disclosure coverage right here.
CapCut for Desktop
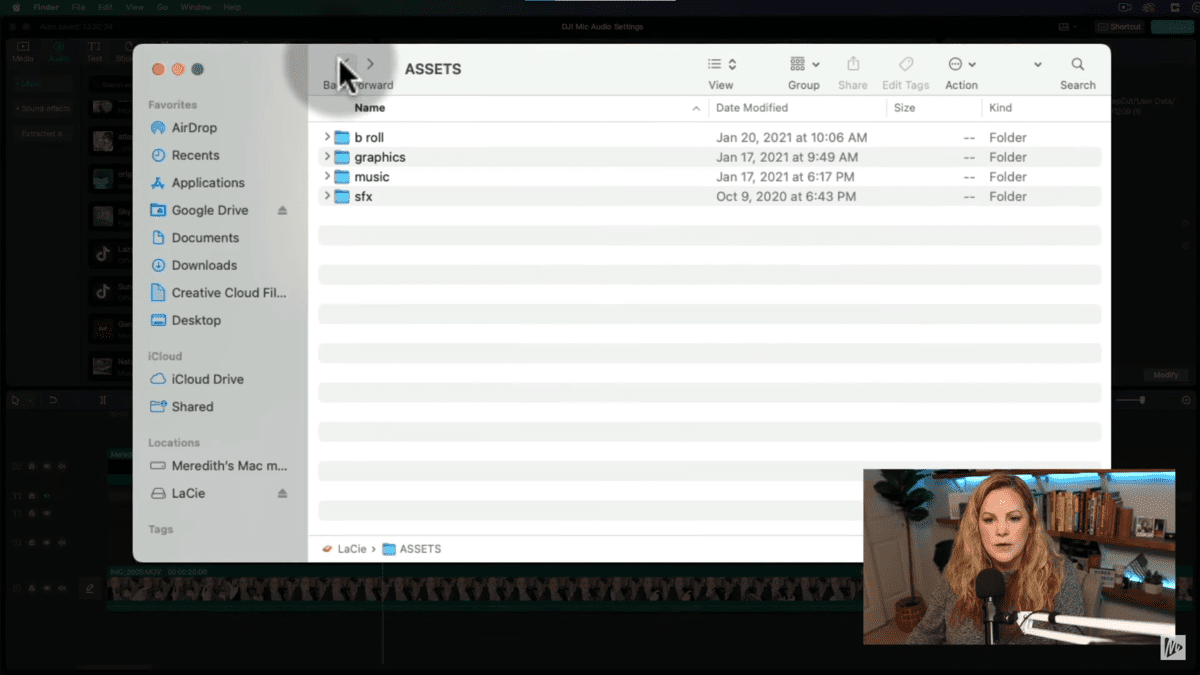
The very first thing you’re going to do is to try the main points on the right-hand aspect. There’s a button on the backside referred to as “modify” that you would be able to click on. It’s a good suggestion to call your mission so it’s simple to search out later and preserve your entire initiatives organized. Talking of group, I preserve all my media in its unique place. Now I’ve all of my YouTube content material organized on my exterior exhausting drive.
Modifying Settings
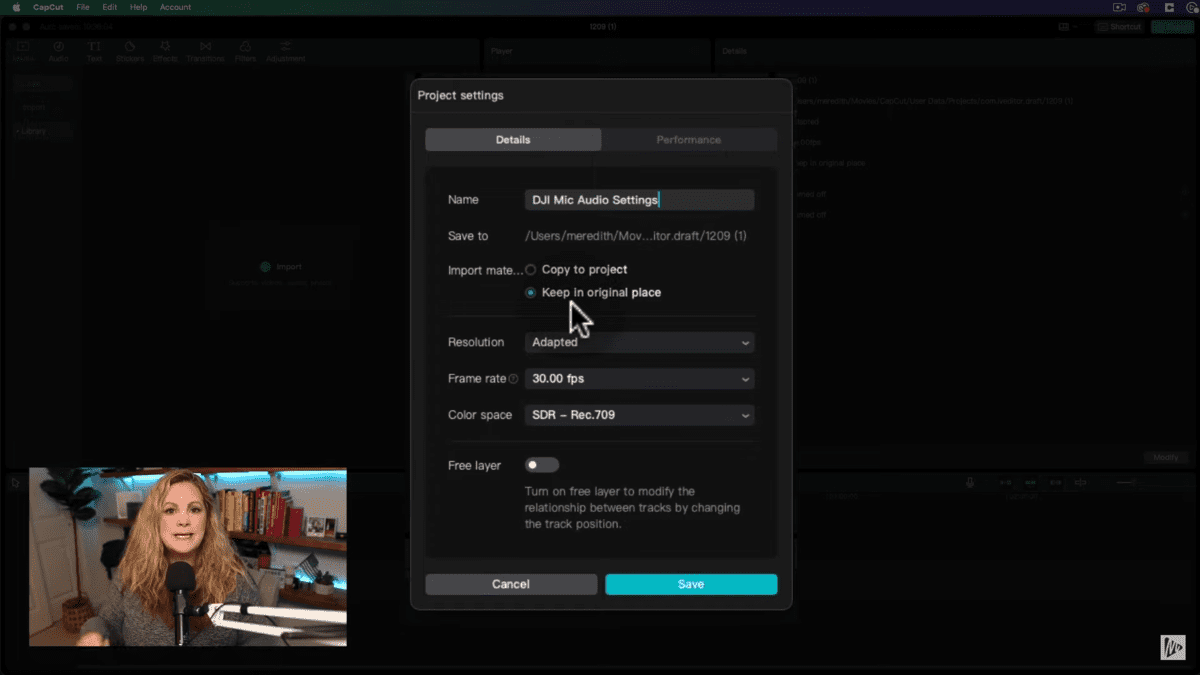
Underneath the decision, we are going to select “Customise” right here as a result of CapCut is superb for modifying your YouTube movies. And I wish to make certain this video is ready up for YouTube. So it’s 1920×1080. That method, the mission might be a 1920×1080 YouTube video.
The body charge might be 30 frames per second, the colour house will keep at SDR, and the free layer might be a captivating setting. I like that they included this as a result of you probably have it turned on, then CapCut for desktop acts slightly bit extra like an precise desktop editor, the place you possibly can transfer your clips round in your timeline from one monitor to a different actually shortly. After getting your mission settings arrange, simply hit save on the backside.
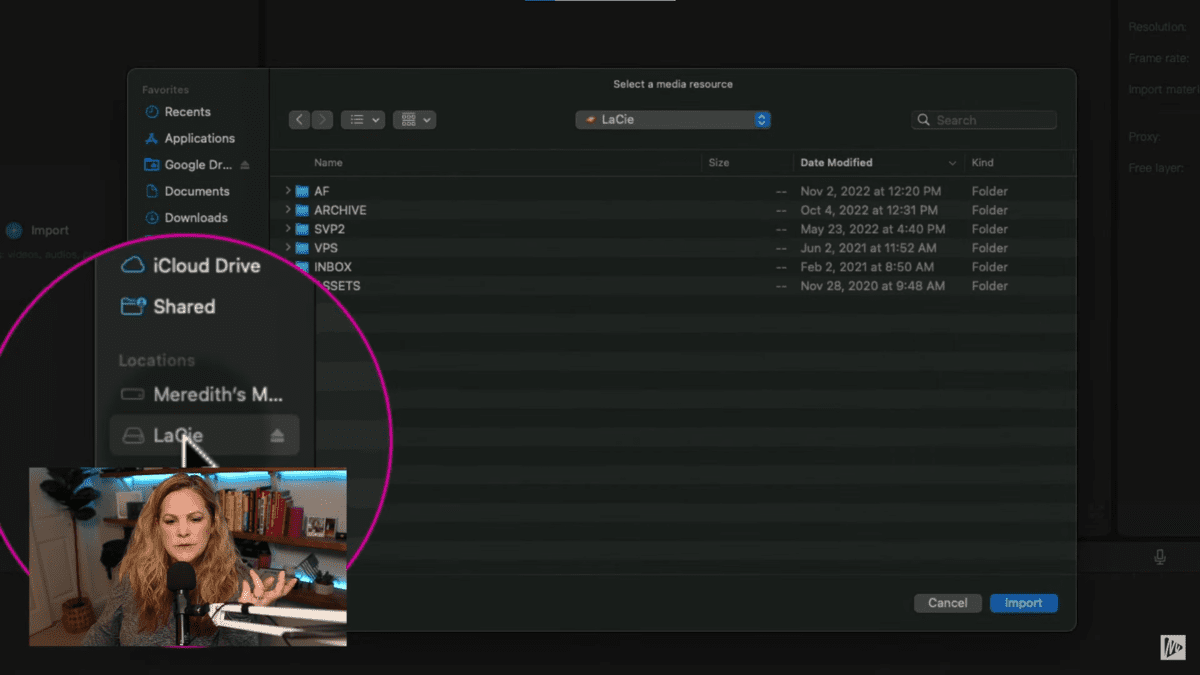
You clearly must import your media, so click on the blue plus button, import, and that is going to open up the folders. I’m going to go to my exterior exhausting drive, my inbox, and the video that I’m modifying, which is DJI mic settings. I’ve two screencasts and two common movies that I shot on my cellphone. So we’re going to have A roll and slightly little bit of possibly B roll plus a screencast. I chosen the recordsdata and the precise video recordsdata that I’m going to import, and I’m going to decide on import.
Now, I’ll educate you precisely what I educate my college students inside Social Video Professional in my 30 days to a thriving YouTube channel course. That is the video modifying methodology that I take advantage of and educate others, and I name it the BFF modifying methodology. So we’re going to start out with the letter B for fundamental. The hyperlink to the BFF methodology cheat sheet might be proper right here.
To make your fundamental edits, we have to get that footage down onto the timeline. So I’m going to start out with the primary clip that I recorded. I’m simply going to pick it and drag it all the way down to the timeline. That is going so as to add all the clip to my timeline.
If I wished to simply add one piece or one part of this to my timeline, I may simply drag these bars on the left and proper to shorten that clip slightly bit after which deliver it all the way down to the timeline. And it’ll simply be that one little snippet. After which if we zoom in on the timeline, we now have the clip down under. We’ll see it in our participant window in addition to the waveforms down there.
Break up Clips
So you possibly can see once I wasn’t speaking after which once I was speaking. I’m going to make use of slightly little bit of it as B roll. However we’ll get to that in only a second. That is would be the starting of the video. So I’ve this spot the place I ended speaking, and I would like to chop this as a result of proper in between right here, I type of tousled my phrases or I began over once more.
So, I’m going to separate this clip as a result of we have to chop up this complete total clip to maintain the elements the place I really stated what I meant to say and do away with something the place I made a mistake or I restarted. That is the essential edit. We’re making a tough lower.
Trim Clips
And as I’m going alongside, I’m simply discovering the place I wish to break up the clip utilizing Command B or simply hitting that break up button over right here after which deciding on what I wish to delete and hitting this little garbage can, after which my two clips come again collectively once more. And I don’t have a bizarre house the place I deleted one thing. Another approach to clear up your cuts like this may be to simply drag the tail finish over to the place you need the clip to really begin.
So that you’re both taking it like a bit of tape and chopping it up with scissors and eliminating the elements you don’t need. Otherwise you’re simply trimming the ends of that piece of tape if all you want is slightly little bit of an edit firstly and on the finish. It actually will depend on the way you shoot your video and what number of errors you make while you’re taking pictures your movies.
Rearranging Clips on Timeline

Then, I wish to transfer my subsequent clip to my timeline, and we’ll do the identical actual factor to that one. So I’m simply going to pull it down. And I’m going to put it proper between my intro and my outro. We will combine issues up later, however simply to make it simpler on myself I’m going to place it proper the place I would like it on this specific edit. So, I’ve just a few clips on the finish, just a few clips firstly, and there’s an extended clip that I’m going to cut up subsequent.
Now, I’ve a tough lower of my intro and my outro and the primary a part of my A-roll. I wish to level out that all the pieces you’re doing along with your clips on CapCut on the timeline is undo-able. So should you make a mistake, should you miss this right here and also you’re like, “Oops, that’s too far,” all it’s important to do is hit Command+Z and it’ll return. If you wish to re-edit the entire thing, that’s superb too.
Your entire clips which might be up right here in your media space, you’re not doing something everlasting to them. You’re simply pulling them into the timeline, chopping them up like a bit of tape, after which rearranging them. So, you might seize these clips, pull them up, and drop them in wherever you need them to go. After which should you can’t bear in mind the place it went, simply hit undo command Z. And can return to the place it was earlier than.
Lock, Conceal, and Mute Observe
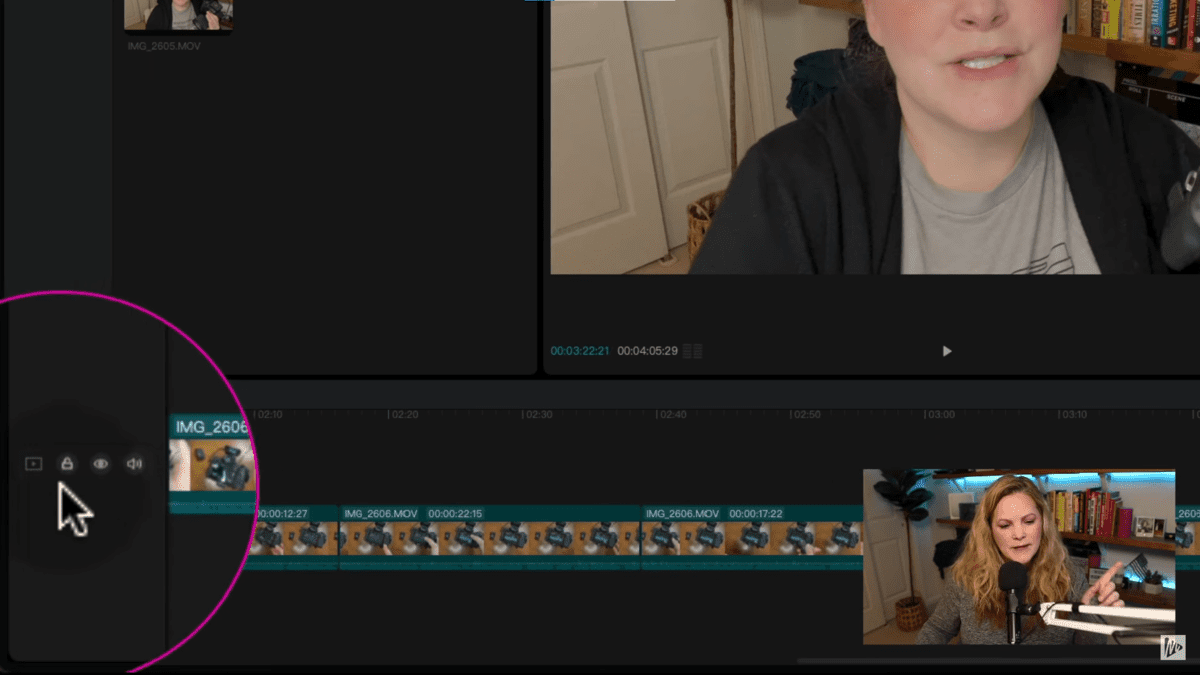
You may also use the features method over on the left to lock your monitor. When you’re including your B-roll, otherwise you’re enjoying along with your background music, you possibly can at all times lock a monitor so that you simply don’t by accident do one thing. You may also make your monitor invisible in order that it isn’t viewable within the preview window and mute a complete monitor.
Import Screencast to Timeline

Subsequent, I’ll want to drag in my screencast. My screencast is already edited as a result of I wish to edit my screencast in ScreenFlow. So I simply must import that. I’m going to seize my screencast and pull it down, I would like it to go proper in between my clips. After which I’ve one other little snippet to place proper after that. So I’m going to pull that down too. So now I’ve an entire tough lower.
Relying in your wants or your wishes for this video, you might be finished with it, you might export it to YouTube. However what about textual content and results and background music? You could wish to fine-tune this slightly bit and make it look slightly bit extra polished and slightly bit extra skilled. So we’ll speak about fine-tuning in only a minute. If you’re finished and wish to export your video, we’ll speak about that on the very finish.
Modifying Textual content in CapCut for Desktop
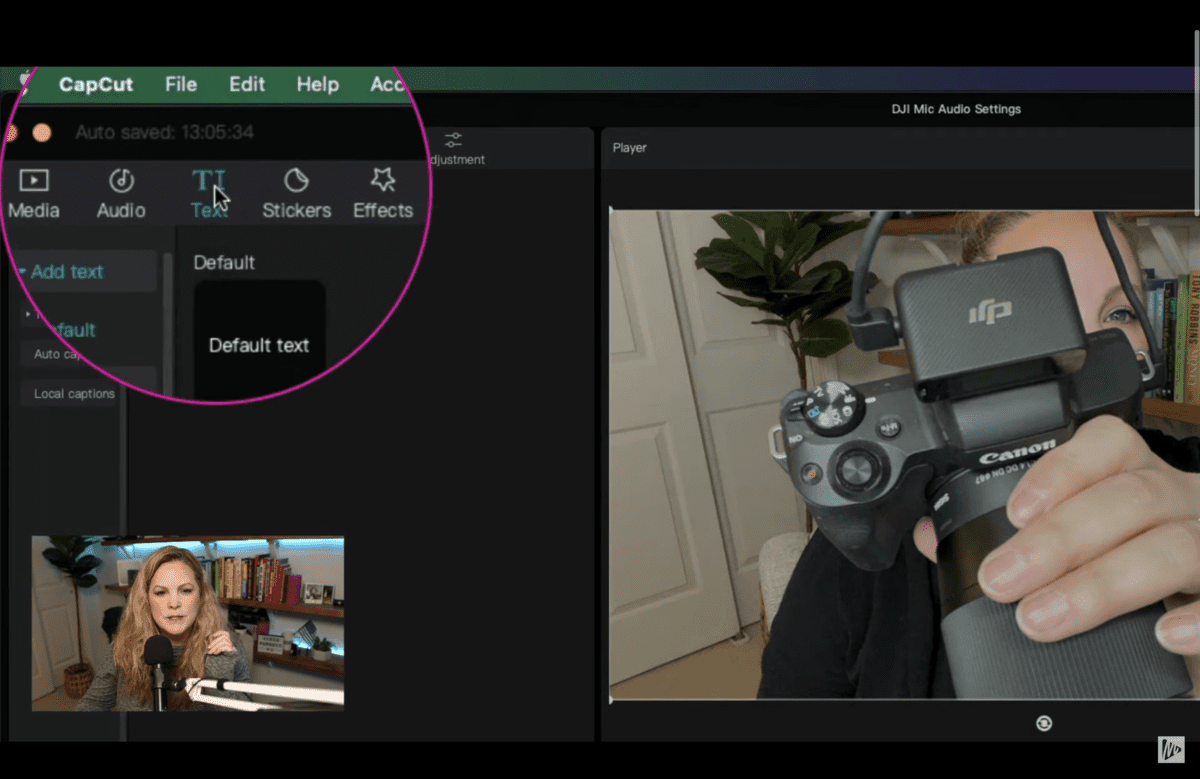
So let’s speak about textual content. Up right here on the very high, select textual content. And we’ll have a default textual content, we are able to add this to our mission by simply hitting the plus button. That may add slightly textual content field and you’ll see it on the participant. You possibly can see it down right here on our timeline. And we are able to deal with this identical to it was a daily clip. We will transfer it round, we are able to put it wherever we would like it to go, and we are able to additionally change the size simply utilizing the trim handles on both aspect. I’m simply going to double-click on the textual content I’ve chosen within the timeline.
So I may simply seize it and transfer it someplace, however I wish to put it proper again within the center. I might be utilizing my guides. If I double-click, then I can simply fill within the textual content field and begin typing. and I can edit the textual content field on the right-hand aspect and I can select what font I would like. I can use the slider to vary my font measurement, and
I may additionally simply kind within the quantity or use the arrows right here and we now have the “Model” button.
Textual content Designs
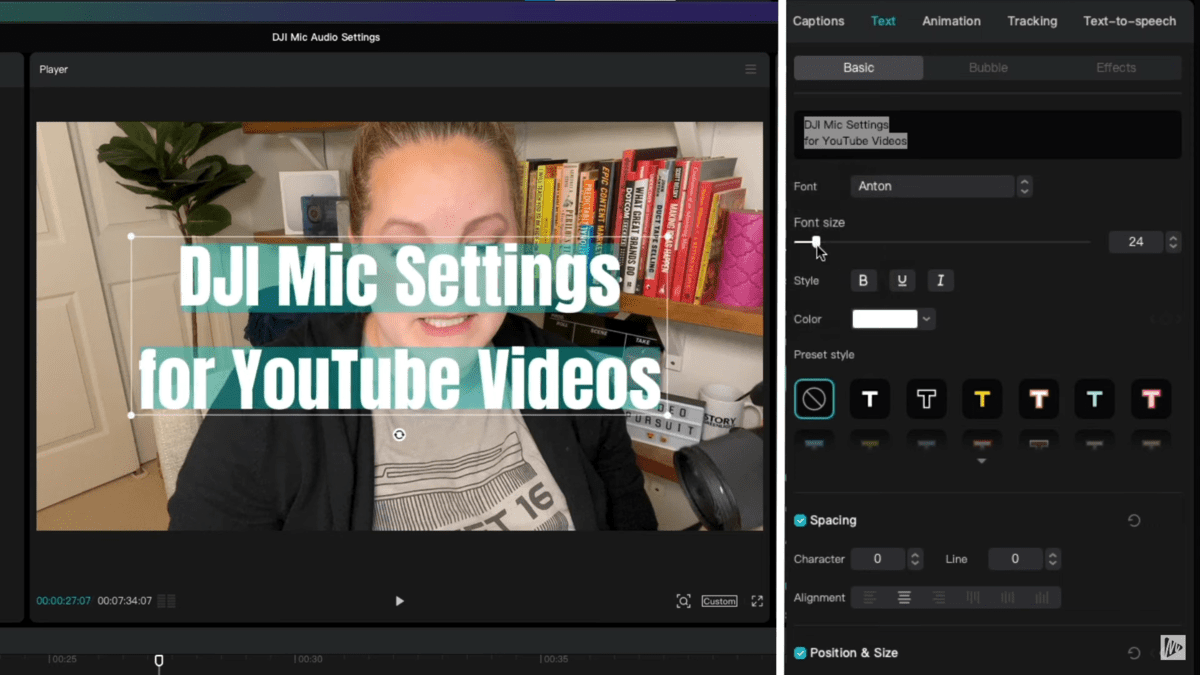
So we may make it daring, we may make it underlined, or italicized. We will change the colour. There are some preset types. So should you use the CapCut for deesktop, these types turn out to be useful. So you can also make it with an overview, or you possibly can reverse it.
We now have character spacing, which goes to unfold your characters out. We now have line spacing, which is one thing that you simply would possibly wish to do. That is going to type of depend upon the font that you simply select. We now have place and measurement. You possibly can add a customized stroke or define, and likewise textual content shade and textual content shadow. You have got all of those textual content settings that are actually nice, as properly different choices, after which simply use among the default ones there.
And you then even have premade textual content results. These are like fundamental title screens and textual content that you are able to do in just about any editor, however CapCut has a few different options like animation the place you possibly can have it fade in/out. When you’re aware of text-to-speech choices on TikTok, for instance, you even have these inside CapCut.
Captions In CapCut for Desktop
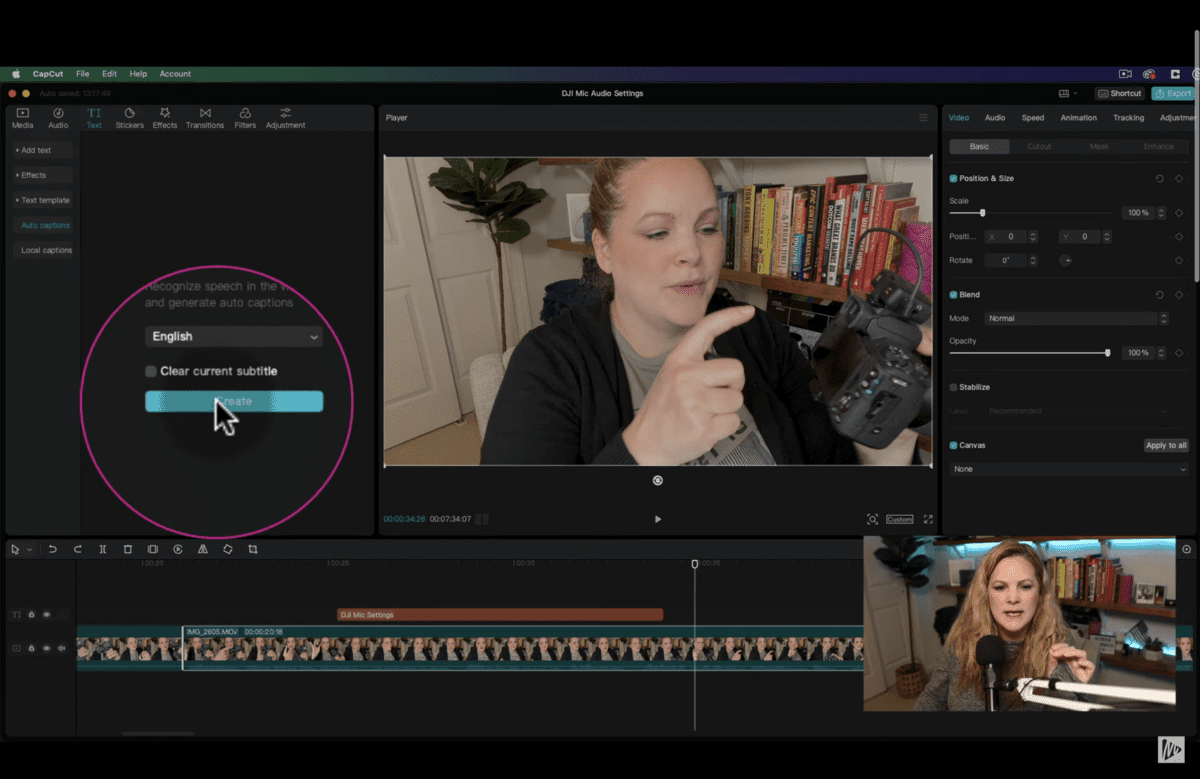
The opposite textual content choice I wished to indicate you is the captions. Come down over on the left to auto-captions, and hit create. It’s best to now see one other row in my timeline, and people are the captions. Now I can undergo and simply verify them. You might click on on one, double click on and edit it up there if it transcribed the phrase fallacious or if you wish to capitalize one thing while you edit your styling. That is the place I actually just like the preset types from CapCut. Then all it’s important to do is simply select a mode or give it your personal customized type. Then, it is going to apply to all the captions in your video. It’s really easy.
Add B-Roll to Timeline
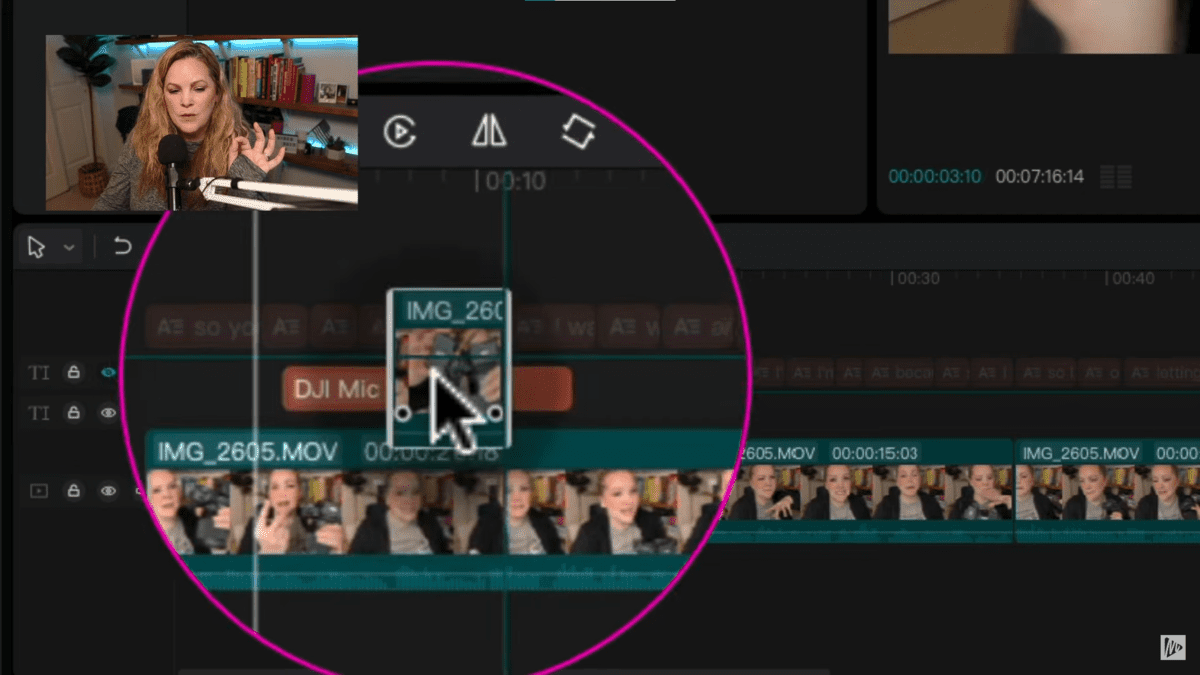
One other widespread perform while you’re modifying movies, particularly for YouTube, is the addition of a B-roll. That’s the place you might have some further footage that goes excessive of your foremost footage, your A-roll footage. On this case, I’ve slightly little bit of footage right here firstly of my video that I wish to use as B-roll.
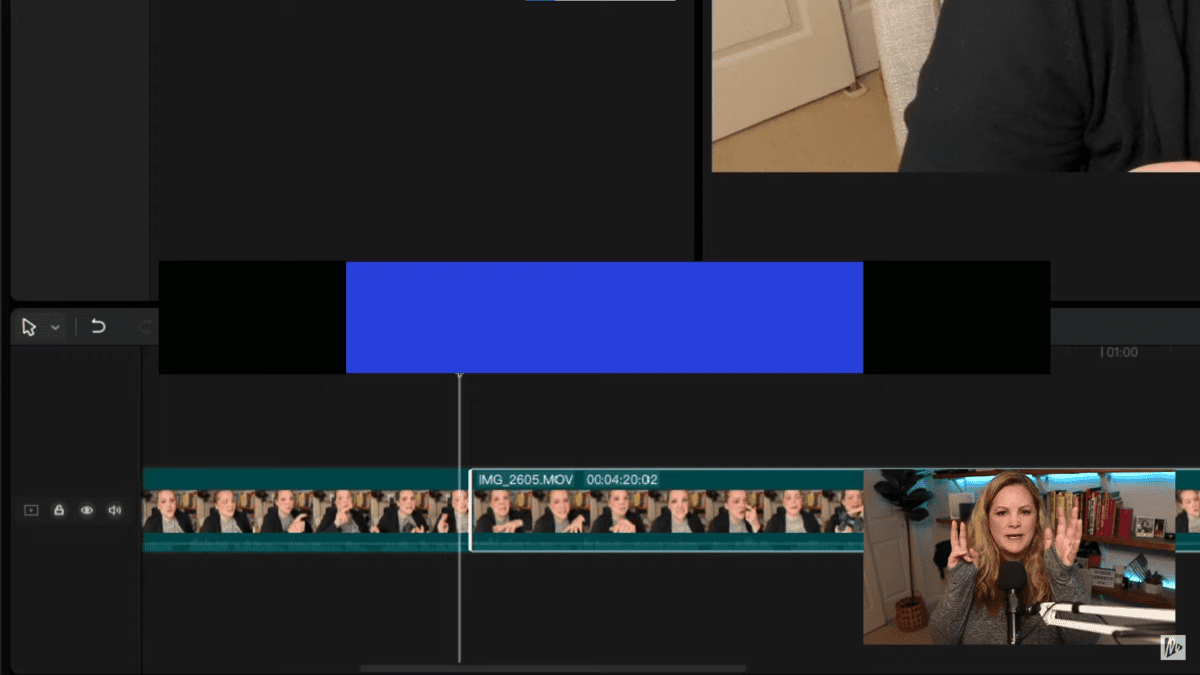
Now, I’ve slightly clip of B-roll that I wish to have excessive of the place I’m talking. So I’m simply going to seize the clip, I’m simply going to maintain my mouse button down, I’m going to carry this down, and if I simply preserve dragging it locations, it’s going to provide me these guides and ask me the place I wish to put this factor.
It simply created a complete new monitor, so I’m going to deliver my title up a monitor. These tracks are type of swapping locations. So I’ve my title excessive of my B roll. I don’t actually have a lot different B roll so as to add in. However all it’s important to do is add your media, determine what you wish to add, after which simply drag it down. If I wished this piece to be B roll, I simply drag it down and depart it on the monitor that I would like the B roll to be on. It’s really easy. On this fine-tuning section, I’m type of placing all the pieces collectively to finalize all the pieces.
I wish to guarantee that all of the little cuts in between my clips are good, clear, and clean. That often means zooming method in. So I’m simply trimming the ends just a bit bit. At this level, you’ve finished your fundamental edits, your fine-tuned edits, and the ultimate F within the BFF methodology is getting slightly bit fancy.
Decrease Thirds and Background Music
What I’d like to speak about right here is including decrease thirds to your movies and including background music. And that is fairly simple with the textual content perform. You possibly can simply add decrease thirds by selecting a textual content template, and even simply coming in and utilizing common textual content.
So you might have your textual content, animation, and decrease third. There’s background music inside CapCut that you need to use. All it’s important to do is locate the sound you wish to use. Add it with the plus button and it’ll add to the monitor and now you might have a background audio monitor.
I don’t use any software program put in background music as a result of I don’t know what the rights are to that music. And I at all times wish to guarantee I’m utilizing royalty-free background music. I take advantage of Epidemic Sound for this. That method, I do know that the background music that I’m utilizing on YouTube, Tiktok, Instagram, Fb, or wherever it will get uploaded, shouldn’t be going to have any copyright claims or copyright strikes.
I do know I’m protected that method when utilizing Epidemic Sound for my background music. So let me simply pull one thing in from my Epidemic Sound library, so it’s dropping proper in on my timeline. Then what often occurs is that the music is method too loud, proper? What we have to do is deliver the quantity down slightly, and you’ll both seize the little quantity line and you’ll see the little arrows that pop up.
You possibly can seize it and simply drag the entire thing down, or you need to use the audio modifying pane and drag the quantity sliders up and down. So while you’re prepared, up within the high proper, now you can select to Export.
Export CapCut Venture for Desktop
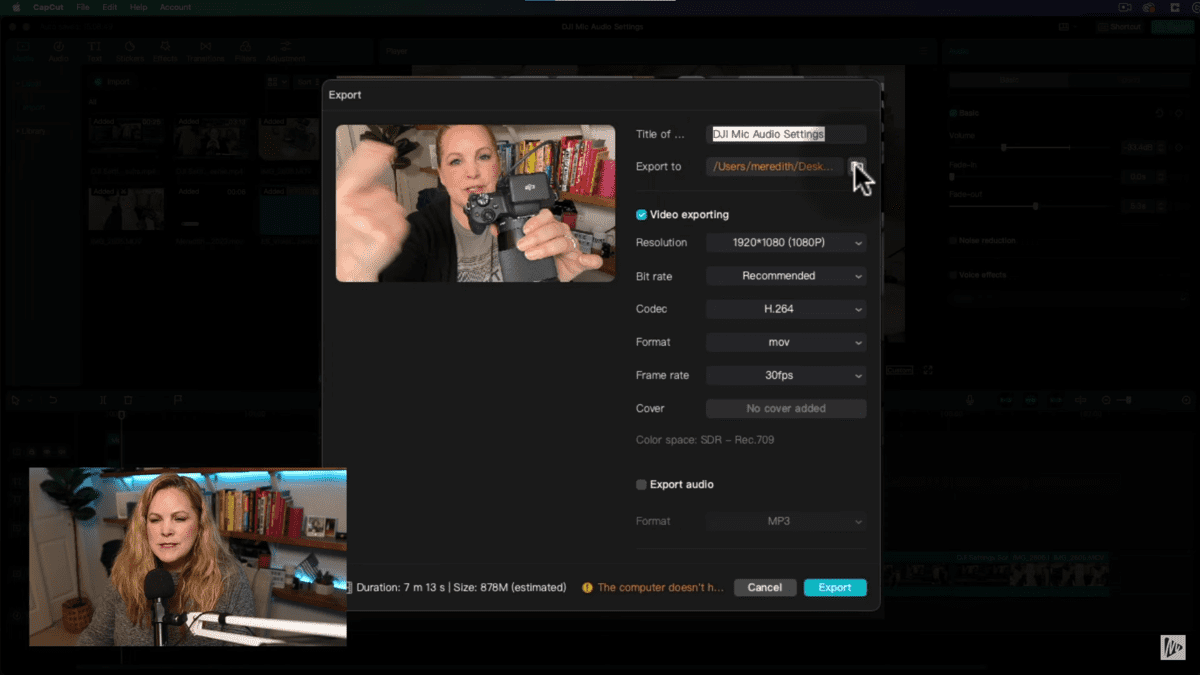
CapCut desires to know the place we should always export this video to. In order that’s the place the video’s closing model will go. For me, I’m going to place mine proper on my exterior exhausting drive. So my mission is at 1920×1080. The decision doesn’t want to vary. That’s how I wished the mission arrange and that’s how I would like the exported file to be as properly.
This can be a 1080P video. For the bit charge, I’m going to go for the advisable codec, which is H.264. I would like my format to be an MP4 file, my body charge goes to be 30 frames per second, and I’m not going to do something with a canopy picture or something like that. It’ll inform me proper down right here on the backside that this video is 7 minutes 13 seconds, 878 MB in measurement, and hit Export. That’ll take a couple of minutes, identical to any video modifying software program will take to export, after which you possibly can add it to YouTube.
So now you understand how to make use of the BFF methodology that I’m instructing inside Social Video Professional, my 30 Days to a Thriving YouTube Channel Program, and you understand how to make use of it with CapCut for Desktop so you possibly can create skilled trying, polished YouTube movies. Don’t overlook you possibly can obtain the BFF methodology cheat sheet right here.
VIDEO: CapCut for Desktop – Tutorial for Learners
Click on right here to subscribe to Meredith Marsh on YouTube.