This 12 months has been fairly a 12 months for brand new drones. DJI has been releasing drones quicker than they are often reviewed and examined, it appears. Maybe you have got or will likely be receiving a brand-new drone within the close to future.
In case you are new to drones and have simply acquired a model new Mini 4 Professional, we will likely be going by way of the steps wanted to get most new, first-time drone homeowners up and flying.
On this article and video tutorial we will likely be contemplating the next:
What’s within the varied combos
Charging all the batteries
Inserting SD playing cards
Downloading, Putting in, and organising the DJI Fly Software program
Making ready the drone for flight
Hopefully, after this information, you, as a brand new Mini 4 Professional proprietor, can have the instruments wanted to rise up within the air safely and shortly.
High Drone Programs
Pricing
The Mini 4 Professional comes within the following Packages:
We earn a fee if you happen to make a purchase order, at no further price to you.
10/11/2023 04:17 am GMT
Consists of:
DJI Mini 4 Professional
DJI RC 2 Distant Controller
1 x Clever Flight Battery (Commonplace)
USB-C Cable
Android and iOS Management Cables
Entrance Sensor and Gimbal Guard
Propeller Holder
2 Units of Spare Props and 6 Screws
Screw Driver
Mini 4 Professional Fly Extra Combo (DJI RC 2/Commonplace Battery)
Consists of:
DJI Mini 4 Professional
DJI RC 2 Distant Controller
3 x Clever Flight Battery (Commonplace)
Battery Charging Hub
Carrying Bag
USB-C Cable
USB-C to USB-C PD Cable
Android and iOS Management Cables
Entrance Sensor and Gimbal Guard
Propeller Holder
6 Units of Spare Props and 18 Screws
Screw Driver
Mini 4 Professional Fly Extra Combo Plus (DJI RC 2/Plus Battery)
Consists of:
DJI Mini 4 Professional
DJI RC 2 Distant Controller
3 x Clever Flight Battery (Plus)
Battery Charging Hub
Carrying Bag
USB-C Cable
USB-C to USB-C PD Cable
Android and iOS Management Cables
Entrance Sensor and Gimbal Guard
Propeller Holder
6 Units of Spare Props and 18 Screws
Screw Driver
Charging the Batteries
Though new drone day is thrilling, and we need to get out and fly instantly, the very first thing that may should be achieved, is to cost all the batteries that come within the varied packages and combos, together with the distant controller batteries.
RC-N2 and DJI RC 2 Controllers
Though the distant controller might need roughly half energy when initially opened, it is very important absolutely cost the distant controller.
As is the case with earlier DJI Mini drones, together with the Mini 3 Professional, the Mini 4 Professional doesn’t embrace an influence adaptor. For the quickest charging speeds, it’s endorsed you buy a 30-watt charger. With a 30-watt charger, it is possible for you to to cost a controller by way ofthe battery hub, in addition to the drone’s batteries.
You possibly can both buy DJI’s branded charger or any third celebration charger chances are you’ll be comfy with.
If you happen to determine to go along with a single 30-watt charger, as a substitute of 1 with a number of ports, if you plug the 3-battery charging hub as much as the 30-watt charger, then use a 2nd USB-C cable to attach the distant controller, the Mini 4 Professional batteries will all the time cost first.
Solely after the batteries have absolutely charged will the distant controller start to cost.
Tip: If you happen to shouldn’t have batteries within the hub, then the RC will cost usually. To get round this, it’s advisable to both have a 2nd charger, particularly for the RC, or a multiport charger.
To cost the usual RC-N2 controller, plug the included USB-C cable into the underside of the RC. The LED indicator lights will start to blink, signifying the distant controller is charging.
To cost the DJI RC 2, with the 5″ built-in display screen, the USB-C charging port is positioned within the port to the precise of the Micro SD card slot. Plug the USB-C cable in and the controller will start charging.
Mini 4 Professional Batteries
The Mini 4 Professional makes use of the identical Commonplace and Plus battery choices because the Mini 3 and Mini 3 Professional.
The Mini 4 Professional will get roughly 34 minutes of flight time with the Commonplace battery choice and 45 minutes with the Plus battery. The distinction in flight occasions between the Mini 3 Professional and the Mini 4 Professional could should do with the additional processing and energy wanted for the omnidirectional impediment avoidance system within the new Mini 4 Professional.
With the Mini 4 Professional, as with the earlier Mini 3 Professional, there are 2 methods through which to cost the batteries.
The first Methodology: That is for individuals who bought the Mini 4 Professional with just one drone battery, having not opted for the Flymore combo. The Mini 4 Professional battery could be charged whereas put in within the Mini 4 Professional.
Find the USB-C charging port within the rear of the drone. Insert the supplied UBS-C cable into the Mini 4 Professional after which right into a 30-watt charger. The battery will start charging.
The 2nd Methodology: If you happen to bought one of many Flymore combos, it is possible for you to to cost all 3 batteries, in succession, not concurrently. To do that, insert the batteries into the Flymore combos charging hub and join the included USB-C cable to a 30-watt charger (not included). The batteries will then cost individually, one after one other.
In case you have a fly extra combo and likewise bought an extra battery (as I’ve), then you may cost 3 batteries within the charging hub and use a separate USB-C and 30-watt charger to cost the extra battery within the Mini 4 Professional itself. I take advantage of the charger that I’ve particularly for the DJI RC to cost my 4th battery.
SD Playing cards
Whereas the Mini 4 Professional does have 2GB of inside storage, whether or not you have got determined to get the usual Mini 4 Professional package with the RC-N2 controller, or with the DJI RC 2, you’ll need to buy an SD card if you happen to’d prefer to report numerous movies or photographs.
If you happen to bought the DJI RC 2 package, there may be additionally an SD card slot within the distant controller. That is used for display screen recording. If you happen to don’t do display screen recording, nonetheless, you may retailer an SD Card within the DJI RC 2 as a backup, simply in case the Mini 4 Professional’s SD card is left in a pc at residence.
To insert an SD card into the Mini 4 Professional:
With the again of the Mini 4 Professional dealing with you, insert the SD card into the SD card slot (to the precise of the USB-C port), with the gold pins dealing with upwards.
Utilizing a thumb or fingernail will support in getting the cardboard in. Simply beware that the SD card slot is spring-loaded. In case your nail slips, it may trigger the SD card to fly out of the slot.
To insert an SD card into the DJI RC 2:
With the underside of the DJI RC 2 dealing with you, insert the SD card into the SD card slot (to the left of the USB-C charging port) with the gold pins dealing with downwards.
Like with the Mini 4 Professional, the DJI RC 2 SD card slot is likewise spring-loaded.
Beneath is an inventory, direct from DJI, of really useful SD playing cards:
SanDisk Excessive PRO 32GB V30 U3 A1 microSDHC
Lexar 1066x 64GB V30 U3 A2 microSDXC
Lexar 1066x 128GB V30 U3 A2 microSDXC
Lexar 1066x 256GB V30 U3 A2 microSDXC
Lexar 1066x 512GB V30 U3 A2 microSDXC
Kingston Canvas GO! Plus 64GB V30 U3 A2 microSDXC
Kingston Canvas GO! Plus 128GB V30 U3 A2 microSDXC
Kingston Canvas React Plus 64GB V90 U3 A1 microSDXC
Kingston Canvas React Plus 128GB V90 U3 A1 microSDXC
Kingston Canvas React Plus 256GB V90 U3 A1 microSDXC
Samsung EVO Plus 512GB V30 U3 A2 microSDXC
Flight Software program – DJI Fly
Other than making certain all batteries are charged, to fly your Mini 4 Professional, you’ll need to make use of DJI flight software program.
Flight software program is an app utilized by both a smartphone or digital gadget and linked to your distant controller, which allows the Mini 4 Professional and distant controller to speak, important for flight management.
The software program that works for the Mini 4 Professional is the DJI Fly app. In case you have a DJI RC 2 combo, the DJI Fly app is pre-loaded on the distant controller.
In case you are utilizing a separate digital gadget with the RC-N2 controller, you’ll must obtain the DJI Fly software program.
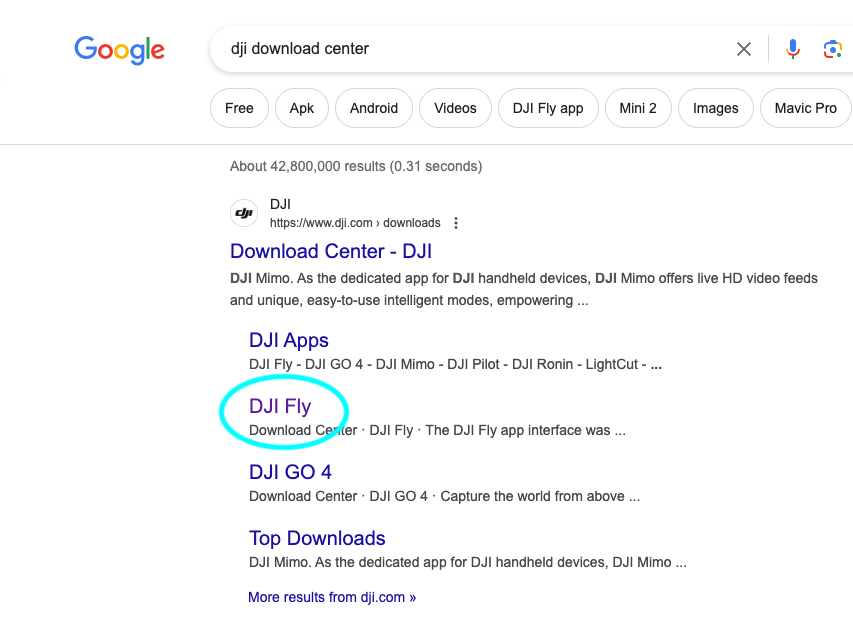
The place to Obtain DJI Fly
In case you are utilizing both an Android or iOS telephone or pill, the hyperlinks to obtain the DJI Fly app are as follows:
Moreover, out of your smartphone or digital gadget, you are able to do a Google Seek for “DJI Obtain Heart”. Within the outcomes, select DJI Fly and you may be dropped at the software program downloads web page.
Please observe: the DJI Fly app for Android is just obtainable on-line on the hyperlink above, and is now not obtainable within the Google Play retailer, whereas the iOS model for Apple gadgets is accessible by way of the App Retailer.
Organising your DJI Account
Now that you’ve the DJI Fly app put in, it’s time to arrange your DJI Account. You possibly can both accomplish that from throughout the app in your cellphone, or utilizing the DJI RC 2.
In case you have a DJI RC 2:
Step 1: Activate the RC by urgent as soon as on the facility button, then instantly press and maintain the facility button.
After the DJI splash display screen seems, you ought to be dropped at the primary residence display screen.
You’ll want to hook up with WiFi if organising a DJI account by way of the DJI RC 2.
Step 2: To activate WiFi and connect with a community, double-swipe down from the highest of the DJI RC 2 display screen.
This may carry up a display screen with a notification window on the left facet, and a setting window to the precise.
Step 3: Press and maintain the WiFi icon, as can be achieved on an Android or Apple telephone. This may carry you to the Community Choose display screen.
Step 4: Choose your community and enter the WiFi password if there may be one.
Exit out of the screens again to the primary display screen and observe the steps beneath for organising a profile you probably have an RC-N2.
In case you have an RC-N2
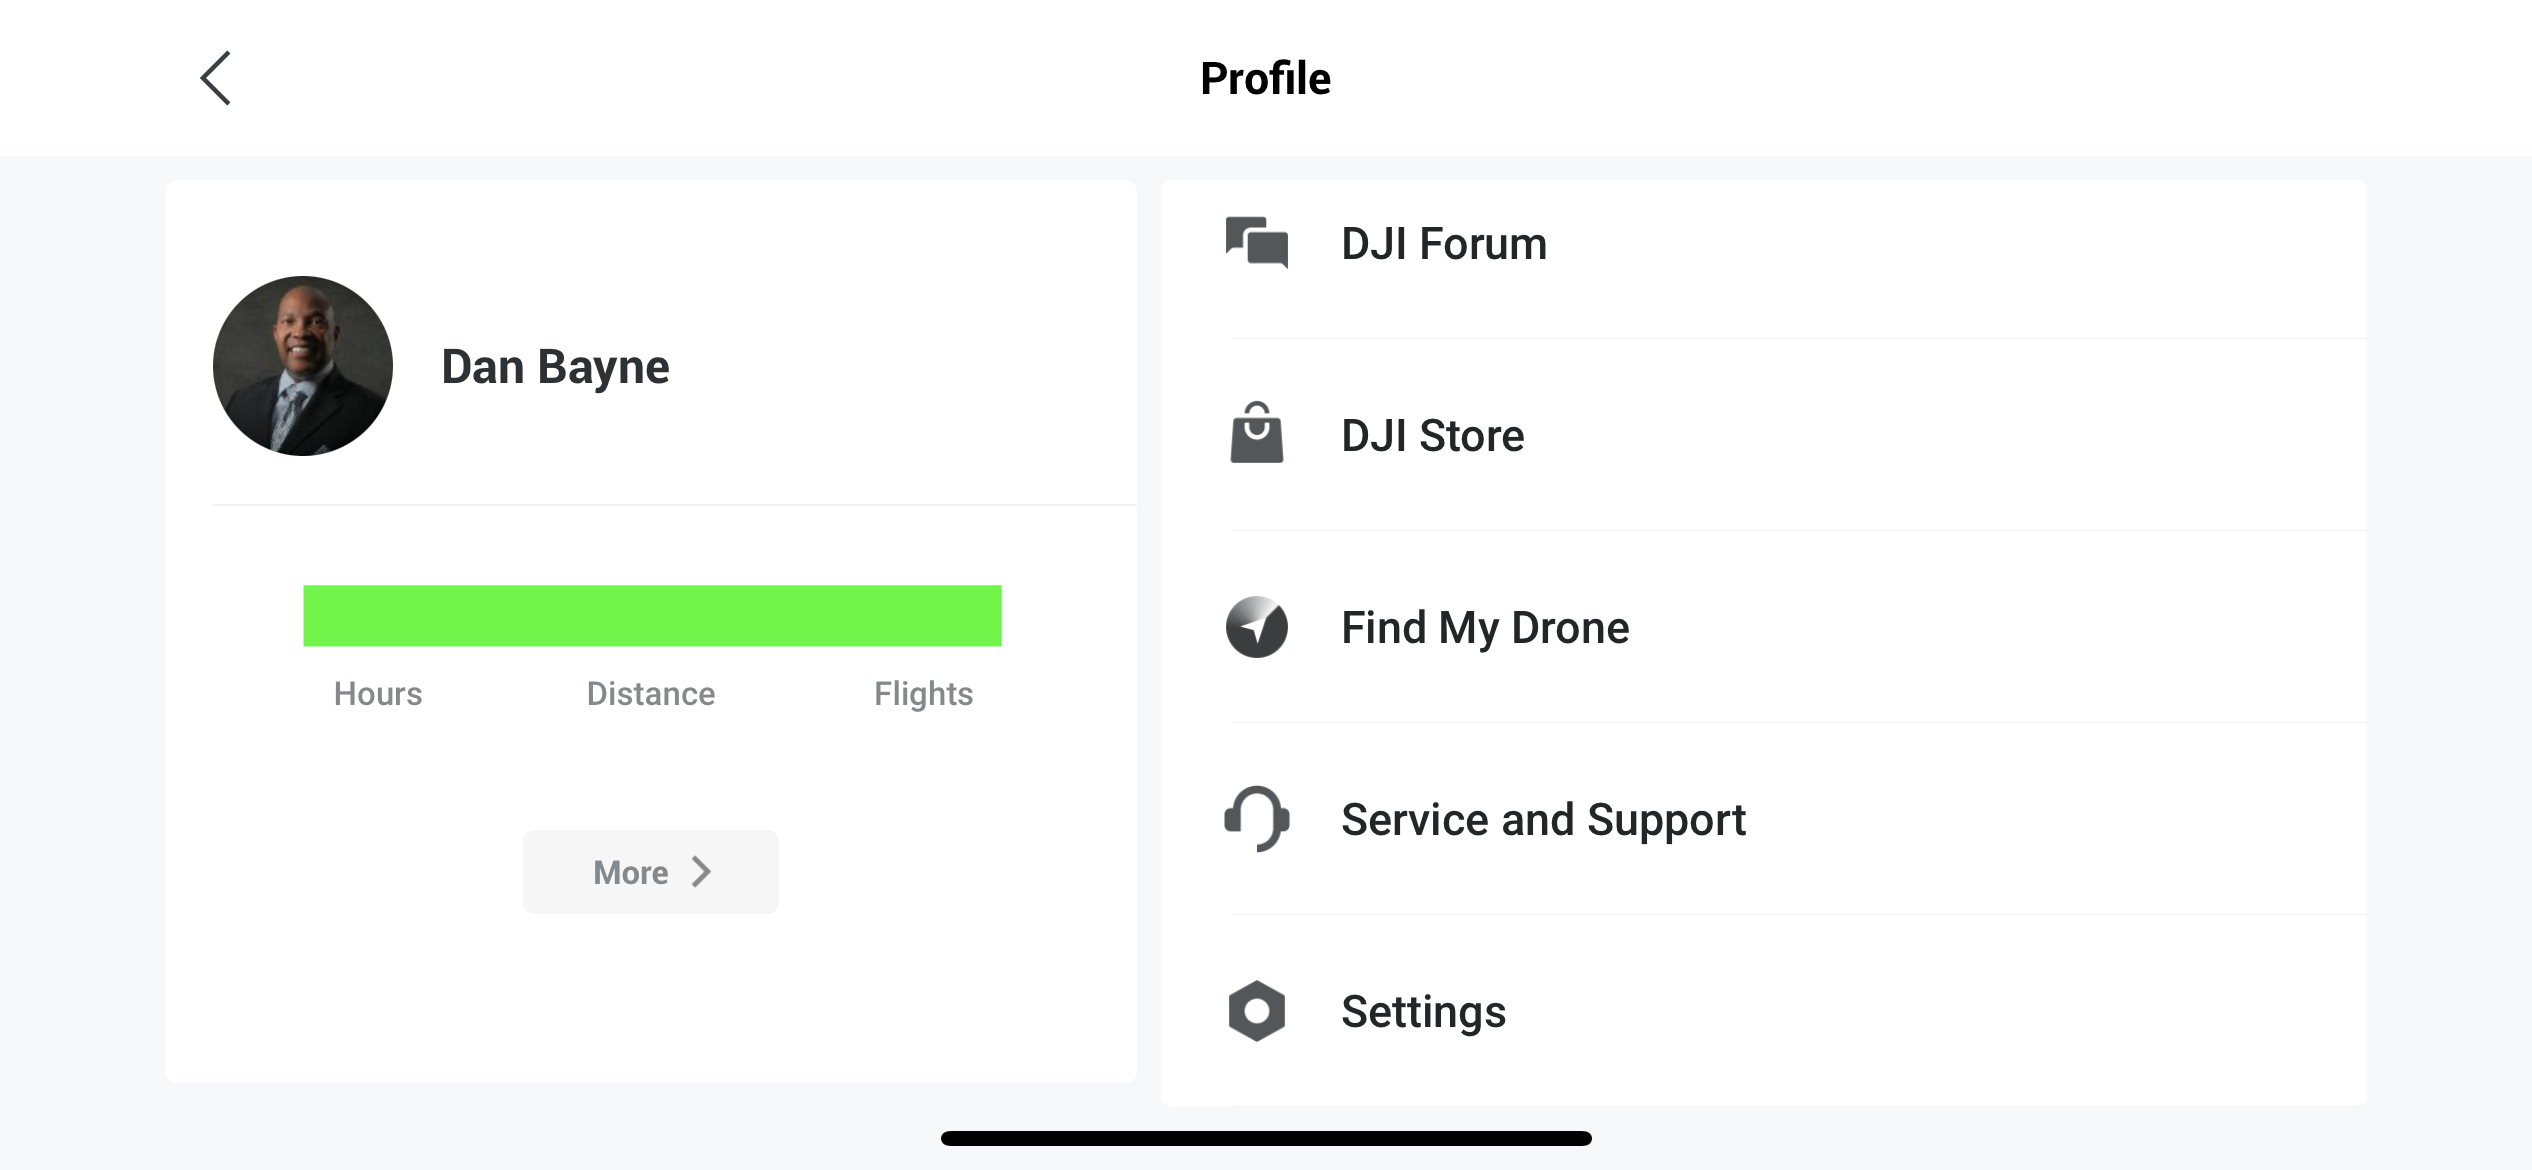
STEP 1: With out being linked to the RC-N2, from a cellphone or good gadget launch the DJI Fly app and go into Profile.
STEP 2: As soon as within the Profile Display, go to Log In.
STEP 3: Enter the telephone or e-mail you wish to register with and you should definitely test off the “I’ve learn” part on the backside.
STEP 4: Create your DJI Account by organising a password for the e-mail tackle you’re utilizing to log in to your DJI Account.
STEP 5: Enter the Captcha data and submit.
You’ll now be dropped at the primary profile web page. You will notice you have got been arrange as a generic DJI Person.
STEP 6: To vary your identify and profile image, faucet your present djiuser_ identify (it will carry you to the Profile particulars web page, and you may change your DJI username to no matter you’d like, in addition to add a profile image.
Navigating DJI Fly
It’s now time to enter the DJI Fly app and get aware of flying for the primary time.
Connecting to the Fly App
With the RC-N2 Controller:
STEP 1: In case you are nonetheless within the Fly app, Exit the app. Join your smartphone to your RC-N2 controller, as seen beneath.
STEP 2: Open the DJI Fly app and activate the RC-N2.
To energy on the controller, press the facility button as soon as, then long-press-hold till the RC makes a power-on sign. The lights may even flash.
Step 3: First, unfold the legs and arms of the Mini 4 Professional and take away the gimbal cowl. Activate the Mini 4 Professional by urgent the facility button as soon as, then press and maintain the facility button and the Mini 4 Professional will activate.
With the DJI RC 2 Controller:
If you happen to created your DJI Profile together with your DJI RC 2 and the RC is already on, activate the Mini 4 Professional.
First, unfold the legs and arms of the Mini 4 Professional and take away the gimbal cowl. Subsequent, press the facility button as soon as, then press and maintain the facility button and the Mini 4 Professional will activate.
The Dwelling Display/Flight View
The primary display screen throughout the DJI Fly app homes all of the necessary flight info you’ll need for a flight.
At a look, you may see (alongside the highest):
Plane Battery share – flight time remaining
RC (Distant Management) sign energy
Impediment Avoidance mode – whether or not it’s off, set to bypass, or hover
Variety of locked satellites (it’s best to fly after 7-12 satellites have been locked)
If you happen to press the battery share icon, whereas in flight, you’re given extra detailed info concerning:
What number of minutes till RTH (return to residence)
What number of minutes till the drone drive lands
What number of minutes till the batteries are fully depleted
On the backside of the app, you’ll see the next:
How briskly you’re flying
How far out the drone is out of your present place
How excessive the drone presently is AGL (above floor degree)
Drone positioning (Map)
By tapping the Map icon (backside left – small up-arrow), you may get into 3 totally different Map views:
Now that you’re aware of the primary display screen, we’ll discuss in regards to the varied in-app choices that have an effect on flight security.
In-App Choices
To get into the numerous Fly app choices, press the 3-button menu on the top-right of the display screen.
Within the choices, you will note the next tabs:
Security
Management
Digicam
Transmission
About
For our intent and functions, we’ll undergo the tabs which might be particular to getting up within the air safely and take just a few photos and movies.
OBSTACLE AVOIDANCE
This is likely one of the extra necessary choices that should be set appropriately and has an affect on these new to flying drones.
The Mini 4 Professional now has omnidirectional impediment avoidance, that means it could actually sense obstacles to the:
Entrance
Again
High
Backside, and
Either side
There are three choices for setting impediment avoidance habits: Bypass, Brake, and Off.
OFF – Mainly, because of this the highest, backside, entrance, rear, and facet sensors are inactivated, which, sadly, does will let you fly your drone into any impediment that is perhaps within the Mini 4 Professionals flight path.
Why would anybody need to flip these impediment avoidance sensors off? That may be to get shut to things and fly in tight areas that may in any other case not be attainable with the sensors on, because the Mini 4 Professional would cease upon sensing the obstacles within the rapid flight path.
BYPASS – this permits the Mini 4 Professional (when flying in a straight line) to go round an object presently in its manner. The Mini 4 Professional will decide the very best path to take action.
BRAKE – when enabled, the Mini 4 Professional will cease and proceed to hover when an impediment presents itself. You’ll then be capable of decide the very best plan of action to take to get across the object.
RADAR MAP
When on, this feature will provide you with a real-time on-screen view of how far objects are in entrance of, on the facet of, and behind the Mini 4 Professional. That is really an incredible choice to have in case you are flying with the impediment avoidance system off (like I usually do), as you may be offered with audible and visible alerts when shut to things, with out being slowed down.
FLIGHT PROTECTION
Flight safety, like impediment avoidance, has crucial choices and needs to be instantly set.
Within the Flight Safety tab, you may set the Most Peak the Mini 4 Professional can fly, Its most flight distance, Superior RTH (Return to Dwelling) Choices, and the Auto RTH Altitude.
Max Altitude – In the USA, as specified by the FAA, the utmost altitude a drone can fly is 400ft AGL (Above Floor Stage).
Nevertheless, there are some exceptions to this, equivalent to when flying round excessive buildings (buildings, towers, and many others.). To remain in compliance, it’s best to set the Max peak at both 400ft or simply shy of it, so that you received’t have to fret about breaking the regulation whereas in flight.
Max Distance – Additionally, in the USA, the FAA has mandated that drones keep inside visible line of sight (VLOS). That is subjective to how far an individual can see with out assistance from binoculars.
We recommend setting the Max Distance to “no restrict” and simply taking care to keep watch over the place the Mini 4 Professional is always.
As you look by way of the choices extra carefully, you’ll see point out of RTH (Return to Dwelling). RTH is a operate constructed into most DJI drones that, when activated (both manually by the operator or routinely at RC disconnect), the Mini 4 Professional will cease what it’s doing and make its manner again to you.
Superior RTH – It is a newer choice within the DJI Fly app. There are two choices: Optimum and Preset.
Optimum permits the Mini 4 Professional, throughout good lighting circumstances, utilizing the impediment avoidance sensors, to ascend/descend to the very best peak to return residence, given the rapid environment.
Preset will set the Mini 4 Professionals RTH to a predetermined altitude of your selecting, to keep away from colliding with obstacles when in low-light conditions
Auto RTH Altitude – That is additionally crucial. If the RTH peak shouldn’t be set a minimum of greater than the very best object the place you’re flying, the Mini 4 Professional is at risk of crashing into stated object.
Some select to have their RTH peak set to 400ft and simply neglect about it.
We recommend setting your RTH to 30 or so toes above the peak of the very best impediment the place you’re flying. Setting your RTH on this method can show to be safer for manned plane that is perhaps flying in your rapid space (i.e. helicopters, seaplanes, and many others..)
COMPASS and IMU
When flying for the primary time with a brand new drone, it’s necessary to calibrate your Compass and IMU.
The compass (and IMU) is used for the drone’s positioning, identical to an ordinary hand-held compass. If the drone compass shouldn’t be calibrated or calibrated appropriately, it may outcome within the drone flying erratically or the lack of the drone (in worse-case eventualities).
Oftentimes, when flying in the identical normal space, the Mini 4 Professional compass would simply should be calibrated as soon as. If you happen to fly in vastly totally different geographical areas, or removed from residence, however in the identical state, calibrating the compass is really useful.
To calibrate the Compass or IMU on the Mini 4 Professional, whereas within the Security tab go to Compass or IMU and faucet Calibrate and the Fly app will stroll you thru how to take action.
As well as, chances are you’ll be prompted by the Fly app to calibrate both the Compass or IMU whether it is deemed vital, like when utilizing the Mini 4 Professional for the primary time. In these circumstances, you’ll observe the easy on-screen prompts.
ADVANCED SAFETY SETTINGS
A necessary security setting that needs to be achieved repeatedly, based mostly in your state of affairs and the place you’re flying, is setting the Mini 4 Professionals habits for when the sign is misplaced.
There could come occasions when, as a consequence of environmental points, there may be sign loss between the Mini 4 Professional and the distant controller. This would possibly occur in congested areas or simply out of the blue, now and again.
There are 3 actions the Mini 4 Professional can take upon sign loss:
RTH – When sign loss is detected, the Mini 4 Professional will ascend to the predefined RTH peak, beforehand talked about earlier, and return to the drone operator.
DESCEND – With this feature, the Mini 4 Professional will descend, to the purpose of touchdown. This could possibly be a viable choice when flying your Mini 4 Professional in windy circumstances, whereas over land.
Many drone homeowners (not simply Mini homeowners) have said that this feature has saved fairly just a few DJI drones, the place RTH would have brought on the drone to get misplaced in extreme winds at greater altitudes.
HOVER – This may enable the Mini 4 Professional to hover in place when the sign is misplaced. That is best for flying indoors or in areas with loads of tall buildings or skyscrapers, the place RTH would inevitably trigger a crash or lack of the drone.
Distant Controller
Briefly, we’ll spotlight the varied features of the RC-N2 and DJI RC 2 distant controllers.
RC-N2 Controller
As talked about earlier, to energy on the controller, press the facility button as soon as, then long-press-hold till the RC makes an audible sign. This denotes that the distant is powering on.
The face of the DJI RC-N2
Energy button
4 LED indicator/standing lights and a Energy On LED
4 inexperienced LED: 75% – 100% battery life
3 inexperienced LED: 50% – 75% battery life
2 inexperienced LED: 25% – 50% battery life
1 inexperienced LED: 0% – 25% battery life
Cine, Regular, and Sport mode swap
Cine – sluggish clean flight with dampened controls. Tailor-made for getting cinematic pictures
Regular – straight out of the field, customary management pace
Sport – permits the Mini 4 Professional to fly at speeds as much as 35.7mph. This mode turns off all obstacle-avoidance
Flight Pause/Return to Dwelling button (RTH)
When pressed and held, the Mini 4 Professional will routinely return to the situation marked as residence within the DJI Fly app. RTH choices could be adjusted.
Press as soon as to make the plane brake and hover in place
FN (Perform) button which could be personalized as such:
Single Press
Recenter Gimbal
Auxiliary LED
Toggle Map/Dwell View
Gimbal Comply with/FPV Mode
Digicam Settings
AE Lock/Unlock
Improve EV
Lower EV
Portrait/Panorama Mode Swap
Plan Waypoint Flight
Cruise Management
Double Press
Recenter Gimbal
Auxiliary LED
Toggle Map/Dwell View
Gimbal Comply with/FPV Mode
Digicam Settings
AE Lock/Unlock
Improve EV
Lower EV
Portrait/Panorama Mode Swap
Plan Waypoint Flight
Cruise Management
Photograph/Video Toggle
Press as soon as to modify between photograph and video mode.
2 Detachable Management Sticks
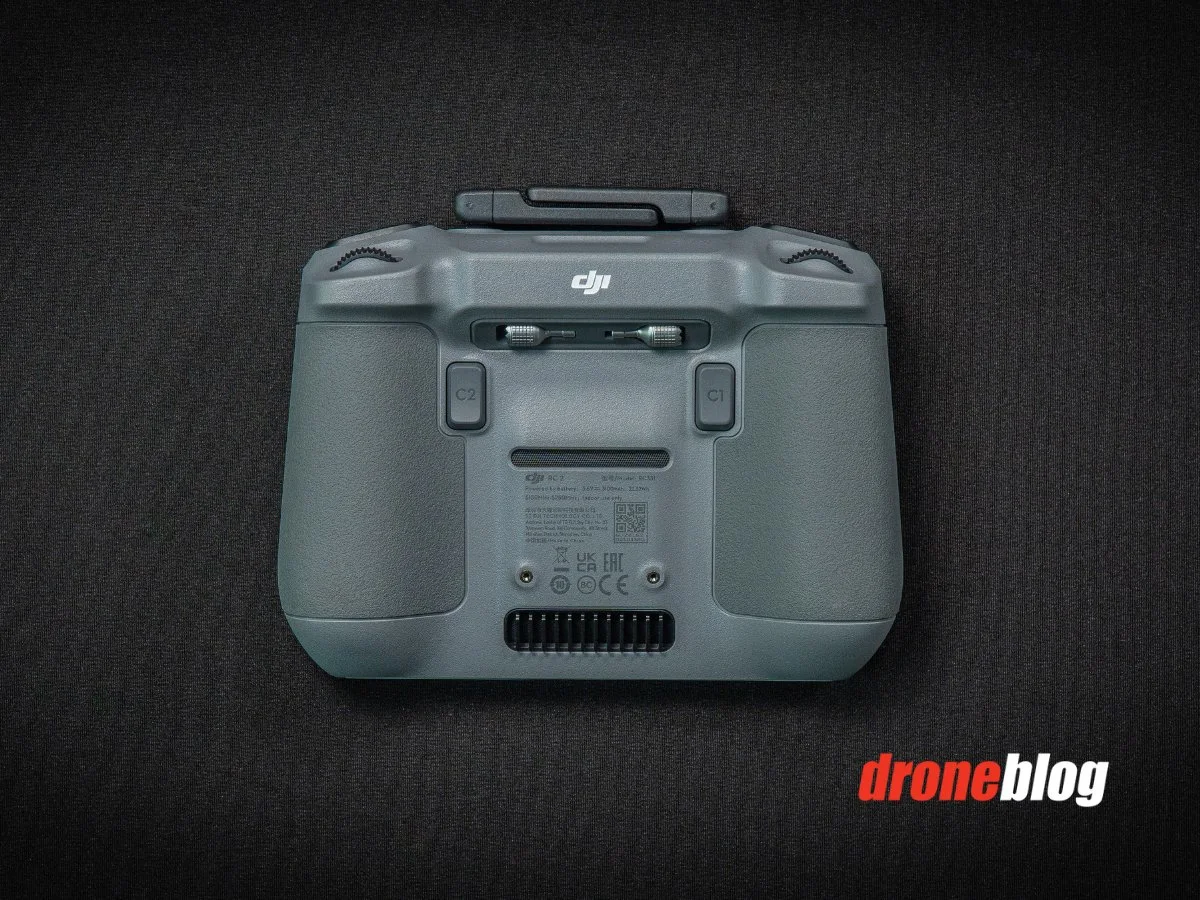
The again of the DJI RC-N2
Warmth vent
2 Ergonomic Hand Grips
The highest of the DJI RC-N2
The slide-out built-in antenna and smartphone holder/mount
The digital camera/video set off button
Press as soon as to take photographs or begin or cease recording
Plastic Scroll-wheel
adjusts the pitch of the digital camera gimbal
2 indented pads to lock the smartphone in
Android or iOS Management Cable
The underside of the DJI RC-N1
USB-C Charging Port
Management Stick Holder
DJI RC 2 Controller
The DJI RC 2, like the unique DJI RC launched with the Mini 3 Professional, is a welcomed new addition to the DJI line of Sensible Controllers.
Though considerably cheaper than the DJI RC Professional and virtually the identical value as the unique DJI RC, the DJI RC 2 likewise has a shiny display screen at 700 nits and a 5.5″ built-in display screen.
Much like the RC-N2, to energy on the controller, press the facility button as soon as, then long-press-hold till the RC makes an audible sign. You’ll quickly see the DJI splash display screen.
The face of the DJI RC 2
Flight Pause/Return to Dwelling button (RTH)
When pressed and held, the Mini 4 Professional will routinely return to the situation marked as residence within the DJI Fly app. RTH choices could be adjusted.
Press as soon as to make the plane brake and hover in place
