ActivePresenter 9 does supply the Regulate Quantity function that permits you to flip up or flip down the quantity of movies or audio clips. The quantity might be modified not just for the entire monitor but in addition for particular person components.
At this time’s tutorial will stroll you thru fundamental steps to regulate the audio quantity in ActivePresenter 9.
This tutorial covers:
- Regulate audio quantity for the entire monitor
- Change quantity for particular components of the monitor
- Restore unique quantity
Regulate Audio Quantity for the Complete Observe
In ActivePresenter 9, you’ll be able to alter the quantity for each audio and video objects. Take the next steps:
Step 1: Choose the audio or video object (on the Canvas, Timeline, or Choice pane).
Step 2: Click on the Regulate Quantity button (1). Then, a dialog seems to permit adjusting quantity from 0% (mute) to 500% (unique quantity x 5) because the screenshot under:
Step 3: Drag the slider up/down or scroll the mouse wheel up/down to regulate the specified audio quantity. Moreover, you’ll be able to click on the Mute examine field to shortly silence the audio.
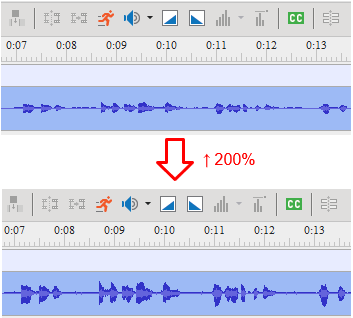
The quantity change can be mirrored on the waveform of the thing. A bigger waveform means a louder quantity, and vice versa.
Change Quantity for Particular Elements of the Observe
Moreover altering the quantity for the entire monitor, it’s potential to regulate the quantity to a selected a part of the audio or video as nicely. Do as follows:
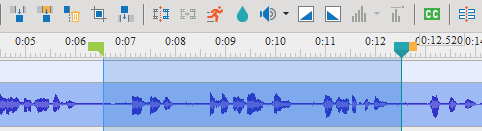
Step 1: Drag the Begin and Finish markers of the Playhead to outline the vary you wish to change the quantity.
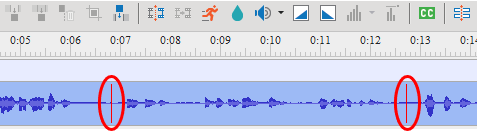
Step 2: Click on the Regulate Quantity button (1) and choose a quantity scale to use to this vary. At any time when a spread is adjusted quantity, it will likely be marked by the two pink vertical markers at each the beginning level and finish level.
Restore Unique Quantity
By doing the next fundamental steps, you’ll be able to carry the quantity again for the entire audio monitor or part of it.
Step 1: Select the audio monitor or a spread you wish to restore the quantity.
Tip: By default, the snapping mode is on to make it simpler so that you can choose the vary. In case it’s off, simply entry the View tab and click on Timeline Snapping to show it on.
Step 2: Click on the drop-down arrow (2) subsequent to the Regulate Quantity button > Restore Unique Quantity.

Now, you get the unique quantity in your audio monitor.
So, you’ll be able to simply alter the quantity of audio, movies, and audio hooked up to things by utilizing the identical fundamental steps in ActivePresenter 9. Let’s go to our Tutorials web page, and Youtube channel to get extra helpful issues.

See additionally: