

Hi, I’m Benjamin Sokomba Dazhi and I welcome you to this iClone 8 (iC8) tutorial the place we’re going to speak about the best way to improve your scenes visually utilizing reflective surfaces in iClone 8.
The brand new options of iClone 8 features a Mirror Aircraft Shader that simulates reasonable reflective surfaces that may be utilized to mirrors, televisions, flooring or home windows. You may outline the mirror form by Opacity texture, and regulate the energy and readability of the mirror reflection with the Materials Settings.
Let’s get to it.
Already, I’ve a personality in my scene which I’ve arrange with lights positioned at completely different Inside furnishings. The purpose right here is to create reflective surfaces just like the mirror and likewise make the ground reflective.
So the very first thing you do is you click on on PLANE. I’ve already imported a Aircraft to the scene and set it up right here. (Fig 1.0)

Go to modify.

Underneath Modify, go to Texture Settings. (Fig 3.0)
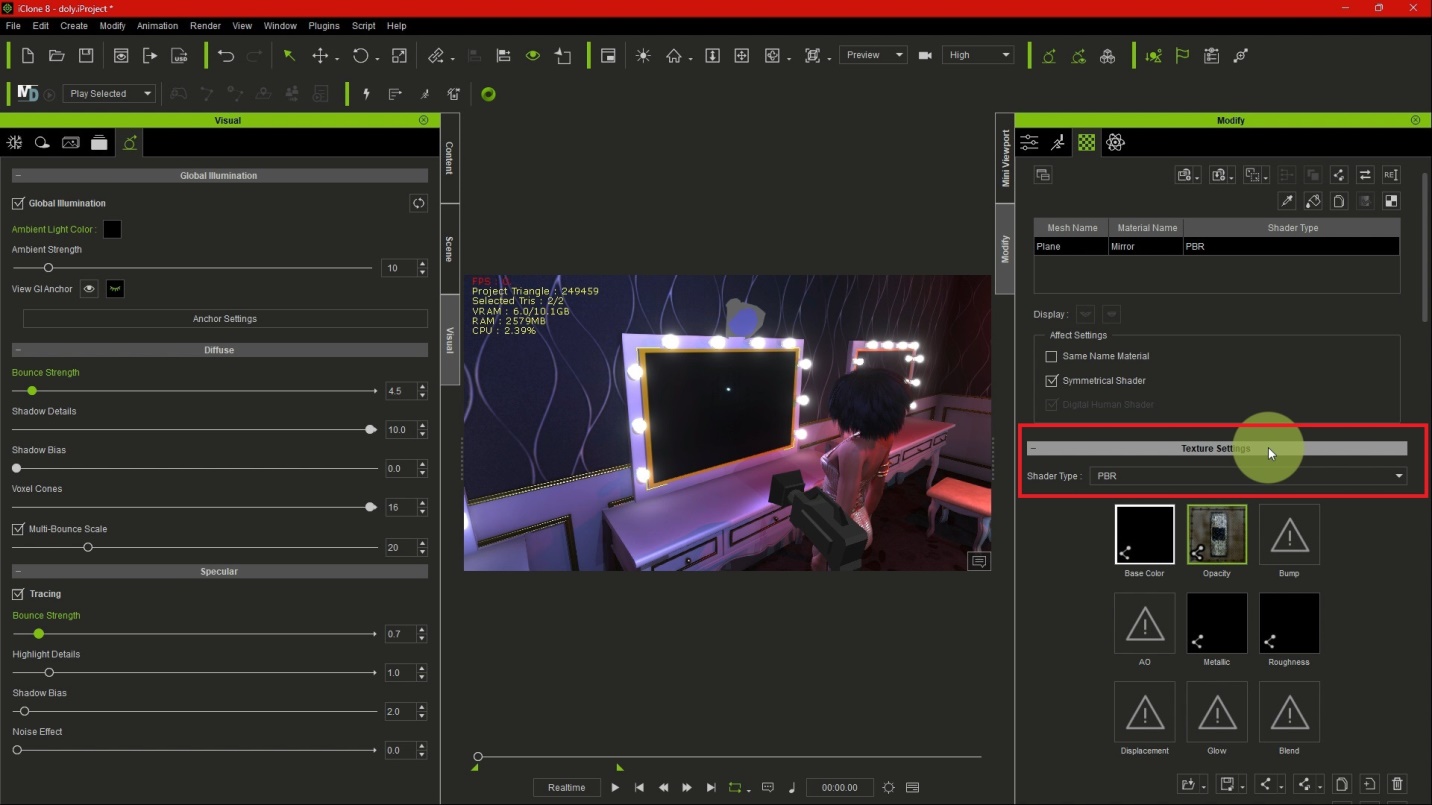
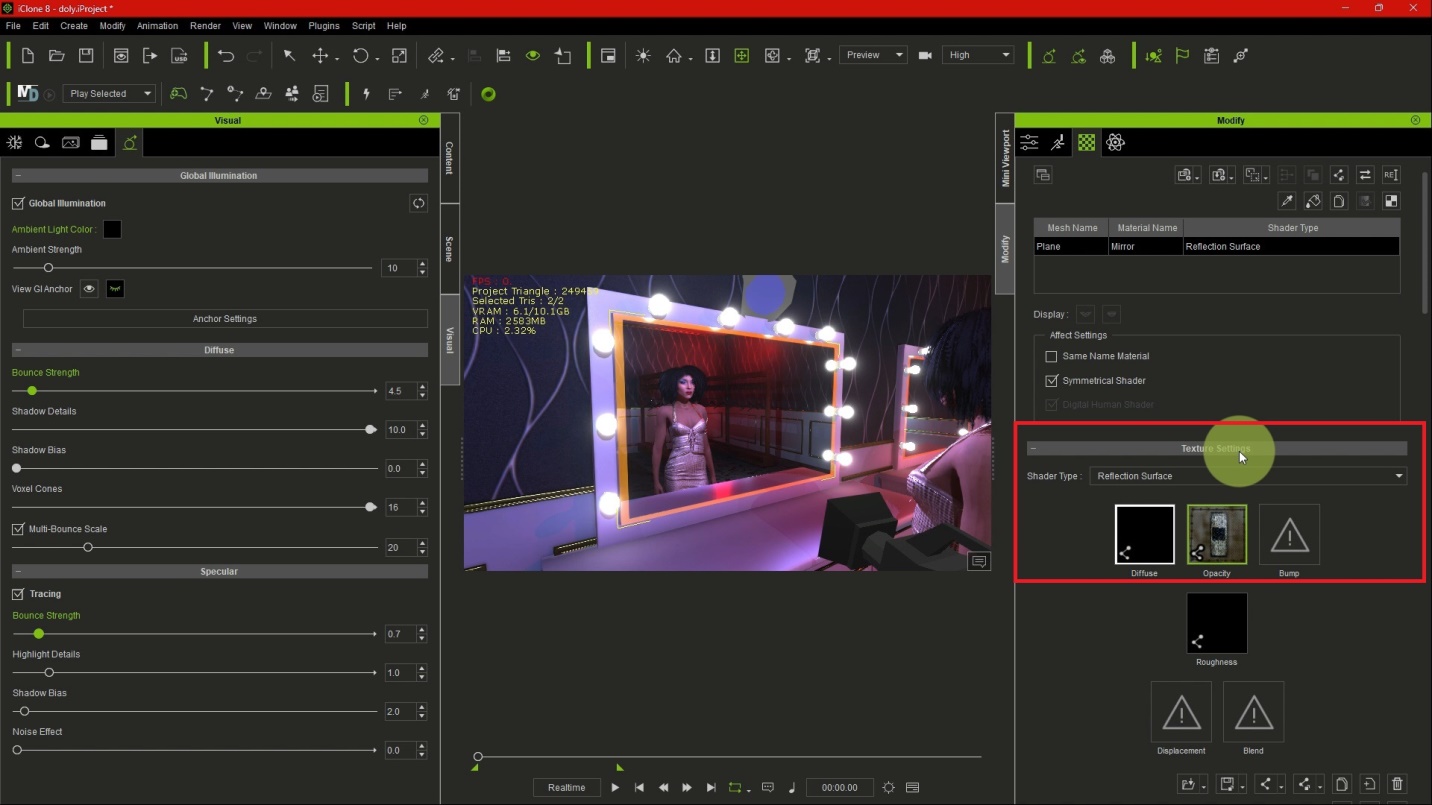
Right here, you see the Shader Kind is already on PBR. We wish to change it to Reflection Floor as proven in Fig 4.0 under.

So when you click on on Reflection Floor, growth! It begins reflecting as proven under in Fig 5.0. Now you possibly can see the mirror and the characters reflection by means of it. It’s as simple and easy as that.

You can even tweak or modify the mirror.
This may be achieved by altering the Opacity of the mirror. You may put a distinct kind of Opacity simply so it doesn’t look too clear or sharp.
When you play with the Opacity you possibly can put a distinct Materials or Texture to make the mirror seem like glass. For those who play it you see it’s nonetheless reflecting. (Fig 8.0)

You can even modify it additional by utilizing Diffuse colour, Reflection energy, Reflection blur and many others… however on this explicit mirror floor, you don’t want the reflection to be blurred.

One other simple method to create a airplane with reflection is to go to Create, then Reflection Floor. When you click on on it it is best to see a Reflection Floor within the scene proper there. (Fig 10.0)

Subsequent, resize the Reflection Floor to the form or measurement of the object you need it on as on this case the mirror as proven under. Or you possibly can reshape it to what you like and place it wherever you need.

That’s one other simple methodology that’s fairly simple. We will delete it for now since we have already got the reflective floor we beforehand positioned.
Subsequent factor we’re going to work on is the Flooring. As you possibly can see we simply have a fundamental flooring. What we wish to do proper now’s attempt to make it extra reflective.
You would possibly suppose it’s already reflecting from the picture proven under however not fairly. It’s solely reflecting the gentle within the scene and has extra to do with the roughness of the ground materials. (Fig 12.0)

Similar as earlier than, click on on the ground or the airplane on the bottom.

Go to modify. (Fig 14.0)

I’ve my textures already set beneath modify. So go to Shader Kind beneath texture setting. Click on on PBR then go to reflection floor once more. (Fig 15.0)

As you possibly can see under, it’s already reflecting however on this case you possibly can see its extra blur as a result of I attempted making it blur so it doesn’t have a water or glass really feel. It must seem like a marble flooring.

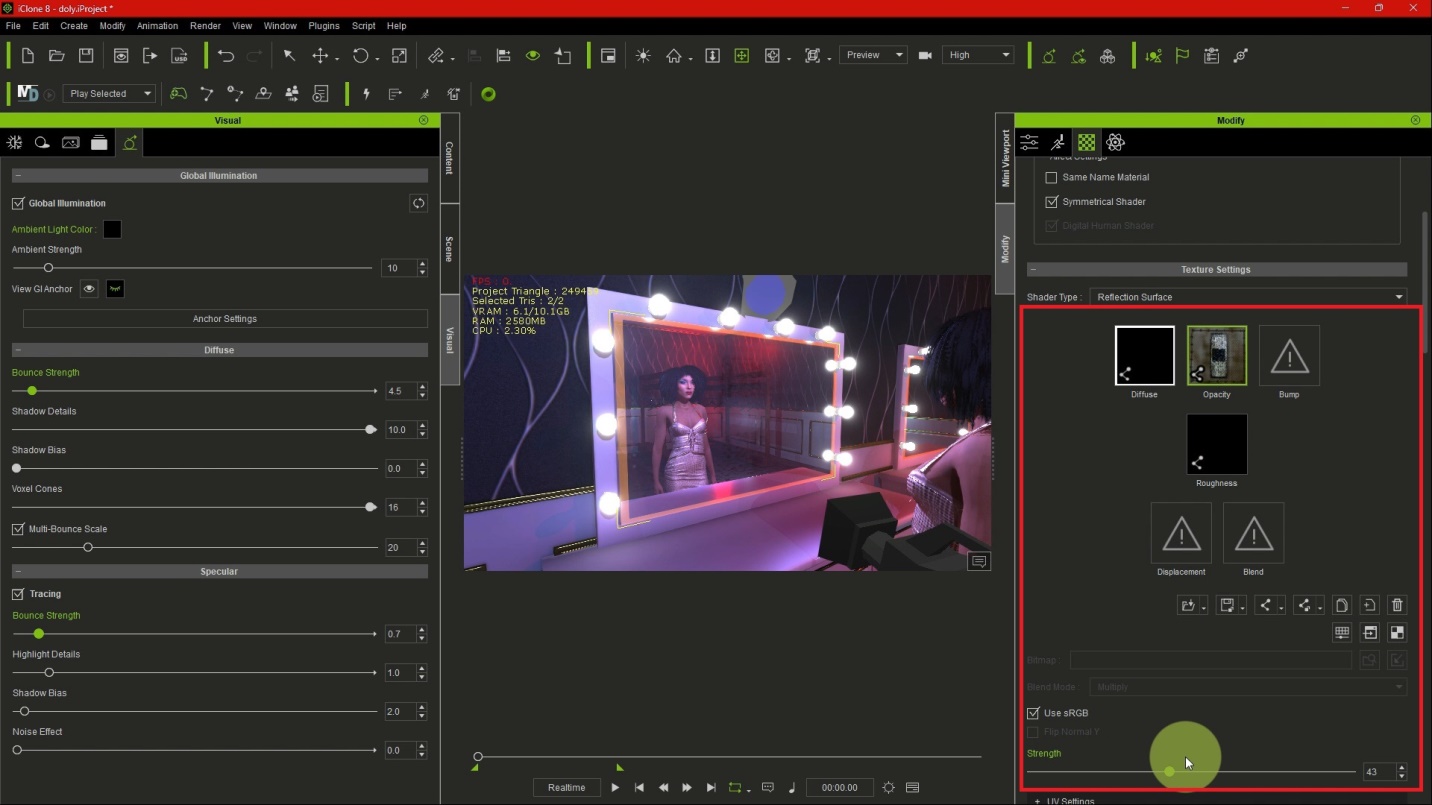
How I did that’s I went to the Modify Panel and beneath Shader settings I performed with the Reflection Power. (Fig 17.0)

Simply as talked about, you possibly can improve or scale back the Reflection Power utilizing the slider highlighted in Fig 18.0 under.

You may decide a worth of perhaps say 47.
You can even improve the Reflection blur from 47 however it shouldn’t be too blurry, however it actually simply depends upon what you’re on the lookout for. I don’t need it to be too sharp so it doesn’t seem like a glass or mirror therefore the chosen worth.
We will additionally change the Diffuse Coloration too.
I made it darker however you can also make it brighter. I simply determined to make it a bit bit darker as that’s the way you get this explicit reflection created within the scene under. (Fig 19.0)

Lastly, let’s evaluation and see all the consequences we’ve got added:
The character is reflecting, every little thing within the scene is reflecting from the furnishings to the ceiling, and the great factor is that you may nonetheless see that the materials/texture of the ground continues to be there. From the ultimate scene render, by means of the digital camera view I created, you possibly can see that each the mirror and the ground at the moment are reflective.
So that is the way you create reflections in iClone 8 to reinforce the visuals in your scene. It actually offers it extra life and realism and makes the entire undertaking extra fascinating.
I hope this tutorial was simple and I hope you should utilize this to make extra stunning and reasonable scenes in your initiatives utilizing iClone 8.
Thanks for having me once more.
Goodbye till subsequent time!
————————————————————
Comply with Benny Dee:
Instagram:
https://www.instagram.com/therealbennydee/
YouTube:
https://www.youtube.com/channel/UCJ8aa9y8s52q90DvV3yI1OA