
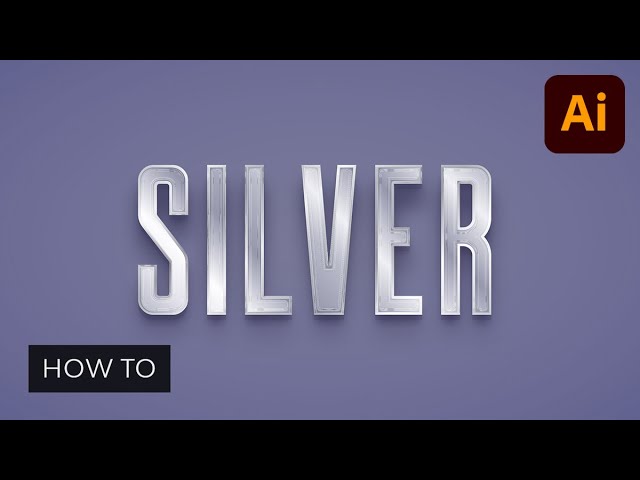
Within the following tutorial, you’ll learn to make a metallic impact in Illustrator. Within the first half you’ll learn to create a brushed steel impact in Illustrator, and in the second you’ll learn to create a silver metallic impact in Illustrator.
If you do not have the time to learn to make a metallic impact in illustrator from scratch, you may at all times depend on Envato Components. There you will discover a huge assortment of assets that you should utilize to create metallic results in Illustrator. This set of metallic graphic kinds is simply one of many many examples. With only a click on, you can provide your textual content that metallic look in Illustrator.


In search of a video tutorial to observe alongside? We have you lined. You may watch this new video from the Envato Tuts+ YouTube channel to learn to make a metallic impact in Illustrator:
What You will Be taught in This Adobe Illustrator Metallic Impact Tutorial
- How you can create the numerous backgrounds
- How you can make a metallic impact in Illustrator
- How you can create a brushed steel impact in Illustrator
- How you can create a silver steel impact in Adobe Illustrator
What You will Want
You will want the next assets as a way to full these metallic results in Illustrator:
1. How you can Set Up the Background for the Brushed Metallic Impact in Illustrator
Step 1
Hit Management-N to create a brand new doc. Choose Pixels from the drop-down menu, set the Width to 850 and the Top to 400, after which click on that Extra Settings button.
Choose RGB for the Shade Mode, set the Raster Results to Excessive (300 ppi), after which click on the Create button to create your doc.


Step 2
Decide the Rectangle Software (M) and focus in your Toolbar. Take away the colour from the stroke after which choose the fill and set its shade to R=68 G=68 B=68. Click on in your artboard to open the Rectangle window and easily create an 870 x 420 px form.
Preserve this form chosen, change to the Choice Software (V), and deal with the management panel to simply heart your choice. Be sure that the Alignment is ready to Artboard after which simply click on the Horizontal Align Heart and Vertical Align Heart buttons.
Transfer to the Look panel (Window > Look) and click on the Add New Fill button so as to add a second fill to your rectangle. Choose this new fill and alter its Mixing Mode to Gentle Gentle, after which click on the Radial Gradient button from the Gradient panel (Window > Gradient). It will apply a radial gradient to your chosen fill. Concentrate on the gradient sliders and begin by choosing the left one. Decrease its Opacity to 0% after which double-click it to interchange the present shade with R=68 G=68 B=68. Transfer to the opposite gradient slider, double-click it, and set the colour to R=18 G=18 B=38.
When you’re finished, choose the Gradient Software (G) out of your toolbar and use it to stretch your radial gradient roughly as proven within the following picture. Now that your background is ready up, let’s learn to make a metallic impact in Illustrator.


2. How you can Make a Metallic Impact in Illustrator
Step 1
Decide the Kind Software (T) and open the Character panel (Window > Kind > Character).
Choose the Headline Common font, set the scale to 150 px and the monitoring to 50, after which merely click on in your artboard to sort in “METAL”.


Step 2
Be sure that your textual content stays chosen as we transfer on. Concentrate on the Swatches panel (Window > Swatches) and click on the [None] swatch to do away with the present textual content shade.
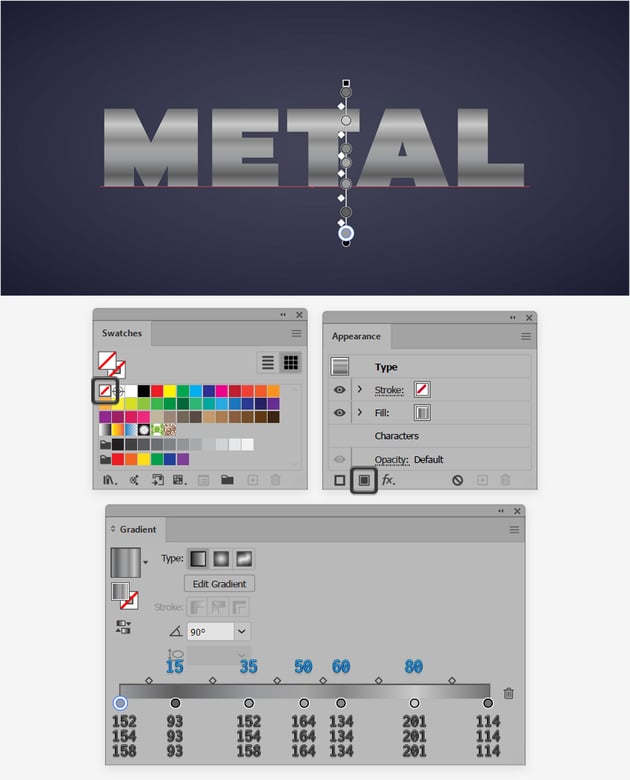
Transfer to the Look panel and use that Add New Fill button once more so as to add a fill to your textual content. Choose it, transfer to the Gradient panel, and click on that Linear Gradient button to use a linear gradient to your chosen fill. Set the Angle to 90 levels and deal with the gradient sliders.
Initially, double-click the left slider and set the colour to R=152 G=154 B=158, after which double-click the appropriate one and substitute the colour with R=114 G=114 B=114.
Click on on the gradient bar so as to add a 3rd gradient slider, choose it and set the Location to 15%, after which double-click it to set the colour to R=93 G=93 B=93. Repeat the identical approach so as to add 4 extra gradient sliders and choose them one after the other:
- For the primary one, set the Location to 35% and the colour to R=152 G=154 B=158.
- For the second, set the Location to 50% and the colour to R=164 G=164 B=164.
- For the third one, set the Location to 60% and the colour to R=134 G=134 B=134.
- For the fourth one, set the Location to 80% and the colour to R=201 G=201 B=201.


Step 3
Be sure that your textual content stays chosen, hold specializing in the Look panel, and choose the stroke. Click on the Stroke button to open the Stroke fly-out panel, enhance the Weight to 3 pt, and remember to test the Spherical Cap button.
Apply a black to white linear gradient for this stroke, set the Angle to 90 levels, and return to the Look panel. Decrease the Opacity of your stroke to 50%, change its Mixing Mode to Gentle Gentle, after which go to Impact > Path > Offset Path. Set the Offset to -1.5 px and click on OK.


Step 4
Be sure that your textual content stays chosen, hold specializing in the Look panel, and add a second stroke utilizing the Add New Stroke button. Choose it, set the Weight to 1 pt, and keep in mind to test the Spherical Cap button.
Apply the linear gradient proven beneath, set the Angle to 90 levels, and return to the Look panel. Simply decrease the Opacity of this stroke to 70% after which go to Impact > Path > Offset Path. This time, set the Offset to -0.5 px and click on OK.


Step 5
Be sure that your textual content stays chosen, add a second fill utilizing that very same Add New Fill button, and drag it beneath the present one.
Choose this new fill and set the colour to R=88 G=89 B=91, after which go to Impact > Stylize > Drop Shadow. Enter the settings proven within the prime window, click on OK, and once more go to Impact > Stylize > Drop Shadow. This time, enter the settings proven within the second window and click on OK.


Step 6
Be sure that your textual content stays chosen, add a 3rd fill, and drag it above the present ones. To realize that metallic look in Illustrator, let’s add some raster results.
Choose the brand new fill and set the colour to black (R=0 G=0 B=0), decrease its Opacity to 50% and alter the Mixing Mode to Shade Burn, after which go to Impact > Distort > Diffuse Glow. Drag these sliders to 7, 20, and 10, click on OK, and go to Impact > Sketch > Observe Paper. Enter the settings proven within the following picture and click on OK to use the impact.


Step 7
Be sure that your textual content stays chosen, add a brand new fill, and drag it above the present ones.
Choose this new fill and set the colour to black (R=0 G=0 B=0), change its Mixing Mode to Gentle Gentle, after which go to Impact > Sketch > Observe Paper. Set these sliders to 25, 15, and 8, click on OK, and go to Impact > Distort > Ocean Ripple. Set the Ripple Measurement to 6 and the Ripple Magnitude to 20, click on OK, after which go to Impact > Brush Strokes > Angled Strokes. Enter the settings proven within the following picture and click on OK to use the impact.


Step 8
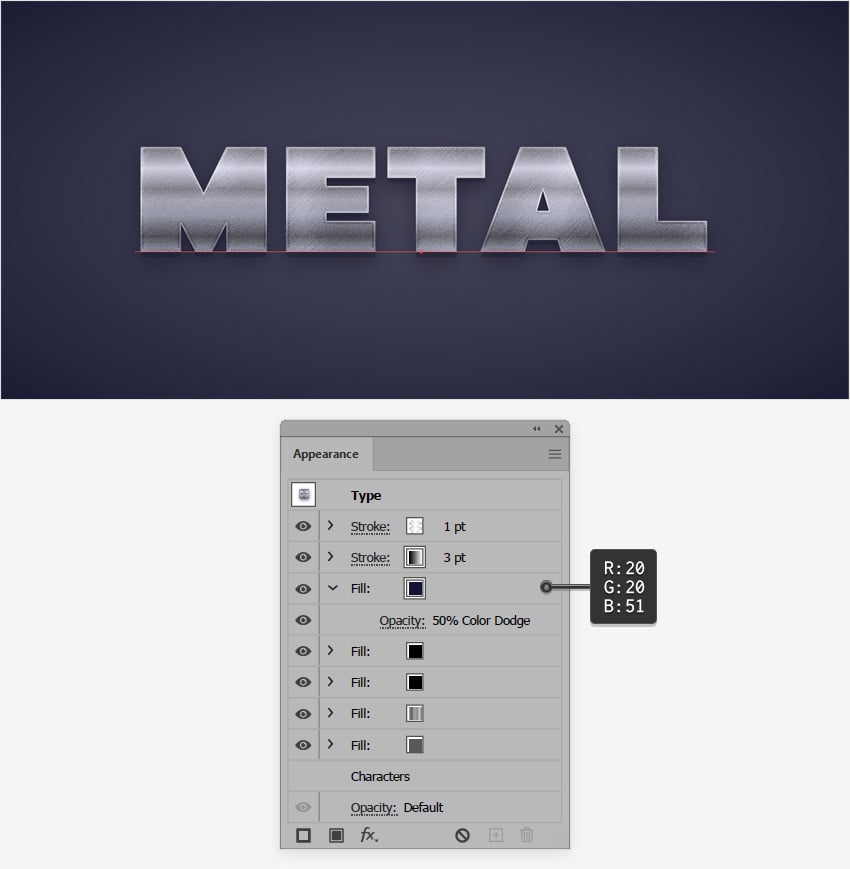
Be sure that your textual content stays chosen, and add another fill on prime of the present ones.
Choose it and set the colour to R=20 G=20 B=51, decrease its Opacity to 50%, and alter the Mixing Mode to Shade Dodge.


Step 9
Now that you’ve got achieved that metallic look in Illustrator, let’s have a look at how one can simply apply it to different parts out of your design. We’ll use this Pointer Brand from Envato Components to exemplify the methods and create a metallic brand in Illustrator.
Be sure that your textual content continues to be chosen, open the Graphic Kinds panel (Window > Graphic Kinds), and simply click on the New Graphic Model button to avoid wasting the Look settings of your textual content as a graphic fashion.
Now choose the pointer brand or every other aspect out of your design and easily click on your saved graphic fashion to create a metallic brand in Illustrator.


3. How you can Set Up the Background for the Silver Metallic Impact in Illustrator
Step 1
Let’s create a brand new doc. Choose Pixels from the drop-down menu, set the Width to 1100 and the Top to 500, after which click on that Extra Settings button.
Choose RGB for the Shade Mode and set the Raster Results to Excessive (300 ppi), after which create your new doc.


Step 2
We’ll begin with the background once more, so choose the Rectangle Software (M) and focus in your Toolbar. Take away the colour from the stroke, after which choose the fill and set its shade to R=120 G=120 B=151. Click on in your artboard to open the Rectangle window and easily create an 1120 x 520 px form.
Preserve this form chosen, change to the Choice Software (V), and deal with the management panel to simply heart your choice. Be sure that the Alignment is ready to Artboard after which simply click on the Horizontal Align Heart and Vertical Align Heart buttons.
Transfer to the Look panel (Window > Look) and click on the Add New Fill button so as to add a second fill to your rectangle. Choose this new fill and alter its Mixing Mode to Gentle Gentle, after which click on the Radial Gradient button from the Gradient panel (Window > Gradient) to use a radial gradient to your chosen fill. Concentrate on the gradient sliders and begin by choosing the left one. Decrease its Opacity to 0% after which double-click it to interchange the present shade with R=120 G=120 B=151. Transfer to the opposite gradient slider, double-click it, and set the colour to R=70 G=70 B=101.
When you’re finished, choose the Gradient Software (G) out of your toolbar and use it to stretch your radial gradient roughly as proven within the following picture.


4. How you can Create a Silver Metallic Impact in Illustrator
Step 1
Decide the Kind Software (T) and open the Character panel (Window > Kind > Character).
Choose the Robinson Common font, set the scale to 330 px and the monitoring to 50, after which merely click on in your artboard to sort in “SILVER”.


Step 2
Be sure that your textual content stays chosen, deal with the Swatches panel (Window > Swatches), and click on the [None] swatch to do away with the present textual content shade.
Transfer to the Look panel and use that Add New Fill button once more so as to add a fill to your textual content. Choose it, transfer to the Gradient panel, and click on that Linear Gradient button to use a linear gradient to your chosen fill. Set the Angle to 45 levels and deal with the gradient sliders.
Initially, double-click the left slider and set the colour to R=188 G=190 B=192, after which double-click the appropriate one and use the identical shade.
Click on on the gradient bar so as to add a 3rd gradient slider, choose it and set the Location to 10%, after which double-click it to interchange the colour with R=231 G=230 B=233. Repeat the identical approach so as to add six extra gradient sliders. Choose them one after the other and use the settings proven within the following picture.
When you’re finished, return to the Swatches panel and click on that New Swatch button to avoid wasting your gradient.


Step 3
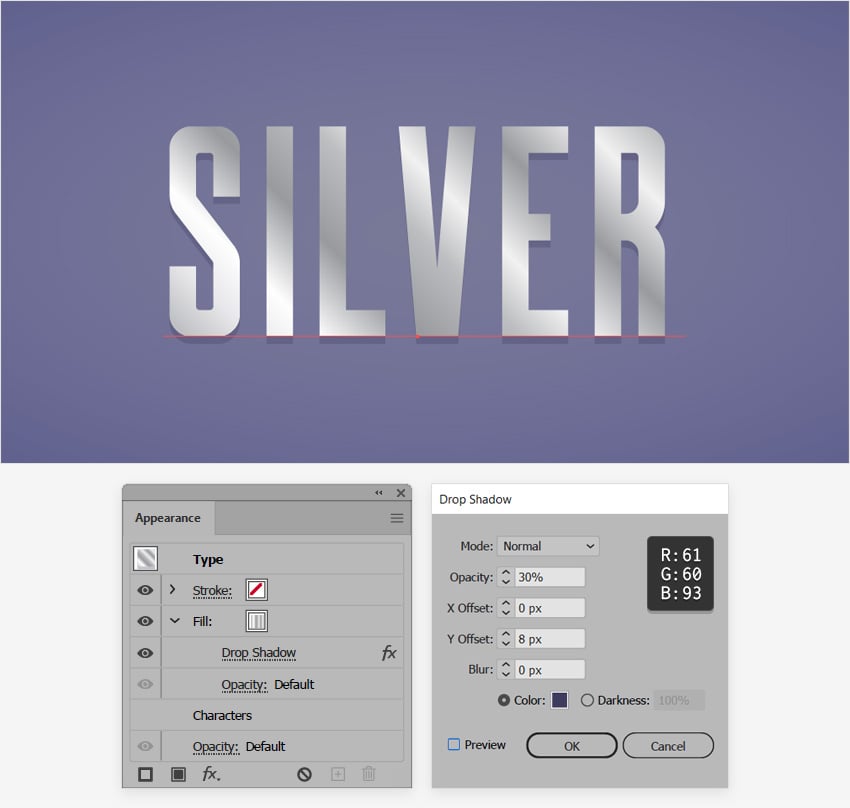
Preserve specializing in the Look panel, make it possible for the fill utilized to your textual content continues to be chosen, and go to Impact > Stylize > Drop Shadow. Enter the settings proven within the following picture and click on OK.


Step 4
Be sure that your textual content stays chosen, hold specializing in the Look panel, and add a second fill utilizing that very same Add New Fill button.
Drag this new fill beneath the present one and choose it. Set the colour to R=61 G=60 B=93 and decrease its Opacity to 75%, after which go to Impact > Path > Offset Path. Set the Offset to -4 px, click on OK, and go to Impact > Distort & Rework > Rework. Simply drag that Transfer – Vertical slider to 16 px, click on OK, and go to Impact > Blur > Gaussian Blur. Set the Radius to 25 px and click on OK.


Step 5
Be sure that your textual content stays chosen, hold specializing in the Look panel, and add a 3rd fill utilizing that very same Add New Fill button.
Drag this new fill beneath the present ones and choose it. Apply the linear gradient proven beneath and go to Impact > Distort & Rework > Rework. This time, drag that Transfer – Vertical slider to 35 px, click on OK, and go to Impact > Blur > Gaussian Blur. Improve the Radius to 60 px and click on OK.


Step 6
Be sure that your textual content stays chosen, add a brand new fill, and transfer it on prime.
Choose it, set the colour to R=120 G=120 B=151 and alter the Mixing Mode to Gentle Gentle, after which go to Impact > Distort > Diffuse Glow. Enter the settings proven beneath and click on OK to use this refined impact.


Step 7
Be sure that your textual content stays chosen, hold specializing in the Look panel, and this time choose the stroke.
Improve the Weight to 4 pt and apply your saved gradient from the Swatches panel, after which go to Impact > Path > Offset Path. Set the Offset to -2 px and click on OK.


Step 8
Be sure that your textual content stays chosen, hold specializing in the Look panel, and add a brand new fill.
Drag this new fill to the highest, above the stroke, and choose it. Set the colour to R=120 G=120 B=151, decrease its Opacity to 50%, and alter the Mixing Mode to Gentle Gentle.


Step 9
Be sure that your textual content stays chosen, hold specializing in the Look panel, and add another stroke.
Drag it to the highest of the panel and choose it. Improve the Weight to 10 pt and set the colour to black, decrease its Opacity to 50% and alter the Mixing Mode to Gentle Gentle, after which go to Impact > Path > Offset Path. Set the Offset to -5 px, click on OK, and go to Impact > Sketch > Chrome. Set the Particulars to 8 and the Smoothness to 10, click on OK, and also you’re finished.


Step 10
We’ll use this Pointer Brand from Envato Components once more to exemplify how one can simply apply this silver impact to create a metallic brand in Illustrator.
Be sure that your textual content continues to be chosen, open the Graphic Kinds panel (Window > Graphic Kinds), and simply click on the New Graphic Model button to avoid wasting the Look attributes of your textual content as a graphic fashion.
Now choose the pointer brand or every other aspect out of your design and easily click on your saved graphic fashion to create a metallic brand in Illustrator.


Congratulations! You are Finished!
I hope you’ve got loved this tutorial and may apply these methods in your future tasks.
Be at liberty to regulate the ultimate designs and make your personal metallic results in Illustrator. You could find some nice sources of inspiration at Envato Components, with fascinating options to enhance your Adobe Illustrator steel results.


Common Adobe Illustrator Metallic Results From Envato Components
Envato Components is a wonderful useful resource for metallic impact Illustrator add-ons. This is a brief listing of among the hottest property that you will discover.
Silver Metallic Impact in Illustrator (AI, EPS)
Flip any font right into a metallic font in Illustrator with this wonderful graphic fashion. All you need to do is sort in your textual content and apply the graphic fashion.


Final Metallic Graphic Kinds for Illustrator (AI)
This huge assortment of metallic graphic kinds is the proper resolution if you want extra options. Amongst these 50 graphic kinds, it is best to be capable to discover one which’s match to your undertaking.


Cute Metallic Textures and Patterns (EPS, JPG, PNG)
This assortment of 200 metallic textures and 24 hand-drawn patterns is ideal if you happen to choose to experiment and create your personal distinctive metallic impact Illustrator.


Metallic Textures (EPS, PNG)
Utilizing these neatly crafted metallic textures, you may simply apply a brushed steel impact Illustrator and make your design stand out.


Vibrant Metal Metallic Impact in Illustrator (AI, EPS)
This is one other graphic fashion that you should utilize to show your fonts into metallic fonts in Illustrator.


Need to Be taught Extra?
Now we have a great deal of tutorials on Envato Tuts+, from newbie to intermediate stage. Have a look!