
On this tutorial, I’ll be demonstrating how one can simply take away a background in Affinity Designer. Contemplating that it’s a vector-based utility, you’d assume that it wouldn’t be the most suitable choice so that you can take away a background in Affinity Designer. Nonetheless, Designer comes geared up with a robust pixel editor that lets you make primary edits to photographs.
To erase a background, Affinity Designer provides two predominant strategies that might be featured on this tutorial. Comply with these steps to learn to take away a white background or perhaps a busy background from any picture.
What You Will Study in This Affinity Designer Tutorial
- Methods to take away a white background in Affinity Designer
- Methods to use the Choose Sampled Colour choice in Affinity Designer
- Methods to use the Choice Brush Device in Affinity Designer
- Methods to take away a busy background from a picture in Affinity Designer
Tutorial Property
To reveal the 2 strategies to get a clear background in Affinity Designer, I might be utilizing these two photographs from Envato Parts:
1. Methods to Open the Picture in Affinity Designer
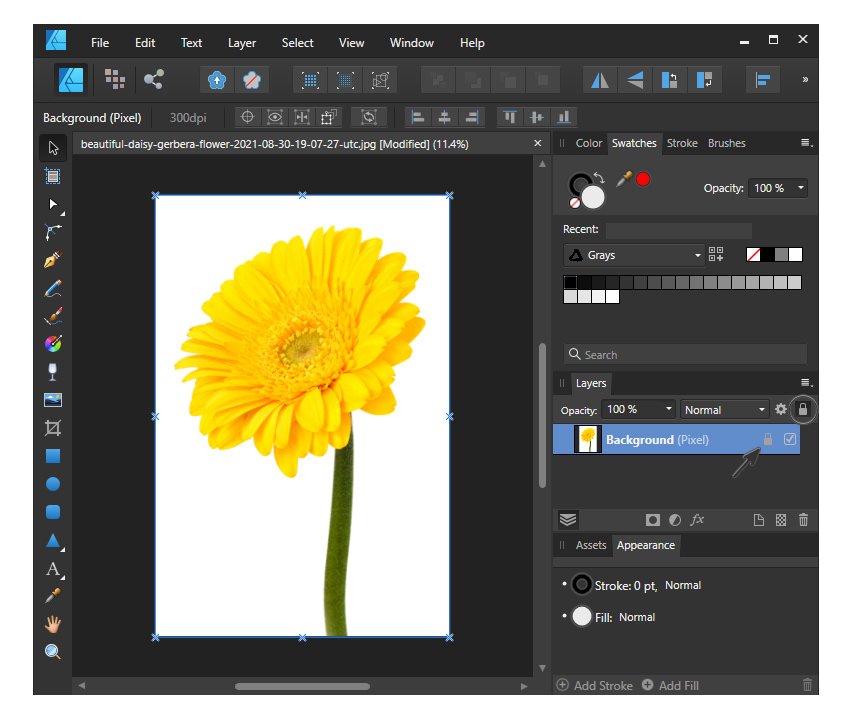
Let’s begin by opening up the picture by going to File > Open and finding the picture in your laptop. Double-click on it to import it into Affinity. I will be utilizing the stunning daisy flower picture on this part of the tutorial to reveal the primary background removing method.
Subsequent, we need to take away the lock from the layer by clicking on the lock icon within the prime proper nook of the Layers panel whereas the background picture is chosen. An alternative choice is to right-click on the background layer and deselect Lock from the menu.


2. Methods to Entry Pixel Persona in Affinity Designer
Since this picture is a rasterized picture product of pixels relatively than a vector design, we need to work with the Pixel Persona for this. Go to the highest left nook of the appliance and click on on the Pixel Persona icon, which is product of small coloured bins. As soon as you’ve got accessed it, discover how the instruments have modified.
3. Methods to Erase a White Background in Affinity Designer
Step 1
Having a JPEG picture with a white background is a typical motive to need to take away the white house and have it with a clear background as a substitute. It would not actually matter if it is white, black, blue, or every other stable shade for this system that you’re about to make use of.
I like to recommend zooming in on the picture. Then, whereas it is nonetheless chosen, go to Choose > Choose Sampled Colour.


Step 2
Designer will robotically choose the principle shade of your picture, so on this case, it is going to choose the white. You’ll be able to select one other shade out of your picture that you may want by merely clicking on that coloured space, and your choice will change.
Subsequent, you’ll be able to regulate the Tolerance degree with the slider should you really feel as if it isn’t choosing up haze or totally different smooth gradients that is likely to be round a shade that you’re eradicating. Rising the worth from 15% upwards would possibly offer you a more in-depth to the sting choice, however this relies from picture to picture. Hit Apply.


Step 3
To really take away the white background, you’ll be able to hit the Delete key in your keyboard or simply go to Edit > Delete. Make certain to comply with up this motion by going with Choose > Deselect.


Step 4
The subsequent pure step is to verify the consequence you bought. Any time you take away a background that’s white or any type of solid-colored background, you need to ensure you put a contrasting shade behind it to ensure you really eliminated all the background.
To do that, return to the Designer Persona by clicking on the icon within the higher left nook of the appliance, after which use the Rectangle Device (M) to click on and draw a form concerning the measurement of your picture. Fill it with black or every other contrasting shade, and ensure to maneuver it behind the topic.
Zoom in as a lot as you want and have a look across the edges of the topic. Should you didn’t take away all the background, you will note a white haze across the picture as a result of a few of these pixels is likely to be totally different hues. This occurs so much, so don’t be concerned. It is fixable.


Step 5
By repeating the earlier steps, you’re going to get a way more exact choice. Whereas within the Pixel Persona, return to Choose > Choose Sampled Colour and click on precisely on the haze to pattern that particular hue. Select a a lot greater Tolerance degree of 30% and hit Apply. Subsequent, press the Delete key in your keyboard to really take away the remaining background adopted by Choose > Deselect.
Again within the Designer Persona, try the consequence. Your extraction ought to be excellent now. You may have efficiently discovered the way to take away a white background in Affinity Designer.


4. Methods to Take away a Busy Background in Affinity Designer
Step 1
Let’s proceed with the second manner of utilizing Affinity Designer to take away a background. This one is appropriate for something that has a busy or textured background and would not essentially have stable edges like earlier than. I will be utilizing the autumn leaves picture on this part of the tutorial.
Issues to do earlier than we begin:
- Open the picture out of your laptop.
- Entry Pixel Persona.
- Unlock the Background layer.
- Find the Choice Brush Device.
To take away the busy background on this picture, we’ll use the Choice Brush Device (W). Within the software’s settings on the prime, make certain to verify Snap to edges and Delicate edges. Now, should you deliver your cursor over the picture, you’ll discover your cursor is now a round brush, and you may change the dimensions of that brush on the prime below Width. You do not need to make it too massive or too small, so a medium measurement like 300 px might be good.


Step 2
Begin portray across the topic, which on this case is the leaf in focus. You’ll discover as you are portray that Affinity Designer is inserting a dotted line across the topic robotically. Some areas are removed from excellent at first, however we’ll right that subsequent.
Proceed to go across the topic till you get all the background chosen throughout. You aren’t creating a variety across the leaf however a variety across the busy background.


Step 3
What we need to do now could be to right the imperfections. Zoom on the sting of the leaf and make the dimensions of the comb smaller. To push again the dotted line, maintain the Alt key and click on on the picture. When you do that, the choice will transfer to the perimeters of the topic.
Proceed to do that in all of the areas that want fixing. Understand that the smaller the comb, the extra precision you may get.


Step 4
Use a really small brush measurement of about 2-3 px for the pointed ideas of the leaf and in addition for the stem to get a exact choice. At this level, the background ought to be able to be lower out.


Step 5
The subsequent step is to open up the Refine Choice window by urgent the Refine button on the prime. Affinity Designer will place a pink masks over the topic that was chosen. You need to use this pink masks as a reference to find out whether or not or not your hint is correct. Zoom in on the leaf as a lot as wanted, and take a look at the perimeters. If it would not look as correct as you need it, you’ll be able to regulate it additional by portray over the lacking areas to incorporate them within the pink space.
You may as well regulate a couple of settings however for an correct hint, the default settings work simply high quality. In fact, this relies from picture to picture and how much background you are attempting to take away.
- Border width
- Clean
- Feather
- Ramp
- Output: Choice, Masks, New layer or New layer with masks


Step 6
Now, to really erase the background in Affinity Designer, all you need to do is press the Delete key in your keyboard, and it is gone. Additionally do away with the choice by going to Choose > Deselect.


Step 7
Let’s verify our work. Again in Designer Persona, seize the Rectangle Device (M) and draw a form that covers the artboard. Ship it behind the topic and fill it with black or every other contrasting shade. Zoom in and take a look at the perimeters throughout. The leaf appears to be like fairly excellent with out the background.


Step 8
All that’s left to do is to save lots of your work. Go to File > Export with a purpose to open the Export Settings window, the place you will note a number of file codecs out there. It is suggested to save lots of your picture as a PNG as a result of this format permits a clear background.
- To save lots of solely the topic with out the additional empty house, make certain to have it chosen earlier than you go to File > Export after which select Space: Choice with out background.
- To save lots of all the picture within the unique measurement, you need not choose something. Simply go to File > Export after which select Space: Entire Doc.
Hit Export and discover a location in your laptop to save lots of the brand new picture.


You are Completed!
You may have efficiently discovered the way to take away a background from a picture and the way to get a clear background in Affinity Designer. Apply these two strategies when you’ve got a white/stable coloured background or when you’ve got a busy and textured background to precisely take away it each time.
Study Extra About Affinity Designer
Here’s a listing of different Affinity Designer tutorials specifically made so that you can study totally different and helpful strategies: